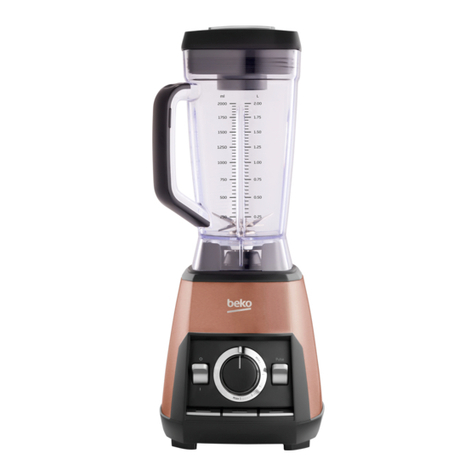
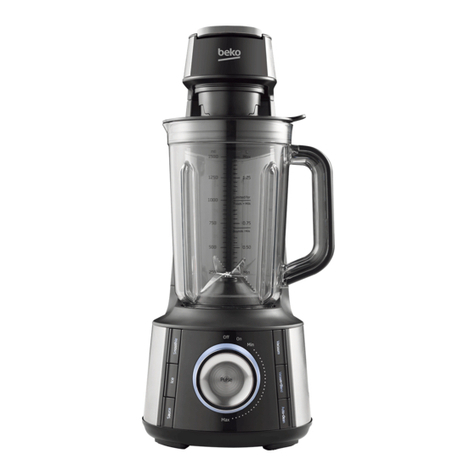
Beko TBV8106BX User manual

www.beko.co.uk
TBV8106BX
01M-8813893200-4419-03
Vacuum Blender
User Manual
EN DE TR FR ES
RO PL IT AR

ENGLISH 06-26
DEUTSCH 27-51
TÜRKÇE 52-75
FRANÇAIS 76-99
ESPAÑOL 100-123
ITALIANO 172-195
01-20
CONTENTS

14
15
16
22
26
2
2
10 1817
24
25
6
5
4
3
8
7
19
20
21
11
12
13
9
23
1
1
The values which are declared in the markings affixed on your product or the other printed documents supplied with it
represent the values which were obtained in the laboratories pursuant to the pertinent standards. These values may vary
according to the usage of the appliance and ambient conditions.

1. Vacuum valve
2. Backflow prevention cap
3. Lid
4. Tritan Jug
5. Jug handle
6. Blade unit
7. Lever
8. Motor housing
9. On-Off / Speed adjustment
knob
10. Pulse button
11. Smoothie button
12. Ice button
13. Sauce button
14. Vacuum button
15. Vacuum+Blend button
16. Auto-Clean button
17. Non-slip feet
18. Cable storage compartment
19. Filter
20. Vacuum seal
21. Suction head cover
22. Measuring cup / Anti-insect cap
23. Portable bottle
24. Vacuum lid
25. Portable bottle Lid
26. Bottle stand
220-240V ~ 50-60 Hz
1000 W
Rights to make technical and design
changes are reserved.

Dear Valued Customer,
Thank you for selecting this Beko appliance. We hope that you get the
best results from your appliance which has been manufactured with high
quality and state-of-the-art technology. For this reason, please read this
user man-ual and all other provided documents carefully before using the
appliance and keep it as a reference for future use. If you hand over the
appliance to someone else, give the user manual as well. Follow the in-
structions by paying attention to all the information and warnings in the
user manual.
Following symbols are used in various sections of this manual:
Suitable for contact with food.
Do not immerse the appliance, the power ca-
ble, or the power plug in water or any other
liquid.
Important information and useful hints
about usage.
Warnings for dangerous situa-
tions concerning the safety of life and prop-
erty.
Ths product has been produced n envronmentally-frendly, state-of-the-art facltes.
It does not contan PCB.Ths applance conforms to the
WEEE regulaton.

6 / EN
This section contains safety instructions that will
help protect from risk of personal injury or mate-
rial damage.
Failure to follow these instructions voids any
grant-ed warranty.
•Read all instructions.
•This appliance may be used by people whose
physical, perceptive or mental skills are impaired
or who are inexperienced or not knowledgeable
about the appliance as long as they are
supervised or informed and made aware of the
safe use of the appliance and the encountered
dangers. Children should not play with the
appliance.
•Do not operate any appliance with a damaged
cord or plug or after the appliance malfunctions,
or is dropped or damaged in any manner.
1

7 / EN
Contact the manufacturer at their customer
service telephone number for information on
examination, repair, or adjustment.
•The use of attachments, including canning jars,
not recommended by the manufacturer may
cause a risk of injury to persons.
•Do not attempt to dismantle the appliance.
•Do not operate orplace any partof this appliance
or its parts on or near hot surfaces.
•Do not use the device for hot food.
•Your mains power supply should comply with
the information supplied on the rating plate of
the appliance.
•Do not use the appliance with an extension
cable.
•Do not touch the plug of the appliance with
damp or wet hands.
1

8 / EN
•Unplug from outlet when not in use, before
putting on or taking off parts, and before
cleaning.
•Hold the blending shaft of the appliance
carefully during transportation and cleaning.
•Never touch blades while using the appliance.
There is the possibility of injury due to incorrect
usage.
•Avoid contacting moving parts.
•Do not use outdoors.
•Do not let cord hang over edge of table or
counter.
•Keep hands and utensils out of jug while
blending to reduce the risk of severe injury to
persons or damage to the blender. A scraper
may be used but must be used only when the
blender is not running.
•Blades are sharp. Handle carefully.
•Always operate blender with cover in place.
1

9 / EN
1
•Do not blend hot liquids.
•To reduce the risk of electric shock, the plug
should only be connected to a proper outlet. If
the plug does not fit fully in the outlet, contact
a qualified electrician.Do not modify the plug in
any way.
•After cleaning, dry the appliance and all parts
before connecting it to mains supply and before
attaching the parts.
•Do not immerse the appliance, the power cable,
or the power plug in water or any other liquid.
•If you keep the packaging materials, store them
out of the reach of children.
•Children shall not use the appliance. Keep the
appliance out of the reach of children.
•Always disconnect the blender from the supply
if it is left unattended and before assembling,
disassembling.

10 / EN
•Switch of the appliance and disconnect
from supply before changing accessories or
approaching parts that move in use.
•CAUTION: In order to avoid a hazard due to
inadvertent resetting of the thermal cut-out,
this appliance must not be supplied through an
external switching device, such as a timer, or
connected to a circuit that is regularly switched
on and o by the utility.
•SAVE THESE INSTRUCTIONS
This product complies with EU WEEE Directive (2012/19/EU). This prod-
uct bears a classification symbol for waste electrical and electronic equip-
ment (WEEE).
This symbol indicates that this product shall not be disposed
with other household wastes at the end of its service life. Used
device must be returned to offical collection point for recycling
of electrical and electronic devices. To find these collection
systems please contact to your local authorities or retailer
where the product was puchased. Each household performs important
role in recovering and recycling of old appliance. Appropriate disposal of
1

11 / EN
1
used appliance helps prevent potential negative consequences for the en-
vironment and human health
The product you have purchased complies with EU RoHS Directive
(2011/65/EU). It does not contain harmful and prohibited materials spec-
ified in the Directive.
Packaging materials of the product are manufactured from recy-
clable materials in accordance with our National Environment
Regulations. Do not dispose of the packaging materials together
with the domestic or other wastes. Take them to the packaging
material collection points designated by the local authorities.
The moulded plug on this appliance incorporates a 13 A fuse. Should the
fuse need to be replaced an ASTA approved BS1362 fuse of the same
rating must be used. Do not forget to refit the fuse cover. In the event of
losing the fuse cover, the plug must not to be used until a replacement
fuse cover has been fitted. Colour of the replacement fuse cover must be
the same colour as that visible on the pin face of the plug Fuse covers are
availabe from any good electrical store.
•
Fiting a different plug
• As the colours of the wires in the mains lead of this appliance may not
correspond with the coloured markings identifying the terminals on
your plug, proceed as follows:

12 / EN
• Brown cable = L (Live)
• Blue cable = N (Neutral)
• Green/yellow cable must be connected to ground (E) line
• With the alternative plugs a 13 A fuse must be fitted either in the plug
or adaptore or in the main fuse box. If in doubt contact a qualified elec-
trician.

13 / EN
This appliance is intended only for household use; it is not suitable for pro-
fessional use. It is designed to chop small amounts of solid foods (onions,
potatoes, carrots, etc.) and fruit (strawberries, bananas, etc.).
Clean the parts of the appliance prior to initial use (see 3.1).
Do not touch the blades with your bare hands.
2
1
3
4
1
2
1
2
Unplug the appliance and
move the speed adjustment
knob (9) to “OFF” position. Pull
up the lever (7) and unlock the
jug (4) anti-clockwise accord-
ing the “Open” arrow on the
motor unit (8).
Open the vacuum valve by
rotatingit and remove the
vacuum from (4) the valve.
Remove the lid from the jug
and turn the jug over (3, 4).
Remove chopping blade unit
(6) by turning clockwise.
2Use

14 / EN
2
1
2
1
Put the silicone ring in its
place on the chopping blade
(6) and place the chopping
blade under the jug (4).
Place it back in the jug (4) by
turning anti-clockwise.
Place the jug onto the motor
housing (8).
Do not operate the appliance when empty.
• The maximum temperature of the liquid to be prepared inside
the appliance must not exceed 40 C degrees.
• Put soft foods or liquids before adding hard foods or ice.
• Adding some water into the appliance will allow it run
smoothly (e.g. 40ml water for 60gr solid food). Add the water
before the ingredients.
2Use

15 / EN
1
2
Place your appliance on a solid
and at surface.
Put the ingredient you want
to process into the jug (4) and
place the lid (3) on it.
Place the jug onto the mo-
tor housing (8) so that the
tab on it seats on the slots of
the motor housing (8), turn it
to the “Lock” position and se-
cure.
1
2
3
1
2
On
Min
Max
On
Min
Max
3
4
2
1
Plug in the appliance and
move the speed adjustment
knob (9) to “ON” position.
Process the ingredients at
the desired speed using the
speed adjustment knob (9).
When the process is com-
plete, move the speed adjust-
ment knob (9) to “OFF” posi-
tion and unplug the appliance.
Remove the jug from the mo-
tor unit by rotating it coun-
terclockwise (4, 8). Open the
lid (3) and take out the food.
2Use

16 / EN
• Gradually increase the speed of the appliance. Do not oper-
ate it at the highest speed suddenly. Otherwise the motor
may overheat.
• Do not run the appliance continuously for more than 2 min-
utes. Let it cool for 5 minute before operating it again.
• Do not insert any foreign objects into the jug (4) when the
appliance is in use.
• Do not remove ingredients from the jug (4) before chopping
blade (6) has completely stopped.
• Do not use carbonated beverage, crop, frozen food, or sticky
food (boiled bean, yam, etc.).
After each use, the jug lid (3, 22) must be washed and remove
moisture for next use. Dry it well before use.
2Use

17 / EN
The appliance is equipped with six automatic programs that you can use:
Smoothie (11), Ice (12), Sauce (13), Vacuum (14), Vacuum+Blend (15), and
Auto Clean (16).
22
3
1
On
Min
Max
1
On
Min
Max
On
Min
Max
Put the ingredients in the jug
(4) and close the lid (3). Plug
in the appliance and move the
speed adjustment knob (9) to
“ON” position.
Select the desired automat-
ic program. The program that
you have chosen will turn on
and start functioning at var-
ious speed settings. If you
choose the vacuum program,
it will start vacuuming and
will stop after 1 minute. If you
choose Vacuum+Mixing pro-
gram, the program will keep
on functioning at various
speeds after the vacuum has
stopped and the program will
stop 2 minutes afterwards.
The light will ash.
When the process is com-
plete, move the speed ad-
justment knob (9) to “OFF”
position and unplug the ap-
pliance.
2Use

18 / EN
For mixing with high speed short pulses, turn speed adjustment knob (9)
to “ON” position and press “pulse” (10). The appliance will stop when you
release the button.
You can use Vacuum program with the storage bottle by assembled it and
the bottle stand accessory onto the appliance.
123
1
On
Min
Max
4
On
Min
Max
2
On
Min
Max
Put the ingredients in the
portable bottle (23) and close
the vacuum lid (24). Place it
into the bottle stand (26) and
lock it by turning clockwise
on the motor unit (8). Plug in
the appliance and move the
speed adjustment knob (9) to
“ON” position.
Select the Vacuum program.
program. The pump will turn
on and stop until the sensoris
automatic o or about 1 min-
ute later. The light will blink.
When the process is com-
plete, move the speed ad-
justment knob (9) to “OFF”
position and unplug the ap-
pliance.
You can keep blended juice or other foods in vacuum using the storage
bottle to keep them fresh for a long time.
2Use

19 / EN
• Vacuum delays oxidation but does not sterilize the contents.
Keep them refrigerated and have them as soon as possible
• If you want to stop the appliance at any time during the
operation, move the speed adjustment knob (9) to “OFF”
position.
• When you store food in the smoothie bottle by means of
vacuum storage, store such in a refrigerator. Do not store
this in a freezer.
• When you store food in the smoothie bottle by means of
vacuum storage, store such in a refrigerator. Do not store
this in a freezer.
• Do not use any jug or part other than those meant for the
purpose intended.
Maintain the maximum or the minimum volume for each type of material
by the scale on the jug (4).
ml
1500
1250
1000
750
50 0
250
L
1.50
1.25
0.75
0.25
Max (V acuum )
Foods + Milk
Soymilk / Milk
0.50
Maximum level for materials to blend (1,500ml)
Minimum level for materials to blend (250ml)
Maximum level for materials including milk products
such as milk and soymilk to vacuum (1,000ml)
Maximum level for milk products such as milk and
soymilk to vacuum (700ml)
2Use

20 / EN
2Use
• Do not exceed the maximum level for each food material
indicated by the scale on the jug (4). Air bubbles or food
materials getting into the pump can cause trouble.
• If there are ingredients stuck between the chopping blades
(6), please dismount it from the jug (4) and remove the
stuck matter using a long slender utensil, etc.
The measuring cup (22) accessory can be used as an anti-insect cap to
prevent insects or bacteria breeding in the vaccum passage.
1
2
Take out the jug (4) from the
motor housing (8) and pull
down the lever (7). Place and
secure the measuring cup
(22) onto the vacuum suction
head (21).
If you want to operate the
appliance again, remove the
measuring cup (22) from the
vacuum suction head (21)
rst before intend to pull up-
the lever (7).
This manual suits for next models
1
Table of contents
Languages:
Other Beko Blender manuals

Beko
Beko BKK 2166 User manual

Beko
Beko HBA6700W User manual

Beko
Beko BKK 2155 User manual

Beko
Beko TBN 7802 X User manual
Beko
Beko HBS6700W User manual

Beko
Beko 01M-8834013200-3216-04 User manual

Beko
Beko TBN7400W User manual

Beko
Beko SMM888BX User manual

Beko
Beko TBN 7802 X User manual

Beko
Beko BKK 2152 User manual
Popular Blender manuals by other brands

German pool
German pool MIX-101 operating instructions

Silvercrest
Silvercrest SSML 1000 A1 operating instructions

Proficook
Proficook PC-SMS 1220 instruction manual

Silvercrest
Silvercrest SSM 250 B1 operating instructions

Vitamix
Vitamix 7500 owner's manual

Silvercrest
Silvercrest SSMD 1000 A1 operating instructions