3Operaton
3.1 Intended use
Ths applance s ntended for prvate domestc use
only and s desgned to prepare food only.
3.2 Intal use
Pror to frst use, smoke can develop due to
producton resdues, use the applance wthout
food. Ensure for proper room ventlaton.
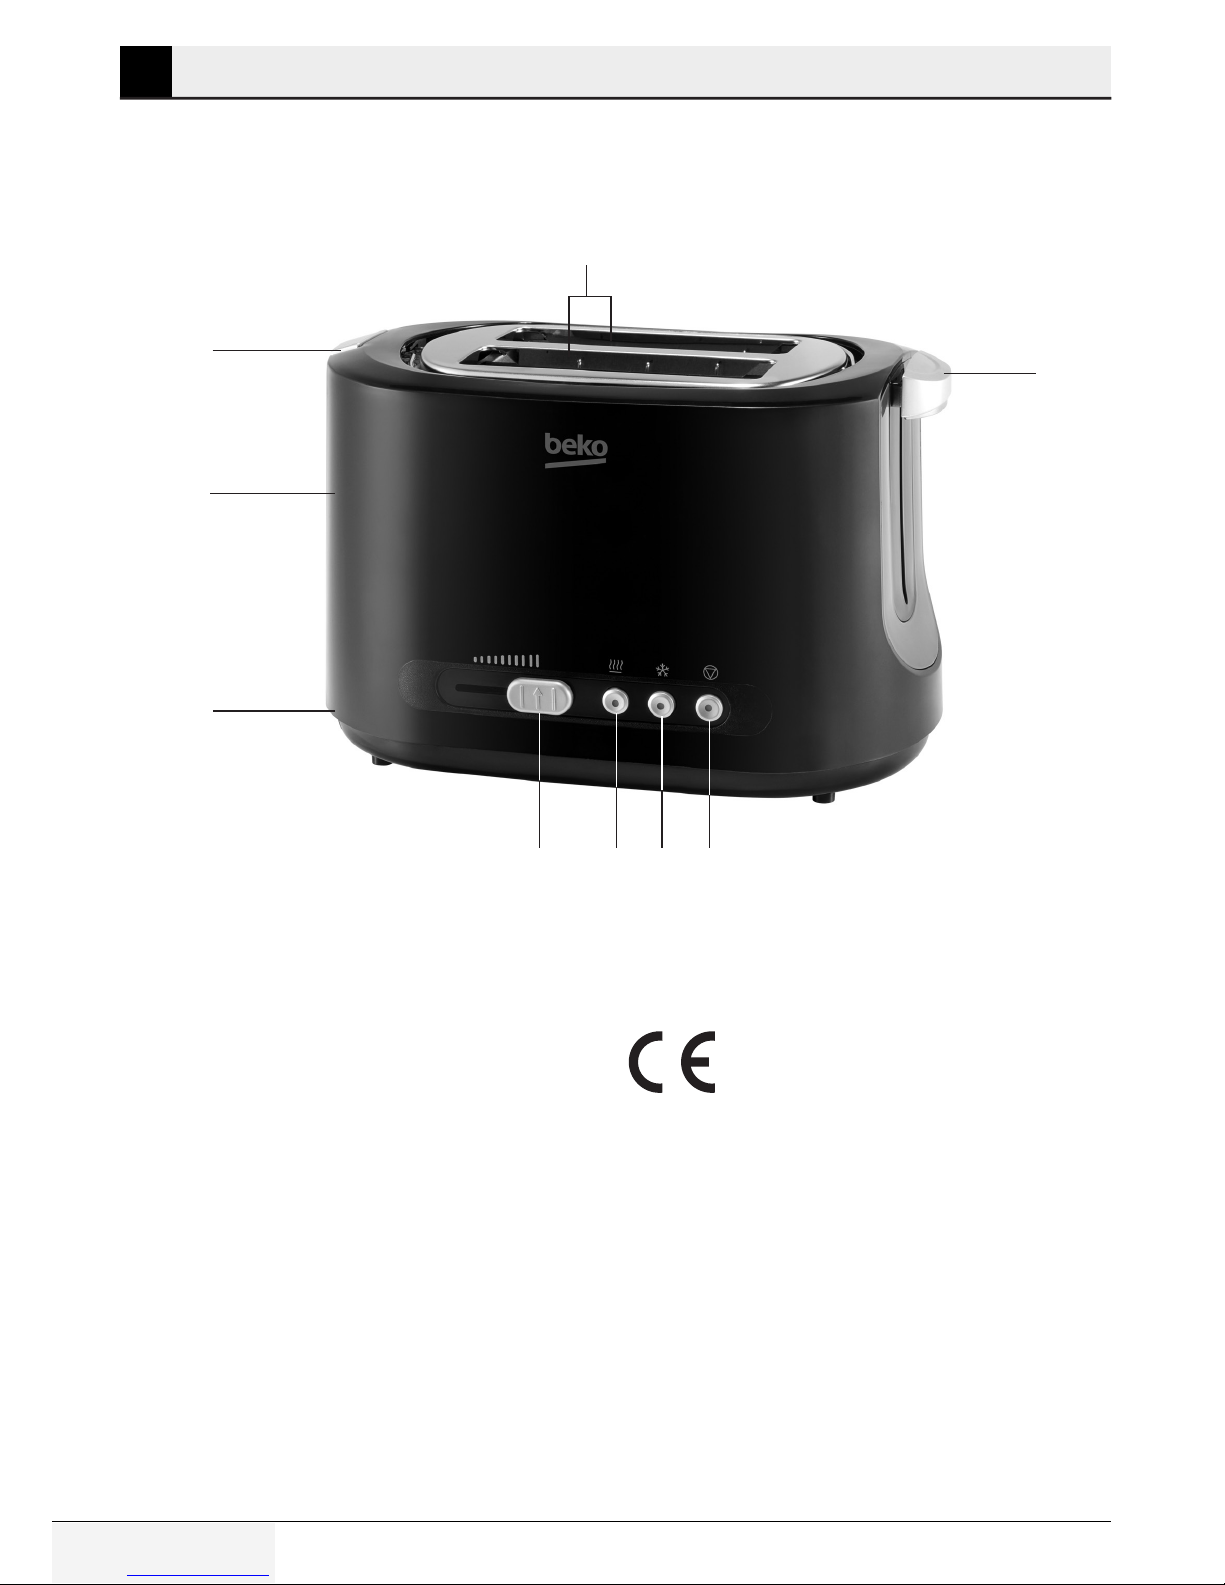
3.3 Toastng
1. Connect the power plug nto the wall socket.
2. Insert only one slce of bread n each of the two
bread slots (4).
3. Usng the brownng control (9) select the desred
degree of brownng.
C
Pushng the brownng control to
the left wll gve the lghtest degree
of brownng and to the rght the
darkest. The brownng degree can
vary dependng on the type of bread.
4. Pressthestartlever(5)downuntltautomatcally
snap nto place.
5. The toastng process begns. The ndcator lght
of the stop button (6) llumnates durng the
toastng process.
AWARNING:
If the power plug s
not connected nto the wall socket,
the start lever (5) does not snap nto
place.
6. The applance automatcally swtches off as soon
as the set degree of brownng has been reached.
– Press the operaton you prefer to use.
– The ndcator lght of the selected button
llumnates durng the toastng process.
– The start lever (5) sprngs back up and the stop
button ( ) (6) lght goes off. The toast slces
are pushed upwards and can be taken out of
the toaster.
C
To cancel the toastng process before
t has fnshed, press the stop button
(6). The start lever (5) sprngs back up
and the toast slces can be taken out
of the toaster.
C
After the start lever (5) sprngs back
up, you can use hgh-lft functon by
pushng the start lever (5) upwards.
7. Dsconnect the applance from the wall socket.
3.3.1 Defrost button
Follow the steps from 1 to 6 at the “Toastng”
secton and press.
3.3.2 Reheat button
Follow the steps from 1 to 6 at the “Toastng”
secton and press.
3.3.3 Stop button
To cancel the toastng process before t has
fnshed, press the stop button (6).
3.4 Warmng up buns
Ths toaster s equpped wth an ntegrated
warmng rack (3).
C
Do not toast bread and warm up buns
at the same tme.
C
Do not warm up toast slces on the
warmng rack (3). The toast slces
hnder suffcent ventlaton.
1. Press down warmng rack lever (3) untl t snaps
nto place.
2. Poston the buns on the rack.
3. Connect the power plug nto the wall socket.
4. Usng the brownng control (9) select the desred
degree of warmng.