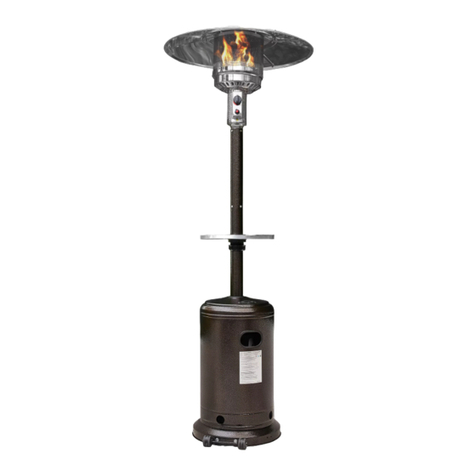
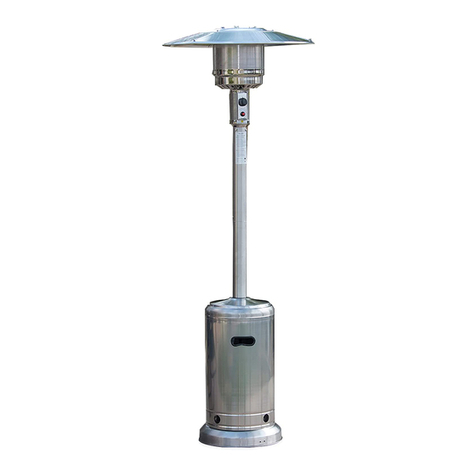
Belleze 014-HG-PH00 User manual

48000 BTU Stand Patio Heater
item no. 014-HG-PH00
www.bellezefurniture.com
1-800-682-6376
@bellezefurniture
FOLLOW US: CONTACT INFO: NOTE:
The instruction booklet contains IMPORTANT safety
information Please read and keep for future reference.

2
OUR BRAND
Since 2013, Belleze has been dedicated to providing customers with quality products and
exceptional service and has prospered into one of the nation’s largest retailers of indoor and
outdoor home décor. Every Belleze product is carefully selected to ensure they meet our
standards as well as your standards. We believe quality should never be determined by price
which is why Belleze is committed to providing high end merchandise at the absolute lowest cost.
PLEASE LIKE, COMMENT AND FOLLOW.
@bellezefurniture
TABLE OF CONTENTS
Safety Information
Package Content
Assembly Instruction
Operation Instruction
Care and Maintenance
Trouble Shooting
03
04
06
11
16
17

3
SAFETY INFORMATION
Your safety and the safety of the others are very important.
This manual provides many important safety information. Always read and obey all
safety message.
Keep this manual for future reference.
If you smell gas,
• Shut off gas supply to the appliance
• Extinguish any open flame
• If odors continues, stay away from the appliance and immediately call your gas
supplier or fire department
Carbon Monoxide Hazard, USE OUTDOOR ONLY
• This appliance can produce carbon monoxide which has so smell. Using the
appliance in an enclosed space would cause carbon monoxide poisoning,
irreversible brain damage or even death.
• DO NOT use this appliance in an enclosed space such as camper, tent, car or home.
• DO NOT store or use gasoline, flammable liquid or vapors in the vicinity of this
appliance.
• Any LP-cylinder not connected for use shall not be stored in the vicinity of this
appliance.
⚠DANGER
⚠DANGER
⚠WARNING
⚠WARNING
⚠WARNING
⚠CAUTION
You can be killed or seriously injured if you
failed to comply to the instruction immediately.
You can be killed or seriously injured if you
failed to comply to the instruction.
You can be injured if you failed to comply to the
instruction.

4
PACKAGE CONTENT

5

6
ASSEMBLY INSTRUCTION
Estimated Time for Assembly
60:00
1
2
Attach the wheel assembly to the base by lining up the holes and insert 2 M8x16 bolts, then
tighten on the other side using 2 M8 flanged nuts
Fill the bast with sand to improve the base stability.
Loosely attach 3 brackets to the base with 3 M8x16 bolts..

7
3
4
Assemble the upper pole on the lower pole and tighten using 2 3/16” screws.
NOTE: The warning label on the upper pole should be on the same side as the flat plate of the
lower pole.
Attach the pole assembly onto the support bracket using 6 M6x30 bolts and 6 M6 flange nuts
Fully tighten all the bolts to make sure the pole and support bracket are securely attach to the
base.

8
5
6
Attach 3 washer and 3 reflector spacer on top of the screen cove . Tighten the reflective space .
Then unscrew 4 bolts from the bottom of the control box.
Cover the support bracket by sliding the cylinder housing from the top.

9
7
8
Insert the head assembly into the pose, then tighten using the bolts removed on step 6.
Remove protective cover on the reflecto .

10
9
10
Slide 1 reflector panel to anothe ,loosely tighten with M6x10 screws, washer, and cap nut.
Repeat the procedure to complete assembling all 3 reflector panels togethe .
Then assemble the round reflector plate on the reflector panels with M6x10 screws, washer an
cap nut. Fully tighten all the screws.
Attach the reflector on top of the heater by putting on 3 washer on the reflector spac , follow by
the reflecto , then another 3 washer. Secure the assembly with 3 wing nut.

11
11
Screw gas hose and regulator to a 20 lb propane cylinder. Careful to prevent cross-threading.
⚠WARNING: Use a standard 20 lb propane cylinder only.
*Use this heater only with a propane vapor withdrawal supply system. See the standard for
storage and handling of liquefied petroleum gas. ANS/ NPFA 58 or CSA B149.1. Your local library
or fire department should have this book
A minimum of 0.4 PSI supply pressure is required for the propane gas input adjustment.
Storing the appliance indoor is only permissible if the cylinder is disconnected and remove from
the appliance.
Propane cylinder must be stored outdoor in a well ventilated area and out of children’s reach.
A disconnected cylinder must have dust cap securely installed and must not be stored in an
enclosed area. A minimum of 17000 BTU per hour is needed for the appliance. The installation
must comply with your local, state, and / or federal standard and codes ANS Z2231, NFDA 54,
natural gas and propane installation code, CSA B149.1, or propane storage and handling code,
B149.2.

12
• A dented, rusted or damaged propane cylinder may be hazardous and should be
checked by your propane supplier. DO NOT use a propane cylinder with a damaged
valve connection.
• The propane cylinder must be constructed and marked in accordance with the
specifications for L gas cylinders of the U.S. Department of Transportation (DoT) or
the standard for cylinders, spheres and tubes for transportation of dangerous goods
and commission, CAN/CSA-B339.
• The cylinder must have a listed overfilling prevention device
• The cylinder must have a connection device compatible with the connection for the
appliance.
• The cylinder used must include a collar to protect the cylinder valve.
• DO NOT connect an unregulated propane cylinder to the heater.
• DO NOT store a spare LP-gas cylinder in the vicinity of the heater.
• DO NOT fill the cylinder beyond 80 percent full
• Place the dust cap on the cylinder valve outlet whenever the cylinder is not in
use. Only install the type of dust cap on the cylinder valve that is provided with the
cylinder valve. Other type of caps or plug may result in propane leakage.
⚠WARNING
⚠WARNING

13
• All leak test should be performs outdoors.
• Extinguish all open flames before testing
• DO NOT smoke when perform leak test.
• DO NOT use the heater until all connections have been tested and do not leak.
⚠WARNING
OPERATION INSTRUCTION
Leak Check
1. Make 2-3 oz of leak check solution (1 part liquid dish washing detergent and 3 pars water).
2. Apply several drops of solution to the connection between the hose and regulator.
3. Apply several drops of solution to the connection between regulator and the cylinder.
4. Make sure all patio heater and light valves are OFF.
5. Turn cylinder valve ON.
1. Turn cylinder valve OFF.
2. If there is a leak, disconnect the connection and reconnect, then perform another leak test.
If bubbles continue to appear after several attempts, you should replace the hose or cylinder
valve.
If NO bubbles appear, the connection is secure.
NOTE: You must perform a complete leak test whenever gas connections are loosened or
removed.
If bubbles appear at any connection, there is a leak.

14
Carbon Monoxide Hazard, USE OUTDOOR ONLY
• This appliance can produce carbon monoxide which has so smell. Using the
appliance in an enclosed space would cause carbon monoxide poisoning,
irreversible brain damage or even death.
• DO NOT use this appliance in an enclosed space such as camper, tent, car or home.
⚠WARNING
Before Turning Gas Supply ON
Before Lighting
DO NOT attempt to operate the unit until you have read and understand all safety information
provided in this manual and all assembly is completed and leak check have been performed.
• The heater is designed and approved for outdoor use only.
• Make sure there is no flammable and combustible around the operating area
• Make sure there is no obstruction to air ventilation.
• Make sure the cylinder cover is clear of debris, and all connections are securely tighten.
• Inspect the hater before each use, and by a qualified service person at least annuall . If
relighting a hot heater, wait at least 5 minutes.
• Inspect the hose assembly for any excessive abrasion, cuts, or wear. Leak test any suspected
area. Replace hose if there is a leak.
This appliance shall be used only in a well-ventilated space and shall not be used in a building,
garage or any other enclosed area.
An appliance may be installed with shelter no more inclusive than:
1)With walls on all sides, but with no overhead cover.
2)Within a partial enclosure which includes an overhead cover and no more than two side walls. These
side walls may be parallel, as in a breezeway, or at right angles to each other.
3)Within a partial enclosure which includes an overhead cover and three side walls, as long as 30
percent or more of the horizontal periphery of the enclosure is permanently open.

15
• DO NOT inhale fumes emitted from the heater in first use. Smoke and odor
from burning manufacturing oil will appear. Smoke and odor will dissipate after
approximately 30 minutes. The heater should NOT produce think black smoke.
⚠CAUTION
Lighting
This heater is equipped with a pilot light that allows for safer startups and shutdown. Pilot must be
lit before main burner can be started.
1. Turn the control knob to the “OFF” position.
2. Fully open the LP cylinder valve.
3. Open viewing hole by sliding cover to either side.
4. Push the control knob in and rotate to “pilot” position.
NOTE: For initial start or after any cylinder change, hold control knob in for 2 minutes to purge air
from gas lines before proceeding.
5. Push and release the igniter button until pilot flame is visible through the glass tube
6. Once the pilot is lit, continue to depress the control knob for 60 seconds.
7. If the pilot does not stay lit, repeat steps 4 to 6.
8. If repeating steps 4 to 6 and the unit does not light, then
• Push in control knob and turn counter clockwise to “Pilot”
• As you are depressing the control knob, place a long stem lighter through the ignition hole
to light the pilot.
• Repeat step 6.
9. Push in and turn the control knob to “Low” position, then release control. If you want a higher
temperature, push in the control knob and turn counter-clockwise to “High” position.
NOTE: If pilot fails to remain lit, all valves should be closed and wait a period of at least 5 minutes
before attempting to light again.

16
• In normal condition, the height of flame is about 2/3 height of the glass tube under “HIGH”
position, and about 1/3 height of the glass tube under “LOW” position.
• The flame should be stable and bright in blue color with yellow tops. If excessive yellow flam
is detected, turn off the heater and consult “ roubleshooting” on page 20.
Re-lighting
Shut Down
For your safety, the control knob can only turn to “OFF position once the knob is depressed in
“Pilot” position.
1. Depress the control knob in “Pilot” position and turn to “OFF”.
2. Wait at least 5 minutes, and let gas dissipate before attempting to relight the heater.
3. Repeat the “Lighting” steps in page 15.
For your safety, the control knob can only turn to “OFF position once the knob is depressed in
“Pilot” position.
1. Depress the control knob in “Pilot” position and turn to “OFF”. (The burner will make a slight
popping sound when extinguished.
2. Turn cylinder valve clockwise to OFF and disconnect regulator when heater is not in use.
NOTE: It is normal for the flame screen to have some discoloration after use
• The heater will be hot after use, handle the heater with extreme care.
⚠WARNING

17
Operation Checklist
For your safety, perform the following check before each use.
1. Make sure you are familiar with the entire user’s manual and understand all precautions notes.
2. All components are properly assembled and are in good condition to operate.
3. No alterations have been made to the unit.
4. All gas connections are secure and do not leak.
5. Wind velocity is below 10 mph.
6. Unit will operate at reduced efficiency below 40°
7. Heater is placed outdoor.
8. There is adequate fresh air ventilation.
9. Heater is placed away from any flammable liquids or gas
10. Heater is placed away from windows, air intakes opening, sprinklers and water sources.
11. Heater is at least 36” on top and 36” away from combustible materials.
12. Heater is placed on solid and level surface.
13. There is no sign of spider or insect nests in the heater.
14. All burner passages are clear.
15. People should be alerted to the hazards of high surface temperature and should stay at safe
distance to prevent burns or clothing ignition.
16. Young children should be carefully supervised when they are around the heater.
17. Any guard or protective device removed for servicing the heater must be replaced prior to
operation.
18. Installation and repair should be done by a qualified service person. The heater should be
inspected by a qualified service person at least annuall .
Perform the following checks after each use.
1. Gas control is in “OFF” position.
2. Propane cylinder valve is in “OFF” position.
3. Gas line is disconnected.

18
CARE AND MAINTENANCE
• Before servicing or cleaning, make sure the heater has been cool down.
⚠WARNING
Cleaning The Exterior Surface
Storage (Between Uses)
Storage (During Long Period of Inactivity)
1. Use warm soapy water to clean the surface. DO NOT use any flammable or corrosive cleanin
agents.
2. Clean the burner holes using a heavy duty pipe cleaner. Make sure no spider or insect or their
nest is inside the heater.
3. Disassemble the reflector from the heater to wash and clean. Make sure to clean any carbo
deposits.
NOTE: A more frequent maintenance should be performed if the heater is being used in salty
environment. Make sure no corrosion in the unit. High quality automotive wax can be used to
maintenance the surface of the heater. DO NOT apply wax to the flame screen or reflect .
⚠WARNING: Make sure the burner and the pilot assembly are dry at all time. DO NOT submerge
the control box assembly. If the gas control is submerged in water, DO NOT use and must be
replaced
1. Make sure control knob and cylinder valve are “OFF”.
2. Disconnect the LP cylinder.
3. Store heater upright in an area away from direct contact with inclement weather such as rain,
sleet, hail, snow, dust, and debris.
4. If desired, cover up the heater to prevent debris build up in air passages.
NOTE: Make sure the heater is cool down before covering.
1. Make sure control knob and cylinder valve are “OFF”.
2. Disconnect the LP cylinder. DO NOT leave LP cylinder under direct sunlight or excessive heat.
3. Store heater upright in an area away from direct contact with inclement weather such as rain,
sleet, hail, snow, dust, and debris.
4. If desired, cover up the heater to prevent debris build up in air passages.
NOTE: Make sure the heater is cool down before covering.
Regular maintenance should be performed to ensure the heater is in perfect working condition.
Visually checking portions of the hose assembly located within the confines of the heater post.
Inspect the entire hose assembly at least annually, disassembling the reflector and burner. Inspect
the hose assembly for evidence of excessive abrasion, cuts, or wear. Suspected areas should be
leak tested. Then assembling the reflector and burner again following with step 7 and 11.

19
TROUBLE SHOOTING
Problem Possible Cause Solution
Pilot light won’t light
Cylinder valve is closed Open the valve
Blockage in gas tube or orific Clear the tube, replace if
necessary
Air in gas line
Open gas line and bleed it by
pressing the control knob in
for 1-2 minutes until you smell
propane
Low gas pressure Replace with a new cylinder
Igniter fails Use a long stem match to light
the pilot
Pilot light won’t stay lit
Dirt built up around the pilot Clean dirt
Loose connection between gas
valve and pilot assembly
Make sure the connection is
tight and perform leak test
Thermocouple fails Replace thermocouple
Burner won’t light
Propane cylinder is frosted
over
Wait until the cylinder warms
up
Blockage in orific Clear any blockage
Control knob is not in “ON”
position Turn the knob to “ON” position

20
Problem Possible Cause Solution
Burner ame is low
Gas pressure is low Replace with new cylinder
Outdoor temperature is below
40°F and cylinder is less than 1/4
full
Use a full cylinder
Blockage in orices Clear any blockage
Thick Black Smoke
Dirt, lm, or carbon built up on
reector and burner screen
Clean the reector and burner
screen
Blockage in the burner Clear any blockage
Other manuals for 014-HG-PH00
3
Table of contents
Other Belleze Patio Heater manuals