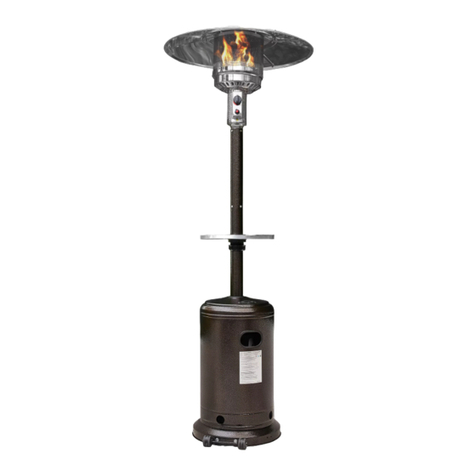
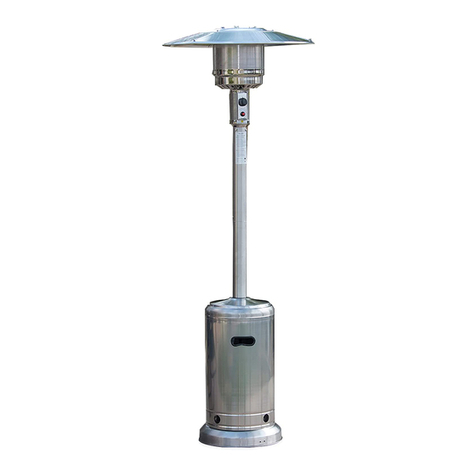
Belleze 014-HG-PH42 User manual

42000 BTU Square Glass Tube Patio Heater
item no. 014-HG-PH42
www.bellezefurniture.com
1-800-682-6376
@bellezefurniture
FOLLOW US: CONTACT INFO: NOTE:
The instruction booklet contains IMPORTANT safety
information Please read and keep for future reference.

OUR BRAND
6LQFH%HOOH]HKDVEHHQGHGLFDWHGWRSURYLGLQJFXVWRPHUVZLWKTXDOLW\SURGXFWVDQG
H[FHSWLRQDOVHUYLFHDQGKDVSURVSHUHGLQWRRQHRIWKHQDWLRQ¶VODUJHVWUHWDLOHUVRILQGRRUDQG
RXWGRRUKRPHGpFRU(YHU\%HOOH]HSURGXFWLVFDUHIXOO\VHOHFWHGWRHQVXUHWKH\PHHWRXU
VWDQGDUGVDVZHOODV\RXUVWDQGDUGV:HEHOLHYHTXDOLW\VKRXOGQHYHUEHGHWHUPLQHGE\SULFH
ZKLFKLVZK\%HOOH]HLVFRPPLWWHGWRSURYLGLQJKLJKHQGPHUFKDQGLVHDWWKHDEVROXWHORZHVWFRVW
PLEASE LIKE, COMMENTAND FOLLOW.
#EHOOH]HIXUQLWXUH
TABLE OF CONTENTS
6DIHW\,QIRUPDWLRQ
3DFNDJH&RQWHQW
$VVHPEO\,QVWUXFWLRQ
2SHUDWLRQ,QVWUXFWLRQ
&DUHDQG0DLQWHQDQFH
7URXEOH6KRRWLQJ

SAFETY INFORMATION
Your safety and the safety of the others are very important.
7KLVPDQXDOSURYLGHVPDQ\LPSRUWDQWVDIHW\LQIRUPDWLRQ$OZD\VUHDGDQGREH\DOO
VDIHW\PHVVDJH
.HHSWKLVPDQXDOIRUIXWXUHUHIHUHQFH
,I\RXVPHOOJDV
6KXWRIIJDVVXSSO\WRWKHDSSOLDQFH
([WLQJXLVKDQ\RSHQIODPH
,IRGRUVFRQWLQXHVVWD\DZD\IURPWKHDSSOLDQFHDQGLPPHGLDWHO\FDOO\RXUJDV
VXSSOLHURUILUHGHSDUWPHQW
&DUERQ0RQR[LGH+D]DUG86(287'22521/<
7KLVDSSOLDQFHFDQSURGXFHFDUERQPRQR[LGHZKLFKKDVVRVPHOO8VLQJWKH
DSSOLDQFHLQDQHQFORVHGVSDFHZRXOGFDXVHFDUERQPRQR[LGHSRLVRQLQJ
LUUHYHUVLEOHEUDLQGDPDJHRUHYHQGHDWK
'2127XVHWKLVDSSOLDQFHLQDQHQFORVHGVSDFHVXFKDVFDPSHUWHQWFDURUKRPH
'2127VWRUHRUXVHJDVROLQHIODPPDEOHOLTXLGRUYDSRUVLQWKHYLFLQLW\RIWKLV
DSSOLDQFH
$Q\/3F\OLQGHUQRWFRQQHFWHGIRUXVHVKDOOQRWEHVWRUHGLQWKHYLFLQLW\RIWKLV
DSSOLDQFH
⥐DANGER
⥐DANGER
⥐WARNING
⥐WARNING
⥐WARNING
⥐CAUTION
<RXFDQEHNLOOHGRUVHULRXVO\LQMXUHGLI\RX
IDLOHGWRFRPSO\WRWKHLQVWUXFWLRQLPPHGLDWHO\
<RXFDQEHNLOOHGRUVHULRXVO\LQMXUHGLI\RX
IDLOHGWRFRPSO\WRWKHLQVWUXFWLRQ
<RXFDQEHLQMXUHGLI\RXIDLOHGWRFRPSO\WRWKH
LQVWUXFWLRQ

4
PACKAGE CONTENT

5
3x
8x
1x
6x
4x
3x
1x
56x
1x
4x
1x
4x
1x
(Not include )
1x
II
M5
Flange
nut
4x

6
ASSEMBLY INSTRUCTION
Estimated Time for Assembly
60:00
1
Attach the wheel assembly to the bottom plate by using 4 pcs of M6 x 12 bolts and 4 pcs of M6
flange nuts

7
2
Align the pins on the base to the holes on the bottom of the lower support.
Press to secure the pins.
Secure the lower support to the base by using 12pcs of 3/16" screws.
Align the pins on the control box assembly to the holes on the top of the lower support.
Press to secure the pins.
Secure the lower support to the control box assembly by using 8 pcs of 3/16” screws.
20
DD
DD

DD
8
3
4
Assemble the block belt to 2 of the lower support by using 4 pcs of M5 x 12 screws.
Insert the upper support to the lower support and secure using 8 pcs of 3/16” screws.
GG 4

9
6
5
Assemble the flame screen on top of the upper support and secure using 8 pcs of 3/16” screws
Attach the reflector on top of the flame screen by putting 3 pcs of studs on the flame screen, th
3 pcs of washers. Put the reflector on top, and secure the assembly with another 3 washers and 3
wing nuts.

10
7
Carefully install the glass tube by lifting up and insert through the venter hole of the flame screen
Make sure the black silicone ring is located at the bottom of the glass tube.
Slide the glass tube through the hold of the plate on top of the control box assembly.
Check and ensure the glass tube is position properly and is completely cover the center hole of
the plate on the control box assembly.
WARNING: The black silicon ring must be in pace before operating the appliance.
Hang the protective guard onto the upper support.
Secure the protective guards with fixing brackets and 4 pcs of 3/16” screws
8DD
HH

11
9
Attach the 3 side panels to the heater using 12 pcs of 3/16” screws.
NOTE: DO NOT cover the front side where the control knob is.
For the middle 2pcs of holes need use M5 Flange Nut and M5 X 12 Screw.
Blocking the lower support on front panel using 4pcs of 3/16" screws.
DD
GG
FF
GG
x 6
M5 X 12 Screw
FF
x 6
M5 Flange nut
KK
x 1
Philips screwdriver
DD x 163/16" Screw
DD

12
10
Attach the knob on the front panel and the chain on the other side.
Secure the knob and chain using a M4 x 10 screw.
Hook the other end of the chain to the control box assembly.
Insert the pothook of the front panel to the holes on the bottom plate.

13
11
Screw gas hose and regulator to a 20 lb propane cylinder. Careful to prevent cross-threading.
WARNING: Use a standard 20 lb propane cylinder only.
*Use this heater only with a propane vapor withdrawal supply system. See chapter 5 of the
standard for storage and handling of liquefied petroleum gas. ANS/ NPFA 58. Your local library or
fire department should have this book
A minimum of 4.1 PSI supply pressure is required for the propane gas input adjustment.
Storing the appliance indoor is only permissible if the cylinder is disconnected and remove from
the appliance.
Propane cylinder must be stored outdoor in a well ventilated area and out of children’s reach.
A disconnected cylinder must have dust cap securely installed and must not be stored in an
enclosed area. A minimum of 17000 BTU per hour is needed for the appliance. The installation
must comply with your local, state, and / or federal standard and codes ANS Z2231, NFDA 54,
natural gas and propane installation code, CSA B149.1, or propane storage and handling code,
B149.2.

$GHQWHGUXVWHGRUGDPDJHGSURSDQHF\OLQGHUPD\EHKD]DUGRXVDQGVKRXOGEH
FKHFNHGE\\RXUSURSDQHVXSSOLHU'2127XVHDSURSDQHF\OLQGHUZLWKDGDPDJHG
YDOYHFRQQHFWLRQ
7KHSURSDQHF\OLQGHUPXVWEHFRQVWUXFWHGDQGPDUNHGLQDFFRUGDQFHZLWKWKH
VSHFLILFDWLRQVIRU/ JDVF\OLQGHUVRIWKH86'HSDUWPHQWRI7UDQVSRUWDWLRQ'R7RU
WKHVWDQGDUGIRUF\OLQGHUVVSKHUHVDQGWXEHVIRUWUDQVSRUWDWLRQRIGDQJHURXVJRRGV
DQGFRPPLVVLRQ&$1&6$%
7KHF\OLQGHUPXVWKDYHDOLVWHGRYHUILOOLQJSUHYHQWLRQGHYLFH
7KHF\OLQGHUPXVWKDYHDFRQQHFWLRQGHYLFHFRPSDWLEOHZLWKWKHFRQQHFWLRQIRUWKH
DSSOLDQFH
7KHF\OLQGHUXVHGPXVWLQFOXGHDFROODUWRSURWHFWWKHF\OLQGHUYDOYH
'2127FRQQHFWDQXQUHJXODWHGSURSDQHF\OLQGHUWRWKHKHDWHU
'2127VWRUHDVSDUH/3JDVF\OLQGHULQWKHYLFLQLW\RIWKHKHDWHU
'2127ILOOWKHF\OLQGHUEH\RQGSHUFHQWIXOO
3ODFHWKHGXVWFDSRQWKHF\OLQGHUYDOYHRXWOHWZKHQHYHUWKHF\OLQGHULVQRWLQ
XVH2QO\LQVWDOOWKHW\SHRIGXVWFDSRQWKHF\OLQGHUYDOYHWKDWLVSURYLGHGZLWKWKH
F\OLQGHUYDOYH2WKHUW\SHRIFDSVRUSOXJPD\UHVXOWLQSURSDQHOHDNDJH
⥐WARNING
⥐WARNING

15
• All leak test should be performs outdoors.
• Extinguish all open flames before testing
• DO NOT smoke when perform leak test.
• DO NOT use the heater until all connections have been tested and do not leak.
WARNING
OPERATION INSTRUCTION
Leak Check
1. Make 2-3 oz of leak check solution (1 part liquid dish washing detergent and 3 pars water).
2. Apply several drops of solution to the connection between the hose and regulator.
3. Apply several drops of solution to the connection between regulator and the cylinder.
4. Make sure all patio heater and light valves are OFF.
5. Turn cylinder valve ON.
1. Turn cylinder valve OFF.
2. If there is a leak, disconnect the connection and reconnect, then perform another leak test.
If bubbles continue to appear after several attempts, you should replace the hose or cylinder
valve.
If NO bubbles appear, the connection is secure.
NOTE: You must perform a complete leak test whenever gas connections are loosened or
removed.
If bubbles appear at any connection, there is a leak.

&DUERQ0RQR[LGH+D]DUG86(287'22521/<
7KLVDSSOLDQFHFDQSURGXFHFDUERQPRQR[LGHZKLFKKDVVRVPHOO8VLQJWKH
DSSOLDQFHLQDQHQFORVHGVSDFHZRXOGFDXVHFDUERQPRQR[LGHSRLVRQLQJ
LUUHYHUVLEOHEUDLQGDPDJHRUHYHQGHDWK
'2127XVHWKLVDSSOLDQFHLQDQHQFORVHGVSDFHVXFKDVFDPSHUWHQWFDURUKRPH
⥐WARNING
Before Turning Gas Supply ON
Before Lighting
'2127DWWHPSWWRRSHUDWHWKHXQLWXQWLO\RXKDYHUHDGDQGXQGHUVWDQGDOOVDIHW\LQIRUPDWLRQ
SURYLGHGLQWKLVPDQXDODQGDOODVVHPEO\LVFRPSOHWHGDQGOHDNFKHFNKDYHEHHQSHUIRUPHG
7KHKHDWHULVGHVLJQHGDQGDSSURYHGIRURXWGRRUXVHRQO\
0DNHVXUHWKHUHLVQRIODPPDEOHDQGFRPEXVWLEOHDURXQGWKHRSHUDWLQJDUHD
0DNHVXUHWKHUHLVQRREVWUXFWLRQWRDLUYHQWLODWLRQ
0DNHVXUHWKHF\OLQGHUFRYHULVFOHDURIGHEULVDQGDOOFRQQHFWLRQVDUHVHFXUHO\WLJKWHQ
,QVSHFWWKHKDWHUEHIRUHHDFKXVHDQGE\DTXDOLILHGVHUYLFHSHUVRQDWOHDVWDQQXDOO ,I
UHOLJKWLQJDKRWKHDWHUZDLWDWOHDVWPLQXWHV
,QVSHFWWKHKRVHDVVHPEO\IRUDQ\H[FHVVLYHDEUDVLRQFXWVRUZHDU/HDNWHVWDQ\VXVSHFWHG
DUHD5HSODFHKRVHLIWKHUHLVDOHDN
This appliance shall be used only in a well-ventilated space and shall not be used in a building,
garage or any other enclosed area.
An appliance may be installed with shelter no more inclusive than:
1)With walls on all sides, but with no overhead cover.
2)Within a partial enclosure which includes an overhead cover and no more than two side walls.
TheseVLGHZDOOVPD\EHSDUDOOHODVLQDEUHH]HZD\RUDWULJKWDQJOHVWRHDFKRWKHU
3)Within a partial enclosure which includes an overhead cover and three side walls, as long as 30
percent or more of the horizontal periphery of the enclosure is permanently open.
This appliance shall be used only in a well-ventilated space and shall not be used in a building,
y
g
ara
g
e or an
y
other enclosed area.
gg y
An appliance may be installed with shelter no more inclusive than:
y
1
)
With walls on all sides, but with no overhead cover.
)
2)
Within a partial enclosure which includes an overhead cover and no more than two side walls.
T
h
ese
VLGHZDOOVPD
\
EHSDUDOOHODVLQDEUHH]HZD
\
RUDWULJKWDQJOHVWRHDFKRWKHU
3)Within a partial enclosure which includes an overhead cover and three side walls, as long as 30
)
p
ercent or more o
f
the horizontal peripher
y
o
f
the enclosure is permanentl
y
open.

17
• DO NOT inhale fumes emitted from the heater in first use. Smoke and odor
from burning manufacturing oil will appear. Smoke and odor will dissipate after
approximately 30 minutes. The heater should NOT produce think black smoke.
CAUTION
Lighting
This heater is equipped with a pilot light that allows for safer startups and shutdown. Pilot must be
lit before main burner can be started.
1. Turn the control knob to the “OFF” position.
2. Fully open the LP cylinder valve
3. Push the control knob in and rotate to “pilot” position.
NOTE: For initial start or after any cylinder change, hold control knob in for 2 minutes to purge air
from gas lines before proceeding.
4. Push and release the igniter button until pilot flame is visible through the glass tube
5. Once the pilot is lit, continue to depress the control knob for 60 seconds.
6. If the pilot does not stay lit, repeat steps 4 to 6.
7. If repeating steps 4 to 6 and the unit does not light, then
• Push in control knob and turn counter clockwise to “Pilot”
• As you are depressing the control knob, place a long stem lighter through the glass tube to
light the pilot.
• Repeat step 6.
8. Push in and turn the control knob to “HIGH” position, then release control. If you want a lower
temperature, push in the control knob and turn counter-clockwise to “Low” position.
NOTE: If pilot fails to remain lit, all valves should be closed and wait a period of at least 5 minutes
before attempting to light again.

,QQRUPDOFRQGLWLRQWKHKHLJKWRIIODPHLVDERXWKHLJKWRIWKHJODVVWXEHXQGHU³+,*+´
SRVLWLRQDQGDERXWKHLJKWRIWKHJODVVWXEHXQGHU³/2:´SRVLWLRQ
7KHIODPHVKRXOGEHVWDEOHDQGEULJKWLQEOXHFRORUZLWK\HOORZWRSV,IH[FHVVLYH\HOORZIODP
LVGHWHFWHGWXUQRIIWKHKHDWHUDQGFRQVXOW³ URXEOHVKRRWLQJ´RQSDJH
Re-lighting
Shut Down
)RU\RXUVDIHW\WKHFRQWURONQREFDQRQO\WXUQWR³2))SRVLWLRQRQFHWKHNQRELVGHSUHVVHGLQ
³3LORW´SRVLWLRQ
'HSUHVVWKHFRQWURONQRELQ³3LORW´SRVLWLRQDQGWXUQWR³2))´
:DLWDWOHDVWPLQXWHVDQGOHWJDVGLVVLSDWHEHIRUHDWWHPSWLQJWRUHOLJKWWKHKHDWHU
5HSHDWWKH³/LJKWLQJ´VWHSVLQSDJH
)RU\RXUVDIHW\WKHFRQWURONQREFDQRQO\WXUQWR³2))SRVLWLRQRQFHWKHNQRELVGHSUHVVHGLQ
³3LORW´SRVLWLRQ
'HSUHVVWKHFRQWURONQRELQ³3LORW´SRVLWLRQDQGWXUQWR³2))´7KHEXUQHUZLOOPDNHDVOLJKW
SRSSLQJVRXQGZKHQH[WLQJXLVKHG
7XUQF\OLQGHUYDOYHFORFNZLVHWR2))DQGGLVFRQQHFWUHJXODWRUZKHQKHDWHULVQRWLQXVH
127(,WLVQRUPDOIRUWKHIODPHVFUHHQWRKDYHVRPHGLVFRORUDWLRQDIWHUXVH
7KHKHDWHUZLOOEHKRWDIWHUXVHKDQGOHWKHKHDWHUZLWKH[WUHPHFDUH
⥐WARNING

Operation Checklist
)RU\RXUVDIHW\SHUIRUPWKHIROORZLQJFKHFNEHIRUHHDFKXVH
0DNHVXUH\RXDUHIDPLOLDUZLWKWKHHQWLUHXVHU¶VPDQXDODQGXQGHUVWDQGDOOSUHFDXWLRQVQRWHV
$OOFRPSRQHQWVDUHSURSHUO\DVVHPEOHGDQGDUHLQJRRGFRQGLWLRQWRRSHUDWH
1RDOWHUDWLRQVKDYHEHHQPDGHWRWKHXQLW
$OOJDVFRQQHFWLRQVDUHVHFXUHDQGGRQRWOHDN
:LQGYHORFLW\LVEHORZPSK
8QLWZLOORSHUDWHDWUHGXFHGHIILFLHQF\EHORZ
+HDWHULVSODFHGRXWGRRU
7KHUHLVDGHTXDWHIUHVKDLUYHQWLODWLRQ
+HDWHULVSODFHGDZD\IURPDQ\IODPPDEOHOLTXLGVRUJDV
+HDWHULVSODFHGDZD\IURPZLQGRZVDLULQWDNHVRSHQLQJVSULQNOHUVDQGZDWHUVRXUFHV
+HDWHULVDWOHDVW´RQWRSDQG´DZD\IURPFRPEXVWLEOHPDWHULDOV
+HDWHULVSODFHGRQVROLGDQGOHYHOVXUIDFH
7KHUHLVQRVLJQRIVSLGHURULQVHFWQHVWVLQWKHKHDWHU
$OOEXUQHUSDVVDJHVDUHFOHDU
3HRSOHVKRXOGEHDOHUWHGWRWKHKD]DUGVRIKLJKVXUIDFHWHPSHUDWXUHDQGVKRXOGVWD\DWVDIH
GLVWDQFHWRSUHYHQWEXUQVRUFORWKLQJLJQLWLRQ
<RXQJFKLOGUHQVKRXOGEHFDUHIXOO\VXSHUYLVHGZKHQWKH\DUHDURXQGWKHKHDWHU
$Q\JXDUGRUSURWHFWLYHGHYLFHUHPRYHGIRUVHUYLFLQJWKHKHDWHUPXVWEHUHSODFHGSULRUWR
RSHUDWLRQ
,QVWDOODWLRQDQGUHSDLUVKRXOGEHGRQHE\DTXDOLILHGVHUYLFHSHUVRQ 7KHKHDWHUVKRXOGEH
LQVSHFWHGE\DTXDOLILHGVHUYLFHSHUVRQDWOHDVWDQQXDOO
3HUIRUPWKHIROORZLQJFKHFNVDIWHUHDFKXVH
*DVFRQWUROLVLQ³2))´SRVLWLRQ
3URSDQHF\OLQGHUYDOYHLVLQ³2))´SRVLWLRQ
*DVOLQHLVGLVFRQQHFWHG

CARE AND MAINTENANCE
%HIRUHVHUYLFLQJRUFOHDQLQJPDNHVXUHWKHKHDWHUKDVEHHQFRROGRZQ
⥐WARNING
Cleaning The Exterior Surface
Storage (Between Uses)
Storage (During Long Period of Inactivity)
8VHZDUPVRDS\ZDWHUWRFOHDQWKHVXUIDFH'2127XVHDQ\IODPPDEOHRUFRUURVLYHFOHDQLQ
DJHQWV
&OHDQWKHEXUQHUKROHVXVLQJDKHDY\GXW\SLSHFOHDQHU0DNHVXUHQRVSLGHURULQVHFWRUWKHLU
QHVWLVLQVLGHWKHKHDWHU
'LVDVVHPEOHWKHUHIOHFWRUDQGJODVVWXEHIURPWKHKHDWHUWRZDVKDQGFOHDQ0DNHVXUHW
FOHDQDQ\FDUERQGHSRVLWV
127($PRUHIUHTXHQWPDLQWHQDQFHVKRXOGEHSHUIRUPHGLIWKHKHDWHULVEHLQJXVHGLQVDOW\
HQYLURQPHQW0DNHVXUHQRFRUURVLRQLQWKHXQLW+LJKTXDOLW\DXWRPRWLYHZD[FDQEHXVHGWR
PDLQWHQDQFHWKHVXUIDFHRIWKHKHDWHU'2127DSSO\ZD[WRWKHIODPHVFUHHQRUUHIOHFW
⥐:$51,1*0DNHVXUHWKHEXUQHUDQGWKHSLORWDVVHPEO\DUHGU\DWDOOWLPH'2127VXEPHUJH
WKHFRQWUROER[DVVHPEO\,IWKHJDVFRQWUROLVVXEPHUJHGLQZDWHU'2127XVHDQGPXVWEH
UHSODFHG
0DNHVXUHFRQWURONQREDQGF\OLQGHUYDOYHDUH³2))´
'LVFRQQHFWWKH/3F\OLQGHU
6WRUHKHDWHUXSULJKWLQDQDUHDDZD\IURPGLUHFWFRQWDFWZLWKLQFOHPHQWZHDWKHUVXFKDVUDLQ
VOHHWKDLOVQRZGXVWDQGGHEULV
,IGHVLUHGFRYHUXSWKHKHDWHUWRSUHYHQWGHEULVEXLOGXSLQDLUSDVVDJHV
127(0DNHVXUHWKHKHDWHULVFRROGRZQEHIRUHFRYHULQJ
0DNHVXUHFRQWURONQREDQGF\OLQGHUYDOYHDUH³2))´
'LVFRQQHFWWKH/3F\OLQGHU'2127OHDYH/3F\OLQGHUXQGHUGLUHFWVXQOLJKWRUH[FHVVLYHKHDW
6WRUHKHDWHUXSULJKWLQDQDUHDDZD\IURPGLUHFWFRQWDFWZLWKLQFOHPHQWZHDWKHUVXFKDVUDLQ
VOHHWKDLOVQRZGXVWDQGGHEULV
,IGHVLUHGFRYHUXSWKHKHDWHUWRSUHYHQWGHEULVEXLOGXSLQDLUSDVVDJHV
127(0DNHVXUHWKHKHDWHULVFRROGRZQEHIRUHFRYHULQJ
5HJXODUPDLQWHQDQFHVKRXOGEHSHUIRUPHGWRHQVXUHWKHKHDWHULVLQSHUIHFWZRUNLQJFRQGLWLRQ
9LVXDOO\FKHFNLQJSRUWLRQVRIWKHKRVHDVVHPEO\ORFDWHGZLWKLQWKHFRQILQHVRIWKHKHDWHUSRVW
,QVSHFWWKHHQWLUHKRVHDVVHPEO\DWOHDVWDQQXDOO\GLVDVVHPEOLQJWKHUHIOHFWRUDQGEXUQHU,QVSHFW
WKHKRVHDVVHPEO\IRUHYLGHQFHRIH[FHVVLYHDEUDVLRQFXWVRUZHDU6XVSHFWHGDUHDVVKRXOGEH
OHDNWHVWHG7KHQDVVHPEOLQJWKHUHIOHFWRUDQGEXUQHUDJDLQIROORZLQJZLWKVWHSDQG
9LVXDOO
\
FKHFNLQ
J
S
RUWLRQVR
I
WKHKRVHDVVHPEO
\
ORFDWHGZLWKLQWKHFRQ
I
LQHVR
I
WKHKHDWHU
S
RVW
\JS \ S
,QVSHFWWKHHQWLUHKRVHDVVHPEO\DWOHDVWDQQXDOO\GLVDVVHPEOLQJWKHUHIOHFWRUDQGEXUQHU,QVSHFW
S\\J S
WKHKRVHDVVHPEO\IRUHYLGHQFHRIH[FHVVLYHDEUDVLRQFXWVRUZHDU6XVSHFWHGDUHDVVKRXOGEH
\S
O
HDNWHVWHG7KHQDVVHPEOLQ
J
WKHUHIOHFWRUDQGEXUQHUD
J
DLQIROORZLQ
J
ZLWKVWHS
DQG
Table of contents
Other Belleze Patio Heater manuals