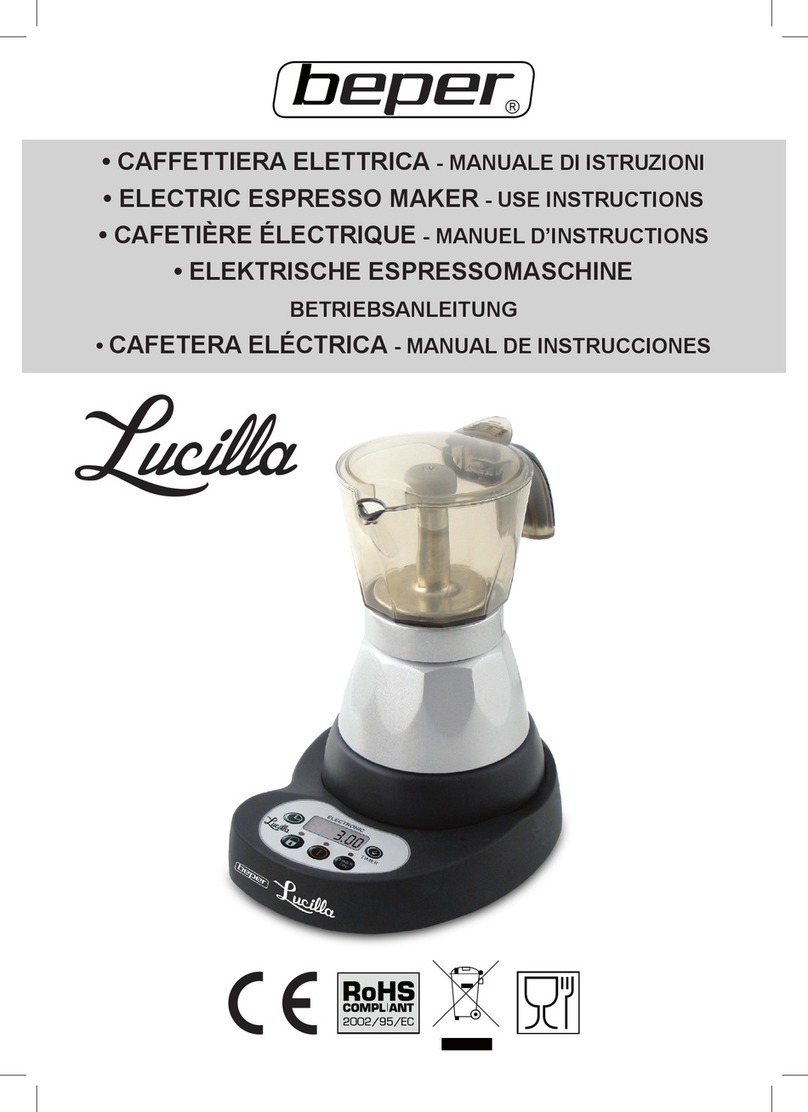
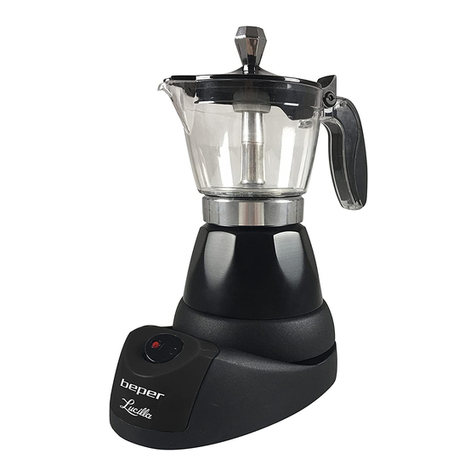
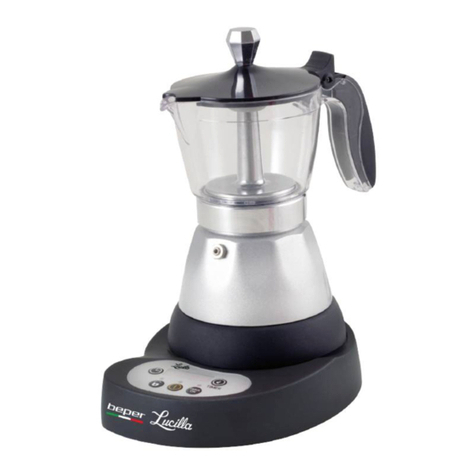
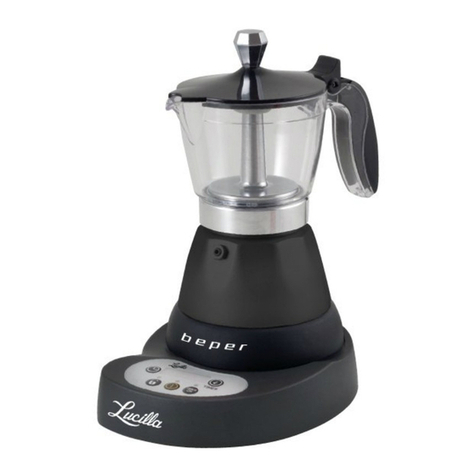
Beper BC.041N Quick guide

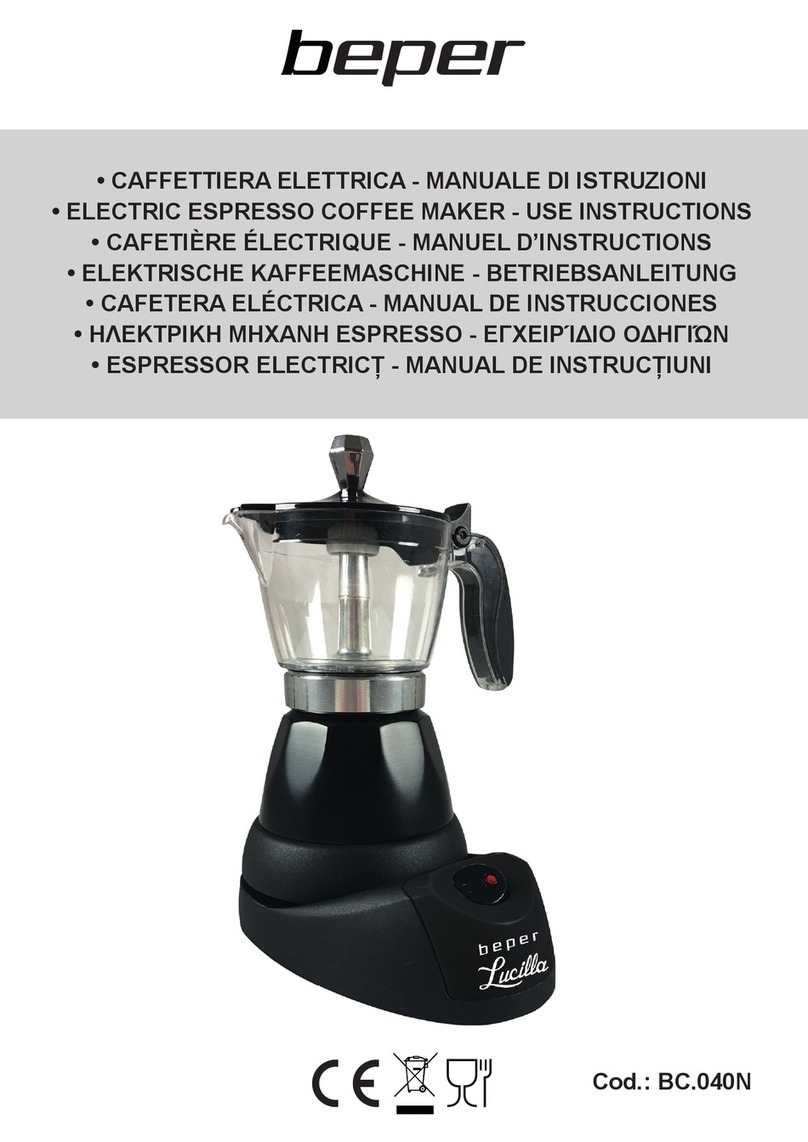
Cod.: BC.041N
• CAFFETTIERA ELETTRICA - MANUALE DI ISTRUZIONI
• ELECTRIC ESPRESSO COFFEE MAKER - USE INSTRUCTIONS
• CAFETIÈRE ÉLECTRIQUE - MANUEL D’INSTRUCTIONS
• ELEKTRISCHE KAFFEEMASCHINE - BETRIEBSANLEITUNG
• CAFETERA ELÉCTRICA - MANUAL DE INSTRUCCIONES
• ΗΛΕΚΤΡΙΚΗ ΜΗΧΑΝΗ ESPRESSO - ΕΓΧΕΙΡΊΔΙΟ ΟΔΗΓΙΏΝ
• ESPRESSOR ELECTRICȚ - MANUAL DE INSTRUCȚIUNI

Caffettiera elettrica Manuale di istruzioni
pag. 3
pag. 12
pag. 20
pag. 30
pag. 39
pag. 48
For further information and/or for instructions for use in other languages, please visit: beper.com
ITALIANO
ENGLISH
FRANÇAIS
DEUTSCH
ESPAÑOL
ROMÂNĂ

3
Caffettiera elettrica Manuale di istruzioni
IT
AVVERTENZE GENERALI
LEGGERE QUESTE ISTRUZIONI PRIMA DI USARE L’APPAREC-
CHIO.
Prima e durante l’uso dell’apparecchio è necessario seguire alcune
precauzioni elementari.
Dopo aver tolto l’imballaggio assicurarsi dell’integrità dell’apparec-
chio. In caso di dubbio non utilizzare l’apparecchio e rivolgersi a per-
sonale professionalmente qualicato. Gli elementi dell’imbal laggio
(sacchetti di plastica, polistirolo, ecc.) non devono essere lasciati alla
portata dei bambini, in quanto potenziali fonti di pericolo.
Assicurarsi sempre che la tensione di rete elettrica sia uguale a quel-
la indicata nell’etichetta dati tecnici e che l’impianto sia compatibile
con la potenza dell’apparecchio.
Non tirare mai il cavo per scollegarlo dalla presa di corrente elettrica.
Assicurarsi che il cavo non sia in contatto con superci calde o ta-
glienti.
Non utilizzare l’apparecchio con il cavo danneggiato.
Se il cavo di alimentazione è danneggiato, esso deve essere sostitu-
ito dal Costruttore o dal suo Servizio Assistenza Tecnica o comunque
da una persona con qualica similare, in modo da pre venire ogni
rischio.
Collegare l’apparecchio esclusivamente ad una presa di corrente
elettrica alternata.
In generale è sconsigliabile l’uso di adattatori, prese multiple e/o pro-
lunghe. Qualora il loro uso si rendesse indispensabile è necessario
utilizzare solamente adattatori e prolunghe conformi alle vigenti nor-
me di sicurezza.
Questo apparecchio dovrà essere destinato solo all’uso per il quale
è stato espressamente concepito. Ogni altro uso è da considerarsi
improprio e quindi pericoloso, nonché far decadere la garanzia. Il
costruttore non può essere considerato responsabile per eventuali
danni derivati da usi impropri, erronei ed irragionevoli.
Per evitare surriscaldamenti pericolosi si raccomanda di svolgere in
tutta la sua lunghezza il cavo di alimentazione.
Prima di effettuare qualsiasi operazione di cambio degli accessori o
di pulizia disinserire l’apparecchio dalla rete di alimentazione elettri-
ca.
Non lasciare esposto l’apparecchio ad agenti atmosferici (pioggia,
sole, etc.).

4
Caffettiera elettrica Manuale di istruzioni
AVVERTENZE D’USO
. Questa macchina è stata costruita per “fare il caffè”. Non utilizzare mai altri estratti, polvere di ca-
cao, camomilla, infusi o sostanze solubili: questi possono bloccare i fori del ltro.
. Durante la pulizia non immergere mai la base e la caldaia in acqua: si tratta di un apparec-
chio elettrico.
. Fare attenzione a non scottarvi con getti di acqua o vapore o per l’uso improprio dell’apparecchio.
. Quando si utilizza l’apparecchio non toccare le superci calde. Utilizzare i pulsanti o le maniglie.
. Riempire la caldaia con acqua prima di mettere la caffettiera sulle strutture di sostegno.
. Non lasciare che il cavo di alimentazione venga a contatto con le parti metalliche della caffettiera
quando è in funzione.
La base di appoggio della caraffa e il serbatoio diventano molto caldi durante il funzionamento, non
toccare queste parti per evitare il rischio di scottature.
Non sollevare il coperchio mentre la caffettiera è in funzione; attendere qualche minuto dallo spe-
gnimento prima di sollevare il coperchio poiché la fuoriuscita improvvisa di vapore potrebbe causare
scottature.
Non lasciare il cavo di alimentazione inutilmente inserito nella presa di corrente, scollegarlo sempre
quando non si utilizza la macchina per caffè.
Non tirare il cavo di alimentazione per staccare la spina.
In caso di danneggiamento del cavo, provvedere alla sua sostituzione rivolgendosi esclusivamente
ai centri autorizzati.
Non immergere la caffettiera in acqua o altro liquido ed evitare di fare inltrare liquidi.
Non esporre la caffettiera a fonti di umidità e non utilizzarla all’aperto. In caso di inltrazioni di liquidi
nel corpo della caffettiera, disinserire subito la spina dalla presa di corrente elettrica e far riparare la
caffettiera da personale qualicato.
Non toccare la caffettiera e il cavo di alimentazione con le mani bagnate.
La caffettiera è concepita per essere usata esclusivamente in ambiente domestico, non è progettata
per un impiego commerciale.
Non tenere l’apparecchio vicino a fonti di calore (es. termosifone).
Questo apparecchio non deve essere utilizzato da persone (compre-
si i bambini) con capacità siche, sensoriali o mentali ridotte; da per-
sone che manchino di esperienza e conoscenza dell’apparecchio, a
meno che siano attentamente sorvegliate o ben istruite relativamente
all’utilizzo dell’apparecchio stesso da parte di una persona responsa-
bile della loro sicurezza.
Assicurarsi che i bambini non giochino con l’apparecchio.
Allorché si decida di smaltire come riuto questo apparecchio, si rac-
comanda di renderlo inoperante.
SI RACCOMANDA INOLTRE DI RENDERE INNOCUE
QUELLE PARTI DELL’APPARECCHIO SUSCETTIBI-
LI DI COSTITUIRE UN PERICOLO, SPECIALMEN-
TE PER I BAMBINI CHE POTREBBERO SERVIRSI
DELL’APPARECCHIO PER I PROPRI GIOCHI.

5
Caffettiera elettrica Manuale di istruzioni
IT
DESCRIZIONE DEL PRODOTTO
A. Coperchio
B. Caffettiera
C. Caldaia
D. Filtro
E. Guarnizione
F. Base di supporto
G. Cavo di alimentazione
H. Pannello di controllo
I. Spia luminosa
J. Valvola di sicurezza
K. Filtro ad imbuto
L. Adattatore per metà caffettiera
M. Erogatore
INSTALLAZIONE
. Posizionare l’apparecchio su una supercie piana lontano da rubinetti dell’acqua
e lavelli.
. Vericare che la tensione della rete elettrica corrisponda al valore indicato sulla targhetta dell’ap-
parecchio. Collegare l’apparecchio solo ad una presa elettrica che sia correttamente messo a
terra. Il costruttore declina ogni responsabilità per eventuali incidenti causati se il sistema non è
correttamente messa a terra.
. Se la presa di corrente non corrisponde alla spina dell’apparecchio, inserire la presa in adattatore
idoneo.

6
Caffettiera elettrica Manuale di istruzioni
COME PREPARARE IL CAFFE ‘
Quando si collega la base alla rete elettrica, il controllo elettronico emette un segnale acustico;
quando sul display appaiono i trattini lampeggianti è possibile impostare l’ora del giorno oppure
preparare subito il caffè.
1) Controllare che la caffettiera sia fredda, e svitarla tenendo la caldaia con una mano e girando in
senso antiorario la caffettiera con l’altro (Fig.1).
2) Rimuovere l’imbuto.
3) Se si desidera preparare 3 tazze di caffè, riempire la caldaia con acqua fresca no a raggiunge-
re la valvola di sicurezza (visibile all’interno della caldaia), senza superarla (Fig.2). Se, invece, si
vuole preparare metà caffettiera, riempire la caldaia con acqua no al segno circolare (circa 2 cen-
timetri) al di sotto della valvola di sicurezza.
SUGGERIMENTO: utilizzare acqua fresca e morbida. Acqua salmastra o ricca di calcare afevoli-
sce il sapore.
IMPORTANTE: non utilizzare la caffettiera senza acqua nella caldaia oppure con acqua calda
per un funzionamento più veloce.
4) Inserire il ltro ad imbuto nella caldaia (Fig. 3). Per preparare metà caffettiera inserire anche il
disco adattatore nel ltro ad imbuto (Fig. 4).
5) Riempire il ltro imbuto con caffè macinato, senza pressarlo (Fig. 5). Riempirlo un po’ alla vol-
ta per evitare la fuoriuscita del caffè macinato.
6) Distribuire il caffè macinato in maniera uniforme e rimuovere l’eventuale eccedenza di caffè dal
bordo del ltro.
IMPORTANTE: L’utilizzare caffè macinato di buona qualità, di macinatura media e per caffettiere.
Non utilizzare la caffettiera con caffè d’orzo.
7) Stringere la caffettiera in modo sicuro, senza esagerare, tenendo la caldaia con una mano e
ruotando in senso orario la caffettiera con l’altra, evitando di far leva sul manico.
8) Riporre la caffettiera sulla base (Fig. 6). Chiudere il coperchio.
ACCENSIONE MANUALE
Premere il tasto on/off (Fig. 7). La spia on/off indica che la caffettiera è in funzione, mentre la spia
BLOCCO TASTI il caffè indica che è attiva la funzione blocco tasti.
Il caffè inizierà a fuoriuscire dopo pochi minuti.
L’erogazione sarà completata in 4-5 minuti. La caffettiera si spegnerà dopo che la luce “ON / OFF”
è accesa da 30 minuti.
AUTOACCENSIONE PROGRAMMATA
Questa funzione permette di programmare l’ora di autoaccensione dell’apparecchio, ad esempio la
sera per la mattina successiva. Procede nel seguente modo:
Impostare l’ora esatta
Premere e tenere premuto il tasto “OROLOGIO” per impostare l’ora esatta. (Ogni pressione breve
avanzerà il tempo di un minuto, mantenere premuto per avanzare il tempo in fretta).
Impostare l’ora di accensione
Premere il tasto “TIMER”, e mantenerlo premuto no al raggiungimento dell’ora di accensione de-
siderata.
In ogni momento è possibile visualizzare l’ora programmata premendo il tasto “TIMER”, dopo alcuni
secondi sul display ricompare l’ora corrente.
7
Caffettiera elettrica Manuale di istruzioni
IT
Una volta preparata la caffettiera e aver programmato l’ora di accensione desiderata, premere il
tasto “TIMER ON”; si accende la spia di accensione programmata e la spia BLOCCO TASTI.
All’ora programmata si spegne la spia di accensione programmata e si accende la spia “ON / OFF”
e la spia BLOCCO TASTI a segnalare che l’apparecchio inizia a scaldare l’acqua.
L’erogazione sarà completata in 4-5 minuti. La caffettiera si spegnerà dopo che la luce “ON / OFF”
è accesa da 30 minuti.
Se si desidera spegnere la funzione BLOCCO TASTI basterà tenere premuto per 3 secondi il tasto
in oggetto; ora è possibile spegnere la caffettiera.
Al termine dell’erogazione
Quando l’erogazione è completata, rimescolare il caffè prima di servirlo per uniformare la corposità.
Per ottenere caffè caldo si raccomanda di utilizzare le quantità d’acqua indicate al punto 3 del pa-
ragrafo “Come preparare il caffè”
IMPORTANTE: la prima volta che viene utilizzata la caffettiera , tutti gli accessori ed i circuiti inter-
ni devono essere lavati con acqua calda. Poi fare alcuni caffè a perdere.

8
Caffettiera elettrica Manuale di istruzioni
NOTA:
a. Il tempo inizierà nuovamente da zero quando raggiunge 24:00, il che signica che il timer può
funzionare per un massimo di 24 ore.
b. Funzione di memoria: se viene impostato come orario le 7.00 per la preparazione del caffè, ogni
mattina alle 7.00 il caffè verrà preparato, senza reimpostarlo ogni giorno (fatto salvo che l’utente
non lo modichi).
c. il tempo d’erogazione programmabile massimo è di 15 ore
Esempi
Supponiamo che siano le 21:00. Se si vuole godere il caffè alle 07:00 della mattina seguente, è
sufciente impostare il timer programmato come segue:
1, Collegare la caffettiera nella presa
2, Tenere premuto “orario” per impostare il tempo di 21:00
3, Tenere premuto “timer” per impostare il tempo di 07:00
4, Premere il tasto “timer on” per attivare il timer
5, L’erogazione del caffè inizia automaticamente quando l’orologio del display è alle “07:00”, la spia
“ timer on “ si spegne, nel frattempo si accende la spia “ON / OFF”
6, Quando sono le 07:30, la caffettiera si spegne e si spengono le spie.
FUNZIONE MANTIENI CALDO
Grazie al dispositivo mantieni caldo, il caffè può essere bevuti caldo alla giusta temperatura no a
mezzora dopo l’accensione della macchina.
Il dispositivo si attiva automaticamente ad ogni accensione dell’apparecchio.
PULIZIA E MANUTENZIONE
. Prima di eseguire le operazioni di pulizia, attendere che la macchina da caffè si raffreddi dopo
l’uso.
. Pulire l’interno dell’erogatore periodicamente.
. Controllare regolarmente l’imbuto e la guarnizione. Sostituire se ci sono segni di usura o deterio-
ramento. Utilizzare esclusivamente ricambi originali.
. Ogni tanto controllare che i fori del ltro non vengono bloccati, se necessario, pulire con uno spillo
(Fig. 8).
. Non lavare la macchina da caffè in lavastoviglie.
. Per la pulizia della caldaia non usare solventi o detergenti abrasivi. È sufciente pulirla con una
spugna, mantenendo l’attenzione a non bagnare le parti elettriche.
Quando si toglie il ltro a disco per operazioni di pulizia o per sostituzione della guarnizione, ricor-
darsi poi di re-inserirlo correttamente per evitare pericolosi spruzzi di acqua calda.
Non sciacquare la caldaia sotto il rubinetto dell’acqua e non immergere in acqua.

9
Caffettiera elettrica Manuale di istruzioni
IT
ALIMENTAZIONE A BATTERIA:
Sotto la base della caffettiera si trova un vano batterie, in cui è possibile inserire una batteria tipo
CR2032, 3V ( non inclusa).
Funzione della batteria: se viene tolta la spina dalla presa di corrente il timer continua a funzionare,
anche se non appare nessuna scritta sul display. Esempio: se in questo momento il display visua-
lizza le 8.00 e tolgo la spina per un’ora, quando metterò la spina nella presa di corrente il display
visualizzerà in automatico le 9.00.
Per sostituire la batteria seguire le seguenti indicazioni:
1. Inserire nella fessura del copri batteria un pezzo di metallo e ruotare in senso antiorario per aprire
il vano.
2. Usare una pinza e premere la sporgenza in metallo per disinserire la batteria da sostituire.
3. Inserire la nuova batteria (tipo CR2032, 3V) con il polo negativo verso l’alto.
4. Ruotare in senso orario il copri batteria e stringere bene per chiudere il vano.
PROBLEMA CAUSA SOLUZIONE
Non viene rilasciato caffè Assenza di acqua nella cal-
daia
Riempiere la caldaia con
acqua fresca
Il caffè ci mette molto tempo
ad essere erogato
Il caffè utilizzato non è di buo-
na qualità
Il ltro è bloccato
Il caffè è stato pressato
Usare caffè macinato specico
per caffettiere
Pulire il ltro come riportato
nel paragrato “Pulizia e Manu-
tenzione”
Non pressare il caffè macinato
Perdite di caffè dai bordi della
caldaia
Il ltro è bloccato
La guarnizione è bruciato o
usurata
Pulire il ltro come riportato
nel paragrato “Pulizia e Manu-
tenzione”
Sostituire la guarnizione

10
Caffettiera elettrica Manuale di istruzioni
DATI TECNICI
Potenza: 400 W
Alimentazione: 220-240V ~ 50/60Hz
Batteria tipo CR2032, 3V (non inclusa)
In un’ottica di miglioramento continuo Beper si riserva la facoltà di apportare modi che e
migliorie al prodotto in oggetto senza previo preavviso.
Il simbolo del cestino barrato riportato sull’apparecchio indica che il prodotto, alla ne
della propria vita utile, dovendo essere trattato separatamente dai riuti domestici, deve
essere conferito in un centro di raccolta differenziata per apparecchiature elettriche ed
elettroniche oppure riconsegnato al rivenditore al momento dell’acquisto di una nuova ap-
parecchiatura equivalente.
L’adeguata raccolta differenziata per l’avvio successivo dell’apparecchio al riciclaggio, al trattamen-
to e allo smaltimento ambientalmente compatibile contribuisce ad evitare possibili effetti negativi
sull’ambiente e sulla salute e favorisce il recupero dei materiali di cui è composto.
L’utente è responsabile del conferimento dell’apparecchio a ne vita alle appropriate strutture di
raccolta. Per informazioni più dettagliate inerenti i sistemi di raccolta disponibili, rivolgersi al servizio
locale di smaltimento riuti, o al negozio dove è stato effettuato l’acquisto.
Chiunque abbandona o cestina questo apparecchio e non lo riporta in un centro di raccolta differen-
ziata per riuti elettrici-elettronici è punito con la sanzione amministrativa pecuniaria prevista dalla
normativa vigente in materia di smaltimento abusivo di riuti

Caffettiera elettrica Manuale di istruzioni
IT
CERTIFICATO DI GARANZIA
La garanzia di applicazione è valida 24 mesi dalla data di acquisto per difetti di materiale o di fab-
bricazione.
La garanzia è valida unicamente presentando il certicato di garanzia e il documento di
acquisto (scontrino scale) che certichi la data di acquisto e il nome del modello dell’appa-
recchio acquistato.
Se l’apparecchio dovesse richiedere assistenza tecnica rivolgersi al venditore o presso la nostra
sede. Questo per conservare inalterata l’efcienza del vostro apparecchio e per NON invalidare la
garanzia. Eventuali manomissioni dell’apparecchio da parte di personale non autorizzato invalide-
ranno automaticamente la garanzia.
Condizioni di garanzia
Se ci sono guasti a causa di difetti di materiale e/o fabbricazione durante il periodo di garanzia,
garantiamo la riparazione del prodotto gratuitamente.
Non sono coperte dalla garanzia tutte le parti che dovessero risultare difettose a causa di:
a. Danni da trasporto o da cadute accidentali,
b. Errata installazione o inadeguatezza impianto elettrico,
c. Riparazioni o modiche operate da personale non autorizzato,
d. Mancata o non corretta manutenzione e pulizia,
e. Prodotto e/o parti di prodotto soggette a usura e/o consumabili (es.: lampade, batterie, lame)
f. Mancata osservanza delle istruzioni per il funzionamento dell’apparecchio, negligenza
o trascuratezza nell’uso.
L’elenco di cui sopra è a titolo meramente esemplicativo e non esaustivo, in quanto la presente
garanzia è comunque esclusa per tutte quelle circostanze che non possono farsi risalire a difetti di
fabbricazione dell’apparecchio.
La garanzia è inoltre esclusa in tutti i casi di uso improprio dell’apparecchio ed in caso di uso pro-
fessionale.
Beper Srl declina ogni responsabilità per eventuali danni che possano direttamente o indirettamente
derivare a persone, cose ed animali domestici in conseguenza della mancata osservanza di tutte le
prescrizioni indicate nell’apposito “Libretto Istruzioni ed avvertenze” in tema di installazione, uso e
manutenzione dell’apparecchio.
Assistenza tecnica
Per l’assistenza tecnica e/o riparazioni fuori dal periodo di garanzia ci si può rivolgere direttamente
all’indirizzo sottostante.
BEPER SRL
Via Salieri, 30
37050 - Vallese di Oppeano - Verona
Tel. 045/7134674 – Fax 045/6984019
e-mail: assistenza@beper.com

12
Electric Espresso Coffee maker Use instructions
GENERAL SAFETY ADVICE
READ THE OPERATING INSTRUCTIONS CAREFULLY BEFORE
FIRST USE OF THE APPLIANCE.
Read the following instructions carefully, since they give you useful
safety information about installation, use and maintenance and help
you avoid mishaps and possible accidents.
Remove the packing and make sure that the appliance is intact, with
special attention to the supply cable. The elements of the packing
(plastic bags, polystyrene, etc) do not have to be accessible to the
children, in order to preserve them from danger sources.
It is recommended not to throw these packing material in the dome-
stic waste, but to deliver them to the appropriate station of collection
or destruction refusals, asking eventually information to the manager
of the Sanitation Department of your own municipality.
Before connecting the appliance make sure that the mains voltage
corresponds to the data specied on the label.
If the plug does not suit the socket, let it be replaced with another
suitable plug by qualied personnel only, which shall also ensure that
the section of the socket cables is suitable for your appliance power
absorption.
Never pull the supply cord to unplug the appliance.
Make sure that the supply cord never comes into contact with hot or
cutting surfaces
Do not use this appliance if the supply cord is damaged. In case of
damage, it must be replaced by the manufacturer, its service agent or
similarly qualied persons in order to avoid a hazard.
Only connect this appliance on alternating current
Generally, the use adaptors multiple plugs and/or extensions is not
recommended; should they be necessary, please use only simple or
multiple adaptors and extensions in compliance with the safety rules
in force, making sure that the capacity absorption limit marked on the
simple adaptors and the extensions and the maximum power limit
marked on the multiple adaptor are not exceeded.
This appliance is to be destined to its special purpose only.
Any other use is to be considered as improper and thus dangerous.
The manufacturer cannot be responsible for any damages deriving
from improper, wrong or incautious use.
To avoid any heating risk, it is recommended to unroll completely the
supply cord and to unplug the appliance, when not used.

13
Electric Espresso Coffee maker Use instructions
EN
Before cleaning, always unplug the appliance.
To protect against electric shock, do not immerse cord, plug or any
parts of the appliance into water or other uids.
Do not hold the appliance with wet hands or feet.
Do not hold the appliance with naked feet.
Do not expose the appliance to atmospheric agents such as rain,
wind, snow, hail.
Do not use the appliance near explosives, highly ammable mate-
rials, gases, burning ames, heaters.
Do not allow children, disabled people or every people without expe-
rience or technical ability to use the appliance if they are not properly
watched over. Close supervision is necessary when any appliance
used by or near children.
Make sure that children do not play with this appliance.
If you decide not to use the appliance any longer, make it unservice-
able by simply cutting the supply cable after disconnecting the plug
from the socket.
ALSO MAKE ANY DANGEROUS PARTS UNSERVICE-
ABLE, ESPECIALLY FOR CHILDREN WHO COULD
PLAY WITH THE APPLIANCE.

Electric coffee maker Use instructions
14
SAFETY WARNINGS
This machine has been manufactured to “make coffee”. Never use other extracts, cocoa powder,
chamomile, other infusions or soluble substances: these may block the holes in the lter.
During cleaning, never immerse the base and the boiler in water: this is an electrical appliance.
Be careful to avoid being scalded by spraying water or steam or due to the improper use of the
appliance.
When using the appliance do not touch the hot surfaces. Use the buttons or handles.
After having removed the packaging, check that the appliance is in tact. If in doubt, do not use the
appliance and contact a professionally qualied person.
The parts of the packaging (plastic bags, polystyrene foam, etc.) not must be left within the reach of
children, as they are potential sources of danger.
This appliance must only be used for household purpose. All other uses are considered improper
and as a result dangerous.
The manufacturer declines all liability for any damage deriving from improper, erroneous and unre-
asonable use of the appliance.
The appliance must work only connected to a power outlet; never use it directly on ames.
Never touch the appliance with wet or damp hands or feet.
Never allow the appliance to be sued without supervision by children or incapable persons.
Make sure that children do not play with the appliance.
In the event of faults or malfunctioning of the appliance, switch it off and not tamper with it.
For and repairs, only contact service centres that are authorized by the manufacturer and insist on
the use of original spare parts. Failure to observe the above warnings may compromise the safety
of the appliance.
The power cable for this appliance must not be replaced by the user, in that this operation requires
the use of special tools. In the event of damage, only contact a service centre authorized by the
manufacturer so as to avoid any risks.
Fill the boiler with water before placing
the Moka coffee maker on the support
base.
Do not let the power cable come into con-
tact with the metallic parts of the Moka
coffee maker when in operation.
PRODUCT DESCRIPTION
A.Pitcher lid
B.Pitcher
C.Boiler
D.Disk lter
E.Gasket
F.Support base
G.Power cable
H.Control panel
I.Pilot light
J.Safety valve
K.Funnel lter
L.Cup adapter
M.Tube

15
Electric Espresso Coffee maker Use instructions
EN
INSTALLATION
Place the appliance on a bench away from water taps and sinks.
Check that the voltage of the mains power supply corresponds to the value indicated on
the appliance’s rating plate. Only connect the appliance to a power outlet with a minimum
rating of 6A that is properly earthed. The manufacturer declines all liability for any acci-
dents caused if the system is not correctly earthed.
If the power outlet does not match the plug on the appliance , have the outlet repeated
with a suitable type by qualied personnel.
HOW TO PREPARE THE COFFEE
1)Check that the coffee maker is cold, and then unscrew it by holding the boiler with one hand and
turning the pitcher anticlockwise with the other (Fig.1).
2)Remove the funnel
3)If you want to prepare 6 cups of coffee, ll the boiler with fresh water until reaching the safety valve
( visible inside the boiler),without exceeding it (Fig.2). On the other hand, to prepare 6 cups, ll the
boiler with water to the mark ( at round 2 centimeters) below the safety valve.
TIP: use fresh and soft water. Salty or hard water will weaken the ower.
IMPORTANT: do not use the coffee maker without water in the boiler or alternatively using hot water
for faster operation .
4)Insert the funnel lter in the boiler ( Fig. 3). To prepare six cups of coffee, also insert the 6 cup
adapter in the funnel lter( Fig. 4).
5)Fill the funnel lter with ground coffee, without pressing it (Fig. 5). Fill it a little at a time to prevent
spilling the ground coffee.
6)Distribute the ground coffee uniformly and remove any excess coffee from the edge of the lter.
IMPORTANT: Use good quality, medium-ground coffee, for MOKA coffee makers.
7)Tighten the coffee maker securely , without exaggerating, holding the boiler with one hand and
turning the pitcher clockwise with the other, without pushing on the handle
8)Rest the coffee maker on the base ( Fig. 6) . Close the lid.
9)Press the on/off switch (Fig. 7)
10)The coffee will start to be released after a few minutes.
11)When the pitcher is full, mix the coffee for uniformity before serving it .

16
Electric Espresso Coffee maker Use instructions
IMPORTANT: the rst time that the coffee maker is used, all the accessories and the internal circuits
should be washed with hot water. Then make a few batches of coffee to throw away.
1 Plug the coffee maker into socket, the power on and LED display “00:00”.
2 Use the coffee maker directly, press “ON/OFF” start work, indicator light on. The power cut off after
30 minutes automatic.
3 Programmable timer mode: Press and hold “Current Time” to set current time. (Each short press
will advance the time by one minute and keep holding will advance the time quickly.)the LED display
the current time when nished.
4 Press “brewing time”, set the desire time in same way.
5 Press ”TIMER ON”, indicator light on, and “ON/OFF” and “HOLD KEY” start work synchronization,
Timer set successful
6 “TIMER ON” light off when brewing time, ”ON/OFF” light on, start brewing coffee
7 The brewing will be nished in 4-5 minutes. the power will cut off after “ON/OFF” light on 30 mi-
nutes.
NOTE:
a. The time will start from zero again when it reaches 24:00, which means the timer can work for
maximum 24 hours.
b. the timer without memory function, Unplug the coffee maker will display “00:00”
c. the Max programmable reserve time is 15 hours

17
Electric Espresso Coffee maker Use instructions
EN
Examples
Suppose it is 21:00 now. If you want to enjoy coffee at 07:00 the next morning, simply set the pro-
grammed timer as following:
1 Plug the coffee maker into socket
2 Press and hold “Current Time” to set the time 21:00
3 Press and hold “Brewing Time” to set the time 07:00
4 Press “Timer On” to activate the timer
5 The coffee maker start brewing automatic when clock display “07:00”, “Timer On” indicator light
off, meanwhile “ON/OFF” indicator light on
6 When LED display 07:30,the power cut off automatic and all indicator light off
CLEANING AND MAINTENCE
. Before performing the cleaning operations, wait for the coffee maker to have cooled down after
use.
. Clean the inside of the tube periodically.
. Regularly check the funnel and the gasket. Replace if there are signs of wear or deterioration. Use
original spare parts only.
. Every so often check that the holes in the disk lter are not blocked; if necessary, clean using a
pin (Fig. 8).
. Do not wash the coffee maker in the dishwasher.
.When cleaning do not use solvents or abrasive detergents. Simply clean it with a sponge, keeping
attention not to wet the electrical parts.
Never rinse the boiler under the tap water and never immerse it in water.
KEEP WARM FUNCTION
With the keep warm function can be drunk hot at the right temperature for more than half an hour
after switching on the machine.
The device is automatically activated each time the unit.
BATTERY:
Battery compartment is under the base of the coffee maker, where you can insert a battery CR2032,
3V (not included).
Function battery: If you removed the plug from the socket timer the coffee maker continues to run,
even if there no text on the display. Example: if now the display shows 8.00 and the power take off
for an hour, when you put the plug into the socket the display will automatically 9.00.

18
Electric Espresso Coffee maker Use instructions
PROBLEM CAUSE SOLUTION
No coffee is released No water in the boiler Fill the boiler with fresh water
The coffee takes a long time
to be released
The coffee used is not the
right type
The disk lter is blocked
The coffee has been pressed
Use ground coffee expressly
for Moka coffee makers
Clean the disk lter as descri-
bed in the paragraph “Clea-
ning and maintenance”
Do not press the ground
coffee
Coffee leaks from the edges of
the boiler
The disk lter is blocked
The gasket is burned or torn
Clean the disk lter as
described in the paragraph “
Cleaning and maintenance”
Replace the gasket
TECHNICAL DATA
Power: 400 W
Power supply: 220-240V ~ 50/60Hz
Use battery CR2032, 3V (not included)
For any improvement reasons, Beper reserves the right to modify or improve the product
without any notice.
The European directive 2011/65/EU on Waste Electrical and Electronic Equipment (WEEE),
requires that old household electrical appliances must not be disposed of in the normal
unsorted municipal waste stream. Old appliances must be collected separately in order to
optimize the recovery and recycling of the materials they contain, and reduce the impact on
human health and the environment. The crossed out “wheeled bin” symbol on the product
reminds you of your obligation, that when you dispose of the appliance, it must be separa-
tely collected.

Electric Espresso Coffee maker Use instructions
EN
GUARANTEE CERTIFICATE
This appliance has been checked in the factory. From the date of original purchase a 24 month
guarantee applies to material and production defects. The purchase receipt and the guarantee cer-
ticate must be submitted together in case of claim to guarantee.
The guarantee is valid only with a guaranty certicate and proof of purchase (scal receipt)
indicating the date of purchase and the model of the appliance
For any technical assistance, please contact directly the seller or our head ofce in order to preserve
the appliance’s efciency and NOT TO void the guarantee. Any intervention on this appliance by
non-authorized persons will automatically void the guarantee.
GUARANTEE CONDITIONS
If the appliance shows defects as a result of faulty material and/or production during the period of
guarantee, we guarantee repair free of charge on condition that:
- The appliance has been used properly and for the purpose for which it has been intended.
- The appliance has not been tampered with, otherwise it is not maintainable.
- The purchase receipt shall be presented.
- The appliance showing a fair wear and tear shall not be covered by this guarantee.
Therefore, any part that could be accidentally broken or having visible signs of use in consumable
products (such as lamps, batteries, heating elements…) the aesthetic parts are excluded from the
guarantee, and any defect whatsoever resulting from non-respect of the rules for use, negligence in
usage and/or maintenance of the appliance, carelessness, wrong or improper installation, damage
during transport and any other damage not attributable the supplier.
For every defect that could not be repaired within the guarantee period, the appliance will be repla-
ced free of charge.
In any case, if the part to be replaced for defect, breakage or malfunction is an accessory and/or a
detachable part of the product, Beper reserves the right to replace only the very part in question and
not the entire product
TECHNICAL ASSISTANCE
Even after the guarantee period we will always pay attention to repairs for defected appliances.
For technical assistance and/or repairs after the guarantee period you can directly contact the below
address:
CONTACT YOUR DISTRIBUTOR IN YOUR COUNTRY OR ATER SALES DEPARTMENT BEPER.
E-MAIL assistenza@beper.com WHICH WILL FORWARD YOUR ENQUIRIES TO YOUR DISTRI-
BUTOR.

20
Cafetière électrique Manuel d’instructions
PRECAUTIONS GENERALES
LIRE ATTENTIVEMENT LES INSTRUCTIONS SUIVANTES AVANT
LA PREMIERE UTILISATION DE L’APPAREIL.
Avant et durant l’utilisation de cet appareil il est nécessaire de suivre
précautions élémentaires suivantes.
Après avoir enlever l’emballage, s’assurer de l’intégrité de l’appareil.
En cas de doute ne pas utiliser l’appareil et s’adresser à un pro-
fessionnel qualié. Les éléments d’emballage (sachets plastique,
polystyrène, etc.) ne doivent pas être laissés à la portée des enfants,
car potentiellement dangereux.
Il est recommandé de ne pas jeter les éléments d’emballage dans les
déchets ménagers, mais de les déposer dans les centres de traite-
ment des déchets appropriés, en demandant éventuellement conseil
au gérant du centre de sa commune de résidence.
Toujours s’assurer que la tension électrique soit la même que cel-
le indiquée sur l’étiquette des données techniques et que le réseau
électrique soit compatible avec la puissance de l’appareil.
En cas d’incompatibilité entre la prise électrique murale et celle de
l’appareil faire changer la prise de l’appareil par un professionnel
qualié. Ce dernier devra s’assurer que la section des câbles de la
prise soit adaptée à la puissance absorbée par l’appareil.
Ne jamais tirer sur le câble d’alimentation pour débrancher la prise
électrique.
S’assurer que le câble n’entre pas en contact avec des supercies
chaudes ou coupantes.
Ne pas utiliser l’appareil si le câble d’alimentation est abîmé.
Si le câble d’alimentation est endommagé, pour éviter tout risque, il
devra être substitué par le constructeur, par son service d’assistance
technique ou toute autre personne de même qualication.
Brancher l’appareil exclusivement sur une prise de courant alterné.
Il est en général déconseiller d’utiliser des adaptateurs, prises mul-
tiples et/ou rallonges. En cas de nécessité, utiliser seulement des
adaptateurs ou rallonges conformes aux normes de sécurité en vi-
gueur.
Cet appareil ne devra être utilisé que pour l’usage pour lequel il a été
conçu.
Tout autre usage sera considéré comme inapproprié et donc dange-
reux, et engendrera l’annulation de la garantie.
Other manuals for BC.041N
1
Table of contents
Languages:
Other Beper Coffee Maker manuals

Beper
Beper BC.060 Quick guide

Beper
Beper BC.041N Quick guide

Beper
Beper Bellavita CAFE Operating and maintenance manual

Beper
Beper 90.391 Quick guide

Beper
Beper 90.520 Quick guide

Beper
Beper BC.040N Quick guide

Beper
Beper Lucilla Quick guide

Beper
Beper BC.002 Quick guide

Beper
Beper 90.512A Quick guide

Beper
Beper BC.050 Quick guide