Beurer LR 330 User manual

Beurer GmbH
•
Söflinger Str. 218
•
89077 Ulm, Germany
Tel.: +49 (0)731 / 39 89-144
•
Fax: +49 (0)731 / 39 89-255
www.beurer.com
•
Mail: kd@beurer.de
LR 330
D
Luftreiniger
Gebrauchsanweisung............ 2
G
Air cleaner
Instructions for use.............. 13
F
Purificateur d’air
Mode d’emploi...................... 23
E
Limpiador de aire
Instrucciones de uso ........... 33
I
Depuratore dell’aria
Istruzioni per l’uso ............... 44
T
Hava temizleyici
Kullanım kılavuzu ................. 55
r
Очиститель воздуха
Инструкция по
применению......................... 65
Q
Oczyszczacz powietrza
Instrukcja obsługi ................ 77

13
Read these instructions for use carefully and keep them for later
use, be sure to make them accessible to other users and observe
the information they contain.
ENGLISH
Dear customer,
Thank you for choosing one of our products. Our name stands for high-quality, thoroughly tested products
for applications in the areas of heat, gentle therapy, blood pressure/diagnosis, weight, massage, beauty, air
and babycare. Read these instructions for use carefully and keep them for later use, be sure to make them
accessible to other users and observe the information they contain.
With kind regards,
Your Beurer team
Included in delivery
•
1x air cleaner
•
1x combi filter (activated carbon/HEPA filter class E 10)
•
1x pre-filter
•
1x these instructions for use
WARNING
•
This device may be used by children over the age of eight and by people with
reduced physical, sensory or mental skills or a lack of experience or knowledge,
provided that they are supervised or have been instructed on how to use the
device safely, and are fully aware of the consequent risks of use.
•
Children must not play with the device.
•
Cleaning and user maintenance must not be performed by children unless
supervised.
•
Disconnect the device from the mains supply during cleaning.
•
Clean the device using only the methods specified. Under no circumstances
must liquid enter the fan unit.
•
Do not use any solvent-based cleaning products.
•
If the mains connection cable of this device is damaged, it must be disposed of..

14
1. Getting to know your device................... 14
2. Intended use ............................................ 15
3. Notes ........................................................ 15
4. Device description................................... 17
5. Initial use .................................................. 18
5.1 Removing the air cleaner..................... 18
5.2 Setting up the air cleaner .................... 18
5.3 Preparing for the application ............... 18
6. Operation.................................................. 19
6.1 Switching on the air cleaner ............... 19
6.2 Timer function .................................... 19
6.3 Selecting the humidity level ................ 19
6.4 Setting the target humidity ................. 19
6.5 Empty water tank ............................... 19
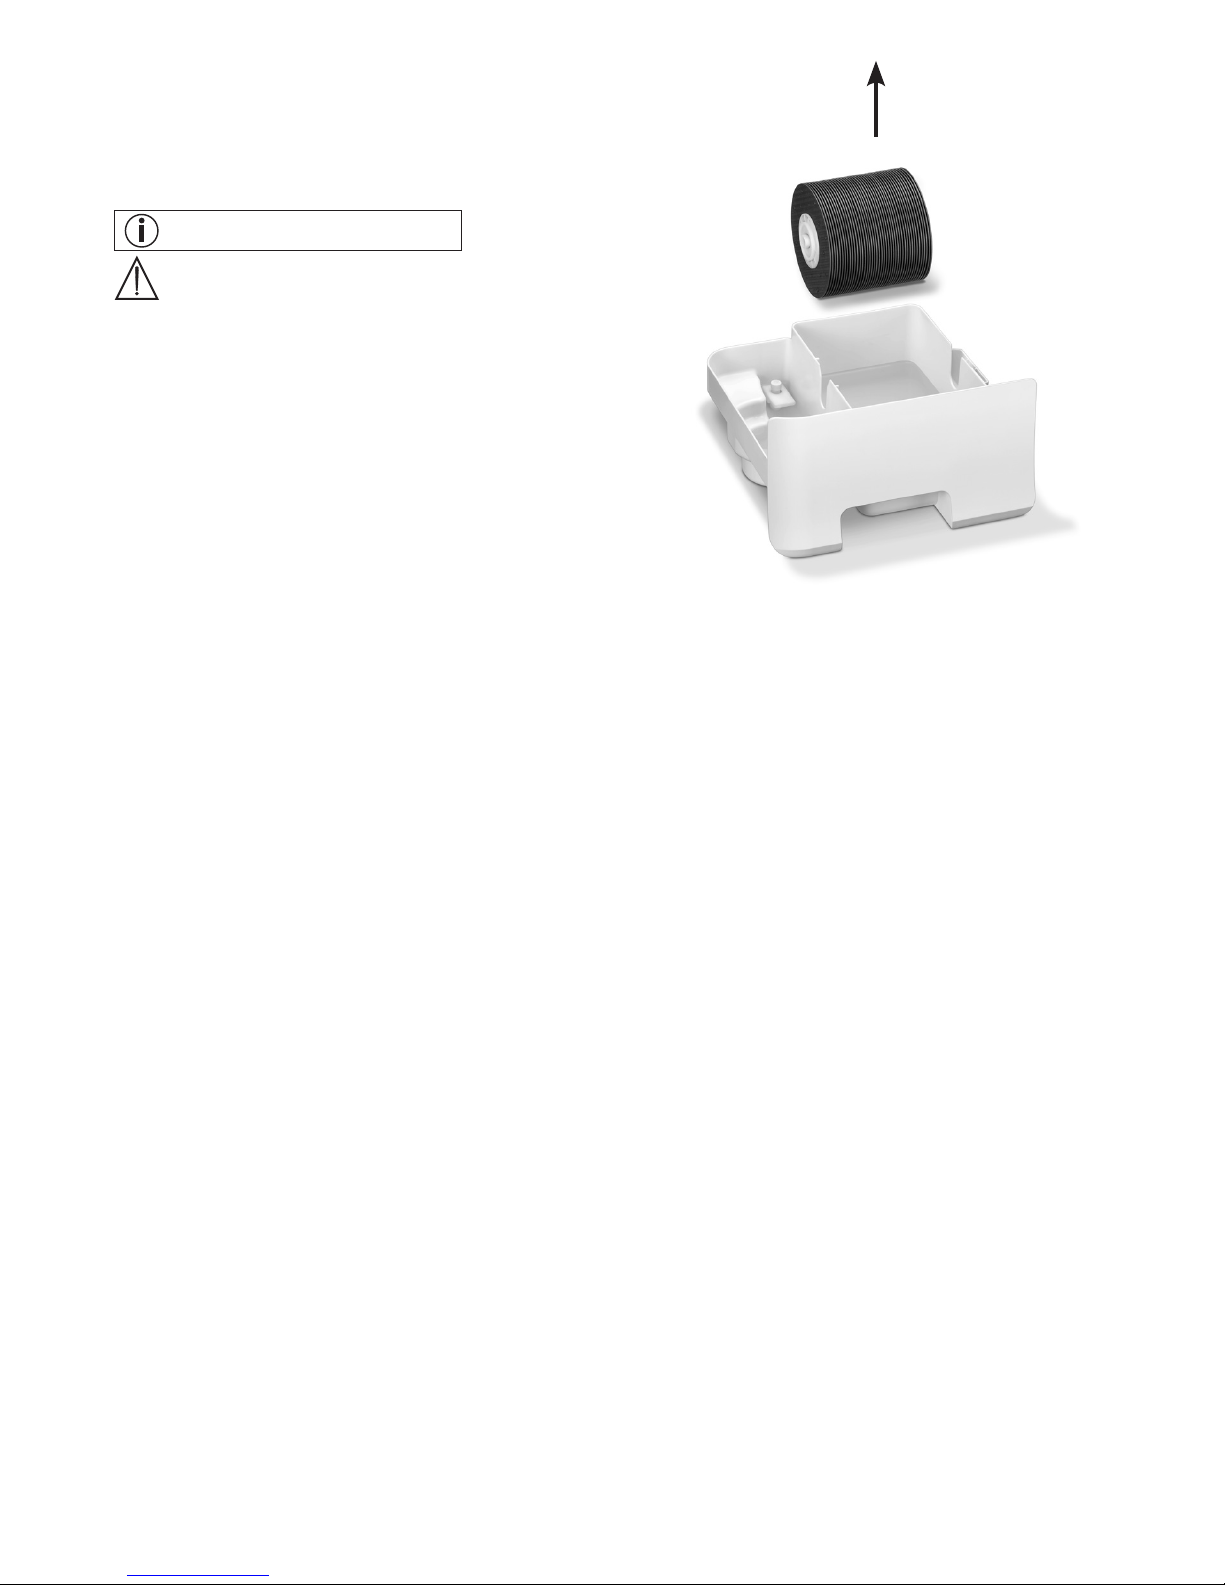
6.6
Replacing the combi filter and pre-filter .
20
7. Cleaning and storage.............................. 20
8. What if there are problems? ................... 22
9. Disposal.................................................... 22
10. Replacement parts and wearing parts 22
11. Technical data........................................ 22
Table of contents
Signs and symbols
The following symbols appear in these instructions for use:
WARNING
Warning instruction indicating a risk of injury or damage to health
IMPORTANT
Safety note indicating possible damage to the device/accessory
Note
Note on important information
1. Getting to know your device
Humans spend a large proportion of their time indoors. The air indoors is often polluted with dust particles,
pollen, animal hair, odours, harmful gases as well as various bacteria and viruses and, particularly in winter,
is also too dry. Ambient air that is too dry and contaminated may have a number of negative eects. The LR
330 air cleaner humidifies air that is too dry and simultaneously cleans the air with a 3-layer filter system.
The LR 330 air cleaner
•
Washes and humidifies air particularly hygienically
•
Filters air with a combi filter (Activated carbon filter against harmful gases and unpleasant odours, HEPA
filter E 10 against particles such as bacteria, viruses, mites, pollen and fine dust)
•
Operates quietly with three output levels
•
Can humidify a room up to a preset target humidity (e.g. 55% air humidity)
•
Has a timer function (1 to 12 hours)
•
Suitable for rooms up to 35 m² in size
•
Consumes little energy and automatically switches o if the water runs out
Principle of air cleaning
1.The quiet and low-energy fan sucks the contaminated air in from the side air inlet.
2.The contaminated air is pre-cleaned by the built-in combi filter (activated carbon filter/HEPA filter). In ad-
dition, the pre-filter filters larger particles and hairs (in general) from the air.
3.The air passes over the disc set that continuously rotates in the tray and picks up calcium-free humidity.
4.
The cleaned air that is enriched with water is emitted via the air outlet on top of the air cleaner into the
ambient air.
The HEPA E 10 filter has a filter performance of 85%. That means that 85% of particles (e.g.bacteria,
viruses and fine dust) can be filtered out.

15
A relative humidity of between 40 and 60% is generally recommended. This value is often not reached in winter
when cold air enters living spaces that are being aired and is then warmed up. Air can absorb more humidity
in line with increasing air temperature. The air tries to compensate by taking humidity from other sources such
as mucous membranes, skin, furniture and accessories, etc. This may have a number of negative eects:
•
Mucous membranes dry out, lips become chapped and dry, eyes become irritated
•
Exhaustion, tiredness and diculty concentrating
•
Pets and plants are put under unnecessary strain
•
Promotion of dust and electrostatic charging of textiles made of synthetic fibres, carpets and plastic floor
coverings
•
Damage to furniture made of wood, particularly parquet floors
•
Detuning of musical instruments
Contaminated, unfiltered air can have the following eects:
•
Infections and respiratory diseases are more likely to occur
•
Damage to health through harmful gases
2. Intended use
This air cleaner is intended to clean and humidify the air indoors.
WARNING
If you suer from severe respiratory or lung disease, consult your doctor before using the air cleaner.
This device must only be used for the purpose for which it was designed and in the manner specified in the
instructions for use. Improper use can be dangerous. The manufacturer is not liable for damage resulting from
improper or careless use.
3. Notes
Read the notes carefully! Non-observance of the following information may result in personal injury or ma-
terial damage.
WARNING
Keep packaging material away from children to avoid danger of suocation.
Electric shock
WARNING
As with every electrical device, use this air cleaner carefully and cautiously, in order to avoid hazards due
to electric shock.
•Therefore,observethefollowinginstructionsforuse:
– do not operate the device at voltages other than those indicated on the device (the type plate is located
underneath the device)
– never if it or its accessories show visible signs of damage
– not during a thunderstorm
•
In the event of defects or operational faults, switch the device o immediately and disconnect it from the
mains socket. Do not pull on the mains cable or on the device to disconnect the plug from the socket. Never
hold or carry the device by the mains cable. Keep the cables away from hot surfaces.
•
Always switch o the device before disconnecting it from the mains.
•
Never disconnect the mains plug with wet or damp hands.
•
Keep the device away from sources of heat as the housing could melt and trigger a fire.

16
•
Ensure that the openings of the air cleaner and the mains cable do not come into contact with water, steam
or other liquids.
•
Do not use the device in close proximity to flammable or explosive gas mixtures.
•
Never reach for a device that has been submerged in water. Disconnect it from the mains plug immediately.
•
Do not use the device if it or its accessories are visibly damaged.
Repairs
WARNING
•
Only specialist personnel may perform repairs on electrical devices. Improper repairs may subject users to
considerable danger. For repairs, please contact Customer Services or an authorised retailer.
•
Do not open the fan unit.
Risk of fire
WARNING
There is a risk of fire if the device is used improperly or these instructions for use are ignored.
Therefore, observe the following instructions for using the air cleaner:
•
Never use underneath a cover, such as blanket, pillow, etc.
•
Never use near petrol or other highly flammable substances.
Handling
IMPORTANT
The device must be switched o and disconnected from the mains after every use and before cleaning.
•
Do not place any objects in device openings or in rotating parts. Ensure that the moving parts can move
freely at all times.
•
Do not place any objects on the device.
•
Do not expose the device to high temperatures.
•
Protect the device against sunlight and impacts and do not drop it.
•
Never shake the device.
•
Avoid water damage by handling the device carefully (e.g. water damage from splashing in the vicinity of
wooden floors).
•
Place the device on a firm, level and water-resistant surface.

17
4. Device description
1 Housing cover 7 Pre-filter
Filters coarse dust and dirt, such as hairs
2 Water tank and screwed plug 8 Filter cover
3 Air outlet 9 Mains cable
4 Illuminated display 10 Disc set
5 Air inlet 11 Tray
6
combi filter (activated carbon/HEPA filter class E 10)
Activated carbon filter: against harmful gases,
VOCs (volatile organic compounds) and unpleas-
ant odours
HEPA filter class E 10: Filters particles such as bac-
teria, viruses, mites, pollen and fine dust
Display and buttons
Buttons Display
1 ON/OFF button 6 Timer symbol
2 TIMER button 7 Water tank empty symbol
3 FAN SPEED button 8 Change filter symbol
4 TARGET HUMIDITY button 9 Target humidity/current humidity
5 CHANGE FILTER button 10 Fan speed settings
1
2
3
4
5
678
9
10

18
5. Initial use
5.1 Removing the air cleaner
1. Open the cardboard packaging.
2. Remove the device from the top of the box without opening the film bag.
3. Now remove all films and the transport lock of the disc set (in the tray). Ensure that you remove all the
foam padding from the disc set. Remove the combi filter and prefilter from the filter cover. Then remove
the plastic film and re-insert the combi filter and prefilter.
4. Check the device, tray with disc set, mains plug and cable for damage.
5.2 Setting up the air cleaner
1. Place the air cleaner on a firm, level and water-resistant surface to prevent vibrations and noise.
2. Set up the air cleaner in such a way that provides 30 cm clearance on all sides.
3. Make sure that the air inlet and air outlet are never blocked.
5.3 Preparing for the application
1. Remove the top housing cover.
2. Carefully pull out the water tank from above.
3. Unscrew the seal on the water tank. Fill the water tank right to the top (approx. 4.6 l) with fresh, cold tap
water.
4. Close the water tank again. Ensure that the screwed plug is screwed on correctly and the water tank is
sealed shut.
5. Carefully place the water tank back into the housing from above.
6. Replace the top housing cover back onto the housing.
7. Insert the mains plug into the socket. Ensure that the cable does not pose a trip hazard.
IMPORTANT
Do not add any essential oils or fragrances to the water tank and/or the tray. If other additives are used, the
plastic material may become discoloured and damaged.
Tip: The addition of a small volume of conventional washing-up liquid (e.g. 1 drop) breaks the water surface
tension and increases evaporation output.
Step 1: remove top cover
Step 2: remove water tank

19
6. Operation
6.1 Switching on the air cleaner
1. Always follow the instructions in chapter “5 Initial use”.
2. Press the ON/OFF button ( ) to switch on the air cleaner. The current ambient humidity is shown on
the display.
When the air cleaner is used for the first time it is set to the middle humidity level.
6.2 Timer function
The air cleaner features a timer function that you can use to determine the number of hours the air cleaner
should run for before it automatically switches itself o. You can set the timer for between 1 and 12 hours
and can choose from the following targets:
01 - 02 - 03 - 04 - 05 - 06 - 07 - 08 - 09 - 10 - 11 - 12 - 00 (continual)
•
To set the timer, press the TIMER button ( ) until your desired hourly value (e.g. 02) appears on the dis-
play. The air cleaner will now automatically switch o after the set number of hours has passed.
6.3 Selecting the humidity level
The air cleaner has three humidification levels that are shown in the display.
•
To switch between the individual humidification levels, press the fan speed button ( )
6.4 Setting the target humidity
The air cleaner can also be used to set a target humidity level. As soon as the set target humidity is reached
in the room, the air cleaner automatically switches o.
You can choose from the following target humidities:
40% - 45% - 50% - 55% - 60% - 65% - 70% - 75% - CO (continual)
•
To set a target air humidity, press the air humidity button ( ) repeatedly until your desired target humidity
is reached in the display.
After one minute the display and tank illumination automatically switch o. The air cleaner is not
switched o at this time. You can reactivate the display and the tank illumination by pressing any but-
ton (except ON/OFF button).
If continual target air humidity (“CO”) is selected, the air cleaner does not switch o. It humidifies un-
til the water tank is empty.
6.5 Empty water tank
As soon as no water is left in the water tank, appears in the display and the device automatically switch-
es o.
To top up the water tank, proceed as follows:
1. Press the ON/OFF button ( ) to switch o the air cleaner.
2. Pull the mains plug out of the socket.
3. Remove the top housing cover.
4. Carefully pull out the water tank from above.
5. Unscrew the seal on the water tank. Fill the water tank right to the top (approx. 4.6 l) with fresh, cold
tap water.
High
Middle
Low

20
6. Close the water tank again. Ensure that the screwed plug is screwed on correctly and the water tank
is sealed shut.
7. Carefully place the water tank back into the housing from above.
8. Replace the top housing cover back onto the housing.
9. Connect the mains plug to the socket and ensure that the cable does not pose a trip hazard.
6.6 Replacing the combi filter and pre-filter
The combi filter and the pre-filter should be replaced with new
filters after 1000 operating hours. After 1000 operating hours,
“CL” flashes in the display and the filter symbol ( ) appears.
1. As soon as “CL” appears in the display, switch o the air
cleaner and disconnect the device from the socket.
2. Replace the
combi filter and the pre-filter as shown in the image.
3. Connect the mains plug to the socket and switch the air
cleaner back on.
4. Press and hold the filter button ( ) for 5 seconds. An acous-
tic signal sounds and the filter symbol goes o in the display.
The operating hours counter now resets to 0.
If you wish to change the combi filter at specific intervals (e.g. every six months), there is a sticker on
the upper edge of the combi filter on which a date can be entered.
7. Cleaning and storage
Cleaning the filter
Regular cleaning of the filter (once a month) is a prerequisite for hygienic and fault-free operation.
•
Clean the three-layered filter using the brush attachment of a vacuum cleaner. To carry out a thorough clean,
pull out the pre-filter and clean the activated carbon filter located behind it and the HEPA filter located at the
rear, also using the brush attachment from a vacuum cleaner. Then replace the pre-filter on the HEPA filter.
Activated carbon filter HEPA filter E 10
(The activated carbon filter is lo-
cated below the pre-filter)
Front Rear
IMPORTANT
The three-layered filter should be changed after 1000 operating hours (see “Filter change” section).
The three-layered filter cannot be washed.
Rinsing the tray
Rinse out the tray every 2 weeks with warm water. If the air is heavily polluted, the device is used intensively
or the water quality is poor, the air cleaner must be cleaned at shorter intervals.

21
6. Close the water tank again. Ensure that the screwed plug is screwed on correctly and the water tank
is sealed shut.
7. Carefully place the water tank back into the housing from above.
8. Replace the top housing cover back onto the housing.
9. Connect the mains plug to the socket and ensure that the cable does not pose a trip hazard.
6.6 Replacing the combi filter and pre-filter
The combi filter and the pre-filter should be replaced with new
filters after 1000 operating hours. After 1000 operating hours,
“CL” flashes in the display and the filter symbol ( ) appears.
1. As soon as “CL” appears in the display, switch o the air
cleaner and disconnect the device from the socket.
2. Replace the
combi filter and the pre-filter as shown in the image.
3. Connect the mains plug to the socket and switch the air
cleaner back on.
4. Press and hold the filter button ( ) for 5 seconds. An acous-
tic signal sounds and the filter symbol goes o in the display.
The operating hours counter now resets to 0.
If you wish to change the combi filter at specific intervals (e.g. every six months), there is a sticker on
the upper edge of the combi filter on which a date can be entered.
7. Cleaning and storage
Cleaning the filter
Regular cleaning of the filter (once a month) is a prerequisite for hygienic and fault-free operation.
•
Clean the three-layered filter using the brush attachment of a vacuum cleaner. To carry out a thorough clean,
pull out the pre-filter and clean the activated carbon filter located behind it and the HEPA filter located at the
rear, also using the brush attachment from a vacuum cleaner. Then replace the pre-filter on the HEPA filter.
Activated carbon filter HEPA filter E 10
(The activated carbon filter is lo-
cated below the pre-filter)
Front Rear
IMPORTANT
The three-layered filter should be changed after 1000 operating hours (see “Filter change” section).
The three-layered filter cannot be washed.
Rinsing the tray
Rinse out the tray every 2 weeks with warm water. If the air is heavily polluted, the device is used intensively
or the water quality is poor, the air cleaner must be cleaned at shorter intervals.
Before you can pull the tray out for cleaning, you must
first pull the water tank out of the air cleaner from above.
Remove any deposits in the tray using a soft cloth. When
cleaning the tray, do not use any corrosive, caustic or sol-
vent-based cleaning products.
The tray is dishwasher-safe.
IMPORTANT
Regular cleaning is a prerequisite for hygienic and fault-free
operation. Always empty and thoroughly clean the water
tank and the tray of the air cleaner if the device contains
water and has not been operated for longer than 3 days. A
lack of cleaning and hygiene can cause bacteria, algae and
fungi to form in the water.
Cleaning the disc set
Before cleaning the disc set, pull it upwards and out of
the device. Clean the disc set every 2 weeks with warm
water and a soft cloth. If it is heavily soiled, you can also
clean the disc set in the dishwasher. When cleaning the disc set, do not use any corrosive, caustic or sol-
vent-based cleaning products.
If it is heavily soiled, you can also clean the disc set in the dishwasher (max. 50°C). Remove the disc set
from the tray and place it in the dishwasher. If there is insucient space in the dishwasher, create extra
space by removing the cutlery basket, for example. The disc set must not be bent or jammed when being
placed in the dishwasher. Set the dishwasher to a gentle cycle (for cleaning glass) and if possible remove
the disc set before the drying process. The cycle must not exceed a temperature of 50°C – otherwise the
disc set may deform. Only continue to use the device when the exterior of the disc set is completely dry.
Descaling the humidification discs and the tub
Depending on water hardness and if necessary, the tub and humidification discs must be descaled in order
to maintain the performance of the air washer. For this purpose, use a standard descaling agent and obser-
ve the information on the label.
Note:
A light build-up of limescale on the humidification discs increases the evaporation output.
Cleaning the housing
Clean the housing of the air cleaner with a damp cloth (water or a mild cleaning solution). When cleaning, do
not use any solvents or other aggressive or abrasive cleaning agents, as the surface may become damaged.
Storage
If you do not plan to use the device for a relatively long period of time, we recommend that you thoroughly emp-
ty, clean and dry the device and store it in the original packing in a dry environment, ensuring it is not weighed
down by additional items. Please ensure in particular that there is no water in the water tank or in the tray.

22
8. What if there are problems?
Problem Cause Solution
The air cleaner will not switch on.
There is no water in the tray. Fill up the water tank as described
in chapter 6.5.
The mains part plug is not plugged
in.
Plug the mains part plug into a suit
-
able socket.
Clicking sounds are heard during
operation.
The disc set is not correctly insert-
ed into the device.
Correctly insert the disc set into the
device.
Limescale deposits have accumu-
lated in the tray.
Remove the limescale deposits from
the tray.
Moisture develops around the
device. Water is escaping from the hous-
ing.
Empty the water from the tray and
allow it to dry for 24 hours.
The disc set does not turn. The disc set is not correctly seat-
ed in the tray. Carefully insert the disc set into the
tray.
9. Disposal
For environmental reasons, do not dispose of the device in the household waste at the end of its useful life.
Dispose of the unit at a suitable local collection or recycling point. Dispose of the device in accord-
ance with EC Directive – WEEE (Waste Electrical and Electronic Equipment).
If you have any questions, please contact the local authorities responsible for waste disposal.
10. Replacement parts and wearing parts
Replacement parts and wearing parts are available from the corresponding service address (according to the
service address list). Please state the corresponding order number.
Designation Item number and/or order number
Pre-filter, combi filter (activated carbon/
HEPA filter class E 10) 660.11
Water tank 163.653
Disc set 163.654
11. Technical data
Model LR 330
Mains voltage / Output See type plate on the device
Dimensions (L x W x H) 370x260x362 mm
Empty weight 6.7 kg
Suitable for rooms up to approx. 35 m
2
Tank capacity 4.6 l
Tray capacity 1.3 l
Evaporation output up to 220 ml/h
Permissible operating conditions +5°C to +40°C, ≤ 90% relative humidity (non-condensing)
Protection class Protection class II
Other manuals for LR 330
2
Table of contents
Other Beurer Air Cleaner manuals

Beurer
Beurer LR 500 User manual

Beurer
Beurer LR 400 User manual

Beurer
Beurer LR 210 User manual

Beurer
Beurer LR 330 User manual

Beurer
Beurer LR 200 User manual

Beurer
Beurer LR 330 User manual

Beurer
Beurer LR 210 User manual

Beurer
Beurer LR 200 User manual

Beurer
Beurer LR 220 User manual

Beurer
Beurer LR 300 User manual