bintec elmeg D140 User manual

elmeg D140 / en / elmegD140_en / Cover_front.fm / 02.10.2013
Version 1, 01.07.2012
1
elmeg D140
bintec elmeg Userguide
Copyright© Version 1.0, 2013 bintec elmeg GmbH
Userguide
elmeg D140

elmeg D140 / en / elmegD140_en / Cover_front.fm / 02.10.2013
Version 1, 01.07.2012
2elmeg D140
bintec elmegUserguide
Legal Notice
Aim and purpose
This document is part of the user manual for the installation and configuration of bintec elgmeg
devices. For the latest information and notes on the current software release, please also read our
release notes, particularly if you are updating your software to a higher release version. You will find
the latest release notes under www.bintec-elmeg.com.
Liability
This manual has been put together with the greatest possible care. However, the information con-
tained in this manual is not a guarantee of the properties of your product. bintec elmeg GmbH is
only liable within the terms of its conditions of sale and supply and accepts no liability for technical
inaccuracies and/or omissions.
The information in this manual can be changed without notice. You will find additional information
and also release notes for Teldat devices under www.teldat.com .
bintec elmeg devices make WAN connections as a possible function of the system configuration.
You must monitor the product in order to avoid unwanted charges. bintec elmeg GmbH accepts
no responsibility for data loss, unwanted connection costs and damage caused by unintended
operation of the product.
Trademarks
bintectrademarks and the bintec logo, artem trademarks and the artem logo, elmeg trademarks
and the elmeg logo are registered trademarks of bintec elmeg GmbH.
Company and product names mentioned are usually trademarks of the companies or manufactu-
rers concerned.
Copyright
All rights reserved. No part of this manual may be reproduced or further processed in any way wit-
hout the written consent of bintec elmeg GmbH. The documentation may not be processed and,
in particular, translated without the consent of bintec elmeg GmbH.
You will find information on guidelines and standards in the declarations of conformity under
www.bintec-elmeg.com .
How to reach bintec elmeg GmbH
bintec elmeg GmbH
a Teldat Group Company
Südwestpark 94, D-90449 Nürnberg, Deutschland,
Telefon: +4991196730, Fax: +499116880725
Internet: www.bintec-elmeg.com
© bintec elmeg GmbH 2013, All rights reserved. Rights of modification reserved.

elmeg D140 / en / elmegD140_en / introduction.fm / 02.10.2013
Version 1, 01.07.2012
4elmeg D140
bintec elmegelmeg D140 - your high-quality accessory
elmeg D140 - your high-quality accessory
This phone sets new standards with its high-quality, ergonomic keypad, 1.8 " TFT colour display
and incorporated functions. Your telephone can do a lot more than just make calls:
Further information on your phone can be found at
www.bintec-elmeg.com
Have fun using your new phone!
Bluetooth® and mini USB
Connect your handset to a PC or headset using a mini USB (¢page 15) or Bluetooth®
(¢page 29).
Directory for up to 500 vCards – calendar and appointments
Save phone numbers and other data to the directory (¢page 20). Enter appointments and
birthdays in the calendar and set reminders (¢page 26).
Large font
Increase readability of call lists and the directory (¢page 32).
Customise
Assign personal caller display pictures (¢page 21), view your personal pictures as a screen-
saver slide show (¢page 32) or change the colour scheme of the display (¢page 32).
Choose from a selection of ringtones specially composed for your elmeg D140 or load your
own (¢page 34).
If you don't (always) want it to ring
Make the most of the silent alert (¢page 34), the time control for calls (¢page 34) or
ensure that all calls with a withheld number are not signalled (¢page 34).
Other practical information
Synchronise the directory of an existing elmeg handset (¢page 22), use the quick dial func-
tion (¢page 22), adapt your phone to suit your handsfree requirements (¢page 33) and
adjust the brightness of your keypad to suit you (¢page 32).

elmeg D140 / en / elmegD140_en / overview.fm / 02.10.2013
Version 1, 01.07.2012
5elmeg D140
bintec elmeg Brief overview
Brief overview 1Display in idle status
2Battery charge status (¢page 14)
3Display keys (¢page 7)
4Message key (¢page 24)
Access to call and message lists;
Flashes: new message or new call
5End call key, On/Off key
End call, cancel function, go back one menu
level (press briefly), back to idle status (press
and hold), activate/deactivate handset (press
and hold in idle status)
6Hash key
Keypad lock on/off (press and hold in idle sta-
tus);
toggles between upper/lower case and digits
7Mute key (¢page 20)
Mute the microphone
8Mini USB port (¢page 15)
9Microphone
10 Recall key
- Recall
- Insert a dialling pause (press and hold)
11 Star key
Ringtone on/off (press and hold);
with an open connection: switch between
pulse dialling/tone dialling (press briefly);
text input: open table of special characters
12 Headset socket (¢page 15)
13 Key 1
Dial (network) mailbox (press and hold)
14 Talk key
Flashes: incoming call;
Accept a call; open redial list (press briefly);
start dialling (press and hold)
15 Handsfree key (¢page 19)
Switch between earpiece and handsfree
mode;
Accept a call; open redial list (press briefly);
start dialling (press and hold)
16 Control key (¢page 15)
17 Signal strength (¢page 14)
Green: Eco Mode (¢page 26) activated
i
V
07:15
INT 1 05 Apr
Calls Calendar
2
3
5
4
6
7
16
14
9
1
15
17
11
13
10
8
12
Please note
To change the display language,proceed as follows (¢page 32):
v¢O5 Press keys slowly one after the other.
sSelect the correct language and press the right display key.

elmeg D140 / en / elmegD140_en / overview.fm / 02.10.2013
Version 1, 01.07.2012
6elmeg D140
bintec elmegBrief overview
Display symbols
The following symbols are displayed dependent on the settings and the operating status of
your telephone:
Signalling
Establishing a connection
W
Connection established
Connection cannot be
established or connection
interrupted
i
»
ó
˝
¼08:00 07:15
INT 1 05 Apr
Ù¾
02 10 09 08
Calls Calendar
ØåÚ
Internal call (¢page 20)
Ø«Ú
External call (¢page 19)
Signal strength i(¢page 14)
or ECO Mode+ icon ¼(¢page 26)
Bluetooth activated (¢page 29)
or ô/ õ(Bluetooth headset/data device) connected
Ringtone switched off (¢page 34)
or ñalert tone activated (¢page 34)
Keypad lock switched on (¢page 16)
Battery charging (¢page 14)
Battery charge status (¢page 14)
Alarm switched on and wake-up time set (¢page 27)
Current time
Current day and month
Name of the handset
Number of new messages:
u
Ã
on the network mailbox (¢page 24)
u™in the missed calls list (¢page 24)
u¾in the SMS list (dependent on base)
uin the missed alarms list (¢page 25)
V
ØðÚ
Anniversary (¢page 27)
ØìÚ
Alarm (¢page 27)
ØáÚ
Appointment (¢page 27)
z X

elmeg D140 / en / elmegD140_en / overview.fm / 02.10.2013
Version 1, 01.07.2012
7elmeg D140
bintec elmeg Display keys
Other display symbols
Display keys
The functions of the display keys change
depending on the particular operating situ-
ation. Example:
Important display keys:
Open call lists.
Open calendar.
Open a menu for further func-
tions.
Confirm selection.
Delete key: delete character by
character/word by word from
right to left.
Go back one menu level or can-
cel operation.
Save entry.
Main menu symbols
Information on using the menus
(¢page 16)
Menu overview (¢page 17)
Information
¶ Û
Query Please wait...
À
Action failed
‰
Action complete
Á
Room monitor activated
(¢page 28)
Ð
‹ Œ °
Snooze mode (¢page 28)
Switch from earpiece to
handsfree mode
(¢page 19)
Switch from handsfree to
earpiece mode
(¢page 19)
OneTouchCall active (¢page 19)
”
Back Save
1Current display key function
2Display keys
1
2
1
2
Calls
Calendar
Options
OK
Û
Back
Save
ÇSelect Services
òBluetooth
ÉAdditional Features
ÊCall Lists
ËSMS (dependent on base)
ÌVoice Mail
áOrganizer
ÂDirectory
ÏSettings
SMS
ÇòÉ
ÊËÌ
á Â Ï
Back OK

8
Contents
Gigaset SL610H PRO / DE-master / A31008-M2352-R101-2-PG43 / elmeg140IVZ.fm / 02.10.2013
Version 1, 01.07.2012
Contents
elmeg D140 - your high-quality accessory . . . . . . . . . . . . . . . . . . . . . . . . . . . . . . . . . . . . . 4
Brief overview . . . . . . . . . . . . . . . . . . . . . . . . . . . . . . . . . . . . . . . . . . . . . . . . . . . . . . . . . . . . . . . 5
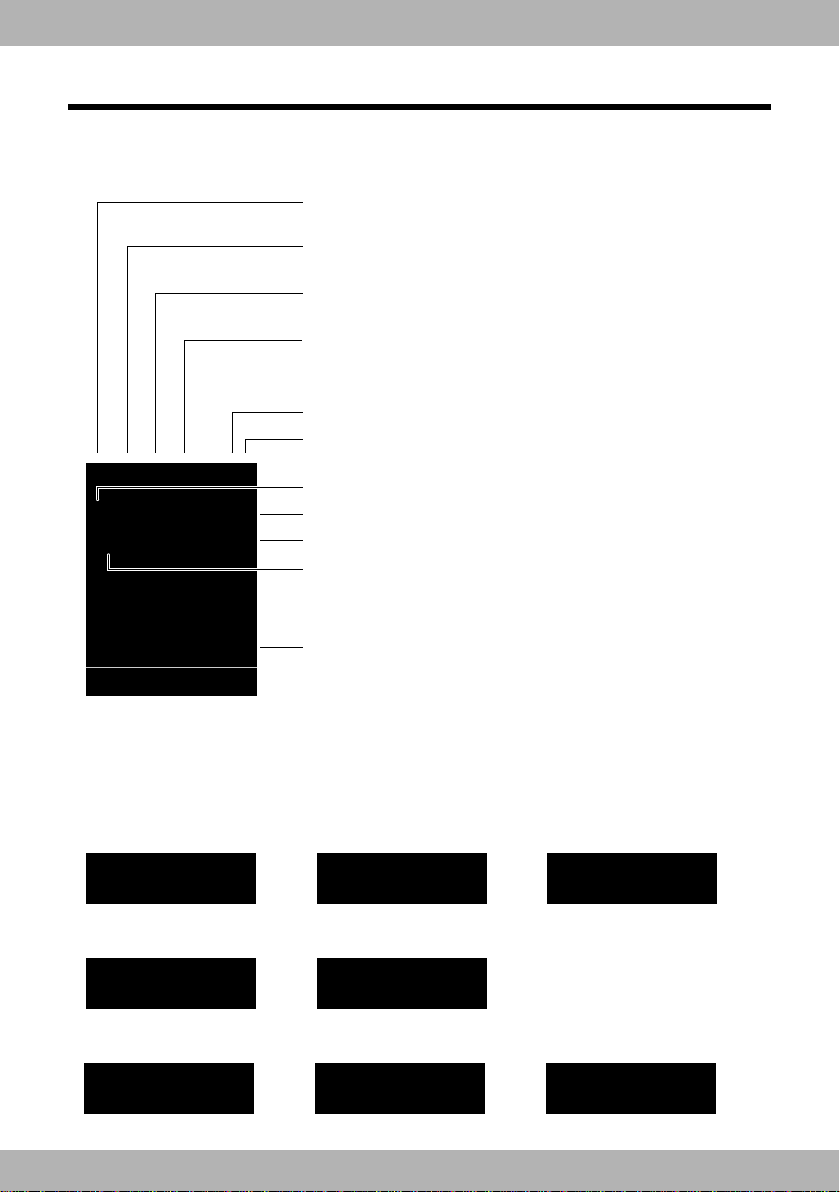
Display symbols . . . . . . . . . . . . . . . . . . . . . . . . . . . . . . . . . . . . . . . . . . . . . . . . . . . . . . . . . . . . . 6
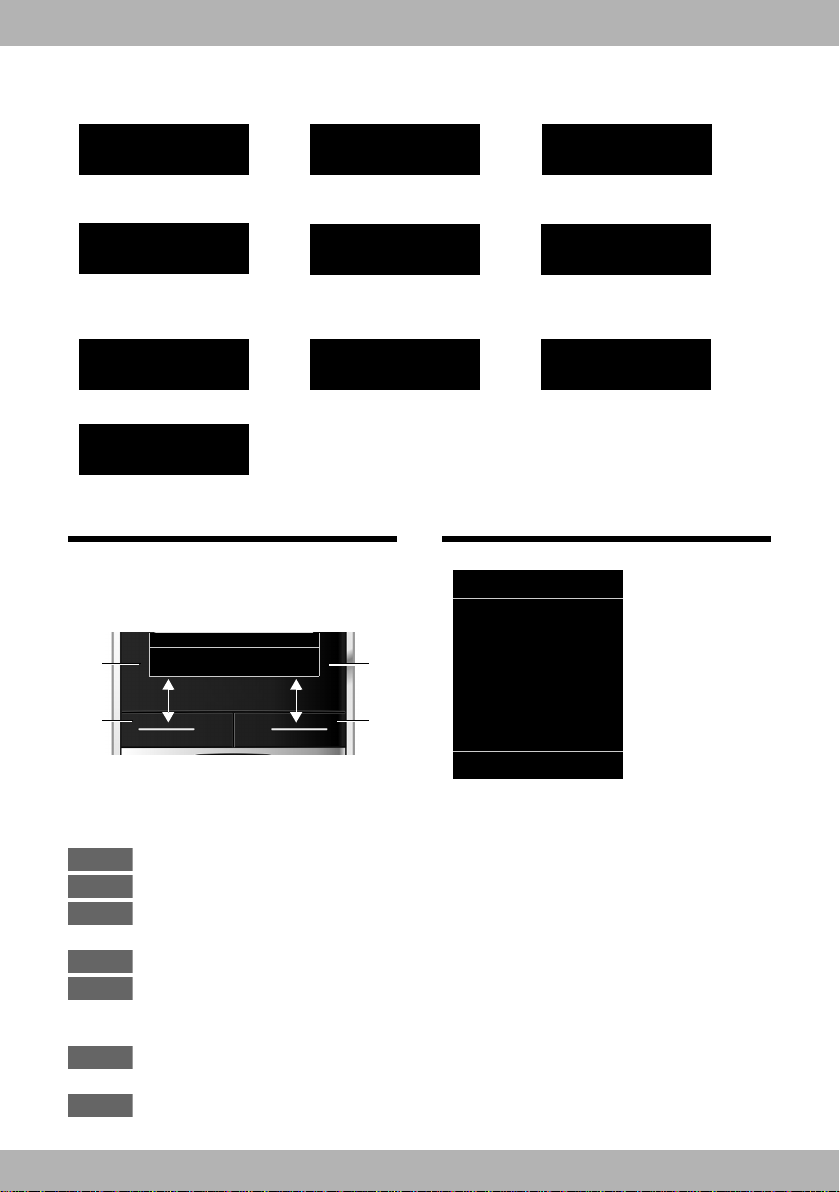
Display keys . . . . . . . . . . . . . . . . . . . . . . . . . . . . . . . . . . . . . . . . . . . . . . . . . . . . . . . . . . . . . . . . . 7
Main menu symbols . . . . . . . . . . . . . . . . . . . . . . . . . . . . . . . . . . . . . . . . . . . . . . . . . . . . . . . . . 7
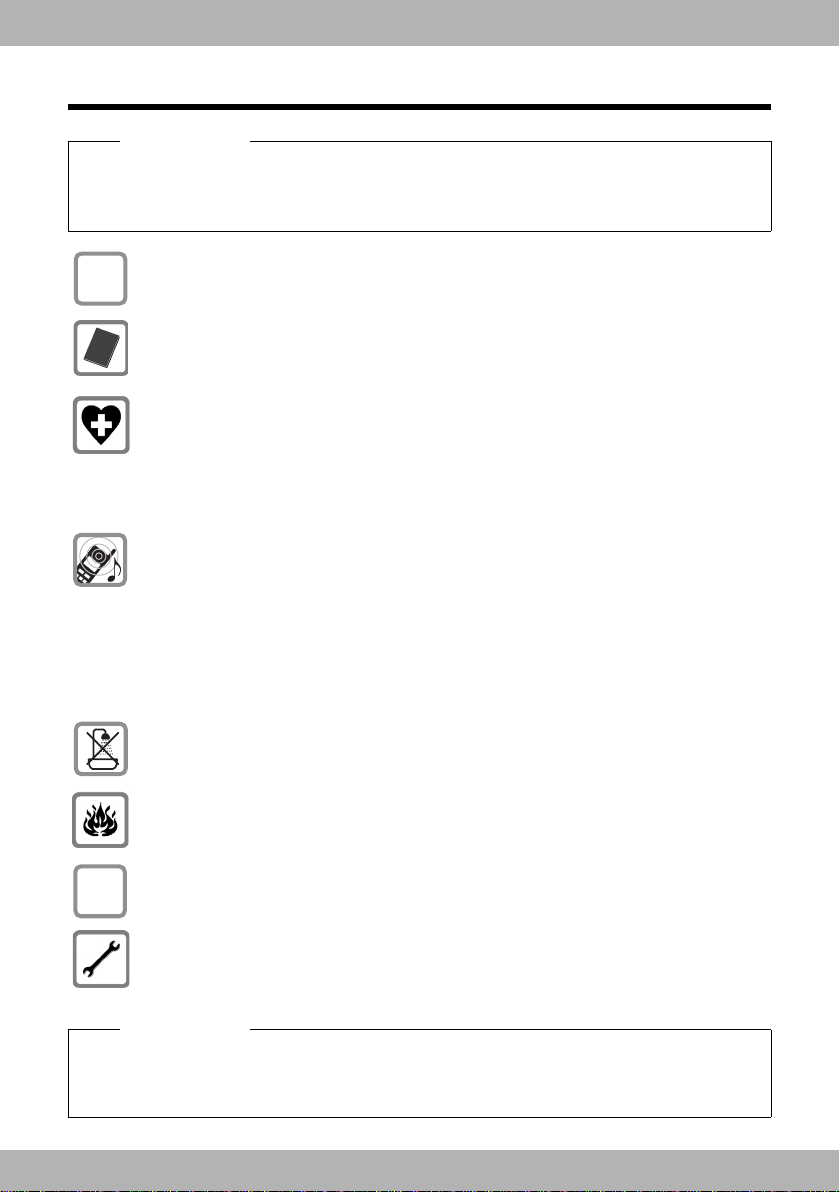
Safety precautions . . . . . . . . . . . . . . . . . . . . . . . . . . . . . . . . . . . . . . . . . . . . . . . . . . . . . . . . . . 10
First steps . . . . . . . . . . . . . . . . . . . . . . . . . . . . . . . . . . . . . . . . . . . . . . . . . . . . . . . . . . . . . . . . . . 11
Installing the charger . . . . . . . . . . . . . . . . . . . . . . . . . . . . . . . . . . . . . . . . . . . . . . . . . . . . . . . . . . . . . . . . . . . . 11
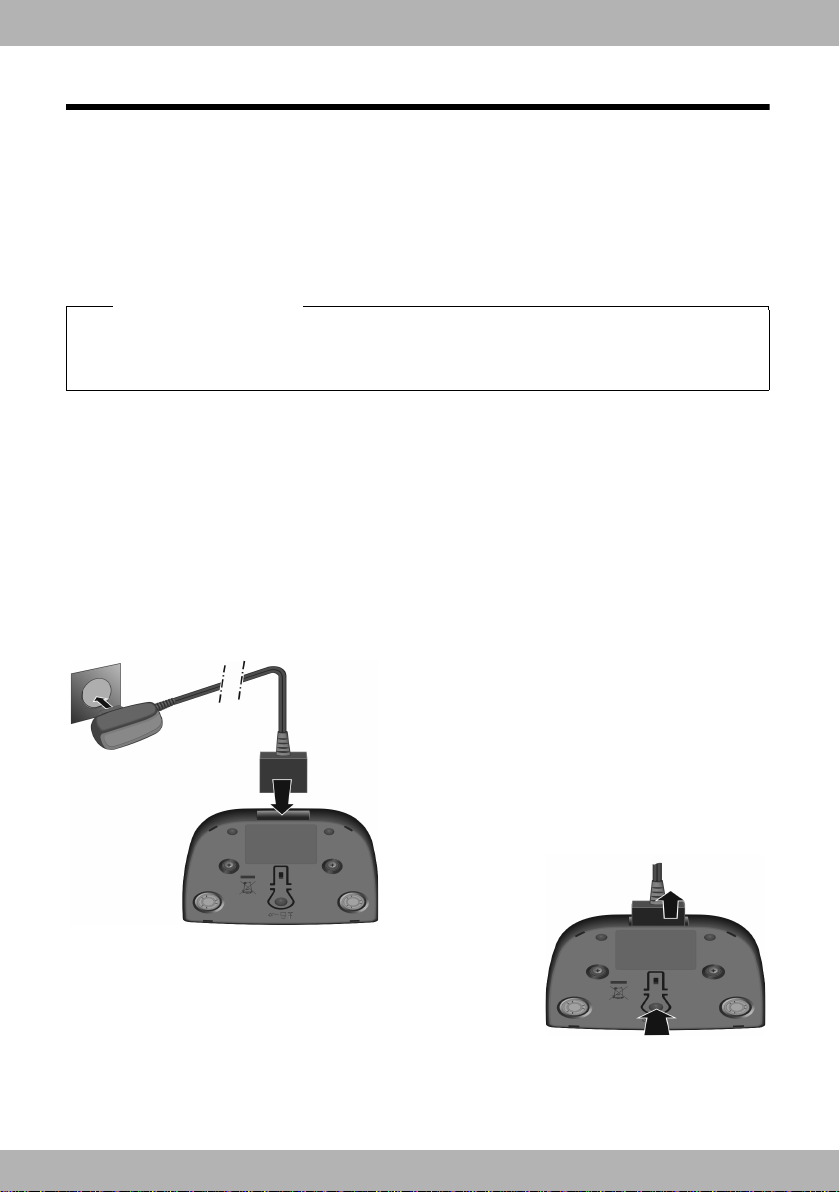
Connecting the charger . . . . . . . . . . . . . . . . . . . . . . . . . . . . . . . . . . . . . . . . . . . . . . . . . . . . . . . . . . . . . . . . . . 11
Setting up the handset for use . . . . . . . . . . . . . . . . . . . . . . . . . . . . . . . . . . . . . . . . . . . . . . . . . . . . . . . . . . . 12
Registering the handset . . . . . . . . . . . . . . . . . . . . . . . . . . . . . . . . . . . . . . . . . . . . . . . . . . . . . . . . . . . . . . . . . . 13
Connecting the headset . . . . . . . . . . . . . . . . . . . . . . . . . . . . . . . . . . . . . . . . . . . . . . . . . . . . . . . . . . . . . . . . . . 15
Connecting the USB data cable . . . . . . . . . . . . . . . . . . . . . . . . . . . . . . . . . . . . . . . . . . . . . . . . . . . . . . . . . . . 15
Using the phone . . . . . . . . . . . . . . . . . . . . . . . . . . . . . . . . . . . . . . . . . . . . . . . . . . . . . . . . . . . . 15
Using the control key . . . . . . . . . . . . . . . . . . . . . . . . . . . . . . . . . . . . . . . . . . . . . . . . . . . . . . . . . . . . . . . . . . . . 15
Using the menus . . . . . . . . . . . . . . . . . . . . . . . . . . . . . . . . . . . . . . . . . . . . . . . . . . . . . . . . . . . . . . . . . . . . . . . . . 16
Activating/deactivating the handset . . . . . . . . . . . . . . . . . . . . . . . . . . . . . . . . . . . . . . . . . . . . . . . . . . . . . . 16
Activating/deactivating keypad lock . . . . . . . . . . . . . . . . . . . . . . . . . . . . . . . . . . . . . . . . . . . . . . . . . . . . . . 16
Menu overview . . . . . . . . . . . . . . . . . . . . . . . . . . . . . . . . . . . . . . . . . . . . . . . . . . . . . . . . . . . . . 17
Making calls . . . . . . . . . . . . . . . . . . . . . . . . . . . . . . . . . . . . . . . . . . . . . . . . . . . . . . . . . . . . . . . . 19
Making an external call . . . . . . . . . . . . . . . . . . . . . . . . . . . . . . . . . . . . . . . . . . . . . . . . . . . . . . . . . . . . . . . . . . . 19
One Touch Call . . . . . . . . . . . . . . . . . . . . . . . . . . . . . . . . . . . . . . . . . . . . . . . . . . . . . . . . . . . . . . . . . . . . . . . . . . . 19
Ending a call . . . . . . . . . . . . . . . . . . . . . . . . . . . . . . . . . . . . . . . . . . . . . . . . . . . . . . . . . . . . . . . . . . . . . . . . . . . . . 19
Accepting a call . . . . . . . . . . . . . . . . . . . . . . . . . . . . . . . . . . . . . . . . . . . . . . . . . . . . . . . . . . . . . . . . . . . . . . . . . . 19
Using handsfree mode . . . . . . . . . . . . . . . . . . . . . . . . . . . . . . . . . . . . . . . . . . . . . . . . . . . . . . . . . . . . . . . . . . . 19
Switching to mute . . . . . . . . . . . . . . . . . . . . . . . . . . . . . . . . . . . . . . . . . . . . . . . . . . . . . . . . . . . . . . . . . . . . . . . 20
Making internal calls . . . . . . . . . . . . . . . . . . . . . . . . . . . . . . . . . . . . . . . . . . . . . . . . . . . . . . . . . . . . . . . . . . . . . 20
Using the directory and lists . . . . . . . . . . . . . . . . . . . . . . . . . . . . . . . . . . . . . . . . . . . . . . . . . 20
Directory . . . . . . . . . . . . . . . . . . . . . . . . . . . . . . . . . . . . . . . . . . . . . . . . . . . . . . . . . . . . . . . . . . . . . . . . . . . . . . . . 20
Redial list . . . . . . . . . . . . . . . . . . . . . . . . . . . . . . . . . . . . . . . . . . . . . . . . . . . . . . . . . . . . . . . . . . . . . . . . . . . . . . . . 23
Call lists (dependent on base) . . . . . . . . . . . . . . . . . . . . . . . . . . . . . . . . . . . . . . . . . . . . . . . . . . . . . . . . . . . . 23
Message key function (dependent on base) . . . . . . . . . . . . . . . . . . . . . . . . . . . . . . . . . . . . . . . . . . . . . . . 24
Missed alarms list . . . . . . . . . . . . . . . . . . . . . . . . . . . . . . . . . . . . . . . . . . . . . . . . . . . . . . . . . . . . . . . . . . . . . . . . 25
Using the network mailbox . . . . . . . . . . . . . . . . . . . . . . . . . . . . . . . . . . . . . . . . . . . . . . . . . . 25
ECO DECT . . . . . . . . . . . . . . . . . . . . . . . . . . . . . . . . . . . . . . . . . . . . . . . . . . . . . . . . . . . . . . . . . . 26
Setting an appointment (calendar) . . . . . . . . . . . . . . . . . . . . . . . . . . . . . . . . . . . . . . . . . . 26
Displaying missed appointments, anniversaries . . . . . . . . . . . . . . . . . . . . . . . . . . . . . . . . . . . . . . . . . . . 27

9
Contents
Gigaset SL610H PRO / DE-master / A31008-M2352-R101-2-PG43 / elmeg140IVZ.fm / 02.10.2013
Version 1, 01.07.2012
Setting the alarm clock . . . . . . . . . . . . . . . . . . . . . . . . . . . . . . . . . . . . . . . . . . . . . . . . . . . . . . 27
Using a handset as a room monitor (Babyphone) . . . . . . . . . . . . . . . . . . . . . . . . . . . . . 28
Using Bluetooth devices . . . . . . . . . . . . . . . . . . . . . . . . . . . . . . . . . . . . . . . . . . . . . . . . . . . . 29
Changing the Bluetooth name of the handset . . . . . . . . . . . . . . . . . . . . . . . . . . . . . . . . . . . . . . . . . . . . 31
Defining handset settings . . . . . . . . . . . . . . . . . . . . . . . . . . . . . . . . . . . . . . . . . . . . . . . . . . . 31
Quick dialling numbers and functions . . . . . . . . . . . . . . . . . . . . . . . . . . . . . . . . . . . . . . . . . . . . . . . . . . . . 31
Changing the display language . . . . . . . . . . . . . . . . . . . . . . . . . . . . . . . . . . . . . . . . . . . . . . . . . . . . . . . . . . 32
Setting the display . . . . . . . . . . . . . . . . . . . . . . . . . . . . . . . . . . . . . . . . . . . . . . . . . . . . . . . . . . . . . . . . . . . . . . . 32
Setting keypad illumination . . . . . . . . . . . . . . . . . . . . . . . . . . . . . . . . . . . . . . . . . . . . . . . . . . . . . . . . . . . . . . 32
Activating/deactivating auto answer . . . . . . . . . . . . . . . . . . . . . . . . . . . . . . . . . . . . . . . . . . . . . . . . . . . . . 33
Changing the handsfree/earpiece volume . . . . . . . . . . . . . . . . . . . . . . . . . . . . . . . . . . . . . . . . . . . . . . . . 33
Setting a handsfree profile . . . . . . . . . . . . . . . . . . . . . . . . . . . . . . . . . . . . . . . . . . . . . . . . . . . . . . . . . . . . . . . 33
Changing ringtones . . . . . . . . . . . . . . . . . . . . . . . . . . . . . . . . . . . . . . . . . . . . . . . . . . . . . . . . . . . . . . . . . . . . . . 34
Using the Resource Directory . . . . . . . . . . . . . . . . . . . . . . . . . . . . . . . . . . . . . . . . . . . . . . . . . . . . . . . . . . . . . 35
Activating/deactivating advisory tones . . . . . . . . . . . . . . . . . . . . . . . . . . . . . . . . . . . . . . . . . . . . . . . . . . . 35
Setting your own area code . . . . . . . . . . . . . . . . . . . . . . . . . . . . . . . . . . . . . . . . . . . . . . . . . . . . . . . . . . . . . . 36
Restoring the handset default settings . . . . . . . . . . . . . . . . . . . . . . . . . . . . . . . . . . . . . . . . . . . . . . . . . . . . 36
Service (Customer Care) . . . . . . . . . . . . . . . . . . . . . . . . . . . . . . . . . . . . . . . . . . . . . . . . . . . . . 37
Questions and answers . . . . . . . . . . . . . . . . . . . . . . . . . . . . . . . . . . . . . . . . . . . . . . . . . . . . . . . . . . . . . . . . . . 37
Authorisation . . . . . . . . . . . . . . . . . . . . . . . . . . . . . . . . . . . . . . . . . . . . . . . . . . . . . . . . . . . . . . . . . . . . . . . . . . . . 38
Quality Management according to DIN EN ISO 9001 . . . . . . . . . . . . . . . . . . . . . . . . . . . . . . . . . . . . . . . 38
Appendix . . . . . . . . . . . . . . . . . . . . . . . . . . . . . . . . . . . . . . . . . . . . . . . . . . . . . . . . . . . . . . . . . . 39
Caring for your telephone . . . . . . . . . . . . . . . . . . . . . . . . . . . . . . . . . . . . . . . . . . . . . . . . . . . . . . . . . . . . . . . . 39
Contact with liquid . . . . . . . . . . . . . . . . . . . . . . . . . . . . . . . . . . . . . . . . . . . . . . . . . . . . . . . . . . . . . . . . . . . . . . 39
Specifications . . . . . . . . . . . . . . . . . . . . . . . . . . . . . . . . . . . . . . . . . . . . . . . . . . . . . . . . . . . . . . . . . . . . . . . . . . . . 39
Writing and editing text . . . . . . . . . . . . . . . . . . . . . . . . . . . . . . . . . . . . . . . . . . . . . . . . . . . . . . . . . . . . . . . . . . 40
Accessing additional functions via the PC interface . . . . . . . . . . . . . . . . . . . . . . . . . . . 41
Index . . . . . . . . . . . . . . . . . . . . . . . . . . . . . . . . . . . . . . . . . . . . . . . . . . . . . . . . . . . . . . . . . . . . . . 43

elmeg D140 / en / elmegD140_en / security.fm / 02.10.2013
Version 1, 01.07.2012
10 elmeg D140
bintec elmegSafety precautions
Safety precautions
Warning
Be sure to read this user guide and the safety precautions before using your telephone.
Explain their content and the potential hazards associated with using the telephone to your
children.
Use only the power adapter supplied, as indicated on the underside of the base.
Use only rechargeable batteries that correspond to the specification provided on
page 39, as this could otherwise result in significant health risks and personal injury.
Using your telephone may affect nearby medical equipment. Be aware of the tech-
nical conditions in your particular environment, e.g., doctor's surgery.
If you use a medical device (e.g., a pacemaker), please contact the device manufac-
turer. They will be able to advise you regarding the susceptibility of the device to
external sources of high frequency energy. Please refer to the "Appendix" chapter for
the specifications of this bintec elmeg product.
Do not hold the rear of the handset to your ear when it is ringing or when handsfree
mode is activated. Otherwise you risk serious and permanent damage to your hear-
ing.
Your telephone is compatible with the majority of digital hearing aids on the market.
However, perfect function with all hearing aids cannot be guaranteed.
The handset may cause interference in analogue hearing aids (humming or whis-
tling) or cause them to overload. If you require assistance, please contact the hearing
aid supplier.
Do not install the base or charger in bathrooms or shower rooms. The base and
charger are not splashproof (¢page 39).
Do not use your phone in environments with a potential explosion hazard (e.g., paint
shops).
If you give your phone to a third party, make sure you also give them the user guide.
Remove faulty bases from use or have them repaired by our Service, as they could
interfere with other wireless services.
Please note
uNot all of the functions described in this user guide are available in all countries.
uThe device cannot be used in the event of a power failure. It is also not possible to trans-
mit emergency calls.
$
ƒ

elmeg D140 / en / elmegD140_en / starting.fm / 02.10.2013
Version 1, 01.07.2012
11elmeg D140
bintec elmeg First steps
First steps
Checking the package contents: One elmeg handset, one battery, one battery cover, one
charger, one power adapter for the charger, one belt clip, one user guide.
Installing the charger
The charger is designed for use in dry rooms in a temperature range of +5°C to +45°C.
¤Install the charger on a level, non-slip surface.
The phone's feet do not usually leave any marks on surfaces. However, due to the multitude of
different varnishes and polishes used on today's furnishings, the occurrence of marks on the
surfaces cannot be completely ruled out.
Please note:
uNever expose the telephone to the influence of heat sources, direct sunlight or other electri-
cal devices.
uProtect your phone from moisture, dust, corrosive liquids and fumes.
Connecting the charger
Please note
Pay attention to the range of the base.
This is up to 300 m in unobstructed outdoor areas and up to 50 m inside buildings. The range
is reduced when Eco Mode (¢page 26) is activated.
¤Plug the power adapter into the plug
socket 2.
¤Connect the flat plug from the power
adapter 1.
To disconnect the plug from the charger, press the release
button 3and disconnect the plug 4.
1
2
3
4

elmeg D140 / en / elmegD140_en / starting.fm / 02.10.2013
Version 1, 01.07.2012
12 elmeg D140
bintec elmegFirst steps
Setting up the handset for use
The display is protected by a plastic film.
Please remove the protective film!
Inserting the battery and closing the battery cover
To reopen the battery cover to replace the battery:
¤Remove the belt clip (if attached).
¤Insert your fingernail into the notch at the
bottom of the casing and pull the battery
cover upwards.
To change the battery,insert your fingernail
into the notch in the casing and pull the bat-
tery upwards.
Please note
Use only rechargeable batteries recommended by bintec elmeg GmbH, as this could result
in significant health risks and personal injury. For example, the outer casing of the battery
could be destroyed or the battery could explode. The phone could also malfunction or be
damaged as a result of using batteries that are not of the recommended type.
¤First insert battery with the contact surface
facing down a.
¤Then press the battery downwards buntil it
clicks into place.
¤First, align the protrusions on the side of
the battery cover with the notches on the
inside of the casing.
¤Then press the cover until it clicks into
place.
a
b

elmeg D140 / en / elmegD140_en / starting.fm / 02.10.2013
Version 1, 01.07.2012
13elmeg D140
bintec elmeg First steps
Initial charging and discharging of the battery
The correct charge status can only be displayed once the battery is first fully charged and dis-
charged.
¤Charge the handset in the charger for 3 hours.
¤After charging, remove the handset from the charger and only replace it when the battery is
fully discharged.
Registering the handset
Your elmeg handset can be registered on up to four bases. You must register the handset on
both the handset (1) and the base (2).
Once the registration process has been completed successfully, the handset returns to idle sta-
tus. The handset's internal number is shown in the display, e.g., INT 1. If not, repeat the proce-
dure.
Please note
Only place the handset in the designated charger.
Please note
uAfter the initial battery charge and discharge, you may place your handset in the base
after every call.
uAlways repeat the charging and discharging procedure if you remove the battery from
the handset and reinsert them.
uThe battery may warm up during charging. This is not dangerous.
uAfter a while, the charge capacity of the battery will decrease for technical reasons.
3hours

elmeg D140 / en / elmegD140_en / starting.fm / 02.10.2013
Version 1, 01.07.2012
14 elmeg D140
bintec elmegFirst steps
1) On the handset
2) On the base
Within 60 sec. press and hold the registration/paging key on the base (approx. 3 sec.).
Display in idle status
Once the phone is registered and the time set, the idle status is shown as in this example.
Displays
uReception between the base and the handset:
– Good to poor: ÐiÑÒ
–Noreception:|
Green: Eco Mode (¢page 26)
uBattery charge status:
–{white: charged over 66%
–{white: charged between 33% and 66%
–ywhite: charged between 10% and 33%
–yred: charged below 10%
–yflashes red: battery almost empty (less than 10-minutes talktime)
–xyxyx{x{ white: battery charging
uINT 1
Internal name of the handset
If Eco Mode+ (¢page 26) is activated, the ¼icon is displayed in the top left corner of the dis-
play.
Your phone is now ready for use!
Please note
If the handset is already registered to at least one base, start the registration process as fol-
lows:
v¢Ï¢Registration ¢Register Handset
If the handset is already registered to four bases, select the required base.
Please note
For instructions on deregistering the handsets, please consult the base user guide.
Register
¤Press the key below §Register§ on the display
screen.
A message appears stating that the handset is
searching for a base that is ready for registration.
i V
07:15
INT 1 04 Apr
Calls Calendar

elmeg D140 / en / elmegD140_en / starting.fm / 02.10.2013
Version 1, 01.07.2012
15elmeg D140
bintec elmeg Using the phone
Connecting the headset
You can connect a headset to the left-hand side of your telephone with
the 2.5 mm jack connector (available from Service).
See the relevant product page at bintec-elmeg.com for information on
recommended headsets.
The headset volume corresponds to the settings for the earpiece vol-
ume.
Connecting the USB data cable
The mini USB connection is on the underside of
your elmeg handset.
You can connect a standard USB data cable with
a USB mini-B connector to synchronise your
handset with a PC. To use this function, the
Gigaset QuickSync software must be installed
(¢page 41).
Using the phone
Using the control key
Below, the side of the control key that you must press in the respective oper-
ating situation is marked in black (top, bottom, right, left, centre), e.g., vfor
"press right on the control key" or wfor "press the centre of the control key".
Functions when pressing the middle of the control key
Depending on the operating situation, the key has different functions.
uIn idle status the key opens the main menu.
uIn submenus, selection and input fields, the key takes on the function of the display keys
§OK§, §Yes§, §Save§, §Select§ or §Change§.
Please note
Please connect your handset directly to the PC; do not connect via a USB hub.

elmeg D140 / en / elmegD140_en / starting.fm / 02.10.2013
Version 1, 01.07.2012
16 elmeg D140
bintec elmegUsing the phone
Using the menus
The menu view can be expanded (expert mode
•
) or simplified. Expert mode is the active
default setting.
Main menu (first menu level)
¤When the handset is in idle status, press the right control key vto open the main menu.
¤Use the control key pto select the required function and press the display key §OK§.
Submenus
The functions in the submenus are displayed as lists.
¤Scroll to the function with the control key qand press §OK§.
Reverting to idle status
You can revert to idle status from anywhere in the menu as follows:
¤Press and hold the end call key a.
or:
¤Do not press any key: after 2 minutes the display will automatically revert to idle status.
Settings that have not been saved by selecting the display keys §OK§, §Yes§ or §Save§ are lost.
Activating/deactivating the handset
aWith the phone in idle status, press and hold the end call key (confirmation tone)
to switch off the handset.
Press and hold the end call key again to switch the handset on.
Activating/deactivating keypad lock
Keypad lock prevents any inadvertent use of the phone.
#Press and hold the hash key in idle status to activate or deactivate keypad lock. You
will hear the confirmation tone.
If keypad lock is activated, you will see a message when you press a key.
Keypad lock deactivates automatically when you receive a call. It is reactivated when the call is
finished.
Please note
When keypad lock is active, you cannot even call emergency numbers.

elmeg D140 / en / elmegD140_en / menuetree.fm / 02.10.2013
Version 1, 01.07.2012
17elmeg D140
bintec elmeg Menu overview
Menu overview
Setting simplified or expert mode
The menu view can be expanded (expert mode
•
) or simplified. Expert mode is the active
default setting. Menu options that are only available in expert mode are marked with the
•
icon.
To change these settings:
Select v¢Ï¢Menu View ¢Simplified or Complete (expert mode)
¢§Select§ (the active mode is marked with Ø)
Open the main menu: press vwhen the phone is in idle mode.
Ç
Select Services (Menu dependent on base)
ò
Bluetooth
Activation ¢page 29
Search for Headset ¢page 30
Search Data Device ¢page 30
Known Devices ¢page 30
Own Device ¢page 31
É
Additional Features
Room Monitor ¢page 28
One Touch Call ¢page 19
•
Resource Directory Screensavers ¢page 35
Caller Pictures ¢page 35
Sounds ¢page 35
Capacity ¢page 35
Ê
Call Lists (Menu dependent on base)
Ë
SMS (Menu dependent on base)
ÌVoice Mail (Menu dependent on base)
á
Organizer
Calendar ¢page 26
Alarm Clock ¢page 27
Missed Alarms ¢page 27
Â
Directory ¢page 20

elmeg D140 / en / elmegD140_en / menuetree.fm / 02.10.2013
Version 1, 01.07.2012
18 elmeg D140
bintec elmegMenu overview
Ï
Settings
Date/Time
Audio Settings Handset Volume ¢page 33
Handsfree Profiles ¢page 33
•
Advisory Tones ¢page 35
Silent Alert ¢page 34
Ringtones(Handset) ¢page 34
•
Music on hold (dependent on base)
Display + Keypad Screensaver ¢page 32
Large Font ¢page 32
Colour Schemes ¢page 32
•
Display Backlight ¢page 32
Keypad Illumination ¢page 32
Language ¢page 32
Registration Register Handset ¢page 13
De-reg. Handset (dependent on base)
Select Base ¢page 13
•
Telephony Auto Answer ¢page 33
(further submenus dependent on base)
•
System Handset Reset ¢page 36
(further submenus dependent on base)
Menu View Simplified ¢page 17
Complete ¢page 17
Eco Mode Eco Mode (dependent on base)
Eco Mode+ (dependent on base)

elmeg D140 / en / elmegD140_en / direct_charges.fm / 02.10.2013
Version 1, 01.07.2012
19elmeg D140
bintec elmeg Making calls
Making calls
Making an external call
External calls are calls using the public tele-
phone network.
~c Enter the number and press the
talk key.
or:
c~ Press and hold the talk key c
and then enter the number.
You can cancel the dialling operation with
the end call key a.
One Touch Call
You can set up your phone that by pressing
any key a previously stored number is
dialled. This allows for example children,
who can not enter a number, to call a certain
number.
v¢É¢One Touch Call
¤Change multiple line input:
Activation:
Select On to activate.
Call to:
Enter or change number.
¤Press §Save§ to save the settings.
When the function is activated, the idle dis-
play looks as shown below:
By pressing any key the saved number is
dialled. Press the end call key a, to cancel
the dialling operation or to end the call.
Deactivating the One Touch Call
¤In idle status, press the display key §OFF§.
¤Press and hold the hash key #, to
deactivate the One Touch Call.
Ending a call
aPress the end call key.
Accepting a call
The handset indicates an incoming call in
three ways: by ringing/silent alert, by a dis-
play on the screen and by the flashing talk
key c.
Accept the call by:
¤Pressing the talk key c.
¤Pressing the handsfree key d.
¤Pressing the display key §Accept§.
If the handset is in the charger and the Auto
Answer function is activated (¢page 33),
the handset will automatically accept a call
when you lift it out of the cradle.
To deactivate the ringtone/silent alert, press
the §Silence§ display key. You can accept the
call as long as it is displayed on the screen.
Using handsfree mode
You can set various handsfree profiles to
optimally adapt your phone to your environ-
ment.
Activating/deactivating handsfree
mode
Activating while dialling
~d Enter the number and press the
handsfree key.
Switching between earpiece and
handsfree mode
dPress the handsfree key.
If you wish to place the handset in the
charger during a call:
i V
07:15
INT 1 22 Oct
”
OneTouchCall active
0891234567
OFF

elmeg D140 / en / elmegD140_en / direct_charges.fm / 02.10.2013
Version 1, 01.07.2012
20 elmeg D140
bintec elmegUsing the directory and lists
¤Press and hold handsfree key dwhile
placing the handset in the base/charger
and for a further 2 seconds.
For instructions on adjusting the handsfree
volume (¢page 33).
Switching to mute
You can deactivate your handset's micro-
phone during a call.
hPress key to mute the handset.
The display shows Microphone
is off.
Press the key again to reactivate
the microphone.
Making internal calls
Internal calls to other handsets registered on
the same base are free.
Calling a specific handset
uInitiate internal call.
~Enter the number of the
handset.
or:
sSelect handset.
cPress the talk key.
Calling all handsets ("group call")
uPress and hold.
or:
uInitiate internal call.
*Press the star key.
or
Call All Select
cPress the talk key.
All handsets are called.
Ending a call
aPress the end call key.
Using the directory and
lists
Directory
You can save up to 500 entries in the direc-
tory.
Open the directory in idle status using the
skey.
Length of the entries
3 numbers: each max. 32 digits
First name and
surname: each max. 16 characters
E-mail address: max. 64 characters
Saving a number in the directory
s¢<New Entry>
¤You can enter data in the following fields:
First Name:/Surname:
Enter first names and/or surnames. (For
instructions on entering text and special
characters, please see ¢page 40.)
Phone (Home):/Phone (Office):/Phone
(Mobile):
Enter a number in at least one of the
fields.
E-mail:
Enter the e-mail address.
Anniversary:
Select On or Off.
With setting On:
Enter Annivers. (Date) and Anniversary
(time) and select reminder type: Anniver-
sary (tone) (¢page 22).
Caller Melody (VIP):
Mark a directory entry as a VIP (Very
Important Person) by assigning a specific
ringtone to it. Prerequisite: Calling Line
Identification Presentation (CLIP).

elmeg D140 / en / elmegD140_en / direct_charges.fm / 02.10.2013
Version 1, 01.07.2012
21elmeg D140
bintec elmeg Using the directory and lists
Caller Picture:
If required, select a picture to be dis-
played when this person calls (see "Using
the Resource Directory", page 35).
Prerequisite: Calling Line Identification
Presentation (CLIP).
§Save§ Press the display key.
Selecting a directory entry
sOpen the directory.
You have the following options:
uUse sto scroll through the entries until
the required name is selected.
uEnter the first letters of the name (max. 8),
if necessary scroll to the entry with the s
key.
Selecting from the directory
s¢s(Select entry)
cPress the talk key.
(If several numbers are entered,
select the required number by
pressing rand press the talk
key cagain).
The number is dialled.
Managing directory entries
Viewing entries
s¢s(Select entry)
§View§ Press the display key. The entry
is displayed.
§Options§ Press the display key.
The following functions can be selected
with q:
Display Number
To edit or add to a saved number, or to
save it as a new entry, press Óafter the
number is displayed.
Delete Entry
Delete selected entry.
Copy Entry
to Internal: Send a single entry to a hand-
set (¢page 22).
vCard via SMS: Send a single entry in
vCard format via SMS.
vCard via Bluetooth: Send a single entry
in vCard format via Bluetooth.
Editing entries
s¢s(Select entry)
§View§ §Edit§ Press the display keys one after
the other.
¤Perform changes and save.
Using other functions
s¢s(Select entry)
¢§Options§ (Open menu)
The following functions can be selected
with q:
Display Number
Edit or add to a saved number and then
dial with cor save as a new entry; to
do so, press Óafter the number is dis-
played.
Edit Entry
Edit selected entry.
Delete Entry
Delete selected entry.
Copy Entry
to Internal: Send a single entry to a hand-
set (¢page 22).
vCard via SMS: Send a single entry in
vCard format via SMS.
vCard via Bluetooth: Send a single entry
in vCard format via Bluetooth.
Delete All
Delete all entries in the directory.
Copy All
to Internal: Send the complete list to a
handset (¢page 22).
vCard via Bluetooth: Send the complete
list in vCard format via Bluetooth.
Available Memory
Display the number of entries that are still
available in the directory (¢page 20).
Table of contents
Other bintec elmeg IP Phone manuals