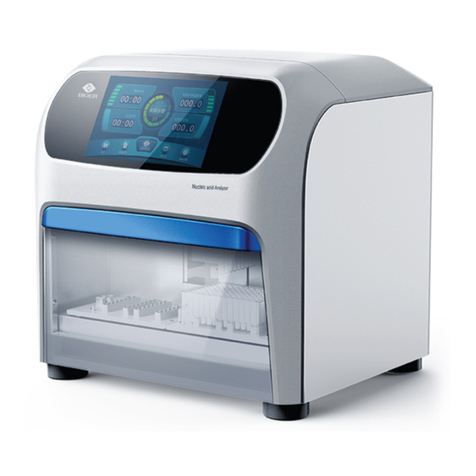
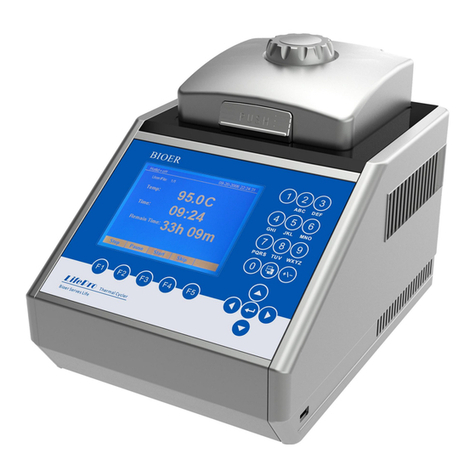
Bioer GeneExplorer GE-96G User manual

GeneExplorer Thermal Cycler
Instruction for Use
GE-96G, GE-384G, GE-4I, GE-48D, GE-48DS, GE-48DG, GE-96S
Note:
Please understand that no further notice will be given for any
Hangzhou Bioer Technology Co., Ltd.

modification to the information contained herein.
The document contains patent information under copyright protection. All rights reserved.
Without prior written approval from Hangzhou Bioer Technology Co., Ltd., any part of the
document shall not be copied, re-produced or translated into other language.
File No.: BYQ56170000000ESM
File Version: Nov. 2021 Edition 2.0
Before using the instrument for the first time,
please carefully read the Operation Manual
!

GeneExplorer Thermal Cycler Instruction for Use Important Notes
—i —
Important Notes
Convention
Attention:
Information of extreme importance is contained under the item of
Attention, thus please carefully read it. Failure to practice as per the
instruction may lead to equipment damage or operation failure.
Warning!
Information under the item of Warning requires special attention for
specific operation step or method. Failure to practice as per the
requirements may lead to severe personal injury.
1Safety
The following basic safety measures must be abided by through all stages including equipment
operation, maintenance and repair. Failure to abide by these measures or warnings indicated in
the manual may affect the protection provided by the instrument. Meanwhile, it may damage the
safety standard for design and manufacturing, and expected application scope of the instrument.
Hangzhou Bioer Technology Co., Ltd. takes no responsibility for any consequences arising from
user’s failure for abiding by the following requirements.
Attention:
The instrument is Type-I equipment in line with GB4793.1 standard with
protection level of IP20. The instrument is designed for indoor use.
A) Instrument grounding
To prevent electric shock, the input power line of the instrument must be reliably grounded. The
instrument adopts three-core grounding plug which includes a third (grounding) foot and can
only used together with grounding socket. This is a safety device. If the plug cannot be inserted
into socket, please ask an electrician to install correct socket, and don’t let the grounding socket
lose its function of safety.
B) Keep away from energized circuit
Operator should not arbitrarily dismantle the instrument. Component replacement or in-machine
adjustment must be completed by specialized maintenance personnel with certificate. Don’t
replace any component when the power line is connected.
C) Attention for power supply
Before connecting AC power supply, ensure the consistence of the voltage of the power supply
and the voltage required by the instrument (a deviation of 10% is allowed), and ensure the

GeneExplorer Thermal Cycler Instruction for Use Important Notes
—ii —
rated loading of the power socket is no less than the requirement of the instrument.
D) Attention for power line
Generally, the instrument should use the power line supplied along with the instrument. In case
of power line damage, it must be replaced instead of repair. For replacement, power line of same
type and specification should be used. Don’t put anything on the power line when the instrument
is being used. Don’t place the power line in the place where people walk through. If the power
line will contact thermal surface when it is used, then protection measures should be taken to
prevent insulation damage to the power line.
E) Plug in and plug off
The plug must be held in hand for plugging in and plugging off. For plugging in, ensure that the
plug is completely inserted into the socket, and don’t pull the power line forcibly for plugging
off.
F) Attention for instrument placing
The instrument should be placed in area of low humidity, less dust and far away from water
source (such as close to water pool or water pipe), and the place should be well ventilated and
free from corrosive gas or high magnetic field interruption. Don’t place the instrument in moisty
or dusty area. Also, don’t place the instrument in area making it difficult to operate the
disconnecting device.
Openings on the instrument are designed for ventilation. To avoid overheating, don’t bloeck or
cover the ventilating openings. For single machine operation, the ventilating openings on the
instrument should be kept at least 20cm away from nearest objects. For simultaneous multiple
machine operation, the distance between instruments should be no less than 10cm. additionally,
don’t use the instrument on floppy surface; otherwise the ventilating openings at instrument
bottom may be blocked.
Over-temperature will affect the instrument performance or lead to faulty. Don’t use the
instrument under direct sunlight and keep the instrument away from heater, furnace and other
heat source.
When the instrument is not in use for an extended period, unplug the power supply and cover
the instrument with soft cloth or plastic paper to prevent dust entering in the machine.
Warning:
The equipment should not be installed on the surface of inflammable
materials!

GeneExplorer Thermal Cycler Instruction for Use Important Notes
—iii —
G) Attention for operation
During experiment operation, avoid liquid dripping on the instrument.
When dealing with reagent, wear personal protective equipment such as protective gloves.
H) Re-transport
If the instrument needs to be transported again, the detection hole position and the instrument
should be thoroughly cleaned and sterilized with ultraviolet light before transportation.
I)Equipment Safety
The instrument was designed, produced, and tested in accordance with EN 61010-1 (IEC
61010-1) “Safety requirements for electrical equipment for measurement, control, and
laboratory use -- Part 1: General requirements”. It has left the factory in a perfectly safe
condition.
The instrument meets the requirements of the Regulation (EU) 2017/746 of the European
Parliament and of the Council of 5 April 2017 on in vitro diagnostic medical devices.
2Instrument label
A) Warning Sign
⚫Warning identification
Attention:
In any of the following cases, immediately unplug the power supply from
the socket, and contact the supplier or ask qualified maintenance
personnel for treatment:
⚫Liquid enters into the instrument.
⚫The instrument is exposed to rain or wet by water.
⚫The instrument fails to work normally, especially there is any
abnormal sound or flavor.
⚫The instrument drops down or the shell is damaged.
⚫The instrument function has evident change.
⚫For any doubt concerning the compatibility between detergent and
equipment part or materials contained in the equipment, please
consult the manufacturer or its agent.

GeneExplorer Thermal Cycler Instruction for Use Important Notes
—iv —
DANGER!
Area with the mark pasted on the
instrument shall avoid improper use and be
careful of danger.
SCALDING!
Area with the mark pasted on the
instrument causes high temperature and is
scalding during use.
BIOHAZARD
Area with the mark pasted on the
instrument will caused biohazard during
use.
PROTECT
CONDUCTOR
TERMINAL
PROTECT CONDUCTOR TERMINAL is
near to the area with the mark pasted on
the instrument
⚫Warning mark
Warning!
The instrument is pasted with a label of “HOT SURFACE!”. Any part of
body is strictly prohibited from touching the metal part (module and hot
lid) around the label during instrument operation or within a certain period
after the program ends.
B) Other symbols on the packaging
Date of manufacture
Indicates the date when the medical device
was manufactured.
RoHS
Restriction on the use of certain hazardous
materials(restriction of hazardous
substances)
Consult instructions
for use
Indicates the need for the user to consult
the instructions for use.
Serial number
Indicates the manufacturer’s derail number
so that a specific medical device can be
identified.
Catalogue number
Indicates the manufacturer’s catalogue
number so that the medical device can be
identified.
In vitro diagnostic
medical device
Indicates a medical device that is intended
to be used as an in vitro diagnostic medical
device.
CE mark
Indicates the medical device meets the CE
related Directives.
Manufacturer
Indicates the medical device manufacturer.

GeneExplorer Thermal Cycler Instruction for Use Important Notes
—v —
Authorised
representative in the
European
Community
Indicates the authorized representative in
the European Community.
Up
Indicates that the correct position of the
transport package is vertical upward.
Fragile
The transport packages contain fragile
goods, so they should be handled with
care.
Keep dry
The package should be rain-proof.
The limit of stacking
layer
Maximum stacking layer of the same
package is 2.
Temperature limit
Indicates that the temperature limit of
transportation package should be - 20 ℃ to
55 ℃.
3Instrument calibration
Before the instrument is delivered, the device is fully calibrated according to the Bioer 's factory
inspection standard, all the actions are under the requirements of ISO 13485 Medical devices -
Quality management systems Requirements for regulatory purposes. If the instrument is
installed in the required working environment, there is no need to calibrate or correct the
temperature after installation.
4Instrument maintenance
Periodically use clean, soft cloth dipped with ethanol to clean the block wells on module to
ensure sufficient contact between test tubes and taper holes and to ensure favorable heat
conduction. If there is any dirt on the instrument surface, use soft cloth dipped with cleansing
cream to clean.
Warning!
The power must be cut off when cleaning the instrument surface.
Corrosive detergent is strictly prohibited from being used to clean the
instrument surface.
The instrument module includes precise optics, dust, foreign matter and
residue should be avoided.
5Disposal
Potentially infectious material and all parts that may come in contact with potentially
infectious material must be disposed in accordance with the relevant legal provisions.

GeneExplorer Thermal Cycler Instruction for Use Important Notes
—vi —
All parts which have been replaced must be disposed in accordance with the relevant legal
provisions.
Disposal of the instrument must be carried out in accordance with the relevant legal
provisions.
Disposal of the packaging material must be carried out in accordance with the relevant legal
provisions.
6After-sales service
See the Warranty Card for specific content and scope of warranty.
Attention:
After opening the packaging box, immediately check the objects
contained therein based on the packing list. In case of any object damage
or missing, please immediately contact the supplier.
After acceptance inspection, fill out the Acceptance Inspection Form and
send the copy (or fax) back to the company for filing and warranty
service.
After the packaging box is opened, please properly keep the packaging
box and packing materials which will be used during maintenance.
Hangzhou Bioer Technology Co., Ltd. will take no responsibility for
instrument damage caused by improper packaging during transport to the
maintenance department.

GeneExplorer Thermal Cycler Instruction for Use Chapter One Introduction
―1-
Contents
CHAPTER ONE INTRODUCTION........................................................................................................................3
1INTRODUCTION TO PCR TECHNOLOGY ........................................................................................................3
2EXAMPLES OF PCR’S APPLICATIONS............................................................................................................3
3FEATURES OF GENEEXPLORER THERMAL CYCLER ......................................................................................3
4USE OF GENEEXPLORER THERMAL CYCLER................................................................................................4
5SERVICE LIFE OF THERMAL CYCLER ............................................................................................................5
CHAPTER TWO CHARACTERISTICS................................................................................................................6
1NORMAL OPERATION CONDITIONS ...............................................................................................................6
2TRANSPORTAND STORAGE CONDITION ........................................................................................................6
3BASIC PARAMETERS.....................................................................................................................................6
4SOFTWARE FUNCTIONS ................................................................................................................................7
5SOFTWARE VERSION ....................................................................................................................................7
CHAPTER THREE PREPARATIONS....................................................................................................................8
1STRUCTURAL SCHEMATIC DIAGRAM................................................................................................................8
2. CHECK BEFORE TURNING ON THE INSTRUMENT ................................................................................................9
3TURN ON THE INSTRUMENT................................................................................................................................9
CHAPTER FOUR OPERATION INSTRUCTIONS............................................................................................10
1TURN ON THE INSTRUMENT..............................................................................................................................10
2PCR PROGRAM EDITING...................................................................................................................................12
2.1 SETTING OF PROGRAM SECTION....................................................................................................................13
2.2 SECTION TEMPERATURE AND CONSTANT TEMPERATURE TIME.......................................................................13
2.3 FUNCTION OF LOOP.......................................................................................................................................14
2.4 EXTENDED PARAMETER................................................................................................................................15
2.5 SAVE EXPERIMENT........................................................................................................................................16
3RUN PROGRAM ................................................................................................................................................16
3.1 TEMPERATURE CONTROL MODE ....................................................................................................................17
4FILE MANAGEMENT .........................................................................................................................................18
5SYSTEM SETTINGS ...........................................................................................................................................20
5.1 PERSONAL CENTER.......................................................................................................................................21
5.2 SYSTEM SETTINGS........................................................................................................................................21
6SOFTWARE UPGRADE .......................................................................................................................................21
6.1 UI PROGRAM UPGRADE.................................................................................................................................21
6.2 DRIVER UPGRADE.........................................................................................................................................22
CHAPTER FIVE FAULTANALYSIS AND TROUBLESHOOTING ................................................................23
1FAULT ANALYSIS AND TROUBLESHOOTING .......................................................................................................23
APPENDIX 1WIRING DIAGRAM (THE DIAGRAM IS ONLY FOR REFERENCE,AND PLEASE UNDERSTAND THAT NO

GeneExplorer Thermal Cycler Instruction for Use Chapter One Introduction
―2-
FURTHER NOTICE WILL BE GIVEN FOR ANY MODIFICATION).................................................................................25
APPENDIX 2VALUE AND MEANING OF SET PARAMETERS...............................................................................26
APPENDIX 3PRODUCT EMC STATEMENT...........................................................................................................28
APPENDIX 4LIST OF ACCESSORIES.....................................................................................................................30

GeneExplorer Thermal Cycler Instruction for Use Chapter One Introduction
―3-
Chapter One Introduction
The chapter covers introduction to PCR technology and examples of its applications,
introduction to PCR Thermal Cycler and features of GeneExplorer Thermal Cycler.
1Introduction to PCR technology
Polymerase Chain Reaction (PCR in short) is a nucleic acid amplification technology of in-vitro
simulation of natural DNA reproduction process. With two DNA chains to be amplified as a
template and mediated by a pair of artificially synthetic ODN primers, and through DNA
polymerase of high temperature resistance, it can rapidly and specifically amplify specific DNA
segment. Due to its simplicity, rapidity, peculiarity and sensitivity, ever since invention of PCR
by Mullis in 1985 and discovery of DNA polymerase of high temperature resistance by Erlich in
1988, over a few years, the technology has been widely applied in various fields of bioscience.
Especially in cytology, virology, oncology, genetic epidemiology, forensic pathology and flora
and fauna immunology, it has accomplished outstanding achievements and become a milestone
of contemporary molecular biology development.
2Examples of PCR’s applications
Application of Thermal Cycler: The product is applicable to polymerase chain reaction in fields
including immunology, human genome engineering, forensic pathology, oncology, organization
and population biology, paleontology, zoology and botany.
3Intended use
The GeneExplorer Thermal Cycler is an automated instrument used for qualitative amplify the
related nucleic acids in human sample using the polymerase chain reaction process. The
instrument is for in vitro diagnostic only.
The GeneExplorer Thermal Cycler is intended for used in medical and biological laboratories by
professional user trained in molecular biological techniques and the operation of GeneExplorer
Thermal Cycler.
4Features of GeneExplorer Thermal Cycler
GeneExplorer Thermal Cycler is a PCR of multiple functions and applications. It features as
below:
⚫Providing up to eight replaceable modules based on requirements of various PCR
experiments.

GeneExplorer Thermal Cycler Instruction for Use Chapter One Introduction
―4-
⚫Adopting advanced American ITI thermoelectric refrigeration technology and
thermoelectric refrigeration element manufactured under Japanese quality management
mode which presents stable and reliable performance;
⚫Maximum ramp rate up to 4C/s and can be adjusted based on experiment requirements.
⚫Multiple temperature control modes and higher reagent compatibility.
⚫Host machine of GeneExplorer Thermal Cycler can automatically recognize module and
run corresponding program.
⚫Colorful large-screen display, humanized operation interface, simple and clear operation.
⚫Power-off protection function, and after power supply recovery, it can continue to complete
the program unfinished.
⚫Hot lid can adjust height and pressure based on actual using condition to adapt to different
reaction tubes and effectively prevent reagent evaporation and pollution.
⚫USB standard port can be connected to general computers, convenient for software upgrade.
5Use of GeneExplorer Thermal Cycler
GeneExplorer Thermal Cycler, taking a leading position among similar products, has combined
various advanced technologies and can meet requirements of various PCR experiments.
Different modules have the suitable consumables, there are as follows.
Standard 0.2ml centrifuge tube
PCR Microplate
Glass slide
GE-96G / GE-96S:
(1) 1×96×0.2ml
0.2ml standard centrifuge tube
(2) 12×8×0.02ml
PCR 8-Strip Tube
(3) 96×1×0.2ml (96 wells PCR Microplate)
GE-48D:GE-48DG: GE-48DS:
(1) 48×0.2ml+48×0.2ml (48 wells PCR Microplate)
GE-384G:384×0.02ml(384 wells PCR Microplate)
GE-4I:4 pcs.of glass slide

GeneExplorer Thermal Cycler Instruction for Use Chapter One Introduction
―5-
6Service life of Thermal Cycler
Service life of Thermal Cycler is 5 years from the date of instrument installation.

Gene Explorer Thermal Cyeler Operation Manual Chapter Two Characteristics
―6-
Chapter Two Characteristics
The chapter mainly introduces the operation, transport and storage conditions of the instrument,
and its basic parameters, performance and functions.
1Normal operation conditions
Ambient temperature: 10C ~ 30C
RH: ≤70%
Power supply: 220V~50Hz
Altitude: <2km
Attention:
Before using the instrument, please confirm if the working conditions can
meet the above requirements. Pay special attention to reliable grounding of
the power line.
2Transport and storage condition
Ambient temperature: -20C ~ +55C
RH: ≤80%
3Basic parameters
The parameters of the modules are as below:
Name
Gene Explorer Thermal Cycler
Model
GE-96G
GE-384G
GE-48D
GE-4I
GE-48DG
GE-48DS
GE-96S
Sample size
96×0.2ml
384×0.02ml
48×0.2ml+4
8×0.2ml
44×gla
ss slide
48×0.2ml+4
8×0.2ml
48×0.2ml+4
8×0.2ml
96×0.2ml
gradient
temperature
range
30℃~99℃
/
30℃~99℃
/
gradient
temperature
difference
range
1℃~30℃
/
1℃~30℃
/
Ladder
Temperature
range
/
0.1℃~6℃
Energy
consumption
600W
1200W
Fuse
250V 12A 5 20
LCD display
Color touch screen (8 inch, 260,000 colors)

Gene Explorer Thermal Cyeler Operation Manual Chapter Two Characteristics
―7-
Temperature
range
4.0-105°C(min. resolution: 0.1°C)
File saving
amount
≥2000 standard programs
Operation
mode
Continuous operation
Dimensions
420mm×269mm×254mm(L×W×H)
Net weight
13kg
Attention:
When the set value of hot lid temperature is lower than the set value of
module temperature, the hot lid temperature displayed on the screen will
be higher than the set value of hot lid temperature.
4Software functions
(1) file edit (including file number, temperature and time of each section, setting of loop times,
view, revise and delete file, automatic file connection, gradient temperature setting; maximum
number of editable sections is 10, maximum number of steps is 100, maximum number of
loop is 99, available for secondary nesting, gradient temperature range is 1℃~30℃; Ladder
Temperature range 0.1℃~6℃,
(2) file storage.
(3) file modification (including adjustment of ramp rate, automatic temperature & time
modification during cycling, time display and calibration).
(4) setting of temperature, time and loop times during file running, and display of instant
values (including voice prompt, estimation of overall and remaining time of file running, fault
protection and warning);
(5) stop file running (including pause file running, stop file running and automatic recovery
after outage).
Attention:
The above software functions are only for reference. Please understand
that no further notice will be given for any modification to the software
functions.
5Software version
Software version: V1.0

Gene Explorer Thermal Cyeler Operation Manual Chapter Three Preparations
-8-
Chapter Three Preparations
The chapter mainly introduces the instrument structure, operation of touch screen, and
preparations before turning on the instrument. If the instrument is used for the first time, please
be familiar with the contents in the chapter before turning on the machine.
1 Structural schematic diagram
The structural parts of the instrument include heating module, hot lid, power switch module
(including power switch, power socket, and fuse holder), and micro-computer controller and
touch screen. All the modules of the instruments are the same except the heating modules,
Diagram for GE-96G, GE-96S, GE-384G
,:
Heating Module for GE-48DS, Heating Module for GE-48D,GE-48DG
1
2
3
4
5
6/7
7
7
7
8
1
1
1
1

Gene Explorer Thermal Cyeler Operation Manual Chapter Three Preparations
-9-
Usage of compression pad Usage of pressure balancing plate
2. Check before turning on the instrument
Before plug in and energize the instrument, please confirm the following:
1Confirm the power supply meets the voltage required by the instrument; (see Chapter
Two for power supply requirements)
2Confirm that the power supply plug has been reliably inserted into the power socket;
3The power line is reliably grounded.
3 Turn on the instrument
Turn on the power switch (switch to the position of “–”), and then the instrument will carry out
self-test which will take about 20s, please wait patiently. If the self-test has discovered no
problems, the main interface will show on the screen, and you can edit, view, revise or delete
PCR amplification files.
module
hot lid
LCD screen
pressure balancing
plate hole
compression pad
power socket
power switch
Attention:
1、Requirements for fuse: 250V 12A 520. For fuse replacement,
product which is in line with the requirements should be used. Contact the
supplier or manufacturer if you need fuse.
2、compression pad for 96 wells PCR plate and 384 wells PCR.
3、pressure balancing plate for 0.2ml single tubes and 8-strip tubes

GeneExplorer Thermal Cycler Operation Manual Chapter Four Operation Instructions
-10 -
Chapter Four Operation Instructions
In this chapter, the methods of editing, viewing, revising, and deleting PCR amplification files
are introduced in detail, as well as the method of running PCR amplification files and setting of
instrument system parameters.
Warning!
After the instrument is turned on, if there is any abnormal sound or display, or
fault alarm and prompt present during instrument self-test, please
immediately turn off the power and contact the supplier.
Attention:
If the sample volume of your experiment is less than the number of cone
holes of the module, please evenly distribute the test tubes to ensure stable
press of the hot lid on the test tube tops, which will also contribute to uniform
module loading and ensure uniformity of temperature change in each test
tube.
1 Turn on the instrument
Turn on the power switch and then the instrument will carry out self-test, please wait patiently.
If the self-test has discovered no problems, the main interface will show on the screen.
Module Type is displayed at bottom left of the main interface. At the middle of the main
interface, it displays four functions of software which are New Experiment, Open Experiment,
Recently Opened and Settings.

GeneExplorer Thermal Cycler Operation Manual Chapter Four Operation Instructions
-11 -
Picture for GE-96G
Picture for GE-48DS
Picture of Model GE-384G/GE-4I/GE-96S would show the module type with 384G, plate and
96V respectively.
Press the icon “New Experiment”to enter into the interface of experiment parameter
setting.

GeneExplorer Thermal Cycler Operation Manual Chapter Four Operation Instructions
-12 -
Press the icon “Open Experiment” to enter into the interface of file list.
Press the icon “Recently Opened” to view experiment.
Press the icon “Settings”to enter Personal Center and System Settings.
During operation, instrument operation status is displayed on the main interface, and click
to enter the interface of operation monitoring.
When operation is stopped, click to enter the interface of experiment parameter setting.
2 PCR program editing
Click “New File” on the main interface or click “New Experiment”under “Open Experiment”
or “Recently Opened”to enter into the interface of program setting.
Picture for “Open Experiment”or “Recently Opened”selection
This manual suits for next models
6
Table of contents
Other Bioer Laboratory Equipment manuals
Popular Laboratory Equipment manuals by other brands
Four E's Scientific
Four E's Scientific MI0102008 operating instructions
Bertin Technologies
Bertin Technologies CORIOLIS COMPACT user manual
VWR
VWR Gel Documentation Imager2 instruction manual
Integra
Integra Luxtec 9300XSP Operation and service manual
Beckman Coulter
Beckman Coulter Avanti J-20 XP instruction manual
FRIMED
FRIMED SB10E Use and maintenance manual


