manuals.online logo
Brands
  1. Home
  2. •
  3. Brands
  4. •
  5. Bioness
  6. •
  7. Medical Equipment
  8. •
  9. Bioness Ness H200 Product information sheet

Bioness Ness H200 Product information sheet

Other manuals for Ness H200

4

Other Bioness Medical Equipment manuals
Bioness bioventus StimRouter User manual
Bioness

Bioness bioventus StimRouter User manual

Bioness BITS User manual

Bioness

Bioness BITS User manual
Bioness StimRouter User manual

Bioness

Bioness StimRouter User manual

Bioness Vector Elite User manual

Bioness

Bioness Vector Elite User manual
Bioness Vector Elite User manual

Bioness

Bioness Vector Elite User manual
Bioness L300 Go Parts list manual

Bioness

Bioness L300 Go Parts list manual
Bioness NESS L300 Plus User manual

Bioness

Bioness NESS L300 Plus User manual

Bioness StimRouter User manual

Bioness

Bioness StimRouter User manual
Bioness NESS L300 Plus User manual

Bioness

Bioness NESS L300 Plus User manual

Bioness StimRouter Parts list manual

Bioness

Bioness StimRouter Parts list manual
Bioness NESS L300 User manual

Bioness

Bioness NESS L300 User manual

Bioness StimRouter User manual

Bioness

Bioness StimRouter User manual
Bioness L300 Go User manual

Bioness

Bioness L300 Go User manual

Bioness NESS L300 User manual

Bioness

Bioness NESS L300 User manual

Bioness NESS L300 Plus User manual

Bioness

Bioness NESS L300 Plus User manual

Bioness NESS L300 User manual

Bioness

Bioness NESS L300 User manual
Bioness Ness H200 User manual

Bioness

Bioness Ness H200 User manual
Bioness Vector base User manual

Bioness

Bioness Vector base User manual

Bioness StimRouter User manual

Bioness

Bioness StimRouter User manual
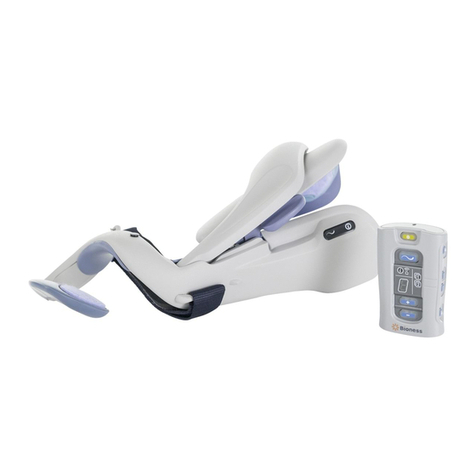
Bioness Ness H200 Parts list manual

Bioness

Bioness Ness H200 Parts list manual

Bioness Vector Elite User manual

Bioness

Bioness Vector Elite User manual

Bioness BITS User manual

Bioness

Bioness BITS User manual

Bioness BITS Owner's manual

Bioness

Bioness BITS Owner's manual

Popular Medical Equipment manuals by other brands

Itamar Medical WatchPAT Operation manual

Itamar Medical

Itamar Medical WatchPAT Operation manual

PROTEOR 1P650 KNEE Assembling and adjustment instructions

PROTEOR

PROTEOR 1P650 KNEE Assembling and adjustment instructions

Liberate Medical VentFree user manual

Liberate Medical

Liberate Medical VentFree user manual

Dicarre DA20 user guide

Dicarre

Dicarre DA20 user guide

Stryker Medical M Series Operation manual

Stryker Medical

Stryker Medical M Series Operation manual

Invacare ScanBed 750 user manual

Invacare

Invacare ScanBed 750 user manual

Getinge Arjohuntleigh Nimbus 3 Professional Instructions for use

Getinge

Getinge Arjohuntleigh Nimbus 3 Professional Instructions for use

Mettler Electronics Sonicator 730 Maintenance manual

Mettler Electronics

Mettler Electronics Sonicator 730 Maintenance manual

Pressalit Care R1100 Mounting instruction

Pressalit Care

Pressalit Care R1100 Mounting instruction

Denas MS DENAS-T operating manual

Denas MS

Denas MS DENAS-T operating manual

bort medical ActiveColor quick guide

bort medical

bort medical ActiveColor quick guide

AccuVein AV400 user manual

AccuVein

AccuVein AV400 user manual

agiliti NP Trio user manual

agiliti

agiliti NP Trio user manual

Rocket Medical Rocket Digital Oocyte Aspiration Pump Service manual

Rocket Medical

Rocket Medical Rocket Digital Oocyte Aspiration Pump Service manual

Monteris Medical Neuroblate Instructions for use

Monteris Medical

Monteris Medical Neuroblate Instructions for use

Otto Block 8E33 7 manual

Otto Block

Otto Block 8E33 7 manual

ADVANCED HOME CARE Helios Guide

ADVANCED HOME CARE

ADVANCED HOME CARE Helios Guide

NeuLog NUL-208 Guide

NeuLog

NeuLog NUL-208 Guide

manuals.online logo
manuals.online logoBrands
  • About & Mission
  • Contact us
  • Privacy Policy
  • Terms and Conditions

Copyright 2025 Manuals.Online. All Rights Reserved.

Connect the System Charger Set to the H200 Wireless Orthosis and the H200 Wireless
Control Unit simultaneously. Charge the H200 Wireless System daily.
Charging the H200 Wireless System
Manufactured by:
Bioness Neuromodulation Ltd.
8 Hanagar St.
Hod Hasharon 4501309
Israel
Worldwide Corporate Office
Bioness Inc.
25103 Rye Canyon Loop
Valencia, CA 91355
Telephone: 800-211-9136 or 661-211-9136
Email: [email protected]
Website: www.bioness.com
User's Reference Card
H200 Wireless Orthosis Displays
System On
Status Light
Flashes Green
Stimulation On
Stim Light
Flashes Yellow
Stimulation Paused
Stim Light
Steady Yellow
Faulty Electrode
Contact
Status Light Flashes Red
Hardware/Software
Error; Charging Error
Status Light Steady Red_
612-00106-001 Rev. D
11/2015
European Authorized Representative
Bioness Europe B.V.
Stationsweg 41
3331 LR Zwijndrecht, The Netherlands
Telephone: +31.78.625.6088
Website: www.bioness.com
Putting on the H200 Wireless Orthosis
3 4 5 621
4
5
6
3
Wet and attach the cloth electrodes.
Position the Orthosis on a stable surface, and put your hand into the spiral end. The Thenar
(with attached electrode) should rest at the base of your thumb.
Position the wrist bridge comfortably on the back of your wrist.
Place your forearm in the Orthosis flexor support.
Close the extensor wing.
Fasten the wrist strap, if appropriate.
2
1
Control Unit Charging Displays
Flashes Yellow Low Battery
Rotating Green Circle Charging
Horizontal Green Line Fully Charged
Orthosis Charging Displays
Status Light Flashes
Yellow Low Battery
Status Light Flashes
Yellow and Green Charging
Status Light Steady
Green Fully Charged
H200 Wireless
Orthosis
H200 Wireless
Control Unit
System
Charger Set
See User’s
Guide
H200 Wireless Control Unit Displays
On/Off Button Flashes Green System is On
Trigger Button Flashes Yellow Rapidly Stimulation is On
Trigger Button is a Steady Yellow Stimulation is Paused
Program 1 Indicator is Green Program 1 Selected
Program 2 Indicator is Green Program 2 Selected
Control Unit Status Indicator is a Steady Red Control Unit Malfunction: Charging Error; Registration
Error; Software Error
RF Communication Indicator Flashes Red RF Communication Error
Operating the NESS H200 Wireless System
1Turn on the system. Press the on/off button.
Test the position of the Orthosis. Press and hold the stimulation test button once to
test the extensor muscles. Release the button and press and hold again to test the flexor
muscles. Repeat as needed.
Select Program 1 or Program 2. Press the Program 1 or Program 2 selection button on
the side of the Control Unit. The selected program indicator will be GREEN: or .
If necessary, adjust the stimulation intensity level. Press the plus or minus
button to increase/decrease stimulation intensity in the Orthosis.
Start a program. Press the trigger button on the Control Unit or the trigger button on
the Orthosis to turn on stimulation. To pause/resume a program, press the trigger button
on the Control Unit or the trigger button on the Orthosis.
Note: Neuroprosthesis Programs cannot be paused. Pressing the trigger button when
stimulation is on initiates the next phase of the program. To turn off stimulation, press the
on/off button.
2
3
4
5
NESS®, NESS H200® Wireless, Bioness, the Bioness Logo® and LiveOn® are registered trademarks of Bioness Inc. in the United States or other countries. | www.bioness.com
15
4
On/Off Button Trigger Button
Intensity Adjustment Buttons
Program 2 Indicator
Program 1 Indicator
RF Communication
Indicator
Control Unit
Status Indicator
Program 1
Selection Button
Program 2
Selection Button
Mute Button
Stimulation Test
Button
3
2
Intensity Level
For a complete list of all contraindications, warnings, adverse reactions, precautions, and care instructions please
review the User’s Guide found at www.bioness.com.
Rx Only (US Only)
© 2015