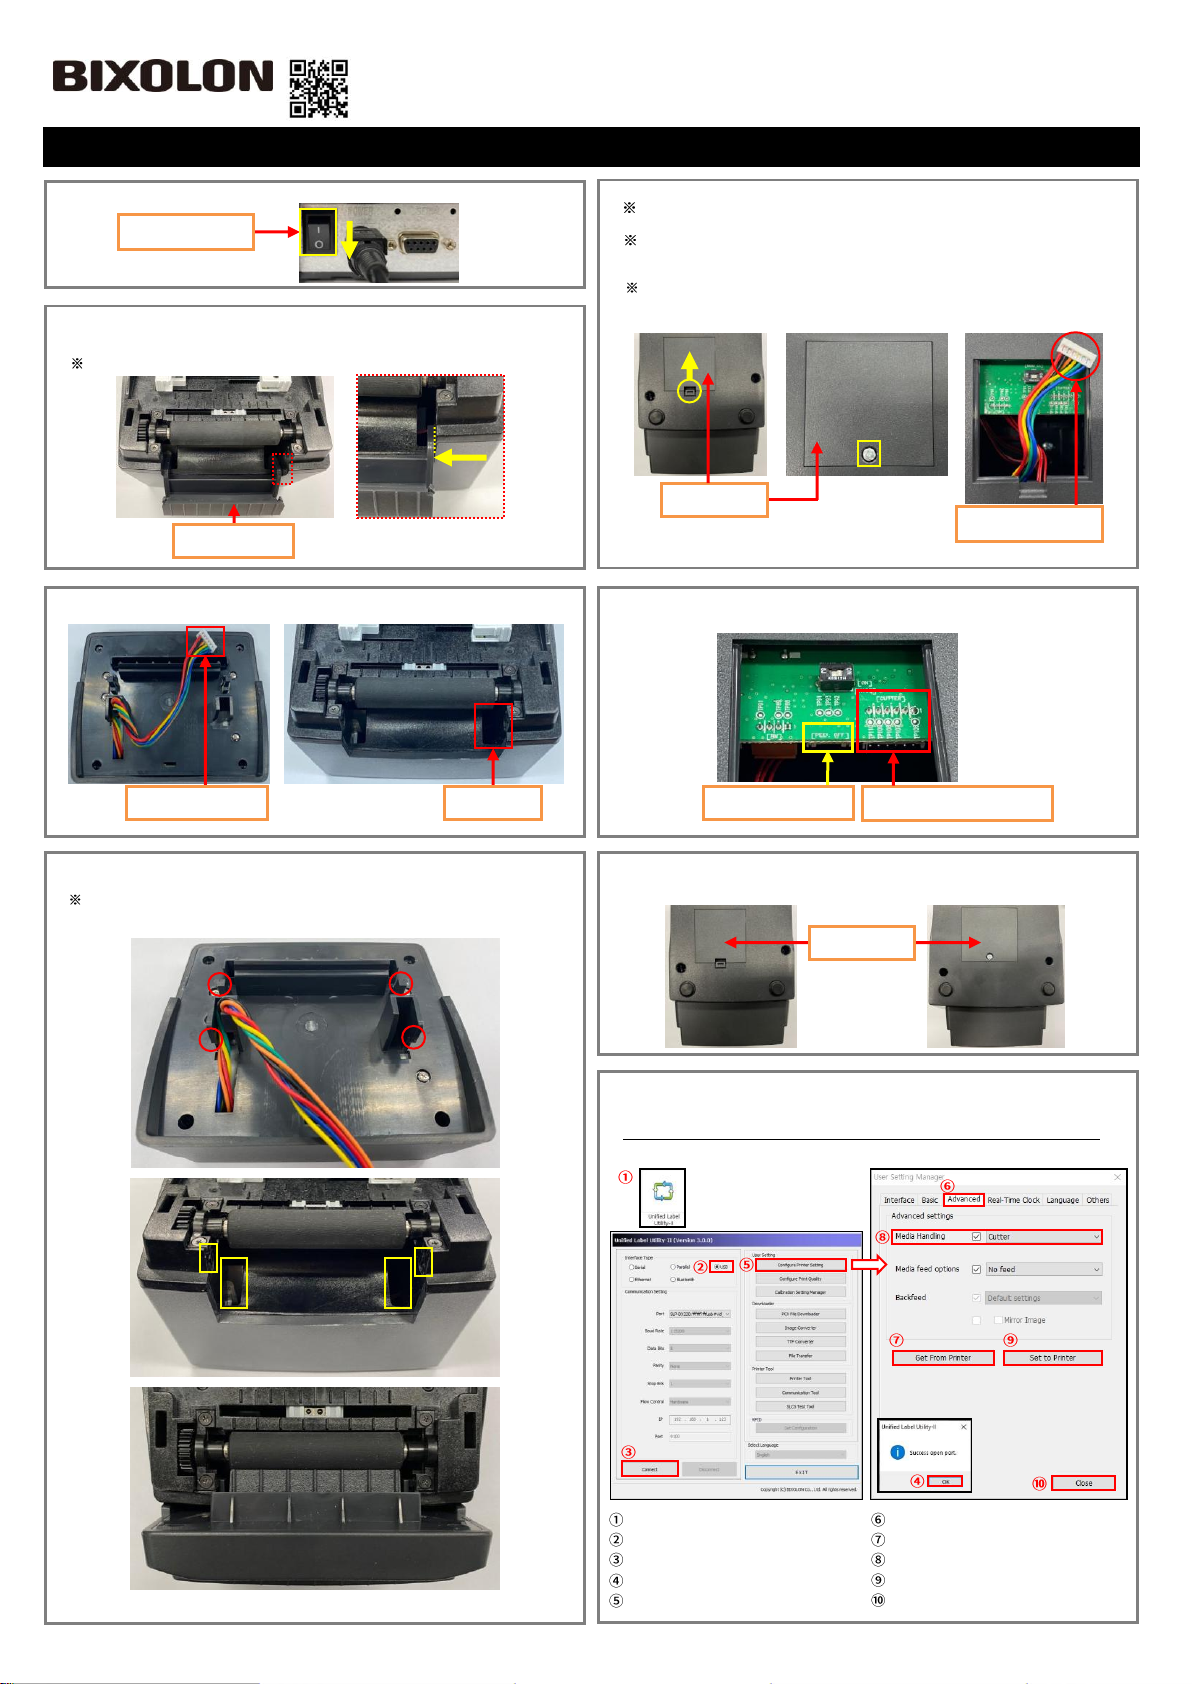
1. Turn the Power Switch Off at the rear of the Printer.
2. Open the printer cover. And Insert tweezers (recommended) into the
Right hole (yellow dotted line) of the Cover STD, then press it inward
(yellow arrow) to disassemble it.
You can also remove it by pressing the left side in the same manner.
3. Insert the Auto Cutter Wire into the Wire Hole.
4. Engage the Hooks (red circles) with the square-shaped sockets
(yellow squares) in the order from top to bottom.
Be careful that the Wire does not get stuck.
5. Place the bottom of the Printer face the front.
SLP-DX22x: Disassemble the Cover DIP by pressing the Hook (Yellow
circle) inward.
SLP-TX22x: After removing one screw (Yellow square) using a screwdriver,
then disassemble the Cover DIP.
Arrange the Auto Cutter Wire so that it looks like the picture below.
Be careful to avoid tangling with other Wires when shaping.
<SLP-DX22x> <SLP-TX22x>
6. Insert the Auto Cutter Wire into the Auto Cutter Connector (red square) in
the correct direction.
7. Reassemble the Cover DIP that was removed in step 5.
<SLP-DX22x> <SLP-TX22x>
8. In order to operate the Auto Cutter, the settings must be changed through the
utility. Access the Bixolon webpage (www.bixolon.com) and download the
Unified Label Utility.
Connect the communication cable (USB) and Turn the Printer power On.
Then, change the settings in the following order.
DX/TX(2inch Model) Series
Launch ‘Unified Label Utility’
‘USB’ Click!
‘Connect’ Click!
‘OK’ Click!
‘Configure Printer Setting’ Click!
‘Advanced’Click!
‘Get From Printer’ Click!
Media Handling ‘Cutter’ Setting!
‘Set to Printer’ Click!
‘Close’ Click!


