manuals.online logo
Brands
  1. Home
  2. •
  3. Brands
  4. •
  5. Black Box
  6. •
  7. Server
  8. •
  9. Black Box 104 User manual

Black Box 104 User manual

Introduction
This Quick Start Guide covers the key points of the
installation for your Terminal Server product. It is intended for
systems administrators familiar with operating systems
covered.
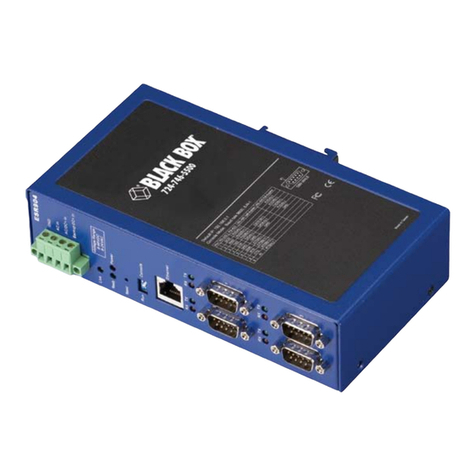
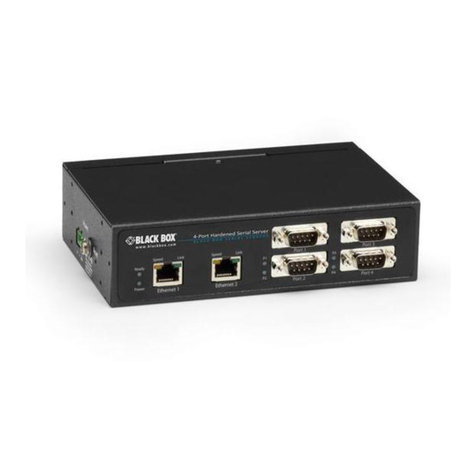
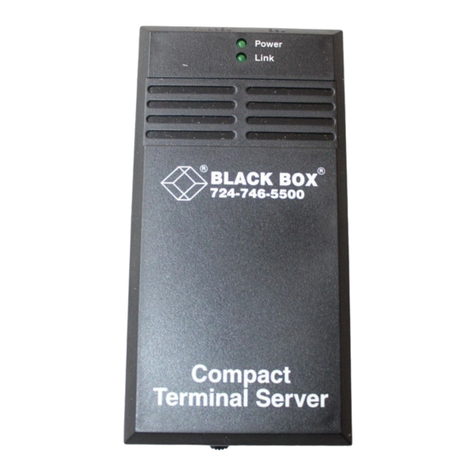
The Terminal Server is a TCP/IP Terminal Server available in
table top form. The table top unit has 2 or 4 RS-232/RS-422
ports that can be used for terminals, modems, printers or other
serial devices. The serial ports are individually numbered.
Connectors and indicators
The functions of these are described in the User and
Administration Guide supplied with this product.
Connecting up the unit and logging
in from a remote host
1. Read the safety manual supplied with this product.
2. Connect the unit to the ethernet.
3. Connect the power cable to the unit.
4. Power up the unit.
5. On a local host, for UNIX type:
arp -s a.b.c.d aa:bb:cc:dd:ee:ff
or for Windows type:
arp -s a.b.c.d aa-bb-cc-dd-ee-ff
replacing a.b.c.d with the unit IP address
and aa:bb:cc:dd:ee:ff with the ethernet
address.
6. From the command prompt, run: telnet a.b.c.d
(This may take a few seconds to complete).
7. At the password prompt press Enter.
8. At the Local > prompt now displayed, type:
set term for supported terminals and press Enter.
9. Type set term <terminal> and then press Enter for the
appropriate terminal type.
You have now connected up and logged into the unit.
Setting the network parameters
1. Press CRTL A for the ADMINISTRATION MENU then
press CRTL P.
2. At the password prompt now displayed, type iolan as the
default password and press Enter.
3. In the administrator password window is now displayed,
use the cursor keys to select Server then press Enter.
The server menu is now displayed.
4. Enter the IP address and host name for the unit. Press
Enter twice to save the changes.
5. Select Reboot from the menu and press Enter.
6. Confirm Reboot and wait for the unit to restart.
Your unit is now set up for operation.
Setting up a printer
This section assumes your printer client is set up for LPD
printing.
1. Power down the unit and attach the serial printer using a
cable specified in the User and Administration Guide.
2. Power up the unit.
3. Log in and select the Administration Mode (using
CTRL A and then CTRL P).
4. Using the cursor keys select the Port option then enter the
number of the serial port you attached the printer to.
5. On the Port Setup Menu, set the parameters in the
Hardware and Flow ctrl to match those of your printer.
6. Enter the print queue filename in the User Name field. and
then press Enter.
7. Set Access to Remote using the spacebar to select the
appropriate action.
8. Set the Local Port field. This is a TCP Port number and for
LPD this should be set to 515.
9. Press Enter twice to save the changes.
10.From the ADMINISTRATION MENU select the Kill
option and enter the serial port number for the printer, then
press Enter.
The port is now setup, you can now send a print job to the unit
to test printing.
Serial ports
Port activity indicators
10/100 BASE-T socket
Network indicator
Power input socket
Power indicator
Front view
Rear view
Note
These instructions assume the unit is attached to the same LAN
as other host machines. Refer to the User and Administration
Guide for other situations. To perform the basic configuration
you will need to know:
• The IP address of the unit
• The ethernet address of the unit
• The host name of the unit
If in doubt please refer to your system administrator.
Notes:
For setting up a unit via a serially attached terminal, refer to the
appropriate section in the User and Administration Guide.
For setting up a unit via BOOTP, refer to the appropriate
section in the User and Administration Guide.
Remote access dial in modem setup
1. Power down the unit and attach the modem using a
suitable cable.
2. Power up the unit.
3. Log in and select the Administration Mode (using
CTRL A and then CTRL P).
4. Using the cursor keys select the Port option then enter the
number of the serial port you attached the printer to.
5. Setup Hardware with Monitor DCD to yes and Flow Ctrl
to match the modem. In the IP address fields, set Src (local
end of PPP connection) and Dst (remote end) addresses.
6. Set Access to Local and Authentication to Host if user has
to be validated. Press Enter twice to save and exit.
7. On the ADMINISTRATION MENU select Access and
press Enter. Now select Remote Site Devicesand press
Enter.
8. Select the entry from the Device type window wherethe
listed items represent the ports (i.e. first item = port1,
second item = port2, etc.), select the port you are attaching
the modem to and press Enter.
9. In the REMOTE SITE DEVICES MENU now displayed.
set the Inactivity timer to an appropriate value in minutes.
10.Set the Config field to the modem’s initialisation
command string. Press Enter twice.
11.From the ADMINISTRATION MENU select Access.
12.In the Access pop-up window now displayed, select
Authentication/Logging and press Enter.
13.In the host AUTHENTICATION AND LOGGING menu
now displayed, go to the Auth Host field enter the IP
address of the authentication host.
14.Change the Success Indication String field and
Failure Indication String field to suit your login
sequence of your authentication hosts. Press Enter twice
to save and exit.
15.In the ADMINISTRATION MENU, select kill and press
Enter.
16.Enter the modem port number and press Enter.
Setup is now complete. A remote user should now attempt to
log in.
102/104 Terminal Server
Quick start guide
Note: If the src is left blank it defaults to the IP address of the
unit.
© Copyright 2002. Black Box Corporation. All rights reserved.
1000ParkDrive∙Lawrence,PA 15055‐1018∙724‐746‐5500∙Fax724‐746‐0746
R1.2
May 2006
102 Terminal Server 41872-R3
104 Terminal Server 41874-R3
CUSTOMER
SUPPORT
INFORMATION
Order toll-free in the U.S 24 hours, 7 A.M. Monday to m idnight Friday: 877-877-BBOX
FREE technical support, 24 hours a day, 7 days a week: Call 724-746-5500 or fa x 724-746-0746
Mail order: Black Box Corporation, 1000 Park Drive, Lawrence, PA 1055-1018
Web site: www.blackbox.com · E-mail [email protected]

This manual suits for next models

1

Other Black Box Server manuals

Black Box LES1108A User manual

Black Box

Black Box LES1108A User manual

Black Box LWS401A User manual

Black Box

Black Box LWS401A User manual

Black Box LWS401A User manual

Black Box

Black Box LWS401A User manual

Black Box ServView II User manual

Black Box

Black Box ServView II User manual

Black Box LES1102A User manual

Black Box

Black Box LES1102A User manual

Black Box LRA 2900 User manual

Black Box

Black Box LRA 2900 User manual

Black Box leS1116a User manual

Black Box

Black Box leS1116a User manual

Black Box LES1508A User manual

Black Box

Black Box LES1508A User manual

Black Box Advanced Console Server User manual

Black Box

Black Box Advanced Console Server User manual

Black Box LS50116-R3 User manual

Black Box

Black Box LS50116-R3 User manual

Black Box Terminal Server User manual

Black Box

Black Box Terminal Server User manual

Black Box LES1202A User manual

Black Box

Black Box LES1202A User manual

Black Box LES290A User manual

Black Box

Black Box LES290A User manual

Black Box ServShield RM470A-R2 User manual

Black Box

Black Box ServShield RM470A-R2 User manual

Black Box LWS300A User manual

Black Box

Black Box LWS300A User manual

Black Box LES301A-KIT User manual

Black Box

Black Box LES301A-KIT User manual

Black Box LS1016A User manual

Black Box

Black Box LS1016A User manual

Black Box iCOMPEL ICC LG WEBOS 3 User manual

Black Box

Black Box iCOMPEL ICC LG WEBOS 3 User manual

Black Box LEU9070 User manual

Black Box

Black Box LEU9070 User manual

Black Box LWS401A User manual

Black Box

Black Box LWS401A User manual

Black Box LRA502A-ET-R5 User manual

Black Box

Black Box LRA502A-ET-R5 User manual

Black Box LS4103A User manual

Black Box

Black Box LS4103A User manual

Black Box LES1208A-R2 User manual

Black Box

Black Box LES1208A-R2 User manual

Black Box RAS-PutIn User manual

Black Box

Black Box RAS-PutIn User manual

Popular Server manuals by other brands

Dell EMC PowerEdge R750 Installation and service manual

Dell

Dell EMC PowerEdge R750 Installation and service manual

HP ProLiant BL e-Class Maintenance and service guide

HP

HP ProLiant BL e-Class Maintenance and service guide

Sun Microsystems Ultra Enterprise 450 Setup and rackmounting guide

Sun Microsystems

Sun Microsystems Ultra Enterprise 450 Setup and rackmounting guide

ADLINK Technology cPCI-6530BLV user manual

ADLINK Technology

ADLINK Technology cPCI-6530BLV user manual

NEC NECCare Gold Express5800/320Fd Guide

NEC

NEC NECCare Gold Express5800/320Fd Guide

Dell poweredge VRTX owner's manual

Dell

Dell poweredge VRTX owner's manual

HP t5300 - Thin Client instructions

HP

HP t5300 - Thin Client instructions

Fujitsu PRIMERGY CX420 S1 operating manual

Fujitsu

Fujitsu PRIMERGY CX420 S1 operating manual

Intel SR1630GP - Server System - 0 MB RAM Service guide

Intel

Intel SR1630GP - Server System - 0 MB RAM Service guide

Fujitsu PRIMERGY RX800 S2 operating manual

Fujitsu

Fujitsu PRIMERGY RX800 S2 operating manual

Digital Equipment Prioris XL 6000 Series Service maintenance manual

Digital Equipment

Digital Equipment Prioris XL 6000 Series Service maintenance manual

Lenovo thinksystem SR630 quick start

Lenovo

Lenovo thinksystem SR630 quick start

HP Cluster Platform Express v2010 manual

HP

HP Cluster Platform Express v2010 manual

TYAN Transport GT24 (B2932) Service manual

TYAN

TYAN Transport GT24 (B2932) Service manual

IBM System x3500 M2 Type 7839 Installation and user guide

IBM

IBM System x3500 M2 Type 7839 Installation and user guide

Snom 4S Media Server Administrator's manual

Snom

Snom 4S Media Server Administrator's manual

Avaya 1000M Installation and commissioning guide

Avaya

Avaya 1000M Installation and commissioning guide

Genesys SIP Feature Server user guide

Genesys

Genesys SIP Feature Server user guide

manuals.online logo
manuals.online logoBrands
  • About & Mission
  • Contact us
  • Privacy Policy
  • Terms and Conditions

Copyright 2025 Manuals.Online. All Rights Reserved.