manuals.online logo
Brands
  1. Home
  2. •
  3. Brands
  4. •
  5. Black Horse Model
  6. •
  7. Toy
  8. •
  9. Black Horse Model RENEGADE User manual

Black Horse Model RENEGADE User manual

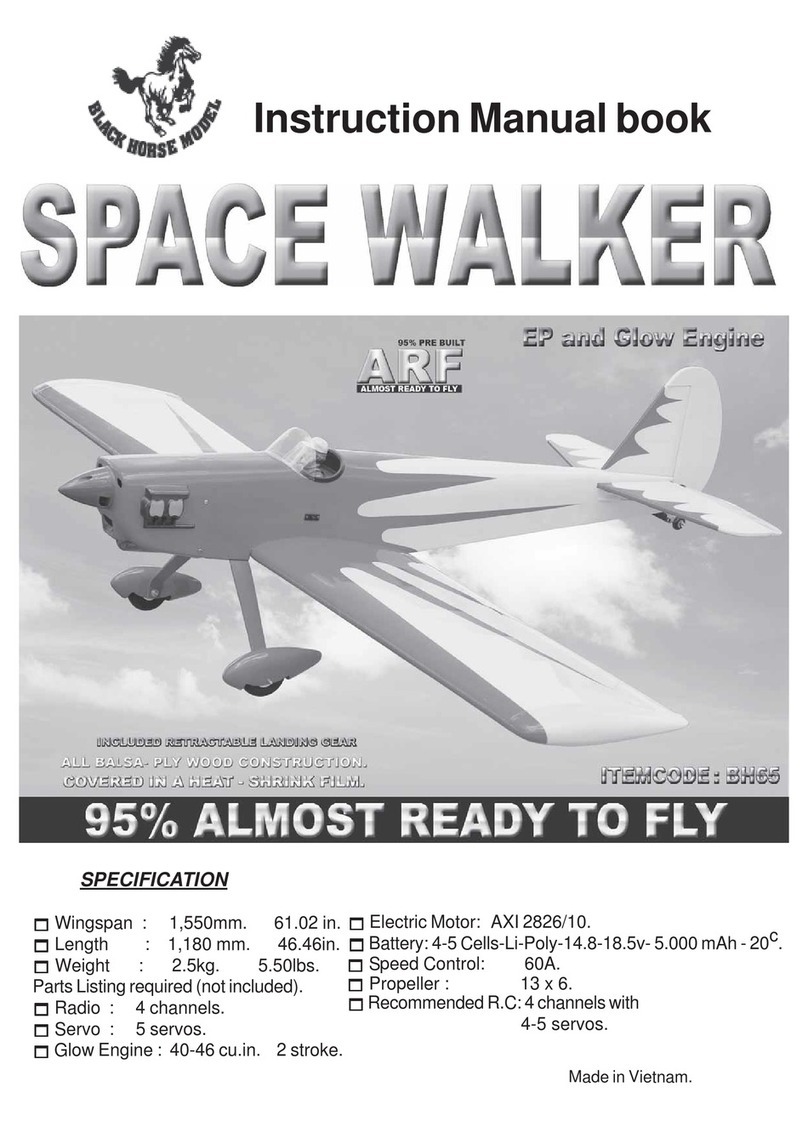
Instruction Manual book
SPECIFICATION
MadeinVietnam.


Wingspan : 1,580mm. 62.20 in.


Length : 1,255 mm. 49.41in.


Weight : 2.5kg. 5.50lbs.
PartsListingrequired(notincluded).


Radio : 4 channels.


Servo : 4-5 servos.


Glow Engine : 46-55 cu.in. 2 stroke.


Propeller : 12 x 6.


Speed Control: 60A.


ElectricMotor: BL2826/06OUTRUNER.


Battery:4Cells-Li-Poly-14.8-5.000mAh.
2
RENEGADE - ITEM CODE:BH66-A Instruction Manual
This instruction manual is designed to help you build a great flying aeroplane. Please read this
manual thoroughly before starting assembly of your RENEGADE. Use the parts listing below to
identify all parts.
WARNING.
Please be aware that this aeroplane is not a toy and if assembled or used incorrectly it is
capable of causing injury to people or property. WHEN YOU FLY THIS AEROPLANE YOU
ASSUME ALL RISK & RESPONSIBILITY.
IfyouareinexperiencedwithbasicR/CflightwestronglyrecommendyoucontactyourR/Csupplier
and join your local R/C Model Flying Club. R/C Model Flying Clubs offer a variety of training
proceduresdesignedtohelpthenew pilotonhiswaytosuccessfulR/C flight.Theywillalso beable
to advise on any insurance and safety regulations that may apply.
TOOLS & SUPPLIES NEEDED.
Thick cyanoacrylate glue.
30 minute epoxy.
5 minute epoxy.
Hand or electric drill.
Assorted drill bits.
Modellingknife.
Straight edge ruler.
2mm ball driver.
Phillips head screwdriver.
220 grit sandpaper.
90° square or builder’s triangle.
Wire cutters.
Masking tape & T-pins.
Thread-lock.
Paper towels.
Some more parts.
HARDWAREPACK
COWLING.
Landinggear.....
Toavoid scratching yournew airplane,do not
unwrap the pieces until they are needed for
assembly. Cover your workbench with an old
towel or brown paper, both to protect the air-
craftand toprotect thetable.Keepacoupleof
jars or bowls handy to hold the small parts af-
ter you open the bag.
Pleasetrialfitalltheparts. Makesureyouhave
the correct parts and that they fit and are
alignedproperly beforegluing!Thiswillassure
proper assembly. RENEGADE ARF is hand
made from natural materials, every plane is
unique and minor adjustments may have to
be made. However, you should find the fit su-
perior and assembly simple.
The painted and plastic parts used in this kit
are fuel proof. However, they are not tolerant
of many harsh chemicals including the follow-
ing:paintthinner,C/Aglueaccelerator,C/Aglue
debonderandacetone. Donotletthesechemi-
cals come in contact with the colors on the
covering and the plastic parts.
PARTS LISTING.
FUSELAGE ASSEMBLY
(1) Fuselage.
WING ASSEMBLY
(1) Right wing half with pre-installed
aileron.
(1) Left wing half with pre-installed
aileron.
Tail section assembly
(1) Vertical stabilizer with pre-
installedrudder.
(1) Horizontal stabilizer with pre-
installedelevator halves.
SUGGESTION.
NOTE.
3
RENEGADE - ITEM CODE:BH66-A Instruction Manual
+ This is not a toy
+ Be sure that no other flyers are using your
radio frequency.
+ Do not smoke near fuel
+ Store fuel in a cool, dry place, away from
children and pets.
+ Wear safety glasses.
+Theglowplug clipmustbesecurely attached
to the glow plug.
+ Do not flip the propeller with your fingers.
+ Keep loose clothing and wires away from
thepropeller.
+ Do not start the engine if people are near.
Donot standinlinewiththesideof thepropel-
ler.
+ Make engine adjustments from behind the
propeller only. Do not reach around the spin-
ningpropeller.
SAFETY PRECAUTION.
REPLACEMENT LARGE PARTS
B. Wing panel (B1&B2).
C. Fuselage.
A.Cowling.
D . Horizontal stabilizer.
F. Aluminium wing dihedral brace.
E. Vertical stabilizer
REPLACEMENT SMALL PARTS
 1. Install the rubber grommets and brass
eyelets onto the aileron servo.
G. Decal sheet.
A.
B1.
C.
B2.
D.
E.
F.
G.
INSTALLING THEAILERON SERVOS.
5.Spinner.
6. Fuel Tank.
4. Tai gear
2. Wheels.
1.Aluminium landing gear.
3. Wheel pants.
5x35mm.
3x15mm.
3x12mm.
3x15mm.
6a
6b.
7. Plastic - enginemount.
Cutthecovering
awayfromtheslot.
Bottom side
Aileron
8.Electric motor ply of wood 1
9.Electricmotor plyof wood2.
4
RENEGADE - ITEM CODE:BH66-A Instruction Manual
2.Using a modelingknife, removethecov-
ering servo tray.
3. Drill 1,5mm pilot holes through the block
of wood for each of the four mounting screws
provided with the servo. Install servo into ai-
leron servo tray as same as picture below.
4. Using the thread as a guide and using
masking tape, tape the servo lead to the end
of the thread: carefully pull the thread out.
When you have pulled the servo lead out, re-
move the masking tape and the servo lead
from the thread.
5. Instal servo tray with aileron servo into
the wing as same as picture below.
Assemble then apply drops of thin
C/A to center of hinge,on both sides.
Bottom side
Secure
Thread
Temporary pin to
keep hinge centered.
Remove covering
Servo tray
Electric wire
5
RENEGADE - ITEM CODE:BH66-A Instruction Manual
INSTALLING THEAILERON CONTROLHORN.
1. Using a ruler & pen to draw a straight
line as below picture.
Installaileroncontrolhornassame
aspicturebelow.
Controlhornof Aileron
2x16mm.
Markline.
3. Drill through 1.5mm (diameter) the ai-
leron using the control horn as a guide and
screw the control horn in place.
2. Locate nylon control horn, nylon con-
trol horn backplates .
Drilla hole
1.5mmdiameter.
Secure.
4. Install control horn as same as picture
below.
Repeat the procedure for the other wing
half.
2 x 10 mm.
Secure
Bottom side
 1. Working with the aileron linkage for
now, thread one clevis onto one of the
threaded wires. M2locknut.
M2clevis.
Snapkeeper.
INSTALLING THE AILERON
LINKAGES.
6
RENEGADE - ITEM CODE:BH66-A Instruction Manual
3. Plug the aileron servo into the receiver
andcentertheservo. Installtheservoarmonto
the servo. The servo arm should be perpen-
dicular to the servo and point toward the mid-
dle of the wing.
4. Locate one nylon servo arm, and using
wire cutters,remove all but one of the arms.
Using a 2mm drill bit, enlarge the third hole
out from the center of the arm to accommo-
date the aileron pushrod wire.
5.Using pliers, carefullymake a90degree
bend down at the mark made. Cut off the ex-
cess wire, leaving about 4mm beyond the
bend.
6.Insertthe90degree bend down through
the hole in the servo arm. Install one nylon
snap keeper over the wire to secure it to the
arm. Installthe servoarm retainingscrew and
remove the masking tape from the aileron.
Bendand
cut after
Bottom side
Cut
2. Attach the clevis to the outer hole in the
control horn.
4x12mm
7
RENEGADE - ITEM CODE:BH66-A Instruction Manual
Repeat the procedure for the other wing
half.
1. OPTION 1: ELECTRIC MOTOR.
Secure
3 x 15mm 3x 15mm
Epoxyglue
C/Aglue
THERE ARE TWO OPTIONS:
1. ELECTRIC MOTOR
2. ENGINE MOUNT.
INSTALLING THE ENGINE MOUNT.
Secure.
8
RENEGADE - ITEM CODE:BH66-A Instruction Manual
When the stopper assembly is installed
in the tank, the top of the vent tube should
rest just below the top surface of the tank.
It should not touch the top of the tank.
 5. Test fit the stopper assembly into the
tank. It may be necessary to remove some of
the flashing around the tank opening using
amodeling knife. Ifflashing is present, make
sure none of it falls into the tank.
INSTALLING THE STOPPER ASSEMBLY
FUEL TANK.
1. The stopper has been pre-assembled at
the factory.
2.Usinga modelingknife, cutone lengthof
siliconfuelline (thelength ofsilicon fuellineis
calculated by how the weighted clunk should
restabout 8mmaway fromtherearofthetank
andmove freelyinside thetank). Connectone
end of the line to the weighted clunk and the
otherend tothenylonpickuptubein thestop-
per.
4. Carefullybend thethird nylontube down
ata 45degreeangle (usingacigarettelighter).
This tubewill bevent tubeto thefuelingvalve.
3. Carefullybend thesecond nylontube up
ata 45degreeangle (usingacigarettelighter).
This tube will be the vent tube to the muffler.
silicon tube not included.
2. OPTION 2: ENGINE MOUNT.
4 x 25mm
ESC
9
RENEGADE - ITEM CODE:BH66-A Instruction Manual
Do not secure the tank into place perma-
nently until after balancing the airplane.
You may need to remove the tank to mount
the battery in the fuel tank compartment.
6. When satisfied with the alignment of the
stopper assembly tighten the 3mm x 20mm
machine screw until the rubber stopper ex-
pandsand sealsthetank opening.Do notover
tighten the assembly as this could cause the
tank to split.
 8. Feed three lines through the fuel tank
compartment and through the pre-drilled hole
in the firewall. Pull the lines out from behind
the engine, while guiding the fuel tank into
place. Push the fuel tank as far forward as
possible,the frontofthetankshould justabout
touch the back of the firewall.
7. Using a modeling knife, cut 3 lengths of
fuel line 150mm long. Connect 2 lines to the 2
vent tubes and 1 line to the fuel pickup tube in
the stopper.
Blow through one of the lines to ensure
the fuel lines have not become kinked inside
the fuel tank compartment. Air should flow
througheasily.
9. To secure the fuel tank in place, apply a
bead of silicon sealer to the forward area of
thetank, whereit exitsthefuselage behindthe
enginemountingbox andtotherearof thetank
at the forward bulkhead.
Secure
Locate the long piece of wire used for the
throttlepushrod. Oneendofthewire hasbeen
pre-bend in to a “Z” bend at the factory. This
“Z” bend should be inserted into the throttle
armofthe enginewhentheengine isfitted onto
theengine mount.Fittheengineto theengine
mount using the screws provided.
INSTALLING THE ENGINE.
Fueltank
10
RENEGADE - ITEM CODE:BH66-A Instruction Manual
100mm
Markpoint
Drill a
hole 2mm
Secure
1. Install one adjustable metal connector
through the third hole out from the center of
one servo arm, enlarge the hole in the servo
arm using a 2mm drill bit to accommodate the
servo connector. Remove the excess mate-
rial from the arm.
INSTALLING THE THROTTLE SERVO.
Pushrod wire
Pushrod wire
3 x 20mm
Right side
11
RENEGADE - ITEM CODE:BH66-A Instruction Manual
After installing the adjustable metal con-
nector apply a small drop of thin C/A to
the bottom nut. This will prevent the con-
nector from loosening during flight.
1. Slide the fiberglass cowl over the en-
gineand lineup thebackedgeofthe cowlwith
the marks you made on the fuselage.
COWLING.
Bottom side
Trim and cut
Throttle Pushrod.
Throttle servo
Throttle servo
Secure
Cut
12
RENEGADE - ITEM CODE:BH66-A Instruction Manual
2. While keeping the back edge of the
cowl flush with the marks, align the front of
thecowlwiththecrankshaftofthe engine. The
front of the cowl should be positioned so the
crankshaft is in nearly the middle of the cowl
opening. Hold the cowl firmly in place using
pieces of masking tape.
3. Slide the cowl back over the engine
andsecure itin placeusing fourwood screws.
See picture below.
4. Installthemufflerandmuffler extension
onto the engine and make the cutout in the
cowl for muffler clearance. Connect the fuel
and pressure lines to the carburetor, muffler
andfuel fillervalve.
Right side
Bottom side
Front view
Installthe spinnerbackplate,propellerand
spinner cone. The spinner cone is held in
place using two 3mm x 15mm wood screws.
INSTALLING THE SPINNER.
Secure
3 x 12mm
Right side
Machine screw.
3 x 15mm
13
RENEGADE - ITEM CODE:BH66-A Instruction Manual
1)Assembleand mountingthewheel pants
as shown in the following pictures.
PARTSREQUIRED
MAIN GEAR INSTALATION. 2) Using the hardware provided, mount
the main landing gear to the fuselage.
Secure
3) A drop of C/A glue on the wheel collar
screws will help keep them from coming lose
duringoperation.
Repeat the process for the other wheel.
5x 35mm 5x 35mm
5x 35mm
Secure.
14
RENEGADE - ITEM CODE:BH66-A Instruction Manual
Assemble then apply drops of thin
C/A to center of hinge,on both sides.
1. Draw a center line onto the horizontal
stabilizer. Then slide the horizontal into the
fuselage.
HORIZONTAL STABILIZER INSTALLATION.
See pictures below:
2. Mount the servo to the tray using the
mountingscrews providedwithyourradiosys-
tem.
1. Install the rubber grommets and brass
colletsinto theelevatorservo.Testfittheservo
into the servo tray.
Elevator servo.
Elevator servo.
Top side
Bottom side
Cutthecovering
awayfromtheslot.
Temporary pin to
keep hinge centered.
Bottom side.
ELEVATOR INSTALLATION.
SERVO INSTALLATION.
15
RENEGADE - ITEM CODE:BH66-A Instruction Manual
4. Remove the stabilizer. Using the lines
youjustdrew asa guide,carefully removethe
coveringfrom betweenthem usingamodeling
knife.
When cutting through the cover-
ingto removeit, cut withonly enough pres-
sure to only cut through the covering it’s
self. Cutting into the balsa structure may
weaken it. This could lead to possible fail-
ure during flight
2 Using a modeling knife, cut away the
covering from the fuselage for the stabilizer
and remove it.
See pictures below:
Center line
Remove covering
3. Markthe shapeof theverticalon theleft
and right sides onto the horizontal stabilizer
using a felt-tip pen
Remove covering
Markline
5. When you are sure that everything is
aligned correctly, mix up a generous amount
of 30 minute epoxy. Apply a thin layer to the
topand bottomofthestabilizermountingarea
and to the stabilizer mounting platform sides
inthefuselage.Slidethestabilizerin placeand
re-align. Double check all of your measure-
ments one more time before the epoxy cures.
Remove any excess epoxy using a paper
towel and rubbing alcohol and hold the stabi-
lizer in place with T-pins or masking tape.
Epoxyglue Left side
Check to mark sure the wing and stabi-
lizer are paralell. If they are not, lightly sand
theopening inthefuselageforthe stabilizer
until the stabilizer is paralell to the wing.
16
RENEGADE - ITEM CODE:BH66-A Instruction Manual
Control horn
of elevator.
 Elevatorpushrod installas sameas theway
of aileron pushrod.
Elevator control horn install as same as the
way of aileron control horn. Please see pic-
tures below.
ELEVATOR CONTROL HORN INSTALLA-
TION.
Control horn of elevator.
2x12mm
6.After the epoxy has fully cured, remove
the masking tape or T-pins used to hold the
stabilizer in place and carefully inspect the
glue joints. Use more epoxy to fill in any
gaps that were not filled previously and
clean up the excess using a paper towel and
rubbingalcohol.
C/Aglue
Epoxyglue
1) Drill through1.5mm (diameter) the el-
evator using the control horn as a guide and
screw the control horn in place.
2) Install control horn as same as picture
below.
M2
M2 lock nut
Secure.
Markpoint and
drill 1.5mm.
ELEVATOR PUSHROD INSTALLATION.
17
RENEGADE - ITEM CODE:BH66-A Instruction Manual
Elevator
pushrod
Elevator
pushrod
Bottom side
Elevator pushrod.
bendand
cut after.
Cut.
Rudder servo install as same as method of
elevator servo. See picture below:
RUDDER SERVO INSTALLATION.
Snapkeeper.
Rudder servo.
18
RENEGADE - ITEM CODE:BH66-A Instruction Manual
5. Slide the vertical stabilizer back in
place. Using a triangle, check to ensure that
thevertical stabilizerisaligned 90ºto thehori-
zontal stabilizer.
90º Vertical
Stabilizer.
Horizontal
Stabilizer.
Temporary pin to
keep hinge centered.
Assemble then apply drops of thin
C/A to center of hinge,on both sides.
1. Slide the rudder into the fuselage as
same as picture below.
2. While holding the vertical stabilizer
firmly in place, use a pen and draw a line on
each side of the vertical stabilizer where it
meets the top of the fuselage.
3. Remove the stabilizer. Using a model-
ing knife, remove the covering from below the
linesyou drew. Also removethe coveringfrom
the bottom edge of the stabilizer.
Remove covering
Rudder servo.
See picture below:
Cutthecovering
awayfromtheslot.
VERTICAL INSTALLATION.
Control clasp.
Markline
19
RENEGADE - ITEM CODE:BH66-A Instruction Manual
6) When you are sure that everything is a
aligned correctly, mix up a generous amount
of 30 minute epoxy. Apply a thin layer to the
slot in the mounting platform and to the verti-
cal stabilizer mounting area. Apply epoxy to
the lower rudder hinge. Set the stabilizer in
place and re-align. Double check all of your
measurements once more before the epoxy
cures. Remove any excess epoxy using a
paper towel and rubbing alcohol and hold the
stabilizerin placewithT-pins ormaskingtape.
Allow the epoxy to fully cure before proceed-
ing.


1. Set the tail wheel assembly in place
on the plywood plate. The pivot point of the
tail wheel wire should be even with the rud-
derhingelineand thetailwheel bracketshould
be centered on the plywood plate.


2. Using a pen, mark the locations of the
two mounting screws. Remove the tail wheel
bracket and drill 1mm pilot holes at the loca-
tions marked.
MOUNTING THE TAIL WHEEL
BRACKET.
3x12mm.
Secure
Markpoint
Epoxyglue
C/Aglue
20
RENEGADE - ITEM CODE:BH66-A Instruction Manual
Rudder control horn install as same as the
way of aileron control horn. Please see pic-
tures below.
Drill 1.5mm diameter a hole of the mounting
rudder control horn on to the rudder.
RUDDER CONTROL HORN INSTALLA-
TION.
Left side
Right side
C/Aglue
C/Aglue
ControlhornofRudder.
Markpoint
2x12mm

Other Black Horse Model Toy manuals

Black Horse Model BH180 Owner's manual

Black Horse Model

Black Horse Model BH180 Owner's manual

Black Horse Model Blade BH 70 Owner's manual

Black Horse Model

Black Horse Model Blade BH 70 Owner's manual

Black Horse Model BH169 User manual

Black Horse Model

Black Horse Model BH169 User manual

Black Horse Model L-39 Albatros Owner's manual

Black Horse Model

Black Horse Model L-39 Albatros Owner's manual

Black Horse Model JU87-STUKA Owner's manual

Black Horse Model

Black Horse Model JU87-STUKA Owner's manual

Black Horse Model SUPER DECATHLON Owner's manual

Black Horse Model

Black Horse Model SUPER DECATHLON Owner's manual

Black Horse Model YAK 54 Owner's manual

Black Horse Model

Black Horse Model YAK 54 Owner's manual

Black Horse Model Blade BH 70 Owner's manual

Black Horse Model

Black Horse Model Blade BH 70 Owner's manual

Black Horse Model P47 Thunderbolt Owner's manual

Black Horse Model

Black Horse Model P47 Thunderbolt Owner's manual

Black Horse Model Spitfire 40 User manual

Black Horse Model

Black Horse Model Spitfire 40 User manual

Black Horse Model P-36A Hawk User manual

Black Horse Model

Black Horse Model P-36A Hawk User manual

Black Horse Model MESSERSCHMITT BF-109E Owner's manual

Black Horse Model

Black Horse Model MESSERSCHMITT BF-109E Owner's manual

Black Horse Model Sea Futy Owner's manual

Black Horse Model

Black Horse Model Sea Futy Owner's manual

Black Horse Model Excel 2000 Owner's manual

Black Horse Model

Black Horse Model Excel 2000 Owner's manual

Black Horse Model F4U CORSAIR Owner's manual

Black Horse Model

Black Horse Model F4U CORSAIR Owner's manual

Black Horse Model SPITFIRE MX Owner's manual

Black Horse Model

Black Horse Model SPITFIRE MX Owner's manual

Black Horse Model PIPER J-3 CUB Owner's manual

Black Horse Model

Black Horse Model PIPER J-3 CUB Owner's manual

Black Horse Model BH129 User manual

Black Horse Model

Black Horse Model BH129 User manual

Black Horse Model L-39 Albatros Owner's manual

Black Horse Model

Black Horse Model L-39 Albatros Owner's manual

Black Horse Model SU-26M Owner's manual

Black Horse Model

Black Horse Model SU-26M Owner's manual

Black Horse Model Space Walker BH65 Owner's manual

Black Horse Model

Black Horse Model Space Walker BH65 Owner's manual

Black Horse Model Travel Air BH.06 Owner's manual

Black Horse Model

Black Horse Model Travel Air BH.06 Owner's manual

Black Horse Model YAK 54 Owner's manual

Black Horse Model

Black Horse Model YAK 54 Owner's manual

Black Horse Model RYAN BH 72 User manual

Black Horse Model

Black Horse Model RYAN BH 72 User manual

Popular Toy manuals by other brands

The Learning Journey Techno Tiles Pastel Castle instruction manual

The Learning Journey

The Learning Journey Techno Tiles Pastel Castle instruction manual

Eduard 32 934 quick start guide

Eduard

Eduard 32 934 quick start guide

CYmodel Pt-19 instruction manual

CYmodel

CYmodel Pt-19 instruction manual

Carrera RC Super Mario Flying Cape Mario Assembly and operating instructions

Carrera RC

Carrera RC Super Mario Flying Cape Mario Assembly and operating instructions

Mattel JURASSIC WORLD JEEP WRANGLER RAPTOR ATTACK... instructions

Mattel

Mattel JURASSIC WORLD JEEP WRANGLER RAPTOR ATTACK... instructions

Aircraft Modelers Research Giant Stick 85 user manual

Aircraft Modelers Research

Aircraft Modelers Research Giant Stick 85 user manual

Eduard 36 208 manual

Eduard

Eduard 36 208 manual

PIKO ELEKTROLOKOMOTIVE BR 147 Instructions for use

PIKO

PIKO ELEKTROLOKOMOTIVE BR 147 Instructions for use

ROBBE SCHLUTER Nova Cuatro manual

ROBBE SCHLUTER

ROBBE SCHLUTER Nova Cuatro manual

Italeri XB-70 Valkyrie 1282 Assembly instructions

Italeri

Italeri XB-70 Valkyrie 1282 Assembly instructions

Bachmann Williams E7A instructions

Bachmann

Bachmann Williams E7A instructions

E.T.T. McTrack Lightning Refrence Manual

E.T.T.

E.T.T. McTrack Lightning Refrence Manual

Eduard Sd.Kfz 10/4 with Flak 30 quick start guide

Eduard

Eduard Sd.Kfz 10/4 with Flak 30 quick start guide

PARKZONE Vapor BNF instruction manual

PARKZONE

PARKZONE Vapor BNF instruction manual

REVELL 4763-0389 instructions

REVELL

REVELL 4763-0389 instructions

Hasbro MARVEL AVENGERS ENDGAME LEGENDS Series manual

Hasbro

Hasbro MARVEL AVENGERS ENDGAME LEGENDS Series manual

Eduard Su-2 exterior quick start guide

Eduard

Eduard Su-2 exterior quick start guide

Sparc Nitewatch owner's manual

Sparc

Sparc Nitewatch owner's manual

manuals.online logo
manuals.online logoBrands
  • About & Mission
  • Contact us
  • Privacy Policy
  • Terms and Conditions

Copyright 2025 Manuals.Online. All Rights Reserved.