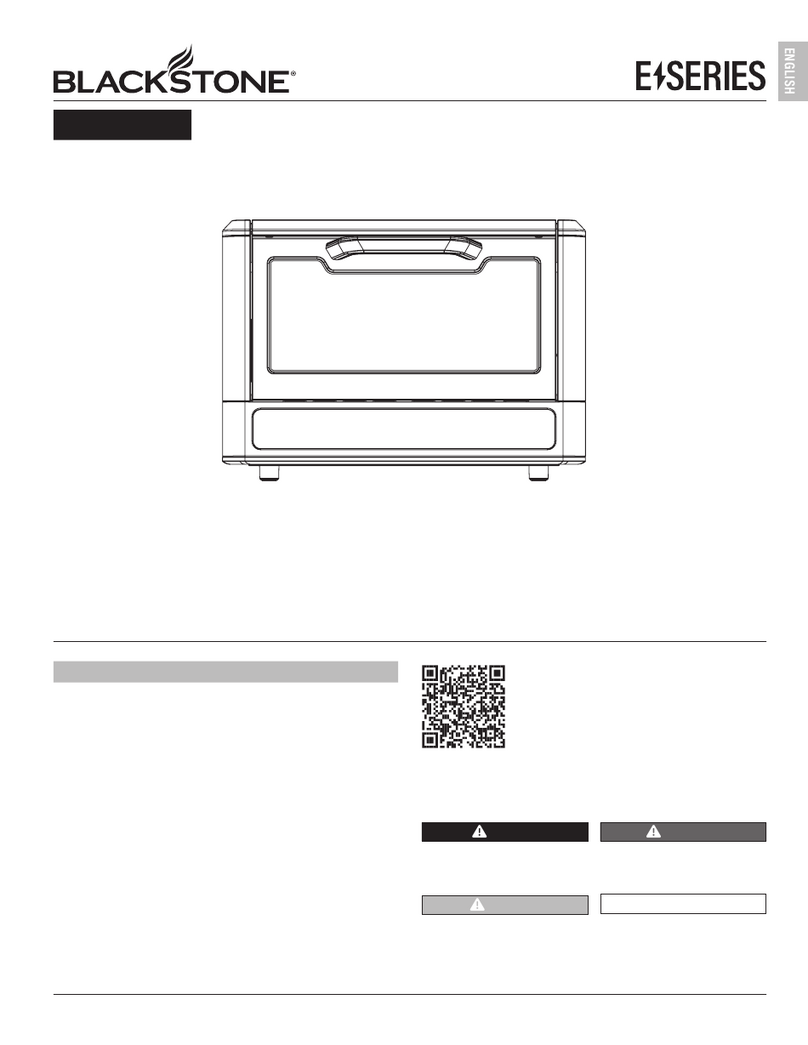
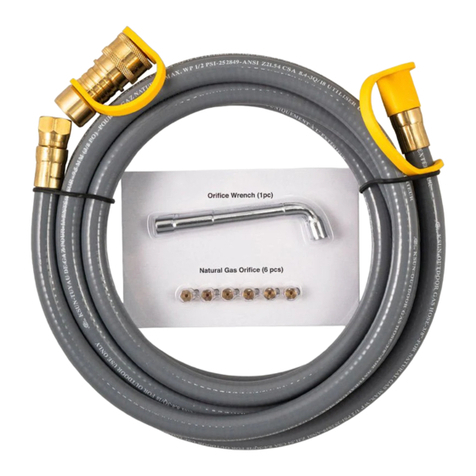
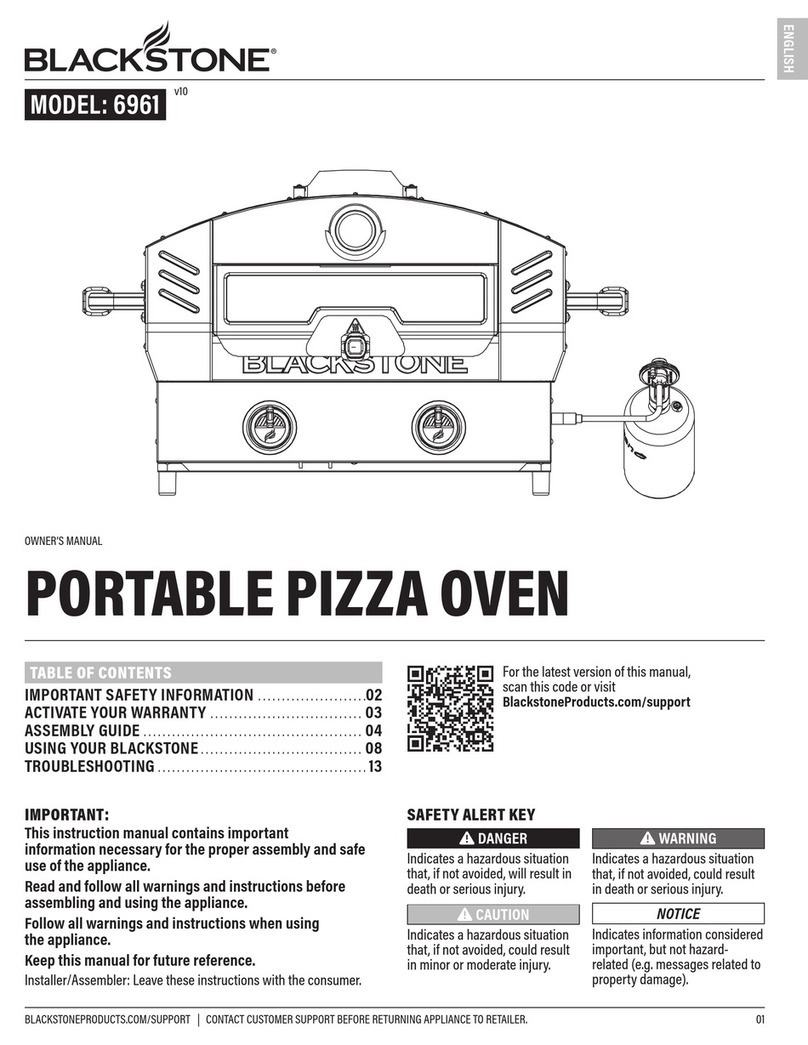
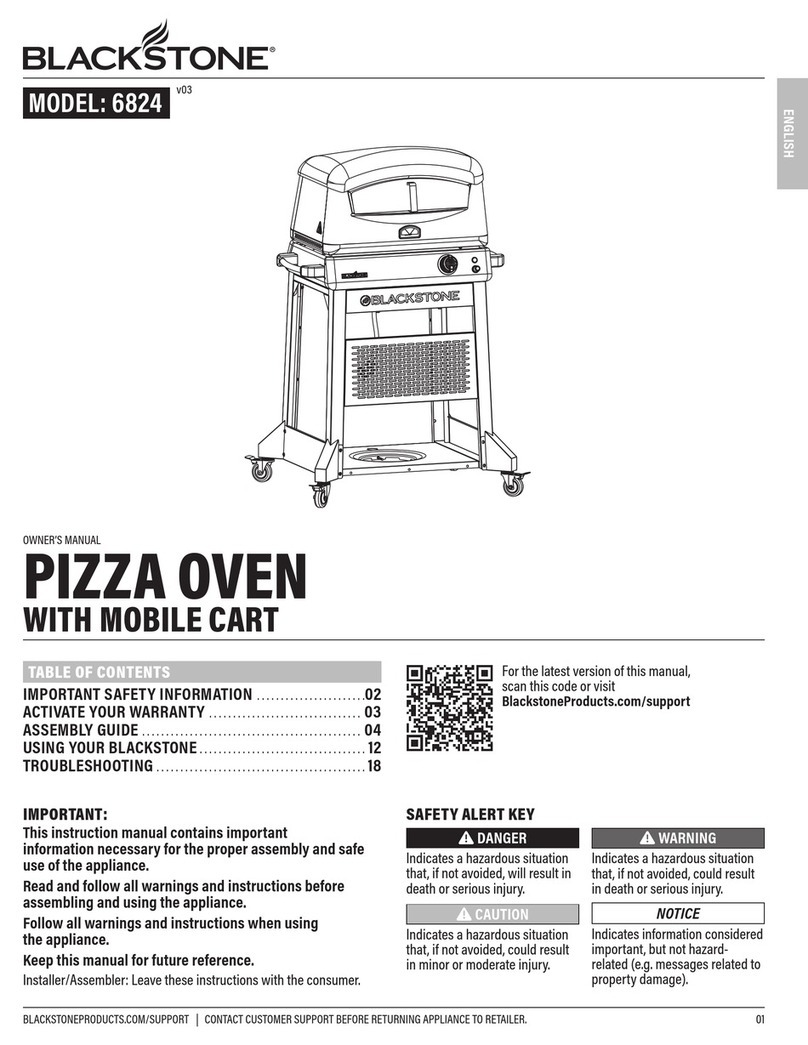
Black Stone 6960 User manual

ENGLISH
ENGLISH
North Atlantic Imports LLC | 1073 West 1700 North Logan, UT 84321 | Blackstoneproducts.com
Please reference blackstoneproducts.com/support for the latest version of this manual, and to follow along with assembly videos.
OWNER’S MANUAL
PORTABLE
PIZZA OVEN
CONVERSION KIT
Model 6960

ENGLISH
ENGLISH
Owner’s Manual |
ENGLISH
TABLE OF CONTENTS
It is the consumer’s responsibility to see that the unit is properly assem-
bled, installed, and maintained. Failure to follow the instructions in this
manual could result in bodily injury and/or property damage.
!DANGER
Indicates an imminently
hazardous situation which,
if not avoided, may result in
death or serious injury.
!WARNING
Indicates the possibility of
serious bodily injury if the
instructions are not followed.
!CAUTION
Indicates a potentially
hazardous situation which,
if not avoided, may result in
minor or moderate injury.
SAFETY ALERT KEY
Read and follow all the notices
throughout the manual.
ENGLISH
������������������������������������������
��������������������������
���������������������������������
����������������������������������������
��������������������������������������
����������������������������������
���������������������������������������
���������������������������
������������������������������������
��������������������������������������
����������������������������������������
����������������������������������������
��������������������������
������������������������������������������
�����������������������������
����������������������������������
�����������������������������������������
����������������������������������������
������������������������������������������
����������������������������
����������������������������
����������������������������������������������������
�������������������������������������������������
��������������������������������
���������������������������������������
���������������������������������������������������
����������������������������������������������������
������������������������������������������������������
��������������������������������
��������������������������������������������
��������������������������������������������������
�������������������������������������������������
������������������������������������������������������
��������
����������������������������������������������������
�����������������������������������
����������������
������������������������
��������������������������������
��������������������������������
������������
������������������������������������������
��������������������������
���������������������������������
����������������������������������������
��������������������������������������
����������������������������������
���������������������������������������
���������������������������
������������������������������������
��������������������������������������
����������������������������������������
����������������������������������������
��������������������������
������������������������������������������
�����������������������������
����������������������������������
�����������������������������������������
����������������������������������������
������������������������������������������
����������������������������
����������������������������
����������������������������������������������������
�������������������������������������������������
��������������������������������
���������������������������������������
���������������������������������������������������
����������������������������������������������������
������������������������������������������������������
��������������������������������
��������������������������������������������
��������������������������������������������������
�������������������������������������������������
������������������������������������������������������
��������
����������������������������������������������������
��������
��������
��������
��������
��������
����������������
����������������
����������������
����������������
�����������������������������������
����������������
������������������������
��������������������������������
��������������������������������
������������
Model Number ___________________________________
Serial Number____________________________________
Date Purchased __________________________________
REGISTER YOUR
PRODUCT
Registration allows our Customer Service Representatives to quickly
provide assistance with your Blackstone product if needed.
OUR CUSTOMER
SERVICE STAFF IS
HERE TO HELP YOU!
Register your Blackstone product at
blackstoneproducts.com/
register
and visit us online at
blackstoneproducts.com/
support
We are pleased to help you with any
questions concerning appliance use,
replacement parts, or your warranty.
Customer Service Hours:
The North Atlantic Imports LLC 1-Year Warranty covers replacement parts up
to one year aer the date of purchase. (Please reference the Warranty chapter
for more information.) To enable this warranty, you will need to provide:
• Proof of Purchase/ Receipt/ Order Details
• Your Blackstone product’s Serial Number
• Your Blackstone product’s Model Number
Your Blackstone product’s Serial and Model numbers can be found on your
griddle’s Origin Label. (The Origin Label is a large silver sticker found on the
body of your appliance.)
Monday – Friday
7:00 am – 5:00 pm (MST)
Register Your Product
CONTENTS
01. REGISTER YOUR PRODUCT ..................................01
02. ASSEMBLY GUIDE ...........................................02
03. CARE & MAINTENANCE.....................................07
04. IGNITION | PIZZA OVEN ....................................08
05. RECIPES.....................................................10
06. WARRANTY.................................................13
B
Model 6960

ENGLISH
ENGLISH
| Owner’s Manual
ENGLISH
TABLE OF CONTENTS
It is the consumer’s responsibility to see that the unit is properly assem-
bled, installed, and maintained. Failure to follow the instructions in this
manual could result in bodily injury and/or property damage.
!DANGER
Indicates an imminently
hazardous situation which,
if not avoided, may result in
death or serious injury.
!WARNING
Indicates the possibility of
serious bodily injury if the
instructions are not followed.
!CAUTION
Indicates a potentially
hazardous situation which,
if not avoided, may result in
minor or moderate injury.
SAFETY ALERT KEY
Read and follow all the notices
throughout the manual.
ENGLISH
������������������������������������������
��������������������������
���������������������������������
����������������������������������������
��������������������������������������
����������������������������������
���������������������������������������
���������������������������
������������������������������������
��������������������������������������
����������������������������������������
����������������������������������������
��������������������������
������������������������������������������
�����������������������������
����������������������������������
�����������������������������������������
����������������������������������������
������������������������������������������
����������������������������
����������������������������
����������������������������������������������������
�������������������������������������������������
��������������������������������
���������������������������������������
���������������������������������������������������
����������������������������������������������������
������������������������������������������������������
��������������������������������
��������������������������������������������
��������������������������������������������������
�������������������������������������������������
������������������������������������������������������
��������
����������������������������������������������������
�����������������������������������
����������������
������������������������
��������������������������������
��������������������������������
������������
������������������������������������������
��������������������������
���������������������������������
����������������������������������������
��������������������������������������
����������������������������������
���������������������������������������
���������������������������
������������������������������������
��������������������������������������
����������������������������������������
����������������������������������������
��������������������������
������������������������������������������
�����������������������������
����������������������������������
�����������������������������������������
����������������������������������������
������������������������������������������
����������������������������
����������������������������
����������������������������������������������������
�������������������������������������������������
��������������������������������
���������������������������������������
���������������������������������������������������
����������������������������������������������������
������������������������������������������������������
��������������������������������
��������������������������������������������
��������������������������������������������������
�������������������������������������������������
������������������������������������������������������
��������
����������������������������������������������������
��������
��������
��������
��������
��������
����������������
����������������
����������������
����������������
�����������������������������������
����������������
������������������������
��������������������������������
��������������������������������
������������
Model Number ___________________________________
Serial Number____________________________________
Date Purchased __________________________________
REGISTER YOUR
PRODUCT
Registration allows our Customer Service Representatives to quickly
provide assistance with your Blackstone product if needed.
OUR CUSTOMER
SERVICE STAFF IS
HERE TO HELP YOU!
Register your Blackstone product at
blackstoneproducts.com/
register
and visit us online at
blackstoneproducts.com/
support
We are pleased to help you with any
questions concerning appliance use,
replacement parts, or your warranty.
Customer Service Hours:
The North Atlantic Imports LLC 1-Year Warranty covers replacement parts up
to one year aer the date of purchase. (Please reference the Warranty chapter
for more information.) To enable this warranty, you will need to provide:
• Proof of Purchase/ Receipt/ Order Details
• Your Blackstone product’s Serial Number
• Your Blackstone product’s Model Number
Your Blackstone product’s Serial and Model numbers can be found on your
griddle’s Origin Label. (The Origin Label is a large silver sticker found on the
body of your appliance.)
Monday – Friday
7:00 am – 5:00 pm (MST)
Register Your Product
01
Model 6960

ENGLISH
ENGLISH
Owner’s Manual |
ENGLISH
ASSEMBLY GUIDE
EXPLODED VIEW
PARTS
QTY
1.1
Front cover assembly
1
1.2
Thermometer heat
shield
1
1.3
Thermometer
1
PARTS
QTY
1.4
Body cover assembly
1
1.5
Upper brackets
2
1.6
Inner heat shield
assembly
1
PARTS
QTY
1.7
Thermometer retaining
bracket
1
1.8
Stone rack assembly
1
9
10
1.3
7
4
1.6
1.8
2
1.4
8
5
1.7
1.1
3
1.5
6
1.2
02
Model 6960Assembly Guide

ENGLISH
ENGLISH
| Owner’s Manual
ENGLISH
TOOLS NEEDED: Phillips head screwdriver
& Adjustable wrench
TOOL NEEDED:
Phillips head screwdriver
TOOL NEEDED:
Adjustable wrench
TOOLS NEEDED: Phillips head screwdriver
& Adjustable wrench
ENGLISH
ASSEMBLY GUIDE
ILLUSTRATED PARTS LIST
1 Oven body (1 piece) 2 Heat shield (1 piece) 3 Vent cover (1 piece)
4 Square stone (1 piece) 5 Round stone (1 piece) 6 Oven door (1 piece)
7 Side handles (2 pieces) 8 Door handle (1 piece) 9 Oven feet
(4 pieces)
10 Mica sheets
(4 pieces)
NOT INCLUDED:
Blackstone 22" Griddle
03
Model 6960 Assembly Guide

ENGLISH
ENGLISH
Owner’s Manual |
ENGLISH
!WARNING
The manufacturer has made
every eort to eliminate any
sharp edges. However, you
should handle all compo-
nents with care to avoid
accidental injury.
Some parts may contain
sharp edges, especially as
noted in these instructions.
Wear protective gloves if
necessary.
!WARNING
The manufacturer has made
every eort to eliminate any
sharp edges. However, you
should handle all compo-
nents with care to avoid
accidental injury.
Some parts may contain
sharp edges, especially as
noted in these instructions.
Wear protective gloves if
necessary.
!WARNING
This appliance will be hot
during and after use. While
cooking, place unit on
heat-resistant and flame-re-
sistant surfaces to avoid
damage and injury.
!WARNING
This appliance will be hot
during and after use. While
cooking, place unit on
heat-resistant and flame-re-
sistant surfaces to avoid
damage and injury.
!WARNING
The manufacturer has made
every eort to eliminate any
sharp edges. However, you
should handle all compo-
nents with care to avoid
accidental injury.
Some parts may contain
sharp edges, especially as
noted in these instructions.
Wear protective gloves if
necessary.
!CAUTION
Two people are recom-
mended for the assembly of
this product.
!CAUTION
Two people are recom-
mended for the assembly of
this product.
ENGLISH
ASSEMBLY INSTRUCTIONS
Please read all instructions thoroughly before proceeding. Make sure all
the plastic packing material is removed before assembling.
Find a large, clean area to assemble your unit. Please refer to the parts list and
assembly diagrams as necessary.
!WARNING
•Do not mix old and new
batteries.
•Do not mix alkaline, stan-
dard (carbon-zinc) or
rechargeable (ni-cad, ni-mh,
etc.) batteries.
!WARNING
•Do not mix old and new
batteries.
•Do not mix alkaline, stan-
dard (carbon-zinc) or
rechargeable (ni-cad, ni-mh,
etc.) batteries.
STEP Place the griddle body (not included) on its back.
Remove the four (4) M8 ange nuts from the four (4) oven feet.
Use the four (4) M8 ange nuts to attach the heat shield and four (4) oven feet
to the bottom of the griddle body.
STEP Remove the four (4)
tapping screws from the upper
brackets.
Use the four (4) tapping screws
to attach the vent cover to the
upper brackets.
STEP Remove the oven body
from its packaging and place it on a
smooth at surface.
04
Model 6960Assembly Guide

ENGLISH
ENGLISH
| Owner’s Manual
ENGLISH
!WARNING
Do not leave the hood
closed for more than 10
minutes while cooking.
!WARNING
Do not leave the hood
closed for more than 10
minutes while cooking.
!WARNING
Do not touch the handle
while cooking.
!WARNING
Do not touch the handle
while cooking.
!CAUTION
•Maximum weight on the side
shelf is 10 lbs (4.5 kg).
•The side shelf may get hot
while griddle is in use.
!CAUTION
•Maximum weight on the side
shelf is 10 lbs (4.5 kg).
•The side shelf may get hot
while griddle is in use.
STEP Remove the eight (8) M6x12 screws from the oven body
side panels.
Use four (4) M6x12 screws to install one (1) side handle and two (2) mica
sheets to the oven body le side panel.
Repeat with the oven body right side panel.
STEP Slide the square stone into the upper oven chamber brackets.
Center the round stone on the oor of the oven chamber.
STEP Remove the one (1) M5
screw from the door handle. Use the
one (1) M5 screw to attach the door
handle to the front of the oven door.
05
Model 6960 Assembly Guide

ENGLISH
ENGLISH
Owner’s Manual |
ENGLISH
FIRST TIME CLEANING
Blackstone Griddles are pre-treated
with cooking oil to prevent rust and
damage during shipping. For rst
time use, wash griddle with hot,
soapy water.
THIS IS THE ONLY TIME YOU
SHOULD USE SOAP ON THE
GRIDDLE COOKING SURFACE.
Rinse and dry completely. Proceed
with seasoning instructions. (Please
reference the Griddle Seasoning
Instructions section.)
PROTECTING YOUR
GRIDDLE TOP
Store griddle in a cool, dry loca-
tion. Always cover griddle if stored
outdoors. Choose from a variety of
griddle covers oered by Blackstone.
When protecting griddle with so
cover, use the “tenting” method to
prevent water from accumulating
on griddle top. “Tenting” involves
placing an object (a bowl, tennis
ball or PVC pipe) beneath so cover
in the center of griddle in order to
allow water to slide o. “Tenting”
helps prevent rust.
CUTTING ON THE
GRIDDLE TOP
Using a knife directly on the surface
of the griddle will not harm the
griddle top.
REMOVING RUST
If rust appears on the griddle surface,
rub it o with steel wool, low grit
sandpaper or the Blackstone
Pumice Stone and re-season
the surface.
!WARNING
NEVER APPLY COLD
WATER ACROSS THE
WHOLE SURFACE OF A
HOT GRIDDLE AT ONCE.
This may cause warping.
Adding a large amount
of cold or frozen food (or
food with significant water
content) to a hot griddle may
cause griddle to warp.
!CAUTION
DO NOT USE SOAP ON
THE GRIDDLE COOKING
SURFACE. This will destroy
the griddle’s seasoning.
NEED HELP?
Register your Blackstone product at
blackstoneproducts.com/register
and visit us online at
blackstoneproducts.com/support
for replacement parts, assembly and
operation questions.
Recovering your Blackstone
Griddle Top
youtube.com/
watch?v=thPE2IgnSiI
Care & Maintenance
STEP With the help of
another person, set the pizza oven
into the griddle body (not included).
NOTE: Take extra care not to
damage the burners. Do not let the
stones slide out.
STEP Tilt the door brake behind the gauge panel and set the oven door
assembly in place.
STEP Enjoy cooking outdoors
on your Blackstone!
NOTE: Please reference your
Blackstone Griddle Owner’s Manual
for fuel instructions.
06
Model 6960Assembly Guide

ENGLISH
ENGLISH
| Owner’s Manual
ENGLISH
Section 03
PIZZA OVEN OPERATION
HOW TO USE YOUR
PIZZA OVEN
For best results:
01. Please reference the
Ignition | Pizza Oven chapter
for instructions on achieving
and maintaining the oven
temperature.
02. Always cook with door closed.
03. Rotate pizza 90° (a quarter turn)
when the cooking time has
reached the halfway point.
FRESH PIZZA
STEP Preheat oven to 700° F
(380° C).
STEP Pizza cooking time is
about 2-4 minutes depending on the
size and thickness of the dough of
the pizza. Thicker or denser foods
require more time.
STEP Pull out the pizza when
the crust has reached your desired
readiness, or when the edges of the
pizza crust are golden-brown.
FROZEN PIZZAS,
COOKIES, ETC.
Follow the food manufacture’s direc-
tions on box/ recipe.
CLEANING YOUR PIZZA
OVEN
• Do not mistake brown or black
accumulation of grease and smoke
for paint. Interiors of gas ovens
are not painted at the factory (and
should never be painted). Apply a
strong solution of detergent and
water, or use an oven cleaner with
scrub brush on insides of oven lid
and bottom. Rinse and allow to
completely air dry.
• Clean cooking stone simply by
brushing o. If desired, wash Pizza
Stone with warm water.
NEVER USE SOAP ON THE
COOKING STONE. This may pene-
trate the stone’s cooking area and
leave a soap taste in food.
!WARNING
Use insulated oven mitts or
gloves when opening oven
door or touching the door
handle.
!CAUTION
The cooking stone surface is
hotter than the air.
Care & Maintenance
ENGLISH
STORAGE
• In order to extend and maintain
the life and condition of your
appliance, we strongly
recommend that the unit be
covered when le outside for any
length of time, especially during
the winter months.
• Take care to always completely
dry your appliance before storing
and keep away from rain and
sprinklers.
• Cover the burners with
aluminum foil in order to prevent
insects or other debris from
collecting in the burner holes.
• When gas supply is connected
to appliance, store appliance
outdoors in a well-ventilated
space and out of reach of children.
• Store appliance indoors ONLY if
gas supply is turned o, discon-
nected, removed from appliance
and stored outdoors.
• When removing appliance from
storage, clean burner assembly
before starting appliance. (Please
reference the Cleaning the Burner
Assembly section.)
VALVE CHECK
Ensure gas is o at the supply shut
o valve before checking appli-
ance valves. Knobs must be locked
in OFF position.
STEP To check valves, push
in knobs and release. Knobs should
spring back.
If knobs do not spring back, replace
valve assembly before using appliance.
STEP Rotate knobs to LOW
position then turn back to OFF posi-
tion. Knobs should turn smoothly.
Care & Maintenance
ENGLISH
CARE & MAINTENANCE
Regularly clean your appliance between uses, especially after extended
periods of storage. In order to extend the life and condition of unit,
follow best practices detailed in this manual.
!WARNING
When not in use, turn unit
controls and gas source
OFF.
!WARNING
The appliance must be
isolated from the gas supply
piping system by closing its
individual manual shuto
valve during any pressure
testing of the gas supply
piping system at test pres-
sures equal to or less than
1/2 psi (3.5 kPa).
!WARNING
This appliance will be hot
during and after use. Use
insulated oven mitts or
gloves for protection from
hot surfaces or splatter from
cooking liquids.
!CAUTION
NEVER handle hot parts
with unprotected hands.
!CAUTION
DO NOT use Citrisol, abra-
sive cleaners, de-greasers or
a concentrated cleaner on
plastic parts. Damage to and
failure of parts may result.
GENERAL CLEANING
Ensure that the appliance and its
components are suiciently cool
before cleaning.
• Clean your appliance oen, pref-
erably aer each use.
• Be sure to keep the ventilation
opening(s) of the cylinder enclo-
sure free and clear from debris.
• Baked-on grease deposits may
require the use of an abrasive
plastic cleaning pad. Use only
in direction of brushed nish to
avoid damage.
• DO NOT use abrasive pad on areas
with graphics.
• If a bristle brush is used to clean
any of the cooking surfaces,
ensure no loose bristles remain on
cooking surfaces prior to cooking.
PLASTIC PARTS: Wash with warm
soapy water and wipe dry.
PAINTED SURFACES: Wash
with mild detergent or nonabra-
sive cleaner and warm soapy
water. Wipe dry with so nonabra-
sive cloth.
STAINLESS STEEL SURFACES:
To maintain appliance frame’s high
quality appearance, wash with mild
detergent and warm soapy water.
Wipe dry with a so cloth aer
each use.
AFTER EACH USE
Ensure that any part of the
appliance that gets hot and expe-
riences grease build up is cleaned
before next use. Otherwise, a re
could occur.
Section 01
GENERAL CARE
Care & Maintenance
07
Model 6960
ENGLISH
ENGLISH
Owner’s Manual |
ENGLISH
❷
❶
❸
!WARNING
Do not lean over the appli-
ance while lighting.
!WARNING
If ignition does NOT occur
in 5 seconds, turn burner
controls OFF, wait 5
minutes and repeat lighting
procedure.
If burner does not ignite with
open valve, gas will continue
to flow out of burner and
could accidentally/inad-
vertently ignite with risk of
injury.
IGNITION |
PIZZA OVEN
PROPANE BURNER OPERATION
For proper ignition and operation of the appliance follow the steps below.
STEP To preheat the oven:
❶Push control knob in to start
gas owing.
❷Turn the control knob counter-
clockwise to activate the starter.
❸Turn the control knob to HIGH.
Repeat with the other control knob.
STEP Once the desired temperature is reached and you are ready to
start baking, turn one (1) control knob to LOW and the other knob to OFF for
the duration of the cook time.
Ignition | Pizza Oven
08
Model 6960

ENGLISH
ENGLISH
| Owner’s Manual
ENGLISH
❷
❶
❸
!WARNING
Do not lean over the appli-
ance while lighting.
!WARNING
If ignition does NOT occur
in 5 seconds, turn burner
controls OFF, wait 5
minutes and repeat lighting
procedure.
If burner does not ignite with
open valve, gas will continue
to flow out of burner and
could accidentally/inad-
vertently ignite with risk of
injury.
IGNITION |
PIZZA OVEN
PROPANE BURNER OPERATION
For proper ignition and operation of the appliance follow the steps below.
STEP To preheat the oven:
❶Push control knob in to start
gas owing.
❷Turn the control knob counter-
clockwise to activate the starter.
❸Turn the control knob to HIGH.
Repeat with the other control knob.
STEP Once the desired temperature is reached and you are ready to
start baking, turn one (1) control knob to LOW and the other knob to OFF for
the duration of the cook time.
Ignition | Pizza Oven
ENGLISH
VIDEO RECIPES:
Find more inspiration and recipes at
@blackstoneproducts
blackstoneproducts.com/
blogs/recipes
youtube.com/c/
BlackstoneGriddles
ENGLISH
RECIPES FOR
THE PIZZA OVEN
Serves 9 | 1 hour 20 min.
Ingredients
• 4 cups of bread our
• 1 and 1/2 cups of warm water
• 1 teaspoon of instant dry yeast
• 3 teaspoons of honey
• 2 teaspoons of salt
• 4 teaspoons of olive oil
STEP Add water, our, yeast, honey and salt together in a large bowl.
(Don’t add the oil yet. You want the our to hydrate rst before adding oil.)
NOTE: Regular sugar should not be substituted for honey. Honey helps
yeast grow a little faster but regular sugar (sucrose) has almost no eect on
yeast growth.
STEP Mix the dough until most of the our is incorporated.
STEP Add the oil and knead your dough for 5-10 minutes.
STEP Cover dough and let it rest for 10-15 minutes.
STEP Divide the dough into 3 pieces and round into balls. Wipe the
dough balls with oil or cooking spray.
STEP Cover dough balls and let rise for about an hour.
NEW YORK STYLE PIZZA DOUGH
Makes 3 Crusts
Recipes
ENGLISH
HOW TO STRETCH PIZZA DOUGH
STEP Generously our your prep surface to prevent sticking and to
make the dough easier to work with.
STEP Flatten the dough with the palm of your hand, starting from the
center out. Don’t use a rolling pin since you want to leave a thicker crust
around the edges.
STEP Pick up the dough and put it on the back of your hands.
Rotate the dough from hand to hand letting gravity do most of the work
stretching it out.
NOTE: An even thickness in the middle and a thicker crust is most
important. The toppings will weigh down the center and allow the crust to
pu naturally.
NOTE: Use a small amount of our, semolina, or cornmeal on your pizza peel
to prevent sticking when moving the pizza into your oven.
Recipes
09
Model 6960

ENGLISH
ENGLISH
Owner’s Manual |
ENGLISH
Serves 3 | 2-3 min.
Ingredients
• 1 crust of pizza dough
• 8 oz. of fresh mozzarella
• 8 fresh basil leaves
• 1/2 cup of vine ripened
crushed tomatoes or San
Marzano tomatoes
• 1 tablespoon of extra
virgin olive oil
• 1 pinch of sea salt
CLASSIC MARGHERITA PIZZA
RECIPES FOR
THE PIZZA OVEN
STEP Preheat oven to 700° F (380° C).
STEP Stretch your pizza dough and add the crushed tomatoes.
STEP Add the fresh mozzarella torn into chunks.
STEP Put fresh basil on top and drizzle with a little olive oil. Sprinkle
the top with a little pinch of sea salt if you’d like.
STEP Bake for 2 1/2 minutes (cheese should be melted, and edges should
be golden brown).
Recipes
ENGLISH
VIDEO RECIPES:
Find more inspiration and recipes at
@blackstoneproducts
blackstoneproducts.com/
blogs/recipes
youtube.com/c/
BlackstoneGriddles
10
Model 6960

ENGLISH
ENGLISH
| Owner’s Manual
ENGLISH
VIDEO RECIPES:
Find more inspiration and recipes at
@blackstoneproducts
blackstoneproducts.com/
blogs/recipes
youtube.com/c/
BlackstoneGriddles
ENGLISH
RECIPES FOR
THE PIZZA OVEN
Serves 3 | 2-3 min.
Ingredients
• 1 crust of pizza dough
• 1/2 cup of Sweet chili sauce (we
recommend Mae Ploy brand)
• 1 cup of diced chicken breast
(pre-cooked)
• 1 - 1 1/2 cup of shredded mozza-
rella cheese
• 1 tablespoon of chopped cilantro
• olive oil (to drizzle)
• 1 cup of Veggie Slaw
Veggie Slaw
• 1 cup of chopped carrots, broccoli,
and cabbage (typically can be
bought in a bag pre-chopped)
• 2 teaspoons of apple cider vinegar
• 1 teaspoon of sugar
• 1 teaspoon of oil
• pinch of salt
STEP Preheat oven to 700° F (380° C).
STEP Mix all Veggie Slaw ingredients together and toss to combine. Set
aside and let sit for 5-10 minutes for avors to combine.
STEP Stretch out your pizza dough and spread the Sweet Chili
sauce over it.
STEP Add the diced chicken and sprinkle with a pinch of
chopped cilantro.
STEP Add mozzarella cheese and drizzle with a little olive oil.
STEP Bake for 2 1/2 minutes (cheese should be melted, and edges should
be golden brown).
STEP Slice pizza and top with Veggie Slaw and more fresh
chopped cilantro.
THAI SWEET CHILI CHICKEN PIZZA
Recipes
11
Model 6960

ENGLISH
ENGLISH
Owner’s Manual |
ENGLISH
Serves 3 | 2-3 min.
Ingredients
• 1 crust of pizza dough
• 1/2 cup of BBQ sauce
• 1 cup of diced chicken breast
(pre-cooked)
• 2 tablespoons of diced red onions
• 1/4 cup of chopped bacon pieces
(pre-cooked)
• 1 1/2 cups of shredded mozza-
rella cheese
BBQ CHICKEN BACON PIZZA
RECIPES FOR
THE PIZZA OVEN
STEP Preheat oven to 700° F (380° C).
STEP Stretch out your pizza dough and spread the BBQ sauce over it.
STEP Add the diced chicken, red onions, and bacon.
STEP Add the mozzarella cheese.
STEP Bake for 2 1/2 minutes (cheese should be melted, and edges should
be golden brown).
Recipes
ENGLISH
VIDEO RECIPES:
Find more inspiration and recipes at
@blackstoneproducts
blackstoneproducts.com/
blogs/recipes
youtube.com/c/
BlackstoneGriddles
12
Model 6960

ENGLISH
ENGLISH
| Owner’s Manual
ENGLISH
NORTH ATLANTIC IMPORTS LLC
YEAR WARRANTY
North Atlantic Imports LLC
warrants to the owner that the
product covered by this agreement
is free from defects in material and
workmanship under normal use and
service for which it was intended
if, but only if, it has been operated
in accordance with North Atlantic
Imports LLC instructions exclu-
sively for domestic use, and not for
private or public club, institutional
or commercial purposes.
North Atlantic Imports LLC’s obliga-
tion under this warranty is limited
to replacing or repairing, free of
charge, any part or parts that may
prove, to the satisfaction of North
Atlantic Imports LLC, to be defective
under normal home use and service
within the following stated periods
of time from the date of purchase;
for one year from purchase, all parts,
nish, and workmanship. Should
any failure to conform to this
warranty become apparent during
applicable warranty periods stated
above, the original purchaser must
notify North Atlantic Imports LLC
of breach of warranty within the
applicable warranty period.
North Atlantic Imports LLC shall
upon notice and compliance by
the original purchaser with such
instructions, correct such noncon-
formity by repair or replacement of
the defective part or parts.
Correction in the manner provided
above shall constitute a fulllment
of all obligations of North Atlantic
Imports LLC with respect to the
quality of the product.
North Atlantic Imports LLC does
not warrant this equipment to
meet the requirement of any safety
code of any state, municipality or
other jurisdiction, and the orig-
inal purchaser assumes all risk
and liability whatsoever resulting
from the use thereof, whether
used in accordance with North
Atlantic Imports LLC instructions
or otherwise.
This warranty does not cover and is
intended to exclude any liability on
the part of North Atlantic its agents,
servants or employees whether
under this warranty or implied
by law for any indirect or conse-
quential damages for breach on
any warranty. The purchaser must
establish all applicable warranty
periods pursuant to this warranty
by verifying the original purchase
date by producing the dated sales
receipt. This warranty shall not
apply to this product or any other
part thereof which has been subject
to accident, negligence, alteration,
abuse, or misuse or which has been
repaired or altered without North
Atlantic written consent, outside of
North Atlantic Imports LLC factory.
The full manufacturer warranty
is not valid for griddles purchased
from unlicensed, third-party
resellers, purchased at a discount
due to missing or damaged parts, or
purchased as a oor model; at the
discretion of North Atlantic Imports.
North Atlantic Imports LLC makes
no warranty whatsoever in respect
to accessories or parts not supplied
with it. This warranty shall apply
only within the boundaries of
the United States of America.
This warranty gives the original
purchaser specic rights, and the
original purchaser may also have
other rights, which vary from
state to state.
North Atlantic Imports, the manufacturer, will warranty for one year from
purchase all parts, workmanship, and nishes. It will be the manufacturer’s
option as to whether to repair or replace any of the above items. All warran-
ties are limited to the original purchaser only. This warranty does not cover
any liability on the part of North Atlantic Imports, its agents or employees,
for any indirect or consequential damages for breach of warranty. The
purchaser must follow the manufacturer’s usage instructions.
Under no circumstances is the manufacturer responsible for damages from
the failure to operate the cooking station properly. It is the responsibility
of the purchaser to establish the warranty period by verifying the original
purchase date with original sales receipt.
For more detailed explanation of the warranty, read below:
Warranty
13
Model 6960

ENGLISHENGLISH
North Atlantic Imports LLC | 1073 West 1700 North Logan, UT 84321 | Blackstoneproducts.com

FRANÇAIS
FRANÇAIS
Veuillez consulter blackstoneproducts.com/support pour obtenir la dernière version de ce manuel et suivre les vidéos d’assemblage.
North Atlantic Imports LLC | 1073 West 1700 North Logan, UT 84321 | Blackstoneproducts.com
MANUEL D’UTILISATION
FOUR À PIZZA
PORTATIF
KIT DE CONVERSION
Modèle 6960

FRANÇAIS
FRANÇAIS
Manuel d’utilisation |
FRANÇAIS
TABLE DES MATIÈRES
Il incombe au consommateur de s’assurer que l’unité est correctement
assemblée, installée et entretenue. Si vous ne suivez pas les instruc-tions
de ce manuel, vous risquez des blessures corporelles et/ou des dégâts
matériels.
!DANGER
Indique une situation
extrêmement dangereuse
qui, si elle n’est pas évitée,
peut entraîner des blessures
graves, voire mortelles.
!ATTENTION
Indique la possibilité de
blessures corporelles graves
si les instructions ne sont pas
suivies.
!MISE EN GARDE
Indique une situation poten-
tiellement dangereuse qui,
si elle n’est pas évitée, peut
entraîner des blessures
légères ou modérées.
MESSAGES RELATIFS À
LA SÉCURITÉ
Lisez et suivez tous les aver-tissements
qui se trouvent dans ce manuel.
FRANÇAIS
������������������������������������������
��������������������������
���������������������������������
����������������������������������������
��������������������������������������
����������������������������������
���������������������������������������
���������������������������
������������������������������������
��������������������������������������
����������������������������������������
����������������������������������������
��������������������������
������������������������������������������
�����������������������������
����������������������������������
�����������������������������������������
����������������������������������������
������������������������������������������
����������������������������
����������������������������
����������������������������������������������������
�������������������������������������������������
��������������������������������
���������������������������������������
���������������������������������������������������
����������������������������������������������������
������������������������������������������������������
��������������������������������
��������������������������������������������
��������������������������������������������������
�������������������������������������������������
������������������������������������������������������
��������
����������������������������������������������������
�����������������������������������
����������������
������������������������
��������������������������������
��������������������������������
������������
������������������������������������������
��������������������������
���������������������������������
����������������������������������������
��������������������������������������
����������������������������������
���������������������������������������
���������������������������
������������������������������������
��������������������������������������
����������������������������������������
����������������������������������������
��������������������������
������������������������������������������
�����������������������������
����������������������������������
�����������������������������������������
����������������������������������������
������������������������������������������
����������������������������
����������������������������
����������������������������������������������������
�������������������������������������������������
��������������������������������
���������������������������������������
���������������������������������������������������
����������������������������������������������������
������������������������������������������������������
��������������������������������
��������������������������������������������
��������������������������������������������������
�������������������������������������������������
������������������������������������������������������
��������
����������������������������������������������������
��������
��������
��������
��������
��������
����������������
����������������
����������������
����������������
�����������������������������������
����������������
������������������������
��������������������������������
��������������������������������
������������
NOTRE PERSONNEL DU
SERVICE À LA CLIENTÈLE
EST LÀ POUR VOUS
AIDER!
Enregistrez votre produit
Blackstone sur
blackstoneproducts.com/register
et visitez-nous en ligne sur
blackstoneproducts.com/support
Nous sommes heureux de vous aider
pour toute question concernant
l’utilisation de l’appareil, les pièces de
rechange ou votre garantie.
Heures de service à la clientèle:
Numéro de modèle________________________________
Numéro de sérier _________________________________
Date d’achat _____________________________________
ENREGISTRER VOTRE
PRODUIT
L’enregistrement permet à nos représentants du service client de fournir
rapidement une assistance avec votre produit Blackstone si nécessaire.
La garantie d’un an de North Atlantic Imports LLC couvre les pièces de rechange
jusqu’à un an après la date d’achat. (Veuillez consulter le chapitre Garantie pour
plus d’informations.) Pour activer cette garantie, vous devrez fournir:
•Preuve d’achat / réception / détails de la commande
•Numéro de série de votre produit Blackstone
•Numéro de modèle de votre produit Blackstone
Les numéros de série et de modèle de votre produit Blackstone se trouvent sur
l’étiquette d’origine de votre plaque chauante. (L’étiquette d’origine est un grand
autocollant argenté qui se trouve sur le corps de votre appareil.)
Lundi au vendredi
7 h à 17 h (MST)
Enregistrer votre produit
CONTENU
01. ENREGISTRER VOTRE PRODUIT.............................01
02. GUIDE DE MONTAGE ........................................02
03. ENTRETIEN ET MAINTENANCE .............................07
04. ALLUMAGE | FOUR ÀPIZZA.................................08
05. RECETTES...................................................09
06. GARANTIE ..................................................13
Modèle 6960
B

FRANÇAIS
FRANÇAIS
| Manuel d’utilisation
FRANÇAIS
TABLE DES MATIÈRES
Il incombe au consommateur de s’assurer que l’unité est correctement
assemblée, installée et entretenue. Si vous ne suivez pas les instruc-tions
de ce manuel, vous risquez des blessures corporelles et/ou des dégâts
matériels.
!DANGER
Indique une situation
extrêmement dangereuse
qui, si elle n’est pas évitée,
peut entraîner des blessures
graves, voire mortelles.
!ATTENTION
Indique la possibilité de
blessures corporelles graves
si les instructions ne sont pas
suivies.
!MISE EN GARDE
Indique une situation poten-
tiellement dangereuse qui,
si elle n’est pas évitée, peut
entraîner des blessures
légères ou modérées.
MESSAGES RELATIFS À
LA SÉCURITÉ
Lisez et suivez tous les aver-tissements
qui se trouvent dans ce manuel.
FRANÇAIS
������������������������������������������
��������������������������
���������������������������������
����������������������������������������
��������������������������������������
����������������������������������
���������������������������������������
���������������������������
������������������������������������
��������������������������������������
����������������������������������������
����������������������������������������
��������������������������
������������������������������������������
�����������������������������
����������������������������������
�����������������������������������������
����������������������������������������
������������������������������������������
����������������������������
����������������������������
����������������������������������������������������
�������������������������������������������������
��������������������������������
���������������������������������������
���������������������������������������������������
����������������������������������������������������
������������������������������������������������������
��������������������������������
��������������������������������������������
��������������������������������������������������
�������������������������������������������������
������������������������������������������������������
��������
����������������������������������������������������
�����������������������������������
����������������
������������������������
��������������������������������
��������������������������������
������������
������������������������������������������
��������������������������
���������������������������������
����������������������������������������
��������������������������������������
����������������������������������
���������������������������������������
���������������������������
������������������������������������
��������������������������������������
����������������������������������������
����������������������������������������
��������������������������
������������������������������������������
�����������������������������
����������������������������������
�����������������������������������������
����������������������������������������
������������������������������������������
����������������������������
����������������������������
����������������������������������������������������
�������������������������������������������������
��������������������������������
���������������������������������������
���������������������������������������������������
����������������������������������������������������
������������������������������������������������������
��������������������������������
��������������������������������������������
��������������������������������������������������
�������������������������������������������������
������������������������������������������������������
��������
����������������������������������������������������
��������
��������
��������
��������
��������
����������������
����������������
����������������
����������������
�����������������������������������
����������������
������������������������
��������������������������������
��������������������������������
������������
NOTRE PERSONNEL DU
SERVICE À LA CLIENTÈLE
EST LÀ POUR VOUS
AIDER!
Enregistrez votre produit
Blackstone sur
blackstoneproducts.com/register
et visitez-nous en ligne sur
blackstoneproducts.com/support
Nous sommes heureux de vous aider
pour toute question concernant
l’utilisation de l’appareil, les pièces de
rechange ou votre garantie.
Heures de service à la clientèle:
Numéro de modèle________________________________
Numéro de sérier _________________________________
Date d’achat _____________________________________
ENREGISTRER VOTRE
PRODUIT
L’enregistrement permet à nos représentants du service client de fournir
rapidement une assistance avec votre produit Blackstone si nécessaire.
La garantie d’un an de North Atlantic Imports LLC couvre les pièces de rechange
jusqu’à un an après la date d’achat. (Veuillez consulter le chapitre Garantie pour
plus d’informations.) Pour activer cette garantie, vous devrez fournir:
•Preuve d’achat / réception / détails de la commande
•Numéro de série de votre produit Blackstone
•Numéro de modèle de votre produit Blackstone
Les numéros de série et de modèle de votre produit Blackstone se trouvent sur
l’étiquette d’origine de votre plaque chauante. (L’étiquette d’origine est un grand
autocollant argenté qui se trouve sur le corps de votre appareil.)
Lundi au vendredi
7 h à 17 h (MST)
Enregistrer votre produitModèle 6960
01

FRANÇAIS
FRANÇAIS
Manuel d’utilisation |
FRANÇAIS
GUIDE DE MONTAGE
VUE ÉCLATÉE
PIèCES
QTé
1.1
Assemblage du capot
avant
1
1.2
Thermomètre bouclier
thermique
1
1.3
Thermomètre
1
PIèCES
QTé
1.4
Ensemble de couverture
de corps
1
1.5
Supports supérieurs
2
1.6
Ensemble de bouclier
thermique intérieur
1
PIèCES
QTé
1.7
Support de maintien du
thermomètre
1
1.8
Assemblage de support en
pierre
1
9
10
1.3
7
4
1.6
1.8
2
1.4
8
5
1.7
1.1
3
1.5
6
1.2
Modèle 6960
02
Guide de montage
Table of contents
Languages:
Other Black Stone Kitchen Appliance manuals

Black Stone
Black Stone 2238 User manual

Black Stone
Black Stone GRIDDLE 1554 User manual

Black Stone
Black Stone 5020 User manual

Black Stone
Black Stone PATIO 1962 User manual

Black Stone
Black Stone E Series User manual

Black Stone
Black Stone 1885 User manual

Black Stone
Black Stone 6964 User manual

Black Stone
Black Stone 6961 User manual

Black Stone
Black Stone 1783 User manual

Black Stone
Black Stone 1868 User manual