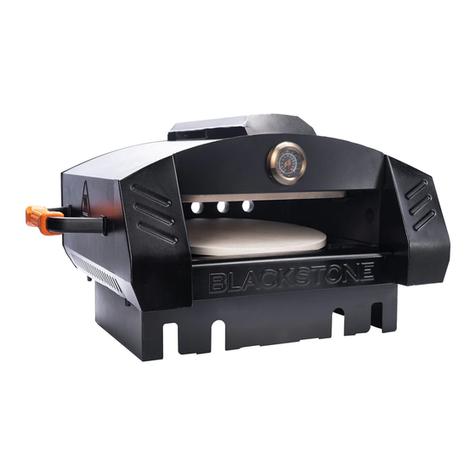
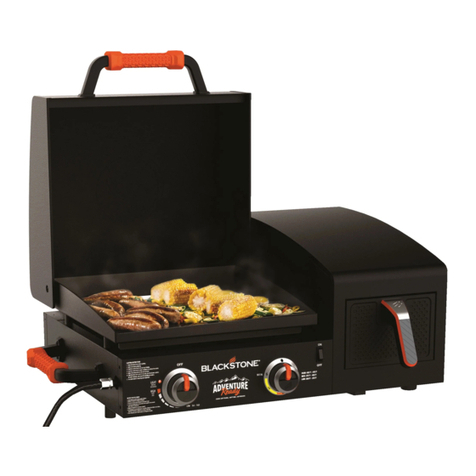
Black Stone ON THE GO 6968 User manual

ENGLISH
BLACKSTONEPRODUCTS.COM/SUPPORT
SAFETY ALERT KEY
DANGER
Indicates a hazardous situation
that, if not avoided, will result in
death or serious injury.
CAUTION
Indicates a hazardous situation
that, if not avoided, could result
in minor or moderate injury.
WARNING
Indicates a hazardous situation
that, if not avoided, could result
in death or serious injury.
NOTICE
Indicates information considered
important, but not hazard-re-
lated (e.g. messages related to
property damage).
OWNER’S MANUAL
IMPORTANT:
This instruction manual contains important information
necessary for the proper assembly and safe use of the
appliance.
Read and follow all warnings and instructions before
assembling and using the appliance.
Keep this manual for future reference.
Installer/Assembler: Leave these instructions with the consumer.
MODEL: v01
PORTABLE PIZZA OVEN
CONVERSION KIT FOR 17" GRIDDLES
TABLE OF CONTENTS
ASSEMBLY GUIDE..........................................................
USING YOUR BLACKSTONE...........................................
TROUBLESHOOTING......................................................
ACTIVATE YOUR WARRANTY.........................................

ENGLISH
BLACKSTONEPRODUCTS.COM/SUPPORT
OWNER’S MANUAL | ASSEMBLY GUIDE MODEL:
ASSEMBLY GUIDE
ExPLODED VIEw
PARTS
QTY
1.1a
Upper oven gauge
panel
1
1.1b
Left oven front panel
1
1.1c Right oven front
panel 1
1.1d Lower oven front
panel 1
PARTS
QTY
1.2a
Thermometer
1
1.2b
Thermometer heat
shield
1
1.2c Thermometer
retaining bracket 1
1.3 Vent brackets 2
PARTS
QTY
1.4
Vent cover
1
1.5
Oven cover supports
2
1.6 Inner heat shield
assembly 1
1.7a Inner cover back
panel 1
PARTS
QTY
1.7b
Radiating pipes
3
1.8a
Oven outer cover
1
1.8b Oven back panel 1
1.9 Stone rack assembly 1
PARTS LIST
5
8
7
4
3
6
9
1.7b1.1a
1.2c
1.1d
1.5
1.8a
1.1b
1.3
1.2a
1.6
1.9
1.1c
1.4
1.8b
2
1.2b
1.7a

ENGLISH
BLACKSTONEPRODUCTS.COM/SUPPORT
| OWNER’S MANUALASSEMBLY GUIDE
ASSEMBLY INSTRUCTIONS
Find a large, clean area to assemble your appliance.
Remove all packing material before assembling.
CAUTION
Sharp edges. Wear gloves while assembling.
TOOLS NEEDED:
Phillips head screwdriver &
Adjustable wrench
TOOL NEEDED:
Phillips head screwdriver
TOOL NEEDED:
Adjustable wrench
NOT INCLUDED:
LPG cylinder
SSize: 18 x 12 in (45 x 30 cm), 20 lb (9 kg)ize: 18 x 12 in (45 x 30 cm), 20 lb (9 kg)
LLPG cylinder must include collar toPG cylinder must include collar to
protect LPG cylinder valve.protect LPG cylinder valve.
NOT INCLUDED:
17" griddle base
NOT INCLUDED:
22" griddle base
NOT INCLUDED:
AA battery
NOT INCLUDED:
LPG cylinder
SSize: 4 x 8 in (10 x 20 cm), 1 lb (453 g)ize: 4 x 8 in (10 x 20 cm), 1 lb (453 g)
CAUTION
Heavy pieces. Two people should assemble this appliance.
NOTICE
Place appliance on a heat-resistant and flame-resistant
surface while in use.
NOTICE
DO NOT leave the hood closed for more than 10 minutes while
cooking.
NOTICE
•DO NOT mix old and new batteries.
•DO NOT mix alkaline, standard (carbon-zinc) or rechargeable
(ni-cad, ni-mh, etc.) batteries.
MODEL:
1 Oven body (1 piece) 2 Heat shield (1 piece) 3 Side handles (2 pieces)
4 Round stone
(1 piece)
5 Square stone
(1 piece)
6 Oven door
(1 piece)
7 Door handle
(1 piece)
8 Oven feet
(4 pieces)
9 Mica sheets
(4 pieces)
STEP 01 Place the griddle base (not included) on its back.
Remove the four (4) M8 flange nuts from the four (4) oven feet.
Use the four (4) M8 flange nuts to attach the heat shield and four (4)
oven feet to the bottom of the griddle base.

ENGLISH
BLACKSTONEPRODUCTS.COM/SUPPORT
OWNER’S MANUAL | ASSEMBLY GUIDE MODEL:
STEP 03 Slide the square stone into the upper oven chamber
brackets.
Center the round stone on the floor of the oven chamber.
STEP 04 With the help of another person, set the pizza oven into
the griddle body.
Note: Take extra care not to damage the burners. DO NOT let the
stones slide out.
STEP 05 Remove the one (1) M5 screw from the door handle. Use
the one (1) M5 screw to attach the door handle to the front of the
oven door.
STEP 02 Remove the eight (8) M6x12 screws from the oven body
side panels.
Use four (4) M6x12 screws to install one (1) side handle and two (2)
mica sheets to the oven body left side panel.
Repeat with the oven body right side panel.

ENGLISH
BLACKSTONEPRODUCTS.COM/SUPPORT
| OWNER’S MANUALASSEMBLY GUIDE
CAUTION
Never leave oil exposed in the rain. This can lead to severe
burns.
Place the included hardcover on the burner when not in use
or if it begins to rain.
NOTICE
•Maximum weight on the side shelf is 10 lbs (4.5 kg).
•The side shelf may get hot while appliance is in use.
CAUTION
Grease build-up on the Flame Tamper can catch fire when
heated.
To prevent damage to the unit and/or injury, clean the top of
the Flame Tamper after each use.
NOTICE
DO NOT sit or stand on the table.
CAUTION
Handle will get hot while appliance is in use.
DO NOT touch the handle while appliance is hot.
CAUTION
Heavy pieces. Two people should assemble this appliance.
NOTICE
Place appliance on a heat-resistant and flame-resistant
surface while in use.
NOTICE
DO NOT leave the hood closed for more than 10 minutes while
cooking.
NOTICE
•DO NOT mix old and new batteries.
•DO NOT mix alkaline, standard (carbon-zinc) or rechargeable
(ni-cad, ni-mh, etc.) batteries.
MODEL:
STEP 07 Proceed to USING YOUR BLACKSTONE
Note: Please reference your Blackstone Griddle Owner’s Manual for
fuel connection instructions.
STEP 06 Tilt the door brake behind the gauge panel and set the oven
door assembly in place.

ENGLISH
BLACKSTONEPRODUCTS.COM/SUPPORT
OWNER’S MANUAL | USING YOUR BLACKSTONE
CLEANING YOUR PIZZA STONE
NOTICE
DO NOT use soap on the cooking stone. This will leave a soap
taste in food.
STEP 01 Wash the cooking stone with warm water.
STEP 02 Rinse and dry completely.
HOw TO USE YOUR PIZZA OVEN
WARNING
Oven door handle gets hot while in use. Use insulated oven
mitts/ gloves when opening or touching the oven door
handle.
FOR BEST RESULTS:
• Always cook with door closed.
• Rotate pizza 90° (a quarter turn) when the cooking time has
reached the halfway point.
FRESH PIZZA
STEP 01 Preheat oven to 700° F (380° C).
STEP 02 Pizza cooking time is about 2-4 minutes depending on the
size and thickness of the dough of the pizza. Thicker or denser foods
require more time.
STEP 03 Pull out the pizza when the crust has reached your desired
readiness, or when the edges of the pizza crust are golden-brown.
FROZEN PIZZAS, COOKIES, ETC.
Follow the food manufacture’s directions on box/ recipe.
CLEANING YOUR OVEN INTERIOR
Apply a strong solution of detergent and water, or use an oven
cleaner with scrub brush on insides of oven lid and bottom. Rinse
and allow to completely air dry.
CLASSIC MARGHERITA
PPizzaizza
NEw YORK STYLE
PPizza doughizza dough
BBQ CHICKEN BACON
PPizzaizza
❶❶Push the control knob in to
start gas flowing.
❷❷Turn the control knob
counter-clockwise to activate
the starter.
❸❸Adjust the temperature to
desired level.
2. PIEZO-ELECTRIC GRIDDLE IGNITION
DO NOT lean over the appliance while lighting.
IGNITION INSTRUCTIONS
1. CHECK VALVES
STEP 01 Turn knobs to OFF position.
STEP 02 Push in knobs and release. Knobs should spring back.
I
I
f knobs
f knobs
DO NOT
DO NOT
spring back, replace valve assembly before using appliance.
STEP 03 Rotate knobs to LOW then turn back to OFF. Knobs should
turn smoothly.
❷❷
❶❶
❸❸
HEALTHY BURNER FLAME
PATTERN BURNER FLAMES ARE YELLOw
OR IRREGULAR
3. CHECK BURNER FLAME
Always check burner flame
before use.
STEP 01 Light burners and rotate
knobs from HIGH to LOW.
STEP 02 Look below the cooking
top to view burners. When knob
is at HIGH, flames should be
larger than when knob is at LOW.
❶
❶Flickers of yellow color.
❷
❷Dark blue color.
❸
❸Vibrant blue.
WARNING
A clogged burner tube can
lead to a fire beneath the
appliance.
Burner should be removed
and cleaned annually or
whenever heavy build-up
or insects/insect nests are
found.
If there is a sudden drop or low
flame issue, please reference the
Troubleshooting chapter.
❶
❶
❷
❷
❸
❸
STEP 01 To preheat the oven:
❶
❶Push the control knob(s) in to
start gas flowing.
❷
❷Turn the control knob(s)
counter-clockwise to activate
the starter.
❸
❸Turn the control
knob(s) to HIGH.
2. PIEZO-ELECTRIC PIZZA OVEN IGNITION
DO NOT lean over the appliance while lighting.
❷
❷
❶
❶
❸
❸
STEP 02 Once the desired
temperature is reached, turn
the control knob to LOW for the
duration of the cook time.
MODEL:
USING YOUR BLACKSTONE

ENGLISH
BLACKSTONEPRODUCTS.COM/SUPPORT
| OWNER’S MANUALUSING YOUR BLACKSTONE
CLEANING YOUR PIZZA STONE
NOTICE
DO NOT use soap on the cooking stone. This will leave a soap
taste in food.
STEP 01 Wash the cooking stone with warm water.
STEP 02 Rinse and dry completely.
HOw TO USE YOUR PIZZA OVEN
WARNING
Oven door handle gets hot while in use. Use insulated oven
mitts/ gloves when opening or touching the oven door
handle.
FOR BEST RESULTS:
• Always cook with door closed.
• Rotate pizza 90° (a quarter turn) when the cooking time has
reached the halfway point.
FRESH PIZZA
STEP 01 Preheat oven to 700° F (380° C).
STEP 02 Pizza cooking time is about 2-4 minutes depending on the
size and thickness of the dough of the pizza. Thicker or denser foods
require more time.
STEP 03 Pull out the pizza when the crust has reached your desired
readiness, or when the edges of the pizza crust are golden-brown.
FROZEN PIZZAS, COOKIES, ETC.
Follow the food manufacture’s directions on box/ recipe.
CLEANING YOUR OVEN INTERIOR
Apply a strong solution of detergent and water, or use an oven
cleaner with scrub brush on insides of oven lid and bottom. Rinse
and allow to completely air dry.
CLASSIC MARGHERITA
PPizzaizza
NEw YORK STYLE
PPizza doughizza dough
BBQ CHICKEN BACON
PPizzaizza
CLEANING YOUR PIZZA STONE
NOTICE
DO NOT use soap on the cooking stone. This will leave a soap
taste in food.
STEP 01 Wash the cooking stone with warm water.
STEP 02 Rinse and dry completely.
HOw TO USE YOUR PIZZA OVEN
WARNING
Oven door handle gets hot while in use. Use insulated oven
mitts/ gloves when opening or touching the oven door
handle.
FOR BEST RESULTS:
• Always cook with door closed.
• Rotate pizza 90° (a quarter turn) when the cooking time has
reached the halfway point.
FRESH PIZZA
STEP 01 Preheat oven to 700° F (380° C).
STEP 02 Pizza cooking time is about 2-4 minutes depending on the
size and thickness of the dough of the pizza. Thicker or denser foods
require more time.
STEP 03 Pull out the pizza when the crust has reached your desired
readiness, or when the edges of the pizza crust are golden-brown.
FROZEN PIZZAS, COOKIES, ETC.
Follow the food manufacture’s directions on box/ recipe.
CLEANING YOUR OVEN INTERIOR
Apply a strong solution of detergent and water, or use an oven
cleaner with scrub brush on insides of oven lid and bottom. Rinse
and allow to completely air dry.
CLASSIC MARGHERITA
P
P
izza
izza
NEw YORK STYLE
P
P
izza dough
izza dough
BBQ CHICKEN BACON
P
P
izza
izza
COOKING ON YOUR BLACKSTONE
DANGER
Flammable items can spontaneously combust if placed near
the appliance. DO NOT place flammable items such as aerosol
containers, oily or greasy towels near the cooking surface.
CAUTION
This appliance will be hot during and after use. DO NOT
handle hot parts with unprotected hands. Use long-handled
cooking utensils and oven mitts.
NOTICE
DO NOT store any items within 3 in (8 cm) of the cooking
surface while in use.
IF GREASE OR OTHER HOT MATERIAL DRIPS ONTO VALVE, HOSE OR
REGULATOR:
STEP 01 Turn o gas supply immediately.
STEP 02 Determine the cause and correct it.
STEP 03 Clean and inspect valve, hose and regulator.
STEP 04 Perform a leak test. (Please reference the Leak Test
Instructions in USING YOUR BLACKSTONE.)
VIDEO RECIPES
Find recipes and cooking tips at:
blackstoneproducts.com/blogs/recipes
youtube.com/c/BlackstoneGriddles
@blackstoneproducts
BREAKFAST
SStrawberries and Cream Pancakestrawberries and Cream Pancakes
DINNER
TTacos Borrachosacos Borrachos
LUNCH
OOklahoma Fried Onion Burgerklahoma Fried Onion Burger
CLEANING YOUR PIZZA STONE
NOTICE
DO NOT use soap on the cooking stone. This will leave a soap
taste in food.
STEP 01 Wash the cooking stone with warm water.
STEP 02 Rinse and dry completely.
HOw TO USE YOUR PIZZA OVEN
WARNING
Oven door handle gets hot while in use. Use insulated oven
mitts/ gloves when opening or touching the oven door
handle.
FOR BEST RESULTS:
• Always cook with door closed.
• Rotate pizza 90° (a quarter turn) when the cooking time has
reached the halfway point.
FRESH PIZZA
STEP 01 Preheat oven to 700° F (380° C).
STEP 02 Pizza cooking time is about 2-4 minutes depending on the
size and thickness of the dough of the pizza. Thicker or denser foods
require more time.
STEP 03 Pull out the pizza when the crust has reached your desired
readiness, or when the edges of the pizza crust are golden-brown.
FROZEN PIZZAS, COOKIES, ETC.
Follow the food manufacture’s directions on box/ recipe.
CLEANING YOUR OVEN INTERIOR
Apply a strong solution of detergent and water, or use an oven
cleaner with scrub brush on insides of oven lid and bottom. Rinse
and allow to completely air dry.
CLASSIC MARGHERITA
PPizzaizza
NEw YORK STYLE
PPizza doughizza dough
BBQ CHICKEN BACON
PPizzaizza
APPLIANCE STORAGE
WARNING
DO NOT move the appliance when in use. Allow the appliance
to cool to 115°F (45°C) before moving or storing.
When not in use, turn OFF appliance by rotating the appliance
control knobs to the OFF position and closing the fuel valve.
When gas supply is connected to appliance, store appliance
outdoors in a cool, dry, well-ventilated space and out of reach of
children.
Visit blackstoneproducts.com/support to find a
cover that will fit your appliance.
CLEANING YOUR APPLIANCE
Clean your appliance after each use, after it is cool to the touch.
• DO NOT use abrasive pad on areas with graphics.
• If a bristle brush is used to clean any of the cooking surfaces,
ensure no loose bristles remain on cooking surfaces prior
to cooking.
WARNING
Grease build up can cause a fire. Clean any part of the
appliance that gets hot and experiences grease build up after
each use.
PLASTIC PARTS & PAINTED SURFACES:
Wash with warm soapy water and wipe dry with a non-abra-
sive cloth.
NOTICE
DO NOT use Citrisol, abrasive cleaners, or a concentrated
cleaner on plastic parts. This may result in damage to and
failure of parts.
FOR EVERY SURFACE
The Blackstone Degreaser
and Cleaning Spray is gentle
enough to clean every surface
of your appliance. Use it on the
cooking surface, the appliance
frame, or anywhere that experi-
ences a build up of grease.
COVER FIT GUIDE
Always cover your appliance if stored outdoors.
MODEL:

ENGLISH
BLACKSTONEPRODUCTS.COM/SUPPORT
OWNER’S MANUAL | TROUBLESHOOTING
CUSTOMER SERVICE
Visit us online at blackstoneproducts.com/support
For assistance concerning appliance use, replacement parts, or
your warranty.
CUSTOMER SERVICE HOURS:
Monday – Friday
7:00 am – 5:00 pm (MST)
MODEL:
TROUBLESHOOTING

ENGLISH
BLACKSTONEPRODUCTS.COM/SUPPORT
| OWNER’S MANUALACTIVATE YOUR WARRANTY
Register your appliance at
Blackstoneproducts.com/register
The North Atlantic Imports LLC 1-Year Warranty covers replacement
parts up to one year after the date of purchase.
TO ENABLE THIS wARRANTY, YOU wILL NEED TO PROVIDE:
☞
☞Your appliance’s Serial Number
The Serial Number can be found on your appliance’s
Manufacturer Label.
(The Manufacturer Label is a large silver sticker found on the body of your
appliance.)
appliance.)
wARRANTY OVERVIEw
North Atlantic Imports, the manufacturer, will warranty for one year
from purchase all parts, workmanship, and finishes. It will be the
manufacturer’s option as to whether to repair or replace any of the
above items. All warranties are limited to the original purchaser
only. This warranty does not cover any liability on the part of North
Atlantic Imports, its agents or employees, for any indirect or conse-
quential damages for breach of warranty. The purchaser must follow
the manufacturer’s usage instructions.
Under no circumstances is the manufacturer responsible for
damages from the failure to operate the cooking station properly. It is
the responsibility of the purchaser to establish the warranty period
by verifying the original purchase date with original sales receipt.
DETAILED ExPLANATION OF THE wARRANTY
North Atlantic Imports LLC warrants to the owner that the product
covered by this agreement is free from defects in material and work-
manship under normal use and service for which it was intended if,
but only if, it has been operated in accordance with North Atlantic
Imports LLC instructions exclusively for domestic use, and not for
private or public club, institutional or commercial purposes.
North Atlantic Imports LLC’s obligation under this warranty is limited
to replacing or repairing, free of charge, any part or parts that
may prove, to the satisfaction of North Atlantic Imports LLC, to be
defective under normal home use and service within the following
stated periods of time from the date of purchase; for one year from
purchase, all parts, finish, and workmanship. Should any failure
to conform to this warranty become apparent during applicable
warranty periods stated above, the original purchaser must notify
North Atlantic Imports LLC of breach of warranty within the appli-
cable warranty period.
North Atlantic Imports LLC shall upon notice and compliance by the
original purchaser with such instructions, correct such nonconfor-
mity by repair or replacement of the defective part or parts.
Correction in the manner provided above shall constitute a fulfill-
ment of all obligations of North Atlantic Imports LLC with respect to
the quality of the product.
North Atlantic Imports LLC does not warrant this equipment to meet
the requirement of any safety code of any state, municipality or other
jurisdiction, and the original purchaser assumes all risk and liability
whatsoever resulting from the use thereof, whether used in accor-
dance with North Atlantic Imports LLC instructions or otherwise.
This warranty does not cover and is intended to exclude any liability
on the part of North Atlantic its agents, servants or employees
whether under this warranty or implied by law for any indirect or
consequential damages for breach on any warranty. The purchaser
must establish all applicable warranty periods pursuant to this
warranty by verifying the original purchase date by producing the
dated sales receipt. This warranty shall not apply to this product or
any other part thereof which has been subject to accident, negli-
gence, alteration, abuse, or misuse or which has been repaired or
altered without North Atlantic written consent, outside of North
Atlantic Imports LLC factory. The full manufacturer warranty is
not valid for griddles purchased from unlicensed, third-party
resellers, purchased at a discount due to missing or damaged
parts, or purchased as a floor model; at the discretion of North
Atlantic Imports.
North Atlantic Imports LLC makes no warranty whatsoever in respect
to accessories or parts not supplied with it. This warranty shall apply
only within the boundaries of the United States of America. This
warranty gives the original purchaser specific rights, and the original
purchaser may also have other rights, which vary from state to state.
������������������������������������������
��������������������������
���������������������������������
����������������������������������������
��������������������������������������
����������������������������������
���������������������������������������
���������������������������
������������������������������������
��������������������������������������
����������������������������������������
����������������������������������������
��������������������������
������������������������������������������
�����������������������������
����������������������������������
�����������������������������������������
����������������������������������������
������������������������������������������
����������������������������
����������������������������
����������������������������������������������������
�������������������������������������������������
��������������������������������
���������������������������������������
���������������������������������������������������
����������������������������������������������������
������������������������������������������������������
��������������������������������
��������������������������������������������
��������������������������������������������������
�������������������������������������������������
������������������������������������������������������
��������
����������������������������������������������������
����������������
����������������
����������������
����������������
�����������������������������������
����������������
������������������������
��������������������������������
��������������������������������
������������
������������������������������������������
��������������������������
���������������������������������
����������������������������������������
��������������������������������������
����������������������������������
���������������������������������������
���������������������������
������������������������������������
��������������������������������������
����������������������������������������
����������������������������������������
��������������������������
������������������������������������������
�����������������������������
����������������������������������
�����������������������������������������
����������������������������������������
������������������������������������������
����������������������������
����������������������������
����������������������������������������������������
�������������������������������������������������
��������������������������������
���������������������������������������
���������������������������������������������������
����������������������������������������������������
������������������������������������������������������
��������������������������������
��������������������������������������������
��������������������������������������������������
�������������������������������������������������
������������������������������������������������������
��������
����������������������������������������������������
��������
��������
��������
��������
��������
����������������
����������������
����������������
����������������
�����������������������������������
����������������
������������������������
��������������������������������
��������������������������������
������������
☞
FREE
MOBILEFRIENDLY
COOKBOOK
When you register
MODEL:
ACTIVATE YOUR wARRANTY
ENGLISH
BLACKSTONEPRODUCTS.COM/SUPPORT
OWNER’S MANUAL |
This page intentionally left blank
MODEL:

ENGLISH
BLACKSTONEPRODUCTS.COM/SUPPORT
| OWNER’S MANUAL
This page intentionally left blank
MODEL:

ENGLISH
BLACKSTONEPRODUCTS.COM/SUPPORT
DISTRIBUTED BY NORTH ATLANTIC IMPORTS, LLC W N LOGAN, UT USA | BLACKSTONE IS A REGISTERED TRADEMARK OF NORTH ATLANTIC IMPORTS, LLC
© NORTH ATLANTIC IMPORTS. ALL RIGHTS RESERVED.

FRANÇAIS
BLACKSTONEPRODUCTS.COM/SUPPORT
CLé D’ALERTE DE SéCURITé
AVERTISSEMENT
Indique une situation dangereuse qui,
si elle n’est pas évitée, peut entraîner
la mort ou des blessures graves.
AVIS
Indique des informations considérées
comme importantes, mais non
liées à un danger (par exemple, des
messages liés à des dommages
matériels).
MANUEL DU PROPRIÉTAIRE
DANGER
Indique une situation dangereuse qui,
si elle n’est pas évitée, entraînera la
mort ou des blessures graves.
ATTENTION
Indique une situation dangereuse
qui, si elle n’est pas évitée, pourrait
entraîner des blessures mineures
ou modérées.
IMPORTANT:
Ce manuel d’instructions contient des informations impor-
tantes nécessaires au montage correct et à l’utilisation en
toute sécurité de l’appareil.
Lisez et suivez tous les avertissements et instructions
avant d’assembler et d’utiliser l’appareil.
Conservez ce manuel pour référence ultérieure.
Installateur/Assembleur : Laisser ces instructions au consommateur.
FOUR À PIZZA PORTATIF
KIT DE CONVERSION POUR PLAQUES CHAUFFANTES DE 17 PO
MODÈLE: v01
TABLE DES MATIÈRES
GUIDE D’ASSEMBLAGE..........................................................
UTILISATION DE VOTRE BLACKSTONE ................................
DÉPANNAGE ...........................................................................
ACTIVEZ VOTRE GARANTIE...................................................

FRANÇAIS
BLACKSTONEPRODUCTS.COM/SUPPORT
MANUEL DU PROPRIÉTAIRE | GUIDE D’ASSEMBLAGE MODÈLE:
GUIDE D’ASSEMBLAGE
VUE éCLATéE
PIÈCES
QTé
1.1a Panneau de jauge du
four supérieur 1
1.1b Façade gauche du four 1
1.1c Façade droite du four 1
1.1d Façade inférieure du
four 1
1.2a
Thermomètre
1
PIÈCES
QTé
1.2b Bouclier thermique pour
thermomètre 1
1.2c Support de maintien du
thermomètre 1
1.3 Supports de ventilation 2
1.4 Couvercle de ventilation 1
PIÈCES
QTé
1.5 Supports de couvercle
de four 2
1.6 Assemblage de l'écran
thermique intérieur 1
1.7a Panneau arrière de la
couverture intérieure 1
1.7b Tuyaux rayonnants 3
PIÈCES
QTé
1.8a Couverture extérieure
du four 1
1.8b Panneau arrière du four 1
1.9 Assemblage du support
à pierres 1
LISTE DES PIÈCES
5
8
7
4
3
6
9
1.7b1.1a
1.2c
1.1d
1.5
1.8a
1.1b
1.3
1.2a
1.6
1.9
1.1c
1.4
1.8b
2
1.2b
1.7a

FRANÇAIS
BLACKSTONEPRODUCTS.COM/SUPPORT
| MANUEL DU PROPRIÉTAIREGUIDE D’ASSEMBLAGE
INSTRUCTIONS DE MONTAGE
Trouvez une grande surface propre pour assembler votre appareil.
Retirez tous les matériaux d’emballage avant l’assemblage.
ATTENTION
Bouts pointus. Portez des gants lors de l’assemblage.
OUTILS NéCESSAIRES:
Tournevis cruciforme et clé à molette
OUTIL NéCESSAIRE:
Tournevis cruciforme
OUTIL NéCESSAIRE:
Clé à molette
NON INCLUS:
Bouteille GPL
TTaille: 45 x 30 cm (18 x 12 po), 9 kg (20 lb)aille: 45 x 30 cm (18 x 12 po), 9 kg (20 lb)
LLa bouteille de GPL doit inclure un collier poura bouteille de GPL doit inclure un collier pour
protéger le robinet de la bouteille de GPL.protéger le robinet de la bouteille de GPL.
NON INCLUS:
Pile AA
NON INCLUS:
Bouteille GPL
TTaille: 10 x 20 cm (4 x 8 po), 453 g (1 lb)aille: 10 x 20 cm (4 x 8 po), 453 g (1 lb)
NON INCLUS:
Base de plaque chauante de 17 po
NON INCLUS:
Base de plaque chauante de 22 po
ATTENTION
Morceaux lourds. Deux personnes doivent assembler cet
appareil.
AVIS
Placez l’appareil sur une surface résistante à la chaleur et aux
flammes pendant son utilisation.
AVIS
Ne laissez pas la hotte fermée plus de 10 minutes pendant la
cuisson.
AVIS
•Ne mélangez pas des piles anciennes et neuves.
•Ne mélangez pas des piles alcalines, standard (carbone-zinc)
ou rechargeables (ni-cad, ni-mh, etc.).
MODÈLE:
1 Corps de four (1 pièce) 2 Bouclier thermique (1 pièce) 3 Poignées latérales (2 pièces)
4 Pierre ronde
(1 pièce)
5 Pierre carrée
(1 pièce)
6 Porte du four
(1 pièce)
7 Poignée de porte
(1 pièce)
8 Pieds de four
(4 pièces)
9 Feuilles de mica
(4 pièces)
éTAPE 01 Placez la base de la plaque chauante (non incluse) sur son dos.
Retirez les quatre (4) écrous à embase M8 des quatre (4) pieds du four.
Utilisez les quatre (4) écrous à embase M8 pour fixer l’écran thermique et les
quatre (4) pieds du four au bas de la base de la plaque chauante.

FRANÇAIS
BLACKSTONEPRODUCTS.COM/SUPPORT
MANUEL DU PROPRIÉTAIRE | GUIDE D’ASSEMBLAGE MODÈLE:
éTAPE 03 Faites glisser la pierre carrée dans les supports de la chambre
supérieure du four.
Centrez la pierre ronde sur le sol de la chambre du four.
éTAPE 04 Avec l’aide d’une autre personne, placez le four à pizza dans le
corps de la plaque chauante.
Remarque: Faites particulièrement attention à NE PAS endommager les
brûleurs. Ne laissez pas les pierres glisser.
éTAPE 05 Retirez la (1) vis M5 de la poignée de porte. Utilisez la (1) vis M5 pour
fixer la poignée de porte à l’avant de la porte du four.
éTAPE 02 Retirez les huit (8) vis M6x12 des panneaux latéraux du corps du four.
Utilisez quatre (4) vis M6x12 pour installer une (1) poignée latérale et deux (2)
feuilles de mica sur le panneau latéral gauche du four.
Répétez avec le panneau latéral droit du corps du four.

FRANÇAIS
BLACKSTONEPRODUCTS.COM/SUPPORT
| MANUEL DU PROPRIÉTAIREGUIDE D’ASSEMBLAGE
ATTENTION
Ne laissez jamais l’huile exposée à la pluie. Cela peut entraîner
de graves brûlures.
Placez la couverture rigide incluse sur le brûleur lorsqu’il n’est
pas utilisé ou s’il commence à pleuvoir.
AVIS
•Le poids maximum sur la tablette latérale est de 10 lb (4,5 kg).
•L’étagère latérale peut devenir chaude pendant l’utilisation de
l’appareil.
ATTENTION
L’accumulation de graisse sur le pilon à flamme peut
s’enflammer lorsqu’il est chaué.
Pour éviter d’endommager l’appareil et/ou de vous blesser,
nettoyez le dessus du sabotage de flamme après chaque
utilisation.
AVIS
Ne vous asseyez pas ou ne montez pas sur la table.
ATTENTION
La poignée deviendra chaude pendant l’utilisation de
l’appareil.
Ne touchez pas la poignée lorsque l’appareil est chaud.
ATTENTION
Morceaux lourds. Deux personnes doivent assembler cet
appareil.
AVIS
Placez l’appareil sur une surface résistante à la chaleur et aux
flammes pendant son utilisation.
AVIS
Ne laissez pas la hotte fermée plus de 10 minutes pendant la
cuisson.
AVIS
•Ne mélangez pas des piles anciennes et neuves.
•Ne mélangez pas des piles alcalines, standard (carbone-zinc)
ou rechargeables (ni-cad, ni-mh, etc.).
MODÈLE:
éTAPE 07 Passez à UTILISATION DE VOTRE BLACKSTONE
Remarque: veuillez vous référer au manuel du propriétaire de votre plaque
chauante Blackstone pour les instructions de raccordement du carburant.
éTAPE 06
Inclinez le frein de porte derrière le panneau de jauge et mettez
l’assemblage de la porte du four en place.

FRANÇAIS
BLACKSTONEPRODUCTS.COM/SUPPORT
MANUEL DU PROPRIÉTAIRE | UTILISATION DE VOTRE BLACKSTONE
NETTOYER SA PIERRE À PIZZA
AVIS
N’UTILISEZ PAS de savon sur la pierre de cuisson. Cela laissera
un goût de savon dans les aliments.
éTAPE 01 Laver la pierre de cuisson à l’eau tiède.
éTAPE 02 Rincez et séchez complètement.
COMMENT UTILISER VOTRE FOUR À PIZZA
AVERTISSEMENT
La poignée de la porte du four devient chaude pendant
l’utilisation. Utilisez des mitaines/gants isolants lorsque vous
ouvrez ou touchez la poignée de la porte du four.
POUR LES MEILLEURS RéSULTATS:
• Cuisinez toujours avec la porte fermée.
• Faites pivoter la pizza de 90° (un quart de tour) lorsque le temps de cuisson a
atteint la mi-cuisson.
PIZZAS FRAÎCHES
éTAPE 01 Préchauer le four à 700°F (380°C).
éTAPE 02 Le temps de cuisson de la pizza est d’environ 2 à 4 minutes selon
la taille et l’épaisseur de la pâte de la pizza. Les aliments plus épais ou plus
denses nécessitent plus de temps.
éTAPE 03 Sortez la pizza lorsque la croûte a atteint la préparation souhaitée ou
lorsque les bords de la croûte de pizza sont dorés.
PIZZAS SURGELéES, BISCUITS, ETC.
Suivez les instructions du fabricant de produits alimentaires sur la boîte/
la recette.
NETTOYAGE DE L’INTéRIEUR DU FOUR
Appliquez une solution forte de détergent et d’eau, ou utilisez un nettoyant pour
four avec une brosse à récurer à l’intérieur du couvercle et du fond du four.
Rincer et laisser sécher complètement à l’air.
MARGHERITA CLASSIQUE
PPizzaizza
À LA MODE
NEw-YORKAISE
PPâte à pizzaâte à pizza
POULET ET AU
BACON BARBECUE
PPizzaizza
❶❶Appuyez sur le bouton de
commande pour démarrer
l’écoulement du gaz.
❷❷Tournez le bouton de commande
dans le sens antihoraire pour activer
le démarreur.
❸❸Réglez la température au
niveau souhaité.
2. ALLUMAGE PIéZO-éLECTRIQUE
DE LA PLAQUE CHAUFFANTE
Ne vous penchez pas sur l’appareil pendant l’allumage.
INSTRUCTIONS D’ALLUMAGE
1. CLAPETS ANTI-RETOUR
éTAPE 01 Tourner les boutons en position OFF.
éTAPE 02 Poussez les boutons et relâchez. Les boutons doivent rebondir.
éTAPE 03 Si les boutons ne reviennent pas, remplacez l’assemblage de la valve
avant d’utiliser l’appareil.
éTAPE 04 Tournez les boutons sur LOW puis remettez-les sur OFF. Les boutons
doivent tourner en douceur.
❷❷
❶❶
❸❸
MODÈLE DE FLAMME DE BRÛLEUR
SAIN LES FLAMMES DU BRÛLEUR SONT
JAUNES OU IRRéGULIÈRES
3. VéRIFIER LA FLAMME DU
BRÛLEUR
Vérifiez toujours la flamme du brûleur
avant utilisation.
éTAPE 01 Allumez les brûleurs et
tournez les boutons de HAUT à BAS.
éTAPE 02 Regardez sous la table
de cuisson pour voir les brûleurs.
Lorsque le bouton est sur HAUT, les
flammes doivent être plus grandes
que lorsque le bouton est sur BAS.
❶
❶Scintillement de couleur jaune.
❷
❷Couleur bleu foncé.
❸
❸Bleu vif.
AVERTISSEMENT
Un tube de brûleur obstrué
peut provoquer un incendie
sous l’appareil.
Le brûleur doit être retiré
et nettoyé chaque année
ou chaque fois qu’une
forte accumulation ou des
insectes/nids d’insectes sont
trouvés.
En cas de chute soudaine ou de
problème de flamme faible, veuillez
consulter le chapitre Dépannage.
❶
❶
❷
❷
❸
❸
éTAPE 01 Pour préchauer le four:
❶
❶Appuyez sur le(s) bouton(s) de
commande pour faire couler le gaz.
❷
❷Tournez le(s) bouton(s) de
commande dans le sens antihoraire
pour activer le démarreur.
❸
❸Tourner le(s) bouton(s) de
commande vers HAUT.
2. ALLUMAGE DU FOUR À PIZZA PIéZO-éLECTRIQUE
Ne vous penchez pas sur l’appareil pendant l’allumage.
éTAPE 02 Une fois la température
désirée atteinte, tournez le bouton de
commande en position basse pendant
toute la durée de la cuisson.
❷
❷
❶
❶
❸
❸
MODÈLE:
UTILISATION DE VOTRE BLACKSTONE

FRANÇAIS
BLACKSTONEPRODUCTS.COM/SUPPORT
| MANUEL DU PROPRIÉTAIREUTILISATION DE VOTRE BLACKSTONE
NETTOYER SA PIERRE À PIZZA
AVIS
N’UTILISEZ PAS de savon sur la pierre de cuisson. Cela laissera
un goût de savon dans les aliments.
éTAPE 01 Laver la pierre de cuisson à l’eau tiède.
éTAPE 02 Rincez et séchez complètement.
COMMENT UTILISER VOTRE FOUR À PIZZA
AVERTISSEMENT
La poignée de la porte du four devient chaude pendant
l’utilisation. Utilisez des mitaines/gants isolants lorsque vous
ouvrez ou touchez la poignée de la porte du four.
POUR LES MEILLEURS RéSULTATS:
• Cuisinez toujours avec la porte fermée.
• Faites pivoter la pizza de 90° (un quart de tour) lorsque le temps de cuisson a
atteint la mi-cuisson.
PIZZAS FRAÎCHES
éTAPE 01 Préchauer le four à 700°F (380°C).
éTAPE 02 Le temps de cuisson de la pizza est d’environ 2 à 4 minutes selon
la taille et l’épaisseur de la pâte de la pizza. Les aliments plus épais ou plus
denses nécessitent plus de temps.
éTAPE 03 Sortez la pizza lorsque la croûte a atteint la préparation souhaitée ou
lorsque les bords de la croûte de pizza sont dorés.
PIZZAS SURGELéES, BISCUITS, ETC.
Suivez les instructions du fabricant de produits alimentaires sur la boîte/
la recette.
NETTOYAGE DE L’INTéRIEUR DU FOUR
Appliquez une solution forte de détergent et d’eau, ou utilisez un nettoyant pour
four avec une brosse à récurer à l’intérieur du couvercle et du fond du four.
Rincer et laisser sécher complètement à l’air.
MARGHERITA CLASSIQUE
PPizzaizza
À LA MODE
NEw-YORKAISE
PPâte à pizzaâte à pizza
POULET ET AU
BACON BARBECUE
PPizzaizza
NETTOYER SA PIERRE À PIZZA
AVIS
N’UTILISEZ PAS de savon sur la pierre de cuisson. Cela laissera
un goût de savon dans les aliments.
éTAPE 01 Laver la pierre de cuisson à l’eau tiède.
éTAPE 02 Rincez et séchez complètement.
COMMENT UTILISER VOTRE FOUR À PIZZA
AVERTISSEMENT
La poignée de la porte du four devient chaude pendant
l’utilisation. Utilisez des mitaines/gants isolants lorsque vous
ouvrez ou touchez la poignée de la porte du four.
POUR LES MEILLEURS RéSULTATS:
• Cuisinez toujours avec la porte fermée.
• Faites pivoter la pizza de 90° (un quart de tour) lorsque le temps de cuisson a
atteint la mi-cuisson.
PIZZAS FRAÎCHES
éTAPE 01 Préchauer le four à 700°F (380°C).
éTAPE 02 Le temps de cuisson de la pizza est d’environ 2 à 4 minutes selon
la taille et l’épaisseur de la pâte de la pizza. Les aliments plus épais ou plus
denses nécessitent plus de temps.
éTAPE 03 Sortez la pizza lorsque la croûte a atteint la préparation souhaitée ou
lorsque les bords de la croûte de pizza sont dorés.
PIZZAS SURGELéES, BISCUITS, ETC.
Suivez les instructions du fabricant de produits alimentaires sur la boîte/
la recette.
NETTOYAGE DE L’INTéRIEUR DU FOUR
Appliquez une solution forte de détergent et d’eau, ou utilisez un nettoyant pour
four avec une brosse à récurer à l’intérieur du couvercle et du fond du four.
Rincer et laisser sécher complètement à l’air.
MARGHERITA CLASSIQUE
P
P
izza
izza
À LA MODE
NEw-YORKAISE
P
P
âte à pizza
âte à pizza
POULET ET AU
BACON BARBECUE
P
P
izza
izza
CUISINER SUR VOTRE BLACKSTONE
DANGER
Les objets inflammables peuvent s’enflammer spontanément
s’ils sont placés à proximité de l’appareil. Ne placez pas
d’objets inflammables tels que des bombes aérosols, des
serviettes huileuses ou grasses près de la surface de cuisson.
ATTENTION
Cet appareil sera chaud pendant et après utilisation. Ne
manipulez pas les pièces chaudes avec les mains non
protégées. Utilisez des ustensiles de cuisine à long manche et
des gants de cuisine.
AVIS
Ne rangez aucun article à moins de 3 po (8 cm) de la surface
de cuisson pendant son utilisation.
SI DE LA GRAISSE OU UN AUTRE MATéRIAU CHAUD S’éGOUTTE SUR LA
VANNE, LE TUYAU OU LE RéGULATEUR:
éTAPE 01 Coupez immédiatement l’alimentation en gaz.
éTAPE 02 Déterminez la cause et corrigez-la.
éTAPE 03 Nettoyez et inspectez la vanne, le tuyau et le régulateur.
éTAPE 04 Eectuez un test de fuite. (Veuillez vous référer aux instructions de
test de fuite dans le UTILISATION DE VOTRE BLACKSTONE.)
RECETTES VIDéO
Trouvez des recettes et des conseils de cuisine sur:
blackstoneproducts.com/blogs/recipes
youtube.com/c/BlackstoneGriddles
@blackstoneproducts
PETIT-DéJEUNER
PPancakes aux fraises et à la crèmeancakes aux fraises et à la crème
DÎNER
TTacos borrachosacos borrachos
DéJEUNER
BBurger aux oignons frits de l’Oklahomaurger aux oignons frits de l’Oklahoma
NETTOYER SA PIERRE À PIZZA
AVIS
N’UTILISEZ PAS de savon sur la pierre de cuisson. Cela laissera
un goût de savon dans les aliments.
éTAPE 01 Laver la pierre de cuisson à l’eau tiède.
éTAPE 02 Rincez et séchez complètement.
COMMENT UTILISER VOTRE FOUR À PIZZA
AVERTISSEMENT
La poignée de la porte du four devient chaude pendant
l’utilisation. Utilisez des mitaines/gants isolants lorsque vous
ouvrez ou touchez la poignée de la porte du four.
POUR LES MEILLEURS RéSULTATS:
• Cuisinez toujours avec la porte fermée.
• Faites pivoter la pizza de 90° (un quart de tour) lorsque le temps de cuisson a
atteint la mi-cuisson.
PIZZAS FRAÎCHES
éTAPE 01 Préchauer le four à 700°F (380°C).
éTAPE 02 Le temps de cuisson de la pizza est d’environ 2 à 4 minutes selon
la taille et l’épaisseur de la pâte de la pizza. Les aliments plus épais ou plus
denses nécessitent plus de temps.
éTAPE 03 Sortez la pizza lorsque la croûte a atteint la préparation souhaitée ou
lorsque les bords de la croûte de pizza sont dorés.
PIZZAS SURGELéES, BISCUITS, ETC.
Suivez les instructions du fabricant de produits alimentaires sur la boîte/
la recette.
NETTOYAGE DE L’INTéRIEUR DU FOUR
Appliquez une solution forte de détergent et d’eau, ou utilisez un nettoyant pour
four avec une brosse à récurer à l’intérieur du couvercle et du fond du four.
Rincer et laisser sécher complètement à l’air.
MARGHERITA CLASSIQUE
PPizzaizza
À LA MODE
NEw-YORKAISE
PPâte à pizzaâte à pizza
POULET ET AU
BACON BARBECUE
PPizzaizza
STOCKAGE D’APPAREILS
AVERTISSEMENT
Ne déplacez pas l’appareil pendant son utilisation. Laissez
l’appareil refroidir à 115°F (45°C) avant de le déplacer ou de le
ranger.
Lorsqu’il n’est pas utilisé, éteignez l’appareil en tournant les boutons de
commande de l’appareil en position OFF et en fermant le robinet de carburant.
Lorsque l’alimentation en gaz est connectée à l’appareil, rangez l’appareil à
l’extérieur dans un endroit frais, sec, bien ventilé et hors de portée des enfants.
Visit blackstoneproducts.com/support to find a cover
that will fit your appliance.
NETTOYAGE DE VOTRE APPAREIL
Nettoyez votre appareil après chaque utilisation, après qu’il soit froid
au toucher.
• N’UTILISEZ PAS de tampon abrasif sur les zones comportant des graphiques.
• Si une brosse à poils est utilisée pour nettoyer l’une des surfaces de cuisson,
assurez-vous qu’aucun poil lâche ne reste sur les surfaces de cuisson avant
la cuisson.
AVERTISSEMENT
L’accumulation de graisse peut provoquer un incendie.
Nettoyez toute partie de l’appareil qui devient chaude et qui
subit une accumulation de graisse après chaque utilisation.
PIÈCES EN PLASTIQUE ET SURFACES PEINTES:
Laver à l’eau chaude savonneuse et essuyer avec un chion non abrasif.
AVIS
N’UTILISEZ PAS de Citrisol, de nettoyants abrasifs ou de
nettoyant concentré sur les pièces en plastique. Cela peut
entraîner des dommages et une défaillance des pièces.
POUR CHAQUE SURFACE
Le Blackstone Degreaser and
Cleaning Spray est assez doux pour
nettoyer toutes les surfaces de votre
appareil. Utilisez-le sur la surface
de cuisson, le cadre de l’appareil ou
partout où il y a une accumulation
de graisse.
GUIDE D’AJUSTEMENT DE COUVERTURE
Couvrez toujours votre appareil s’il est entreposé à l’extérieur.
MODÈLE:

FRANÇAIS
BLACKSTONEPRODUCTS.COM/SUPPORT
MANUEL DU PROPRIÉTAIRE | DÉPANNAGE
SERVICE CLIENTS
Visitez-nous en ligne sur blackstoneproducts.com/support
Pour obtenir de l’aide concernant l’utilisation de l’appareil, les pièces de
rechange ou votre garantie.
HEURES D’OUVERTURE DU SERVICE CLIENT:
Lundi vendredi
7h00 – 17h00 (HNR)
MODÈLE:
DéPANNAGE
Table of contents
Languages:
Other Black Stone Kitchen Appliance manuals

Black Stone
Black Stone 1885 User manual

Black Stone
Black Stone 2238 User manual

Black Stone
Black Stone 6960 User manual

Black Stone
Black Stone 1868 User manual

Black Stone
Black Stone 6961 User manual

Black Stone
Black Stone GRIDDLE 1554 User manual

Black Stone
Black Stone PATIO 1962 User manual

Black Stone
Black Stone 6964 User manual

Black Stone
Black Stone 6824 User manual

Black Stone
Black Stone 1863 User manual