ENGLISH
| Owner’s Manual
ENGLISH
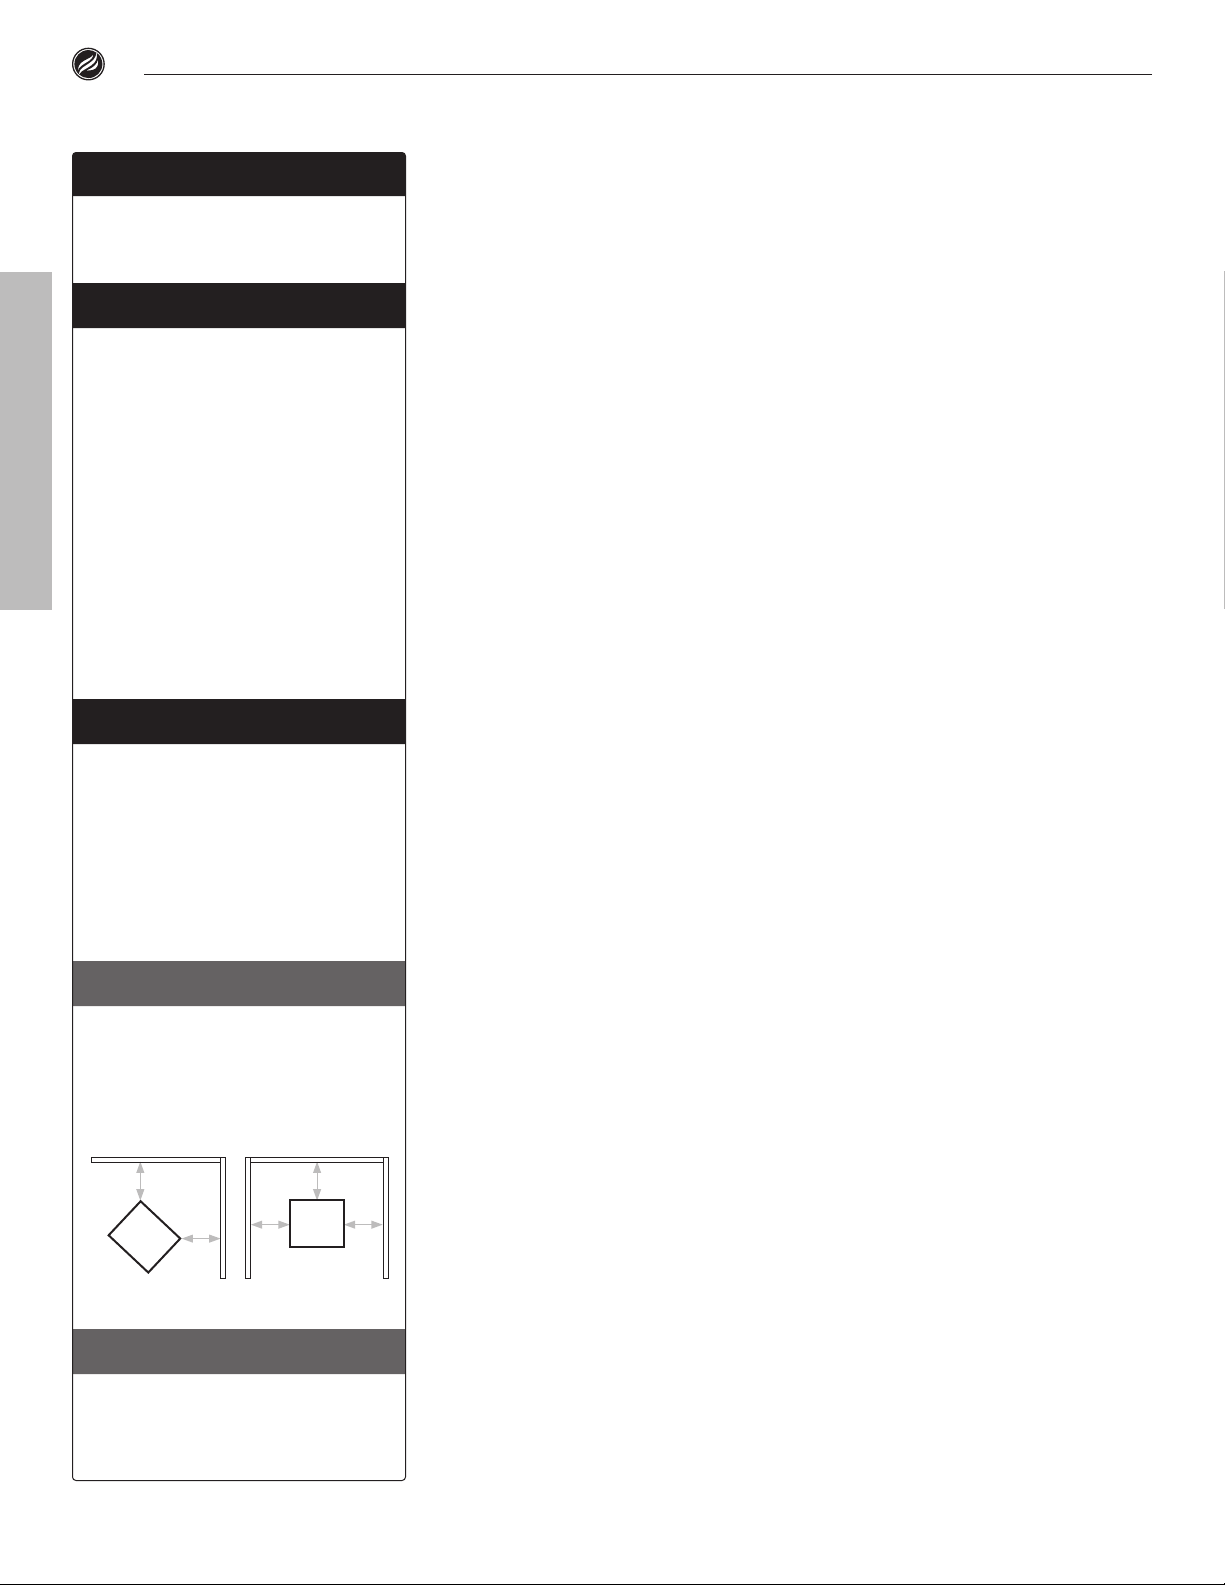
!DANGER
•NEVER operate this appli-
ance within 10ft (3.0 m) of
any structure, combust-
able material or other
gas cylinder.
•NEVER operate this appli-
ance within 25 ft (7.5 m) of
any flammable liquid.
Failure to follow these
instructions may result
in fire, explosion or burn
hazard which could cause
property damage, personal
injury or death.
!DANGER
•This appliance is for outdoor
use only, and is not to be
used in a building, garage, or
any other enclosed area.
•This device is not to be used
in or on recreational vehicles
or boats.
•This appliance is not be
used on or under any apart-
ment or condominium
balcony or deck.
!DANGER
Never operate this appli-
ance unattended.
!WARNING
INSTALLER/ASSEMBLER:
Leave these instructions
with consumer.
CONSUMER:
Retain this manual for
future reference.
!WARNING
This instruction manual
contains important informa-
tion necessary for the proper
assembly and safe use
of the appliance.
Read all warnings and
instructions before assem-
bling the appliance.
!WARNING
Follow all warnings and
instructions while using
the appliance.
!WARNING
This product can expose you
to chemicals including Di(2-
ethylhexyl)phthalate (DEHP),
which are known to the
State of California to cause
cancer and birth defects or
other reproductive harm.
For more information, go to
www.P65Warnings.ca.gov.
!DANGER
Do not store or use gaso-
line or other flammable
liquids or vapors in the
vicinity of this or any other
appliance.
An LP cylinder not
connected for use shall not
be stored in the vicinity of
this or any other appliance.
!DANGER
When cooking with oil or
grease, have a type BC
or ABC fire extinguisher
readily available.
!DANGER
If a fire should occur, keep
away from the appliance
and immediately call your
fire department. DO NOT
attempt to extinguish an oil
or a grease fire with water.
!DANGER
IF YOU SMELL GAS:
1. Shut o gas to appliance.
2.Extinguish any open flame.
3.Open lid.
4.If odor continues, keep
away from appliance and
immediately call your gas
supplier or your fire
department.
Failure to follow these
instructions could result
in fire or explosion which
could cause property
damage, personal injury or
death.
ENGLISH
COOKING TIPS
LOW HEAT:
Cooks slowly and requires more time.
Breaks down connective tissue and fat for a tender, moist meal.
• Fatty, thick cuts of meat.
(eg: pork shoulder, brisket, chicken thighs, short ribs)
• Delicate seafood (eg: octopus, squid)
MEDIUM HEAT:
Stable heat, takes the average time you’d expect for pancakes, eggs,
toast, and more.
For food more susceptible to heat. Sear without overcooking.
• Fish (whole or in pieces)
• Most seafood
• Vegetables (steam with the Blackstone Basting Dome for best avor)
• Pancakes
• Eggs
HIGH HEAT:
Cooks meals fast and in little time.
Slow cooking would dry up these cuts and make them horrible to eat
since they are lower on fat.
• Lean cuts of meat. (eg: chicken breast, tenderloin, skirt steak, ank)
!IMPORTANT SAFEGUARDS
When using electrical appliances, basic safety precautions should
always be followed including the following:
1. Read all instructions.
2. Do not touch hot surfaces. Use handles or knobs.
3. To protect against electrical shock do not immerse cord, plugs, or appli-
ance in water or other liquid.
4. Close supervision is necessary when any appliance is used by
or near children.
5. Unplug from outlet when not in use and before cleaning. Allow to cool
before putting on or taking o parts.
6. Do not operate any appliance with a damaged cord or plug or after the
appliance malfunctions or has been damaged in any manner. Return
appliance to the nearest authorized service facility for examination,
repair, or adjustment.
7. The use of accessory attachments not recommended by the appliance
manufacturer may cause injuries.
8. For Household use only.
9. Do not let cord hang over edge of table or counter, or touch hot surfaces.
10.Do not place on or near a hot gas or electric burner, or in a heated oven.
11. Extreme caution must be used when moving an appliance containing hot
oil or other hot liquids.
12.To disconnect, turn any control to “o’, then remove plug from wall outlet.
13.Do not use appliance for other than intended use.
14.Fuel, such as charcoal briquettes, is not to be used with appliance.
15.Use only on properly grounded outlet.
16.CAUTION: Risk of Electric Shock. Keep extension cord connection dry
and o the ground.
17. For Outdoor use only, do not expose to rain.
18.Be sure that handles are assembled and fastened properly.
SAVE THESE INSTRUCTIONS
For extension cords:
a. A short power-supply cord is provided to reduce the risk resulting from
becoming entangled in or tripping over a longer cord.
b. Longer power-supply cords or extension cords are available and may be
used if care is exercised in their use.
c. If a longer power-supply cord or extension cord is used:
1. The marked electrical rating of the cord set or extension cord should be
at least as great as the electrical rating of the appliance;
2. The cord should be arranged so that it will not drape over the coun-
tertop or tabletop where it can be pulled on by children or tripped over
unintentionally; and
3. The cord set or extension cord should be a grounding-type 3-wire cord.
d. Outdoor extension cords should be used with outdoor use products
and are surface marked with the suix letter “W” and with a tag stating
“Suitable for use with outdoor appliances.”
e. The connection to an Extension cord should be kept dry and
o the ground.
f. Store products indoors when not in use - out of the reach of children.
g. Do not clean this product with a water spray or the like.
!DANGER
•The power cord must be
electrically grounded in
accordance with local codes
or, in the absence of local
codes, with the National
Electrical Code, ANSI/
NFPA 70, or the Canadian
Electrical Code, CSA C22.1.
•Keep the electrical supply
cord and the fuel supply
hose away from any heated
surface(s).
•Use only a Ground
Fault Interrupter (GFI)
protected circuit.
•Never remove the grounding
plug or use with an adapter
of 2 prongs.
•Use only extension cords
with a 3 prong grounding
plug, rated for the power
of the equipment, and
approved for outdoor use
with a W-A marking.
C
Model 1962