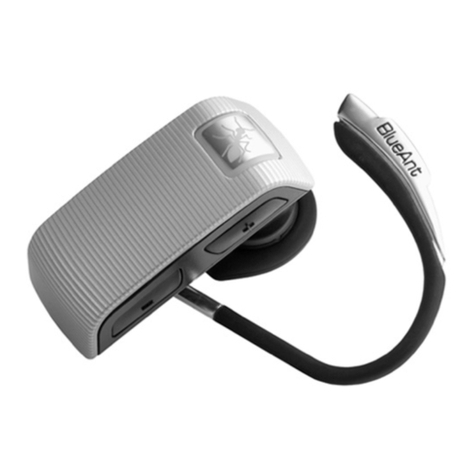
Blueant T2 ENDURE User manual

T2 ENDURE
USER GUIDE
Read Me to Get the Most Out of
Your Device...
T2_User_Guide_EN.indd 1
2/2/2012 7:19:42 PM

T2 Endure Quick Start Guide: English
1
Indicator
Light
Vol -Vol +
Command
Button
Microphones
Charge Your Headset
Your headset has been given an initial partial charge to get started,
but for best results charge it using the supplied USB cable and
adaptor until the indicator light turns white.
>
Charge the T2 whenever it announces that the battery is Very Low.
>
Your headset features Rapid Charge technology. It will charge to
50% capacity in just 30 minutes. A full charge takes about 2 hours.
>
During charging, the indicator light flashes red.
>
When the light goes white, the charge is complete.
>
The T2 features an iPhone headset battery meter so you can check
your battery status at a glance.
2
USB Connector
(lift cover to access)
Power
Switch
T2_User_Guide_EN.indd 2
2/2/2012 7:19:42 PM

T2 Endure Quick Start Guide: English
1
Indicator
Light
Vol -Vol +
Command
Button
Microphones
Charge Your Headset
Your headset has been given an initial partial charge to get started,
but for best results charge it using the supplied USB cable and
adaptor until the indicator light turns white.
> Charge the T2 whenever it announces that the battery is Very Low.
> Your headset features Rapid Charge technology. It will charge to
50% capacity in just 30 minutes. A full charge takes about 2 hours.
> During charging, the indicator light flashes red.
> When the light goes white, the charge is complete.
> The T2 features an iPhone headset battery meter so you can check
your battery status at a glance.
2
USB Connector
(lift cover to access)
Power
Switch
T2_User_Guide_EN.indd 3
2/2/2012 7:19:42 PM

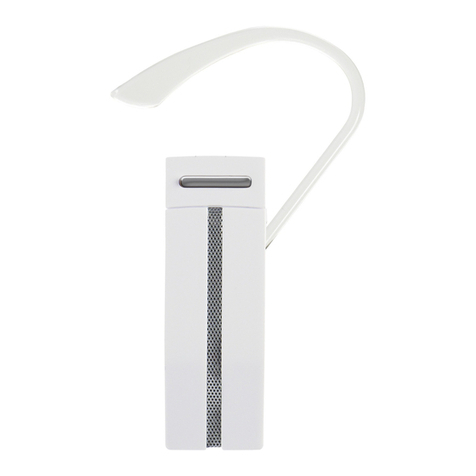
Wearing the T2
You can wear your
headset on either ear.
For best results:
> Position the hook
and ear gel as
shown here.
> Make sure the T2
is angled towards
your mouth.
Pair Your Headset
1. Slide the power switch across to turn the T2 on.
2. Put the T2 in your ear.
3. The first time you use the T2 it will go straight to pair mode and
talk you through the pairing process.
For subsequent pairings, make sure the T2 is not connected to any
phones, then hold down the Command button. The T2 will
announce it is going into pairing mode.
Tip: The pairing code is 0000 (four zeros).
3
4
LEFT
EAR
RIGHT
EAR
Transfer Your Phonebook
Once the pairing is complete, your headset will attempt to transfer
your phonebook contacts so that it can announce the names of
incoming callers. Please accept any connection requests on your
phone from the T2 and wait for the transfer to finish.
Some phones do not support automatic phonebook transfers. If the
T2 announces that this is the case, you need to go to your phone’s
address book and send contacts via Bluetooth to the T2.
See “Phonebook Troubleshooting” or www.blueantwireless.com
for help.
Note: Whenever you add contacts to your phone in future you must
update your phonebook on the T2: with the T2 connected to your
phone but not on a call, hold down the Command button for 3
seconds to initiate a phonebook update.
Voice Commands
To use one of the voice commands, click the Command button, wait
for the T2 to ask you to Say A Command, then say the command:
>
Check Battery — Tells you the current headset battery level.
>
Phone Commands — Activates your phone’s voice dialing feature (if
5
6
T2_User_Guide_EN.indd 4
2/2/2012 7:19:42 PM

Wearing the T2
You can wear your
headset on either ear.
For best results:
> Position the hook
and ear gel as
shown here.
> Make sure the T2
is angled towards
your mouth.
Pair Your Headset
1. Slide the power switch across to turn the T2 on.
2. Put the T2 in your ear.
3. The first time you use the T2 it will go straight to pair mode and
talk you through the pairing process.
For subsequent pairings, make sure the T2 is not connected to any
phones, then hold down the Command button. The T2 will
announce it is going into pairing mode.
Tip: The pairing code is 0000 (four zeros).
3
4
LEFT
EAR
RIGHT
EAR
Transfer Your Phonebook
Once the pairing is complete, your headset will attempt to transfer
your phonebook contacts so that it can announce the names of
incoming callers. Please accept any connection requests on your
phone from the T2 and wait for the transfer to finish.
Some phones do not support automatic phonebook transfers. If the
T2 announces that this is the case, you need to go to your phone’s
address book and send contacts via Bluetooth to the T2.
See “Phonebook Troubleshooting” or www.blueantwireless.com
for help.
Note: Whenever you add contacts to your phone in future you must
update your phonebook on the T2: with the T2 connected to your
phone but not on a call, hold down the Command button for 3
seconds to initiate a phonebook update.
Voice Commands
To use one of the voice commands, click the Command button, wait
for the T2 to ask you to Say A Command, then say the command:
> Check Battery — Tells you the current headset battery level.
> Phone Commands — Activates your phone’s voice dialing feature (if
5
6
T2_User_Guide_EN.indd 5
2/2/2012 7:19:42 PM

available on your phone). Depending on your phone model, you may
need to record voice tags on the phone to use this feature.
On the iPhone 4S this command activates Siri.
On Android devices this command activates Google Voice Actions.
Voice recognition will cancel automatically after a short period
of time if you do not say a command. You can also cancel voice
recognition by clicking the Command button.
Making Calls
Voice Dialing
To use this feature your phone must support voice dialing over
Bluetooth.
1. Double click the Command button or use the Phone Commands
voice command.
2. The T2 activates your phone’s voice dial feature (if available).
Once you have activated the voice dial feature, Voice Dialing uses your
phone’s voice recognition software.
Tip: On the iPhone 4S this command activates Siri. There’s no need to
touch or unlock your phone.
7
Android™ users: use this command to activate Google Voice Actions
(if available).
Please check your phone manual to find out what voice commands
your phone supports.
Other Ways To Make Calls
>
Dial the number on your phone. The audio automatically transfers
to the headset.
>
Hold down Vol + for 1 second to redial the last outgoing call.
>
Hold down Vol - for 1 second to call back the last incoming call.
Taking Calls
When the phone rings, you can answer with your voice: wait for the
prompt to ask you if you want to take the call, and then say Answer
or
Ignore.
If you don’t want to wait for the prompt, or you are in a noisy place:
>
Click the Command button once to accept the call.
>
Double click the Command button to reject the call.
During a call, click the Command button to end the call.
8
T2_User_Guide_EN.indd 6
2/2/2012 7:19:42 PM

available on your phone). Depending on your phone model, you may
need to record voice tags on the phone to use this feature.
On the iPhone 4S this command activates Siri.
On Android devices this command activates Google Voice Actions.
Voice recognition will cancel automatically after a short period
of time if you do not say a command. You can also cancel voice
recognition by clicking the Command button.
Making Calls
Voice Dialing
To use this feature your phone must support voice dialing over
Bluetooth.
1. Double click the Command button or use the Phone Commands
voice command.
2. The T2 activates your phone’s voice dial feature (if available).
Once you have activated the voice dial feature, Voice Dialing uses your
phone’s voice recognition software.
Tip: On the iPhone 4S this command activates Siri. There’s no need to
touch or unlock your phone.
7
Android™ users: use this command to activate Google Voice Actions
(if available).
Please check your phone manual to find out what voice commands
your phone supports.
Other Ways To Make Calls
> Dial the number on your phone. The audio automatically transfers
to the headset.
> Hold down Vol + for 1 second to redial the last outgoing call.
> Hold down Vol - for 1 second to call back the last incoming call.
Taking Calls
When the phone rings, you can answer with your voice: wait for the
prompt to ask you if you want to take the call, and then say Answer
or Ignore.
If you don’t want to wait for the prompt, or you are in a noisy place:
> Click the Command button once to accept the call.
> Double click the Command button to reject the call.
During a call, click the Command button to end the call.
8
T2_User_Guide_EN.indd 7
2/2/2012 7:19:42 PM

Multipoint
Up to 2 phones can connect to the T2 at the same time. To pair a
second phone:
1. Use your phone’s Bluetooth menu to disconnect the existing paired
phone from the T2.
2. With the T2 switched on, hold down the Command button until the
T2 starts to talk you through the pairing process.
3. When the pairing is complete, use the Bluetooth menu on each
phone to reconnect them to the T2.
When you have 2 phones connected, you can always answer a call on
either phone. If you initiate a call through the T2, or activate phone
voice dialing, it will happen on the “primary phone”: the one that
connected to the T2 first.
9
Listening to Audio
The T2 supports A2DP audio streaming: if your phone or Bluetooth
device supports the A2DP profile then you can simply start playing
music or any other audio (including directions from a GPS application
on the phone) and it will automatically transfer to the headset.
The audio will mute automatically if you make or receive a phone call,
and resume when the call ends.
Note: The T2 only supports A2DP bluetooth audio streaming from the
primary phone.
Reset your T2
If you are having problems with the T2, you can reset it and start
again:
1.
Disconnect the T2 from your phone by deleting the pairing from
your phone’s Bluetooth menu.
2.
Turn your phone off and back on again to clear its memory.
3.
With the T2 switched on, but not connected to any phones, hold
down all three buttons (Vol +, Vol -, and the Command button) for
about 3 seconds.
The T2 will reset and go straight to pairing mode. You will now need
to pair your phone with the T2 again.
10
11
T2_User_Guide_EN.indd 8
2/2/2012 7:19:42 PM

Multipoint
Up to 2 phones can connect to the T2 at the same time. To pair a
second phone:
1. Use your phone’s Bluetooth menu to disconnect the existing paired
phone from the T2.
2. With the T2 switched on, hold down the Command button until the
T2 starts to talk you through the pairing process.
3. When the pairing is complete, use the Bluetooth menu on each
phone to reconnect them to the T2.
When you have 2 phones connected, you can always answer a call on
either phone. If you initiate a call through the T2, or activate phone
voice dialing, it will happen on the “primary phone”: the one that
connected to the T2 first.
9
Listening to Audio
The T2 supports A2DP audio streaming: if your phone or Bluetooth
device supports the A2DP profile then you can simply start playing
music or any other audio (including directions from a GPS application
on the phone) and it will automatically transfer to the headset.
The audio will mute automatically if you make or receive a phone call,
and resume when the call ends.
Note: The T2 only supports A2DP bluetooth audio streaming from the
primary phone.
Reset your T2
If you are having problems with the T2, you can reset it and start
again:
1. Disconnect the T2 from your phone by deleting the pairing from
your phone’s Bluetooth menu.
2. Turn your phone off and back on again to clear its memory.
3. With the T2 switched on, but not connected to any phones, hold
down all three buttons (Vol +, Vol -, and the Command button) for
about 3 seconds.
The T2 will reset and go straight to pairing mode. You will now need
to pair your phone with the T2 again.
10
11
T2_User_Guide_EN.indd 9
2/2/2012 7:19:42 PM

Free Android Application
> Reads your incoming text messages
> Helps with pairing and setup
Go to the Android Market and search for “BlueAnt” to download and
install this free application. Once the application is installed you will
hear your text messages read aloud automatically on your BlueAnt
device as they come in.
Supports Android handsets running Android version 2.1 or above.
Android is a trademark of Google, Inc, and its use is subject to its
permissions.
12
Scan this code on your
phone with a QR code
reader to download the
application:
Phonebook Troubleshooting
When you pair your phone the T2 attempts to transfer the contacts
from your phonebook so that it can announce the names of incoming
callers.
Note: If your phone prompts you to allow a connection to the T2, you
must select “YES” or “OK”.
Android™
On Android devices a message about the
phonebook transfer may appear in the
notifications area at the top of the screen.
In order to transfer your contacts you must
swipe your finger over this message and
accept the phonebook transfer request from
the T2.
If you miss this step you will need to:
1.
Delete the T2 pairing from your phone.
2.
Power the phone off and back on.
3.
Reset your T2 and pair it with your phone again.
This is due to the way the Android PBAP request system works.
13
13a
Phonebook Access Request
Notification
shown on
Android
devices
T2_User_Guide_EN.indd 10
2/2/2012 7:19:42 PM

Free Android Application
> Reads your incoming text messages
> Helps with pairing and setup
Go to the Android Market and search for “BlueAnt” to download and
install this free application. Once the application is installed you will
hear your text messages read aloud automatically on your BlueAnt
device as they come in.
Supports Android handsets running Android version 2.1 or above.
Android is a trademark of Google, Inc, and its use is subject to its
permissions.
12
Scan this code on your
phone with a QR code
reader to download the
application:
Phonebook Troubleshooting
When you pair your phone the T2 attempts to transfer the contacts
from your phonebook so that it can announce the names of incoming
callers.
Note: If your phone prompts you to allow a connection to the T2, you
must select “YES” or “OK”.
Android™
On Android devices a message about the
phonebook transfer may appear in the
notifications area at the top of the screen.
In order to transfer your contacts you must
swipe your finger over this message and
accept the phonebook transfer request from
the T2.
If you miss this step you will need to:
1. Delete the T2 pairing from your phone.
2. Power the phone off and back on.
3. Reset your T2 and pair it with your phone again.
This is due to the way the Android PBAP request system works.
13
13a
Phonebook Access Request
Notification
shown on
Android
devices
T2_User_Guide_EN.indd 11
2/2/2012 7:19:42 PM

BlackBerry®
If you are using a BlackBerry smartphone
you may see a message like this one
during the phonebook transfer.
Select “Don’t ask this again” so that a
tick appears in the box, and then choose
“YES”.
Automatic Transfer Not Supported
Some phones do not support automatic phonebook transfers. If this
is the case on your phone the T2 will announce that it cannot transfer
the contacts automatically:
1. Go to your phonebook and select the contacts you want to send
to the T2. Choose the option to “Mark All” or “Select All” if this is
available on your phone (if this is not available, you will need to
transfer each contact individually).
2. Select the option on your phone to “send” or “beam” contacts,
business cards, or v-cards via Bluetooth, and select the T2 from
the list of Bluetooth devices. See your phone’s manual for help
with this step.
Accept connection request
from BlueAnt T2?
YES
NO
Don’t ask this again
13b
13c
Phonebook Transfer Not Supported
Some phones do not support phonebook transfers at all.
In order to transfer your phonebook, your phone must support either
the Phonebook Access Profile (PBAP), AT commands, or the Object
Push Profile (OPP).
If your phone does not support any of these Bluetooth profiles, then
you will not be able to copy your contacts to the T2. When you receive
a call, the T2 will read out the caller’s number instead.
Button Commands
Function Do This
Activate voice dialing, Siri
or Google Voice Actions (if
available) on the (primary)
connected phone
Double click the Command
button
End a call, cancel pair mode,
cancel voice recognition, or
cancel a phonebook transfer/
update
Click the Command button
13d
14
T2_User_Guide_EN.indd 12
2/2/2012 7:19:42 PM

BlackBerry®
If you are using a BlackBerry smartphone
you may see a message like this one
during the phonebook transfer.
Select “Don’t ask this again” so that a
tick appears in the box, and then choose
“YES”.
Automatic Transfer Not Supported
Some phones do not support automatic phonebook transfers. If this
is the case on your phone the T2 will announce that it cannot transfer
the contacts automatically:
1. Go to your phonebook and select the contacts you want to send
to the T2. Choose the option to “Mark All” or “Select All” if this is
available on your phone (if this is not available, you will need to
transfer each contact individually).
2. Select the option on your phone to “send” or “beam” contacts,
business cards, or v-cards via Bluetooth, and select the T2 from
the list of Bluetooth devices. See your phone’s manual for help
with this step.
Accept connection request
from BlueAnt T2?
YES
NO
Don’t ask this again
13b
13c
Phonebook Transfer Not Supported
Some phones do not support phonebook transfers at all.
In order to transfer your phonebook, your phone must support either
the Phonebook Access Profile (PBAP), AT commands, or the Object
Push Profile (OPP).
If your phone does not support any of these Bluetooth profiles, then
you will not be able to copy your contacts to the T2. When you receive
a call, the T2 will read out the caller’s number instead.
Button Commands
Function Do This
Activate voice dialing, Siri
or Google Voice Actions (if
available) on the (primary)
connected phone
Double click the Command
button
End a call, cancel pair mode,
cancel voice recognition, or
cancel a phonebook transfer/
update
Click the Command button
13d
14
T2_User_Guide_EN.indd 13
2/2/2012 7:19:42 PM

Function Do This
Disconnect your phone Click Vol + and Vol - together
when not on a call
Reconnect your phone Hold Vol + for1 second
Update phonebook Hold down the Command button
for 3 seconds (when the T2 is
connected but not on a call)
Mute/unmute the microphone
during a call
Hold Vol + and Vol - together
until the T2 beeps twice (about
1 second)
Transfer audio to the phone Click Vol + and Vol - together
during a call
Hold active call and switch to
incoming or held call
Hold down Vol + for 1 second
End active call and answer a
new incoming call
Hold down Vol - for 1 second
Call conference (if supported
by your phone and network)
Hold the Command button for
3 seconds
Help and Support
This guide is just to get you started. If you are having trouble getting
the T2 to work, please visit www.blueantwireless.com for online
help, support, and troubleshooting tips.
Please contact us before returning the T2 to a store and we will help
you through any difficulty you may have.
Contact Us
North America: 1 855 9 258 3268
Australia: 1300 669 049
New Zealand: 0800 443 122
UK: 0800 285 1272
France: 0800 913 467
Spain: 900 838 030
Hong Kong: 800 905 394
Singapore: 800 130 1940
Thailand: 001 800 13 203 2852
India: 000 800 100 4103
www.blueantwireless.com/support
15
16
T2_User_Guide_EN.indd 14
2/2/2012 7:19:42 PM

Version: T2-MAN-EN-1.0
Function Do This
Disconnect your phone Click Vol + and Vol - together
when not on a call
Reconnect your phone Hold Vol + for1 second
Update phonebook Hold down the Command button
for 3 seconds (when the T2 is
connected but not on a call)
Mute/unmute the microphone
during a call
Hold Vol + and Vol - together
until the T2 beeps twice (about
1 second)
Transfer audio to the phone Click Vol + and Vol - together
during a call
Hold active call and switch to
incoming or held call
Hold down Vol + for 1 second
End active call and answer a
new incoming call
Hold down Vol - for 1 second
Call conference (if supported
by your phone and network)
Hold the Command button for
3 seconds
Help and Support
This guide is just to get you started. If you are having trouble getting
the T2 to work, please visit www.blueantwireless.com for online
help, support, and troubleshooting tips.
Please contact us before returning the T2 to a store and we will help
you through any difficulty you may have.
Contact Us
North America: 1 855 9 258 3268
Australia: 1300 669 049
New Zealand: 0800 443 122
UK: 0800 285 1272
France: 0800 913 467
Spain: 900 838 030
Hong Kong: 800 905 394
Singapore: 800 130 1940
Thailand: 001 800 13 203 2852
India: 000 800 100 4103
www.blueantwireless.com/support
15
16
T2_User_Guide_EN.indd 15
2/2/2012 7:19:43 PM

HELP AND SUPPORT
Visit register.blueantwireless.com to
register your BlueAnt device.
Visit www.blueantwireless.com/support
for online help and support or to contact
the BlueAnt Technical Support team.
North
America Australia New
Zealand UK
1 855 9
258 3268
1300 669
049
0800
443 122
0800 285
1272
Visit www.blueantwireless.com/buy to
buy BlueAnt products, accessories and
spare parts.
© 2012 BlueAnt Wireless. All Rights Reserved.
T2_User_Guide_EN.indd 16
2/2/2012 7:19:43 PM

SAFETY
INFORMATION
AND WARRANTY
TERMS
ENGLISH • FRANÇAIS
ESPAÑOL
Warranty_Safety_EN_FR_ES - 70mm.indd 1
2/1/2012 6:30:07 PM

Important Safety Information
PLEASE READ THIS ENTIRE DOCUMENT CAREFULLY, BECAUSE IT
CONTAINS IMPORTANT INFORMATION ABOUT THE SAFE USE OF
BLUEANT DEVICES
WARNING PROTECT YOUR
HEARING
ALL BLUEANT DEVICES ARE
DESIGNED TO REACH VOLUMES OF
UP TO 100 DECIBELS. PROLONGED
USE OF A BLUEANT DEVICE AT HIGH
VOLUMES MAY AFFECT YOUR HEARING
CAPACITY. USE FOR EXTENSIVE
PERIODS MAY RESULT IN NOISE
INDUCED HEARING LOSS NIHL. TURN
OFF THE POWER TO YOUR DEVICE
WHEN NOT IN USE.
Warranty_Safety_EN_FR_ES - 70mm.indd 2
2/1/2012 6:30:07 PM

Important Safety Information
PLEASE READ THIS ENTIRE DOCUMENT CAREFULLY, BECAUSE IT
CONTAINS IMPORTANT INFORMATION ABOUT THE SAFE USE OF
BLUEANT DEVICES
WARNING PROTECT YOUR
HEARING
ALL BLUEANT DEVICES ARE
DESIGNED TO REACH VOLUMES OF
UP TO 100 DECIBELS. PROLONGED
USE OF A BLUEANT DEVICE AT HIGH
VOLUMES MAY AFFECT YOUR HEARING
CAPACITY. USE FOR EXTENSIVE
PERIODS MAY RESULT IN NOISE
INDUCED HEARING LOSS NIHL. TURN
OFF THE POWER TO YOUR DEVICE
WHEN NOT IN USE.
Warranty_Safety_EN_FR_ES - 70mm.indd 3
2/1/2012 6:30:07 PM

• Hearing loss may occur if a headset is used at maximum volumes for more than 5
minutes per day, or at medium volumes for more than 1 hour per day.
• Exposure to sound at close range such as via an ear piece in your ear may result
in hearing loss, even at low levels.
Do not listen at high volumes. Remember that your ears will adapt to the volume
level and if you change to higher levels your ear may feel no discomfort but damage
to your hearing may be occurring.
BlueAnt Recommends That You:
• Set the volume control in a low position before putting the headset or headphones
on your ears.
• Limit the amount of time you use headsets or headphones at high volume.
• Avoid turning up the volume to block out noisy surroundings.
• Turn the volume down if you cannot hear people speaking near you.
Should you experience any discomfort after using the product, stop using it
immediately. If the problem persists seek medical assistance immediately.
CHOKING HAZARD
YOUR BLUEANT DEVICE, ITS
PACKAGING, AND PACKAGE
CONTENTS MAY CONTAIN PARTS
THAT MAY BE A CHOKING HAZARD TO
SMALL CHILDREN.
Please ensure that the device and any associated
components such as ear gels or chargers are stored
safely and that any packaging or unwanted contents are
disposed of thoughtfully. Do not place the product on the
floor or leave it in a place where young children could
access it, or someone could trip over it.
Using Ear Gels
Your BlueAnt headset will come with ear gels or foam tips that are designed to
provide a secure fit in your ear while providing high quality audio.
•
Ear gels and tips are designed to sit comfortably in your ear and should not be
forced into your ear at any time. If you have trouble fitting the ear gel or foam
please refer to the owner’s manual for correct insertion and usage information.
•
Always make sure that the ear gel or foam is fitted securely to your device before
placing it in your ear.
WARNING
NOTE THAT NONCOMPLIANCE,
MISUSE OR FORCING THE EAR GEL OR
FOAM MAY CAUSE DAMAGE TO YOUR
EAR CANAL OR EARDRUM, OR MAY
Warranty_Safety_EN_FR_ES - 70mm.indd 4
2/1/2012 6:30:07 PM
Other manuals for T2 ENDURE
1
Table of contents
Languages:
Other Blueant Headset manuals

Blueant
Blueant T1 User manual

Blueant
Blueant BLUEANT Z9 User manual

Blueant
Blueant Q1 User manual

Blueant
Blueant V12 User manual

Blueant
Blueant V1 User manual

Blueant
Blueant BLUEANT Z9 User manual

Blueant
Blueant Q1 User manual

Blueant
Blueant SuperTooth II User manual

Blueant
Blueant T2 ENDURE User manual

Blueant
Blueant X5 User manual

Blueant
Blueant Z9i User manual

Blueant
Blueant V1 User manual

Blueant
Blueant V1 User manual

Blueant
Blueant X3 MICRO Installation guide

Blueant
Blueant Interphone none User manual

Blueant
Blueant Q2 User manual

Blueant
Blueant ENDURE User manual

Blueant
Blueant ENDURE User manual

Blueant
Blueant BLUEANT Z9 Installation guide

Blueant
Blueant Q3 User manual