manuals.online logo
Brands
  1. Home
  2. •
  3. Brands
  4. •
  5. Bluestream
  6. •
  7. Switch
  8. •
  9. Bluestream MFP72 User manual

Bluestream MFP72 User manual

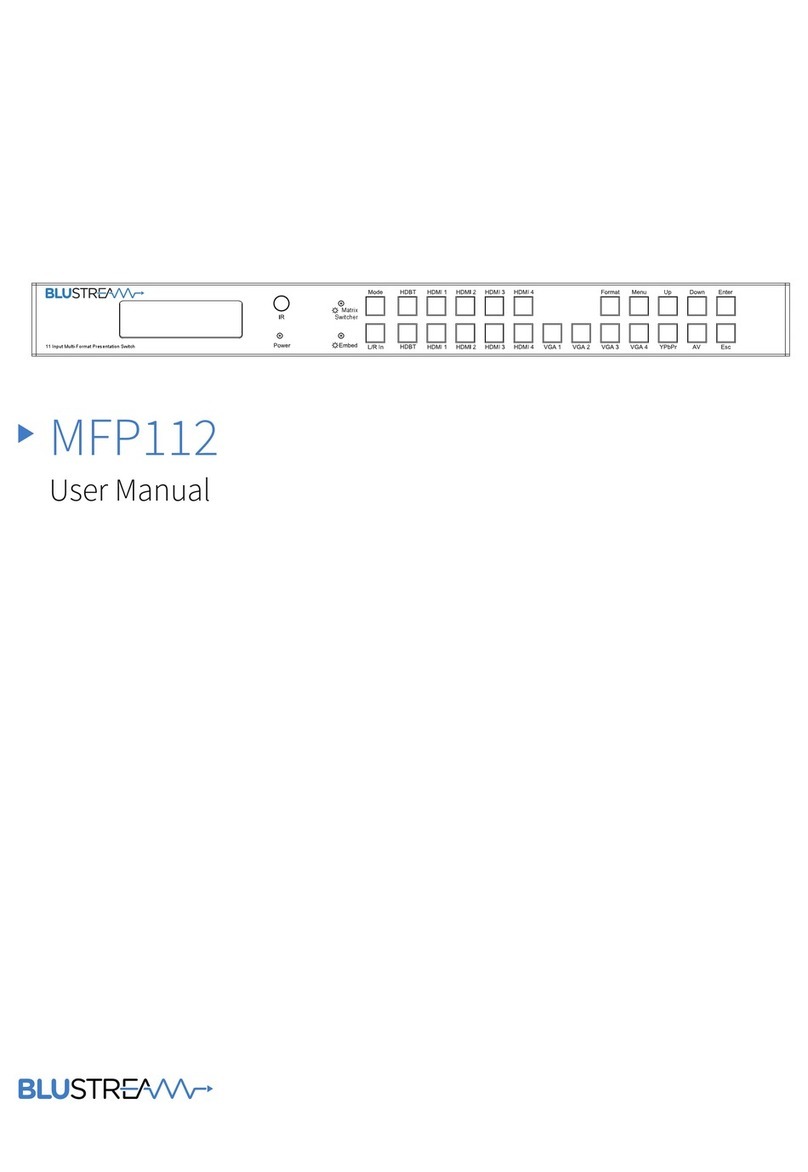
MFP72
User Manual
MFP72 USER MANUAL MFP72 USER MANUAL
03
contact support@blustream.co.uk / support@blustream.com.au
02 www.blustream.co.uk
Our MFP72 is a multi-format presentation switcher with in-built video scaling, audio
embedding, audio de-embedding and EDID management.
The MFP72 works in 2 modes, first as a 7 input dual output switcher, alternatively each
output can work independently with output 1 routing the 4x HDMI inputs only and Output
2 switching all 7 video/audio inputs.
With control of the switcher using the front-panel push buttons, IR remote control or
RS-232 interface it is an ideal solution for commercial installations.
Introduction
FEATURES:
• Switcher can function in 2 modes:-
Splitter mode - Both HDMI output 1 & 2 display the
same selected input.
Matrix Switcher mode - HDMI inputs are
independently switchable to HDMI outputs 1 & 2.
HDMI output 1 has access to HDMI inputs 1-4 (HDMI
signal pass-through including 4K resolution), whilst
output 2 has access to all HDMI and Analogue video
inputs with associated audio.
• Built-in video scaling, both up-scaling (maximum of 1080p)
and down-scaling capabilities (including 4K to lower
resolutions).
• Video inputs support all industry standard video
resolutions including VGA-WUXGA and 480i-4K.
• Scaled video output resolutions include 720p, 1080P,
1280x1024, 1024x768, 1360x768, 1440x900 & 1680x1050.
• Audio embedding - Independent Analogue L/R audio input
can be embedded to HDMI outputs + Analogue L/R audio
and Coaxial digital outputs concurrently (Feature available
on HDMI outputs 1 + 2 in Splitter mode and HDMI output 2
only in Matrix Switcher mode).
• HDMI audio breakout to Analogue L/R audio and Coaxial
digital outputs concurrently (linked to HDMI output 2 when
in Matrix Switcher mode).
• Volume control of HDMI, Analogue L/R audio and Coaxial
digital outputs.
• Supports all known HDMI audio formats on HDMI pass-
through, including Dolby TrueHD, Dolby Atmos, Dolby
Digital Plus and DTS-HD Master Audio transmission.
• Front panel display for status feedback.
• Control via front panel, IR and RS-232.
• 3rd Party drivers available for all major home control
brands.
• Advanced EDID management.
• HDCP compliant.
Features 03
Panel Descriptions 04/05
Remote Control Descriptions 05
IR Distribution 06
Matrix Front Panel 07
Adjusting The Video Output Resolution 08
EDID Configuration 09
Application Diagram 10
Specifications 11
Package Contents 11
Maintenance 11
RS-232 Information 12/13
Infrared Commands 14/15
Contents
Thank you for purchasing
this product.
For optimum performance and safety,
please read these instructions care-
fully before connecting, operating or
adjusting this product. Please keep this
manual for future reference.
Surge protection device
recommended
This product contains sensitive electri-
cal components that may be damaged
by electrical spikes, surges, electric
shock, lightning strikes, etc. Use of
surge protection systems is highly
recommended in order to protect and
extend the life of your equipment.
Safety And
Performance Notice
Do not substitute or use any other
power supply other than the enclosed
unit, or a Blustream approved replace-
ment.
Do not disassemble Blustream hard-
ware for any reason. Doing so will void
the manufacturer’s warranty.
MFP72 USER MANUAL MFP72 USER MANUAL
05
contact support@blustream.co.uk / support@blustream.com.au
04 www.blustream.co.uk
10 11 12 13 14 15 16 17 18 5
1LCD display - Shows the status of
input-output selection, EDID info etc.
2IR receiver window.
3Matrix Switcher LED indicator - When
the LED is lit, Matrix Switcher mode is
active and both HDMI outputs switch
independently. When the LED is not lit
the Matrix switcher is in Splitter mode
and both HDMI outputs will display
the same selected video input.
4Mode button - Press to switch
between Matrix Switcher and
Splitter modes.
5HDMI input selection buttons for
HDMI output 1 when in Matrix
Switcher mode.
6Format set button - Press to set the
output resolution.
7Menu button - Press to enter EDID
set mode, volume setting or F/W
information.
8Up selection button - Press to
change segment’s value.
9Enter button - Press to confirm the
settings.
qPower LED indicator - Indicate the
status of power.
wEmbed LED indicator - When the
LED is lit, Audio embed mode
is active. When active the L/R
Analogue input will be embedded
onto the HDMI outputs. In
Splitter mode analogue audio is
embedded to both of the HDMI
outputs with the ability to adjust
the volume. In Matrix Switcher
mode Analogue audio will only be
embedded onto HDMI output 2.
eL/R in selection button - Press to
embed the Analogue L/R audio
input to the HDMI outputs (as
above).
rHDMI input selection buttons 1 to
4 - Press to select the HDMI input
switched to output 2 in Matrix
Switcher mode, or both HDMI
outputs in Splitter mode.
tVGA input selection button - Press
to select the VGA input with
associated Analogue L/R audio.
yYPbPr (Component video) input
selection button - Press to select
the YPbPr input with associated
Analogue L/R audio input.
uAV input selection button - Press to
select the AV input with associated
Analogue L/R audio input.
iDown selection button - Press to
change segment’s value.
oESC-Press to exit the menu.
1Coaxial digital and analogue audio
outputs - Extracted audio will always
follow HDMI output 2 source selection.
Note: input must be 2ch PCM for
Analogue audio ouput to work.
2VGA input - VGA input with associated
L/R analogue audio input.
3AV input - Composite video input with
associated L/R analogue audio input.
4YPbPr input - YPbPr input with
associated L/R analogue audio input.
5HDMI outputs 1 and 2,.
6HDMI input 1 to 4 - Connect to HDMI
sources
7L/R In - Enables Analogue audio to be
embedded onto both HDMI outputs
in Splitter mode and HDMI output 2 in
Matrix Switcher mode.
8RS232 port - For control of the switcher
from PC or control processor
9IRExt. - Connect to Blustream IR
receiver or control processor when
using Blustream IRCAB cable (sold
separately).
qPower port - Use supplied 5V/2A DC
power supply.
wPower switch - Power on/o the unit.
Front Panel Rear Panel
11 2 3 4
23 4 5 6 7 8 9
Notes:
• Volume can be changed using IR, RS-232 control or from the front panel UP
and DOWN buttons when in the volume menu.
• During F/W mode, pressing the Enter button will show the current F/W
information.
Remote Control Description
6 7 8 9 10 11
OUTPUT AND INPUT SELECTION
ASource selection for HDMI output 1 when in Matrix Switcher mode.
BSource selection for HDMI output 2 when in Matrix Switcher mode or both HDMI outputs
when in Splitter mode.
VIDEO OUTPUT RESOLUTION
C. The MFP72 includes in-built video scaler. To change the HDMI output video resolution
press the required resolution button on the bottom of the Blustream remote control.
Settings
D. Bypass: Audio on HDMI outputs is from HDMI input selected.
E. Mute: Mutes the audio on all outputs (HDMI, Coaxial digitial and Analogue audio).
F. Mode: Switches between Matrix Switcher mode and Splitter mode.
G. Embed: Audio on HDMI outputs is from L/R Analogue audio input (3.5mm Jack).
VOLUME CONTROL
H. Adjust the audio Volume on all outputs (HDMI, Coaxial digitial and Analogue audio).
A
C
B
MFP72 USER MANUAL MFP72 USER MANUAL
06 07
contact support@blustream.co.uk / support@blustream.com.au contact support@blustream.co.uk / support@blustream.com.au
The Blustream range of matrix and switcher products include multiple options for control and routing of IR.
IMPORTANT: Blustream Infrared products are all 5v and NOT compatible with alternate manufacturers Infrared solutions. When
using third party 12v IR control solutions please use supplied Blustream IRCAB cable for IR conversion.
Each Blustream Matrix and HDBaseT receiver is supplied with all necessary IR hardware required and includes:
IR Emitter
Blustream IR Emitter designed for discrete IR control of
hardware
IR Receiver
Blustream IR receiver to receive IR signal and pass-through
Blustream products
IR Control Cable
Blustream IR Control cable 3.5mm Mono to 3.5mm Stereo for
linking third party control solutions to Blustream products.
Will work with 12v IR third party products.
Note: Cable is directional as indicated
Infrared 3.5mm Pin-Out
IR Emitter - Mono 3.5mm
IR Receiver - Stereo 3.5mm
Infrared (IR) Distribution
Signal
Ground
Signal
5V
Ground
11 Input Multi-Format Presentation Switch
Matrix Front Panel Display
The front panel display gives information on the current status of the switcher:
SPLITTER: HDMI 1
1080p AUTO VOL: 26
3
12
4
1: HDMI 1 2: HDMI 2
1360x768 VOL: 26
3
12
4
Matrix Splitter Mode:
Matrix Switcher Mode:
Source selection buttons when in ‘Splitter’ mode
Source selection buttons for HDMI output 2 when in ‘Matrix Switcher’ mode
Source selection buttons for HDMI output 1 when in ‘Matrix Switcher’ mode
(HDMI inputs 1-4 are straight pass-through with no scaling)
1Switcher mode - Switcher is in ‘Splitter’ mode
2 Source selected = HDMI input 1
3Current output resolution = 1080p AUTO
4Current Volume = Volume level 26
1Switcher mode - Switcher is in ‘Matrix Switcher’ mode
Output 1 = HDMI input 1
2 Output 2 = HDMI input 2
3Current output resolution = 1080p AUTO
4Current Volume = Volume level 26
‘Matrix Switcher mode’
Status LED will be lit when
this mode is active
MFP72 USER MANUAL MFP72 USER MANUAL
08 09
contact support@blustream.co.uk / support@blustream.com.au contact support@blustream.co.uk / support@blustream.com.au
EDID Control
EDID (Extended Display Identification Data) is a data structure that is used between a display and asource. This
data is used by the source to find out what audio and video resolutions are supported by the display then from this
information the source will determine what the best resolution is to output.
While the objective of EDID is to make connecting adigital display to a source a simple plug and play procedure
issues do arise when multiple displays or video matrix switching is introduced because of the increased number of
variables.
By pre-determining the video resolution and audio format of the source and display device you can potentially work
around compatibility issues associated with some display and source combinations.
1Using EDID dip-switches on the rear panel of the unit. Please see table below for settings.
Note: You must power-cycle the switcher aer changes have been made in order for the EDID
settings to update.
2Using Matrix Front Panel Buttons
a. Press MENU button
b. Panel will display ‘EDID settings’. Press SELECT button
c. Select the input you wish to fix the EDID on or select ‘All’. Use UP/DOWN buttons to toggle selection and
SELECT button to confirm
d. Select video resolution required (4K, 1080p, 3D etc). Use UP/DOWN buttons to toggle selection and
SELECT button to confirm
e. Select audio format required (2.0, 5.1, 7.1). Use UP/DOWN buttons to toggle selection and SELECT button
to confirm
The EDID configuration can be altered in 2 ways:
[DIP]=0000: HDMI 1080p@60Hz, Audio 2CH PCM
[DIP]=0001: HDMI 1080p@60Hz, Audio 5.1CH PCM/DTS/Dolby
[DIP]=0010: HDMI 1080p@60Hz, Audio 7.1CH PCM/DTS/Dolby/HD
[DIP]=0011: HDMI 1080i@60Hz, Audio 2CH PCM
[DIP]=0100: HDMI 1080i@60Hz, Audio 5.1CH PCM/DTS/Dolby
[DIP]=0101: HDMI 1080i@60Hz, Audio 7.1CH PCM/DTS/Dolby/HD
[DIP]=0110: HDMI 1080p 3D@60Hz, Audio 2CH PCM
[DIP]=0111: HDMI 1080p 3D@60Hz, Audio 5.1CH PCM/DTS/Dolby
[DIP]=1000: HDMI 1080p 3D@60Hz, Audio 7.1CH PCM/DTS/Dolby/HD
[DIP]=1001: HDMI 4K@30Hz, Audio 2CH PCM
[DIP]=1010: HDMI 4K@30Hz, Audio 5.1CH PCM/DTS/Dolby
[DIP]=1011: HDMI 4K@30Hz, Audio 7.1CH PCM/DTS/Dolby/HD
[DIP]=1100: DVI 1280x1024, Audio 2CH PCM
[DIP]=1101: DVI 1920x1080, Audio 5.1CH PCM/DTS/Dolby
[DIP]=1110: DVI 1920x1200, Audio 7.1CH PCM/DTS/Dolby/HD
[DIP]=1111: HDMI EDID copy (EDID copied from HDMI output 2 display)
EDID Dip-switch settings:
NOTE: If the source selected is a VGA input the switcher will automatically output the best resolution
possible.
Adjusting the video output resolution
The MFP72 has an in-built video scaler allowing you to alter the resolution of the video output.
When in ‘Splitter mode’ both the HDMI outputs can be processed via the video scaler, allowing you to alter the resolution of both outputs.
(*Note - This is subject to turning on/o the scaler using the ‘Bypass’ command - see page 13 for further details).
When in ‘Matrix Switcher’ mode only HDMI output 2 can be processed via the video scaler. HDMI output 1 is a straight pass-through video
signal with no video scaling . HDMI output 1 has access to the 4x HDMI inputs only when in this mode. (*Note - HDMI output 2 can bypass the
video scaler when selecting HDMI 1-4 inputs using the ‘Bypass’ command - see page 17 for further details).
Changing the output video resolution
The MFP72 video output resolution can altered in 3 ways:
1Front panel control - Press the ‘FORMAT’ button to scroll through output resolutions
2 MFP72 remote control
1
3Using Blustream RS-232/Telnet commands - Please see page 13 for detailed commands
The MFP72 remote control has fixed output video resolutions. To change the resolution simply
select the required video format required.
MFP72 USER MANUAL MFP72 USER MANUAL
10 11
contact support@blustream.co.uk / support@blustream.com.au contact support@blustream.co.uk / support@blustream.com.au
Video Input Connectors: 4x HDMI Type A, 1x VGA, 1xYPbPr, 1x
Composite
Video Output Connectors: 2x HDMI Type A
Audio Input Connectors: 2x 3.5mm Analogue audio stereo jack,
4x Analogue audio RCA (2 x L/R)
Audio Output Connectors: 1x 3.5mm Analogue audio stereo
jack, 1x SPDIF Coaxial digital
RS-232 serial port: 1x DB 9 connector
IR Input ports: 1x 3.5mm stereo jack
Dimensions (W x H x D): 323mm x 135mm x 44mm, without feet
Shipping Weight: 1.5Kg
Operating Temperature: 32°F to 104°F (0°C to 40°C)
Storage Temperature : -4°F to 140°F (-20°C to 60°C)
Power Supply: DC 5V/2A
Package Contents:
• 1x MFP72
• 1x 5V/2A power supply
• 1x Remote control
• 1x IR Receiver
• 1x mounting kit
Maintenance
Clean this unit with a so, dry cloth. Never use alcohol, paint thinner or benzene to clean this unit.
Specifications:
FCC NOTICE
This equipment has been tested and found to comply with the limits for a Class B digital device, pursuant to part 15 of the FCC
Rules. These limits are designed to provide reasonable protection against harmful interference in a residential installation. This
equipment generates, uses, and can radiate radio frequency energy and, if not installed and used in accordance with the instructions,
may cause harmful interference to radio communications. However, there is no guarantee that interference will not occur in a
particular installation. If this equipment does cause harmful interference to radio or television reception, which can be determined by
turning the equipment o and on, the user is encouraged to try to correct the interference by one or more of the following measures:
• Reorient or relocate the receiving antenna.
• Increase the separation between the equipment and receiver.
• Connect the equipment into an outlet on a circuit dierent from that to which the receiver is connected.
• Consult the dealer or an experienced radio/TV technician for help.
CAUTION - changes or modifications not expressly approved by the party responsible for compliance could void the user’s authority to
operate the equipment.
CANADA, INDUSTRY CANADA (IC) NOTICES
This Class B digital apparatus complies with Canadian ICES-003.
Operation is subject to the following two conditions: (1) this device may not cause interference, and (2) this device must accept any
interference, including interference that may cause undesired operation of the device.
CORRECT DISPOSAL OF THIS PRODUCT
This marking indicates that this product should not be disposed with other household wastes. To prevent possible harm to the
environment or human health from uncontrolled waste disposal, recycle it responsibly to promote the sustainable reuse of material
resources. To return your used device, please use the return and collection systems or contact the retailer where the product was
purchased. They can take this product for environmentally safe recycling.
Certifications
MFP72 USER MANUAL MFP72 USER MANUAL
12 13
contact support@blustream.co.uk / support@blustream.com.au contact support@blustream.co.uk / support@blustream.com.au
MFP72
PIN Assignment
1 NC
2Tx
3 Rx
4 NC
5 GND
6 NC
7 NC
REMOTE CONTROL CONSOLE
PIN Assignment
1 NC
2 Rx
3Tx
4 NC
5 GND
6 NC
7 NC
RS-232 Pin Assignment
Baud Rate: 57600 bps
Data Bit: 8-bit
Parity: None
Stop Bit: 1-bit
Flow Control: None
RS232 and Telnet Commands
The Blustream MFP72 can be controlled via RS-232/serial. The following pages list all available serial commands for the MFP72.
Details of RS232 pin assignment can be found below.
Commonly used Serial commands:
There are several commands that are commonly used for control and testing:-
STATUS Status will give feedback on Matrix such as zones on, type of connection etc
PON Power on
POFF Power o
OUTxxON (xx is the zone number you wish to turn on)
Example:- OUT01ON (This would turn output one back on)
OUTxxFRyy (xx is the zone out, yy is the input)
Example:- OUT01FR04 (This would switch output 1 to source input 4)
Common Mistakes
• Carriage return – Some programs do not require the carriage return where as other will not work unless sent directly aer the
string. In the case of some Terminal soware the token <CR> is used to execute a carriage return. Depending on the program you
are using this token maybe dierent. Some other examples that other control systems deploy include \r or 0D (in hex)
• Spaces – Blustream commands do not require space between commands unless specified. There may be some programs
that require spacing in order to work.
- How the string should look is as follows OUT01ON
- How the string may look if spaces are required: OUT{Space}01{Space}ON
• Baud rate or other serial protocol settings not correct - please see below for Matrix settings
RS232 and Telnet Commands
MFP72 USER MANUAL MFP72 USER MANUAL
14 15
contact support@blustream.co.uk / support@blustream.com.au contact support@blustream.co.uk / support@blustream.com.au
Infrared CommandsRS232 and Telnet Commands
MFP72 USER MANUAL
16
contact support@blustream.co.uk / support@blustream.com.au
www.blustream.co.uk
www.blustream.com.au
Infrared Commands

Other Bluestream Switch manuals

Bluestream SM11EARC-8K User manual

Bluestream

Bluestream SM11EARC-8K User manual

Bluestream SW21AB-V User manual

Bluestream

Bluestream SW21AB-V User manual

Bluestream SW21AB-V2 User manual

Bluestream

Bluestream SW21AB-V2 User manual

Bluestream SW41AB-V2 User manual

Bluestream

Bluestream SW41AB-V2 User manual

Bluestream SW21AB-V2 User manual

Bluestream

Bluestream SW21AB-V2 User manual

Bluestream MFP112 User manual

Bluestream

Bluestream MFP112 User manual

Bluestream MX44AB User manual

Bluestream

Bluestream MX44AB User manual

Bluestream OPT41AU User manual

Bluestream

Bluestream OPT41AU User manual

Bluestream Custom Pro Matrix User manual

Bluestream

Bluestream Custom Pro Matrix User manual

Bluestream SW41HDBT User manual

Bluestream

Bluestream SW41HDBT User manual

Popular Switch manuals by other brands

Lindy 32330 user manual

Lindy

Lindy 32330 user manual

Soundoff Signal ETSWDAS02 Installation & operation instructions

Soundoff Signal

Soundoff Signal ETSWDAS02 Installation & operation instructions

Dell PowerConnect 5224 System user's guide

Dell

Dell PowerConnect 5224 System user's guide

Good Way Technology TD13320 user manual

Good Way Technology

Good Way Technology TD13320 user manual

Dell PowerConnect J-EX8216 Hardware guide

Dell

Dell PowerConnect J-EX8216 Hardware guide

Leviton 47691-3MS Instructions for use

Leviton

Leviton 47691-3MS Instructions for use

IDK FDX-32 Command reference guide

IDK

IDK FDX-32 Command reference guide

Hirschmann GREYHOUND GRS1020 Reference manual

Hirschmann

Hirschmann GREYHOUND GRS1020 Reference manual

Asco Series 300 Operator's manual

Asco

Asco Series 300 Operator's manual

ATEN MiniView CS-14 user manual

ATEN

ATEN MiniView CS-14 user manual

DeLOCK 64207 user manual

DeLOCK

DeLOCK 64207 user manual

Dell Force10 Z9000 Configuration guide

Dell

Dell Force10 Z9000 Configuration guide

Lantronix SM8TAT2SA-DC install guide

Lantronix

Lantronix SM8TAT2SA-DC install guide

Roland V-1200HD RCS owner's manual

Roland

Roland V-1200HD RCS owner's manual

InPOWER SSC42-275 owner's manual

InPOWER

InPOWER SSC42-275 owner's manual

Kramer VS-24x1 user manual

Kramer

Kramer VS-24x1 user manual

Moxa Technologies EDS-2008-EL Series Quick installation guide

Moxa Technologies

Moxa Technologies EDS-2008-EL Series Quick installation guide

GST CAN100H quick start guide

GST

GST CAN100H quick start guide

manuals.online logo
manuals.online logoBrands
  • About & Mission
  • Contact us
  • Privacy Policy
  • Terms and Conditions

Copyright 2025 Manuals.Online. All Rights Reserved.