manuals.online logo
Brands
  1. Home
  2. •
  3. Brands
  4. •
  5. Blumfeldt
  6. •
  7. Outdoor Furnishing
  8. •
  9. Blumfeldt Havanna User manual

Blumfeldt Havanna User manual

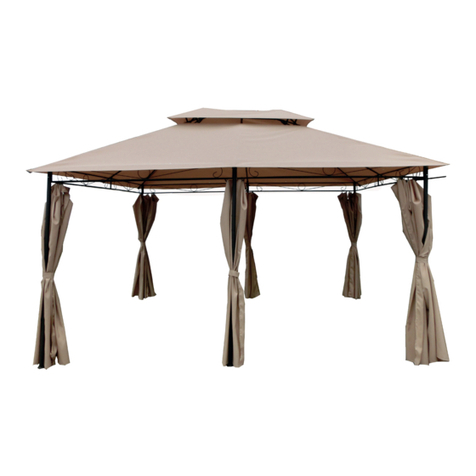
Havanna
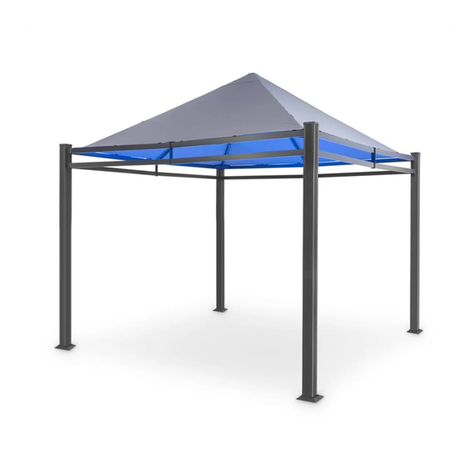
Pavillon mit Sitzgruppe
Gazebo with Lounge Set
Pergola avec salon
Pérgola con asientos
Gazebo con set lounge
10034772
10034773
3
DE
Sehr geehrter Kunde,
wir gratulieren Ihnen zum Erwerb Ihres Produkts.
Lesen Sie die folgenden Hinweise sorgfältig durch und
befolgen Sie diese, um möglichen Schäden vorzubeugen.
Für Schäden, die durch Missachtung der Hinweise und
unsachgemäßen Gebrauch entstehen, übernehmen wir
keine Haftung. Scannen Sie den folgenden QR-Code,
um Zugriff auf die aktuellste Bedienungsanleitung und
weitere Informationen rund um das Produkt zu erhalten:
ARTIKEL
Artikelnummer 10034772
10034773
HERSTELLER
Chal-Tec GmbH, Wallstraße 16, 10179 Berlin, Deutschland.
HINWEISE ZUR SICHERHEIT UND ZUM AUFBAU
• Der Aufbau erfordert mindestens zwei Personen. Eine Person kann Teile
aufstellen und halten, während die andere Person mit Montagematerial
und Werkzeugen arbeitet.
• Planen Sie im Voraus. Beobachten Sie das Wetter. Stellen Sie sicher, dass
der Aufbau an einem trockenen, windstillen Tag stattndet. Versuchen Sie
das Gerüst nicht bei Wind aufzustellen, da es zu einer Personenverletzung
kommen kann.
• Das Gerüst muss auf einer ebenen Fläche augestellt werden. Achten Sie
darauf, dass der Untergrund nicht nass oder schlammig ist.
• Lassen Sie sich reichlich Zeit. Eile verursacht oft Fehler und erfordert
den Neuaufbau eines falsch aufgebauten Gerüsts. Halten Sie das richtige
Werkzeug bereit.
• Tragen Sie Schutzkleidung.
• Am besten legen Sie vor dem Beginn des Aufbaus alle Teile zurecht und
überprüfen, ob alles da ist. Falls die Gefahr besteht, dass Teile zerkratzen,
legen Sie Decken oder Kunststoffplanen darunter.
• Ziehen Sie alle Muttern und Schrauben fest. Vergessen Sie keine
Schrauben.
4
EN
Dear Customer,
Congratulations on purchasing this product. Please read
the following instructions carefully and follow them to
prevent possible damages. We assume no liability for
damage caused by disregard of the instructions and
improper use. Scan the QR code to get access to the
latest user manual and more product information.
ITEM
Item number 10034772
10034773
PRODUCER
Chal-Tec GmbH, Wallstraße 16, 10179 Berlin, Germany.
NOTES ON SAFETY AND CONSTRUCTION
• The assembly requires at least 2 persons. One person can position parts
while the other is able to handle the fasteners and the tools.
• Plan ahead. Watch the weather. Please be sure the day you select for
installation is dry and calm. Do not attempt to assemble your swing in
windy weather because of risk of personal injury.
• The framework must be assembled on a level surface. Mind wet or muddy
ground.
• Allow plenty of time. Rushing often causes errors and the re-doing of
incorrect assemblies. Have the right tools to hand.
• Safety clothing as recommended.
• Ideally lay out the parts and check that all are present before commencing
construction. Lay on cloths or plastic sheets if there is any risk of
scratching the parts.
• Tighten all nuts carefully, being sure not to miss any.
5
FR
Chère cliente, cher client,
Toutes nos félicitations pour l’acquisition de ce nouvel
produit. Veuillez lire attentivement et respecter
les instructions de ce mode d’emploi an d’éviter
d’éventuels dommages. Nous ne saurions être tenus
pour responsables des dommages dus au non-respect
des consignes et à la mauvaise utilisation de l’appareil.
Scannez le QR-Code pour obtenir la dernière version
du mode d‘emploi et des informations supplémentaires
concernant le produit.
ARTICLE
Numéro d‘article 10034772
10034773
FABRICANT
Chal-Tec GmbH, Wallstraße 16, 10179 Berlin, Allemagne.
CONSIGNES DE SÉCURITÉ ET D‘ASSEMBLAGE
• Le montage requiert au moins deux personnes. Une personne peut
installer et tenir les pièces tandis que l‘autre travaille avec les matériaux et
outils d‘assemblage.
• Planiez le montage. Surveillez la météo. Procédez à l‘assemblage par
temps sec et sans vent. N‘essayez pas d‘installer la structure par temps
venteux, car cela peut entraîner des blessures.
• La structure doit être placée sur une surface plane. Assurez-vous que la
surface n‘est pas mouillée ou boueuse.
• Prenez votre temps. La précipitation conduit souvent à des erreurs et
nécessite de recommencer le montage de la structure mal installée.
Préparez les bons outils.
• Portez des vêtements de protection.
• Il est préférable de mettre toutes les pièces en place et de vérier que rien
ne manque avant de commencer l‘assemblage. S‘il y a un risque de rayer les
pièces, placez des couvertures ou des bâches en plastique en dessous.
• Serrez tous les écrous et boulons. N‘oubliez aucune vis.
6
ES
Estimado cliente,
Le felicitamos por la adquisición de este producto.
Lea atentamente las siguientes instrucciones y sígalas
para evitar posibles daños. No asumimos ninguna
responsabilidad por los daños causados por el
incumplimiento de las instrucciones y el uso inadecuado.
Escanee el siguiente código QR para obtener acceso
a la última guía del usuario y más información sobre el
producto.
ARTÍCULO
Número del artículo 10034772
10034773
FABRICANTE
Chal-Tec GmbH, Wallstraße 16, 10179 Berlín, Alemania.
INDICACIONES DE SEGURIDAD Y DE MONTAJE
• El montaje deberá ser realizado por al menos dos personas. Una persona
se ocupará de colocar y sostener las piezas, mientras que la otra trabajará
con el material de montaje y las herramientas.
• Realice la planicación con antelación. Tenga en cuenta la previsión
meteorológica. Asegúrese de realizar el montaje en un día seco y sin
viento. No intente instalar la estructura con viento, podrían producirse
daños personales.
• La estructura deberá colocarse en una supercie plana. Asegúrese de que
el suelo no esté mojado ni embarrado.
• Tómese el tiempo necesario. Las prisas suelen provocan fallos, que
requerirán volver a montar desde cero una estructura mal instalada. Tenga
a mano las herramientas adecuadas.
• Utilice ropa de protección.
• Se recomienda presentar todas las piezas antes de comenzar el montaje
para comprobar que no falte ninguna. Si existe riesgo de que las piezas
arañen la supercie, coloque una manta o lonas plásticas debajo.
• Apriete bien todos los tornillos y tuercas. No se olvide de ningún tornillo.
7
IT
Gentile cliente,
La ringraziamo per aver acquistato il prodotto. La
preghiamo di leggere attentamente le seguenti istruzioni
per l’uso e di seguirle per evitare possibili danni. Non ci
assumiamo alcuna responsabilità per danni scaturiti da
una mancata osservazione delle avvertenze di sicurezza
e da un uso improprio del dispositivo. Scansionare il
codice QR seguente, per accedere al manuale d’uso più
attuale e per ricevere informazioni sul prodotto.
ARTICOLO
Articolo numero 10034772
10034773
PRODUTTORE
Chal-Tec GmbH, Wallstraße 16, 10179 Berlino, Germania.
AVVERTENZE PER LA SICUREZZA E
L‘INSTALLAZIONE
• Il montaggio richiede la presenza di almeno 2 persone. Una persona
può montare i pezzi e tenerli, mentre l’altra si occupa del materiale di
montaggio e degli attrezzi.
• Pianicare il montaggio in anticipo e controllare le condizioni meteo.
Assicurarsi di eseguire il montaggio in un giorno asciutto e senza vento.
Non montare la struttura quando c’è vento, dato che ci si potrebbe fare
male.
• La struttura deve essere montata su una supercie piana. Assicurarsi che il
suolo non sia bagnato o fangoso.
• Prendersi tempo per il montaggio. La fretta causa spesso errori e richiede
un nuovo montaggio se la struttura viene installata erroneamente. Tenere
a portata di mano gli attrezzi giusti.
• Indossare abbigliamento protettivo.
• Prima di iniziare il montaggio, posizionare i pezzi e vericare se ci sono
tutti. Se i pezzi rischiano di grafarsi, usare come fondo di appoggio delle
coperte o dei teli di plastica.
• Stringere bene tutti i dadi e le viti. Non dimenticare nessuna vite.
ZUSAMMENBAU ASSEMBLY / ASSEMBLAGE / MONTAJE /
MONTAGGIO
Teile Parts Pièces Partes Parti
Montageübersicht Assembly overview / Aperçu du montage / Resumen del montaje /
Panoramica del montaggio
A
B
F3
F1
F2
C
D
G*
E
*Erklärung zu Teil G, siehe: Montage-Varianten (Teil G)
Explanation on part G, see: Assembly variants (part G) / Explication de la partie G, voir :
Variantes de montage (partie G) / Para aclaraciones sobre la parte G, consulte: Variantes
de montaje (parte G) / Spiegazione della parte G, vedi: Varianti di montaggio (parte G)
Montage-Varianten (Teil G) Assembly variants (part G) / Variantes de montage (partie G) /
 Variantesdemontaje(parteG)/=Variantidimontaggio(parteG)
Teile G an den Seitenwänden, einander gegenüber liegend, montiert.
Parts G mounted on the side walls, facing each other.
Les parties G sont montées sur les parois latérales, en face les unes des autres.
Partes G montadas en las paredes laterales opuestas entre sí.
Parti G montate sulle pareti laterali, l'una di fronte all'altra.
Teile G an einer Seitenwand und an der Rückwand, eine Ecke bildend, montiert.
Parts G mounted on a side wall and on the rear wall, forming a corner.
Les parties G sont montées sur une paroi latérale et sur la paroi arrière, formant un coin.
Partes G montadas en una pared lateral y en la pared trasera formando una esquina.
Le parti G montate su una parete laterale e sulla parete posteriore formano un angolo.
Hinweise zur Montage
1. Die Streben B und C sollten so montiert werden (Schritt 1), dass sich die 2
Schraubenlöcher jeweils oben an den Außenseiten des Pavillons (linke und rechte
Außenseite) benden. Die Schraubenlöcher dienen der Montage der Clips (Q), siehe
Schritt 5.
2. An den waagerechten Streben (E, F1, F3) benden sich jeweils 4 Schraubenlöcher
auf einer Seite. Montieren Sie die Streben so, dass die Schraubenlöcher sich an der
Außenseite des Pavillons benden. Sie sind für eine mögliche zukünftige Erweiterung
durch eine Holzpergola vorgesehen.
Notes on assembly
1. Struts B and C should be mounted (step 1) so that the 2 screw holes are located at the top
of the outer sides of the pavilion (left and right outer side). The screw holes are used to
mount the clips (Q), see step 5.
2. On the horizontal struts (E, F1, F3) there are 4 screw holes on each side. Mount the braces
so that the screw holes are on the outside of the pavilion. They are intended for a possible
future extension with a wooden pergola.
Notes sur le montage
1. Les montants B et C doivent être montés (étape 1) de manière à ce que les 2 trous de vis
soient situés en haut des côtés extérieurs du pavillon (côté extérieur droit et gauche). Les
trous de vis servent à monter les clips (Q), voir étape 5.
2. Les supports horizontaux (E, F1, F3) comprennent 4 trous de vis de chaque côté. Montez
les supports de manière à ce que les trous de vis se trouvent à l‘extérieur du pavillon. Ils
sont destinés à une éventuelle extension future avec une pergola en bois.
Indicaciones sobre el montaje
1. Los pilares B y C deben montarse (paso 1) de modo que los 2 oricios para los tornillos
queden orientados hacia arriba y en los lados exteriores de la pérgola (partes exteriores
derecha e izquierda). Los oricios para los tornillos sirven para montar los acoples (Q).
Véase paso 5.
2. En cada uno de los postes horizontales (E, F1, F3) encontrará 4 oricios para tornillos en
uno de los lados. Monte los postes de modo que los oricios se orienten hacia la parte
exterior de la pérgola. Están concebidos para una posible ampliación con una pérgola de
madera.
Note per il montaggio
1. I montanti B e C devono essere montati (fase 1) in modo che i 2 fori per le viti si trovino
nella parte superiore dei lati esterni del padiglione (lato esterno sinistro e destro). I fori
per le viti vengono utilizzati per montare le clip (Q), vedi punto 5.
2. Sui montanti orizzontali (E, F1, F3) ci sono 4 fori per le viti su ogni lato. Montare i montanti
in modo che i fori per le viti si trovino all‘esterno del padiglione. Potranno essere utilizzati
in futuro per un ampliamento con una pergola in legno.
Montageschritte Assembly Steps / Étapes du montage / Pasos de montaje / Fasi di montaggio
1
2
4
3
5
6
7
8
9
10
11
12

This manual suits for next models

4

Other Blumfeldt Outdoor Furnishing manuals
Blumfeldt Pantheon Solid Sky Ambient Solar User manual

Blumfeldt

Blumfeldt Pantheon Solid Sky Ambient Solar User manual

Blumfeldt 10029837 User manual

Blumfeldt

Blumfeldt 10029837 User manual

Blumfeldt 10031458 User manual

Blumfeldt

Blumfeldt 10031458 User manual

Blumfeldt Sunnyvale 10035336 User manual

Blumfeldt

Blumfeldt Sunnyvale 10035336 User manual

Blumfeldt 10031262 User manual

Blumfeldt

Blumfeldt 10031262 User manual

Blumfeldt Pantheon Illumina User manual

Blumfeldt

Blumfeldt Pantheon Illumina User manual

Blumfeldt Brentwood User manual

Blumfeldt

Blumfeldt Brentwood User manual

Blumfeldt 10030022 User manual

Blumfeldt

Blumfeldt 10030022 User manual

Blumfeldt Pozilli BL User manual

Blumfeldt

Blumfeldt Pozilli BL User manual

Blumfeldt 10035946 User manual

Blumfeldt

Blumfeldt 10035946 User manual

Blumfeldt 10031011 User manual

Blumfeldt

Blumfeldt 10031011 User manual

Blumfeldt Pantheon Cortina Solid Sky 10034985 User manual

Blumfeldt

Blumfeldt Pantheon Cortina Solid Sky 10034985 User manual

Blumfeldt 10031661 User manual

Blumfeldt

Blumfeldt 10031661 User manual

Blumfeldt Climax Ambient User manual

Blumfeldt

Blumfeldt Climax Ambient User manual

Blumfeldt KD2-BBL-WAO 10029146 User manual

Blumfeldt

Blumfeldt KD2-BBL-WAO 10029146 User manual

Blumfeldt Darwin User manual

Blumfeldt

Blumfeldt Darwin User manual

Blumfeldt Pomporto User manual

Blumfeldt

Blumfeldt Pomporto User manual

Blumfeldt Pantheon RemoteShade Ambient User manual

Blumfeldt

Blumfeldt Pantheon RemoteShade Ambient User manual

Blumfeldt Pantheon 10029627 User manual

Blumfeldt

Blumfeldt Pantheon 10029627 User manual

Blumfeldt 10034687 User manual

Blumfeldt

Blumfeldt 10034687 User manual

Blumfeldt Pantheon Cortina User manual

Blumfeldt

Blumfeldt Pantheon Cortina User manual

Blumfeldt 10033354 User manual

Blumfeldt

Blumfeldt 10033354 User manual

Blumfeldt Oslo 10035575 User manual

Blumfeldt

Blumfeldt Oslo 10035575 User manual
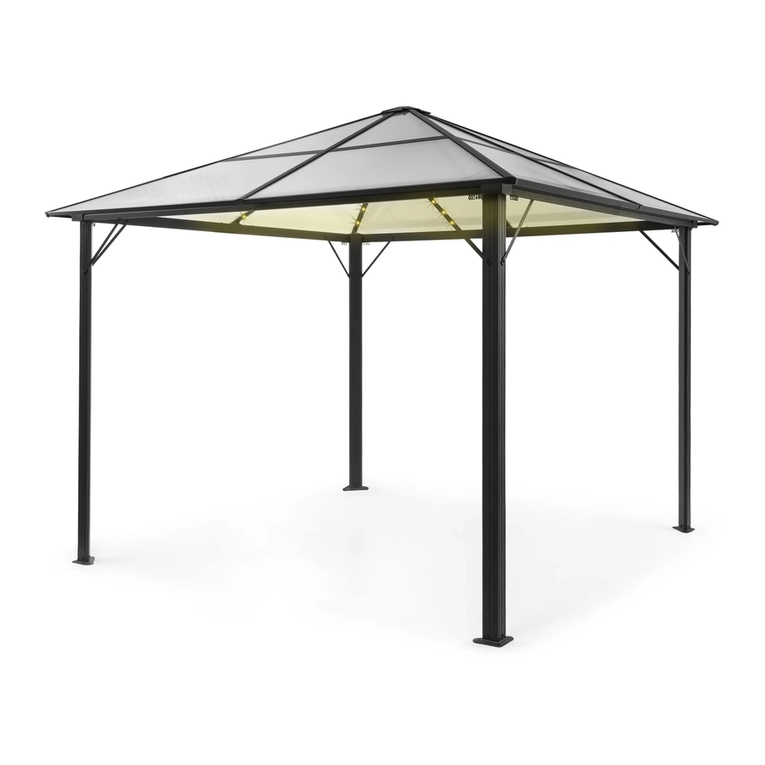
Blumfeldt 10031884 User manual

Blumfeldt

Blumfeldt 10031884 User manual

Popular Outdoor Furnishing manuals by other brands

Big Lots SW-RK997 Assembly instructions

Big Lots

Big Lots SW-RK997 Assembly instructions

Courtyard Creations KUS891W-WM Assembly instructions

Courtyard Creations

Courtyard Creations KUS891W-WM Assembly instructions

Hussey Seating Metro Assembly instructions

Hussey Seating

Hussey Seating Metro Assembly instructions

Canvas 088-1759-2 Assembly instructions

Canvas

Canvas 088-1759-2 Assembly instructions

Sunjoy A101011800 quick start guide

Sunjoy

Sunjoy A101011800 quick start guide

Safavieh Outdoor Ransin PAT7074 manual

Safavieh Outdoor

Safavieh Outdoor Ransin PAT7074 manual

Evergreen Wind & Weather Solar Blossom Spinner Assembly instructions

Evergreen

Evergreen Wind & Weather Solar Blossom Spinner Assembly instructions

MAGLIN LEXICON manual

MAGLIN

MAGLIN LEXICON manual

Trevi LGMF8244 instruction manual

Trevi

Trevi LGMF8244 instruction manual

Royalcraft Lisbon Sun Assembly instructions

Royalcraft

Royalcraft Lisbon Sun Assembly instructions

oviala OIA Assembly instructions

oviala

oviala OIA Assembly instructions

New England Arbors Elysium Assembly guide

New England Arbors

New England Arbors Elysium Assembly guide

Better Homes and Gardens Delahey Porch Swing TM013656 Assembly instructions

Better Homes and Gardens

Better Homes and Gardens Delahey Porch Swing TM013656 Assembly instructions

AOODOR 800-039 Assembly & instruction manual

AOODOR

AOODOR 800-039 Assembly & instruction manual

Sunjoy D-GZ844PCO-J Assembly instructions

Sunjoy

Sunjoy D-GZ844PCO-J Assembly instructions

Suncast Design Brilliant PB2600 owner's manual

Suncast

Suncast Design Brilliant PB2600 owner's manual

AuthenTeak Kingsley-Bate NW42 Assembly instructions

AuthenTeak

AuthenTeak Kingsley-Bate NW42 Assembly instructions

OVE FRANKLIN 3 Assembly instructions

OVE

OVE FRANKLIN 3 Assembly instructions

manuals.online logo
manuals.online logoBrands
  • About & Mission
  • Contact us
  • Privacy Policy
  • Terms and Conditions

Copyright 2025 Manuals.Online. All Rights Reserved.