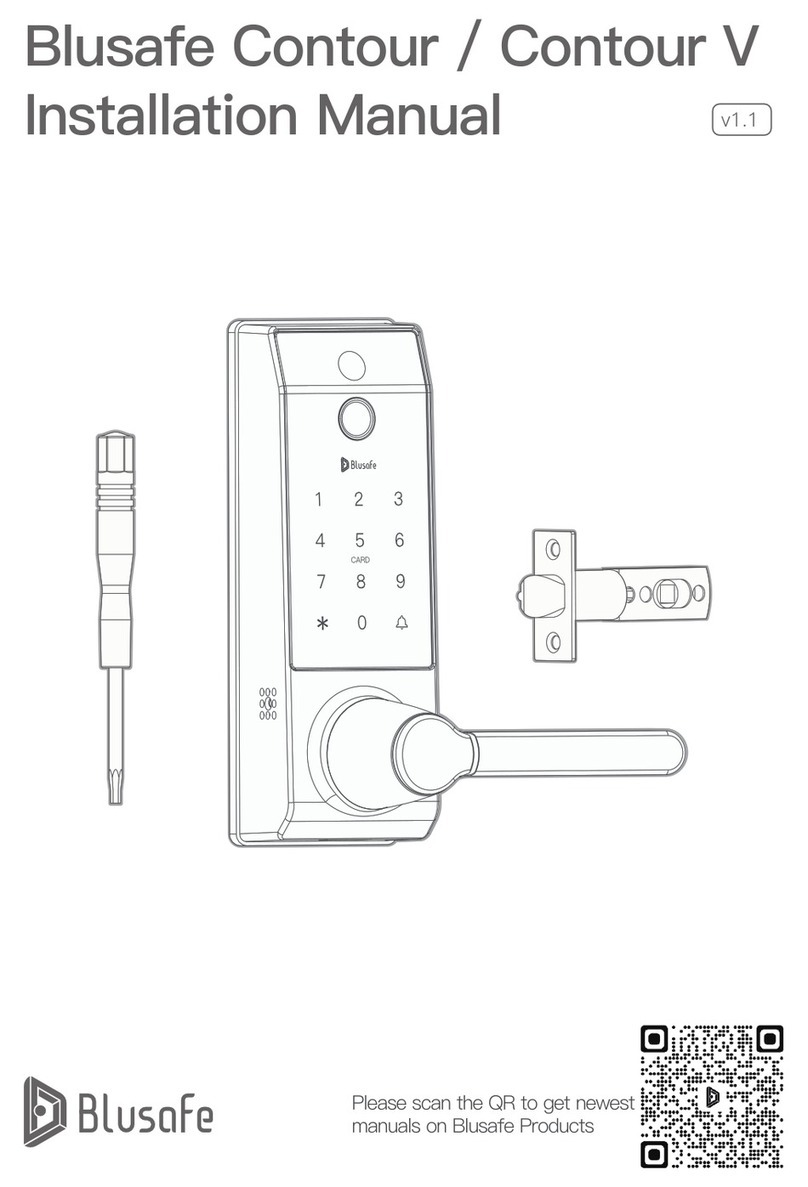
Blusafe Contour User manual

1P
Blusafe Contour / Contour V
Lock User Manual v1.0
Please scan the QR to get newest
manuals on Blusafe Products

2
P

3P
1. IMPORTANT INSTRUCTIONS
1.1 THE ASTERISK AND DOORBELL KEYS
1.2 SLEEP MODE AND WAKEUP
1.3 INITIALIZE MODE
2. MANAGING ACCESS LEVELS AND UNLOCKING METHODS
2.1 INTRODUCTION
2.2 ADDING AN ADMINISTRATOR
2.3 REMOVING AN ADMINISTRATOR
2.4 ADDING A USER
2.5 REMOVING A USER
3. UNLOCKING YOUR CONTOUR SMART LOCK
3.1 UNLOKCING VIA THE FINGERPRINT SENSOR
3.2 UNLOCKING VIA KEYCARD
3.3 UNLOCKING VIA PASSCODE
3.4 UNLOCKING VIA BACKUP KEY
3.5 UNLOCKING VIA APPLICATION
3.6 UNLOCKING FROM INSIDE
4. OTHER FUNCTIONS
4.1 DOORBELL
4.2 CHANGE VOLUME
4.3 LOW VOLTAGE WARNING
4.4 BACKUP POWER
4.5 ANTI-PRYING (TAMPER) FUNCTION
4.6 ANTI-PEEKING FUNCTION
4.7 DATE AND TIME SETUP
4.8 VERIFY MODE SETUP
4.9 PASSAGE MODE SETUP
5 MANAGING SYSTEM LOCKOUT, RECOVERY, AND RESET
5.1 SYSTEM LOCKOUT
5.2 SYSTEM RECOVERY
5.3 FACTORY RESET
P 02
P 02
P 02
P 02
P 03
P 03
P 03
P 05
P 06
P 08
P 09
P 09
P 09
P 10
P 11
P 12
P 12
P 13
P 13
P 13
P 14
P 14
P 15
P 16
P 16
P 17
P 17
P 18
P 18
P 18
P 18
Table of Contents

4
P

01P
Blusafe Contour Lock
Battery Cover
Internal Handle
Louderspeaker Hole
Internal Panel
External Panel
Camera
(Only available in
Contour V)
Micro USB
Cylinder Cover
Key Card Area
Keypad
Fingerprint
Sensor
Mechanical
Key hole
External
Handle

02
P
1.3 INITIALIZE MODE
1.1 THE ASTERISK AND
DOORBELL KEYS
• The and keys are located at the
bottom of the lock’s external keypad.
• They are used as "Cancel"and
"Conrm"functions respectively in
system settings.
• The lock will set automatically
to "Sleep"mode if there are no
operations for more than ten
seconds and the keypad lights will
turn o to conserve power.
• Touch the key or swipe your hand
across the front of the lock to wake
up the keypad.
Scenario A:
No operations within 10 seconds, the
keypad lights will turn o and lock goes
to sleep mode;
Scenario B:
No passcode input, press the * key
twice, the keypad lights will turn o and
lock will enter sleep mode;
Scenario C:
5 seconds after passcode / key card /
ngerprint unlock, the keypad lights will
turn o and lock will enter sleep mode.
Illustrations of the lock entering "Sleep"
mode are shown below:
The rst time the lock is used or when
it is reset to "Default", the lock will enter
"Initialize Mode". Any ngerprint or key
card, or the default passcode (123456)
can unlock the lock.
1.2 SLEEP MODE AND WAKEUP
IMPORTANT INSTRUCTIONS
1. IMPORTANT INSTRUCTIONS P2

03P
2.1 INTRODUCTION
There are two levels of access on the
lock i.e., "Administrator"and "User"for
the lock. Each level exists in one of
three forms:
① ngerprint;
② key card or;
③ passcode.
The "Administrator"can control device
settings and operations and can add /
edit / delete all users. Those with "User"
access can only operate the device.
The table below provides explanation of
the dierent access levels.
Number
Allowable
Storage
Capacity
Admin
Fingerprint
9
100 MAX
100 MAX
100 MAX
User
RFID Key
Card
Passcode
291
2. MANAGING ACCESS LEVELS AND UNLOCKING ETHODS P3-P8
MANAGING ACCESS LEVELS AND UNLOCKING METHODS
The "Administrator"and "User"on the
lock are dierent to "Homeowner",
"Administrator"and "Common Member"
on the Application. The "Administrator"
and "User"on the lock are used for
accessing the lock’s system settings;
while the "Homeowner", "Administrator"
and "Common Member" are dierent
access levels for "Home"on the
Application.
Note
① Wake up the keypad, and then press
the followed by key.
② Use a registered Administrator’s
ngerprint / key card / passcode (the
rst time the lock is used, or after
resetting to default, the passcode is
123456) to enter the "Settings"menu.
③ Follow the voice navigation and press
1 to enter "Administrator Setup".
④ Press again to enter "Add a user".
⑤ Now add a ngerprint (5a), a key
card (5b), or a passcode (5c). Please
refer to respective steps below for
instructions.
2.2 ADDING AN ADMINISTRATOR
If any keys other than the and keys
is pressed after waking up the lock,
the lock will NOT enter "Settings".
Press the * key several times until the
keypad lights turn o, then restart the
process from the beginning.
Fix
1.Administrator
Setup
2.User Setup 1.Add a user
3.System Setup 2.Delete a user
4.Initialize Mode
Setup
(Reset to Default)

04
P
2. MANAGING ACCESS LEVELS AND UNLOCKING ETHODS P3-P8
2.2 ADDING AN ADMINISTRATOR
5a. ADDING ADMINISTRATOR
FINGERPRINTS
① Follow the voice prompts to add a
ngerprint to the lock; you will need
to press your nger against the
sensor about 5 times.
② You will hear a success tone
indicating the user ID if you have
added the ngerprint successfully.
③ Please take a note of the user ID and
save it elsewhere.
Please write down the corresponding
User ID or save it in another location,
such as the NOTES application on your
smart device.
Important !
The ngerprint sensor will need to take
several scans of your ngerprint. We
suggest that you change the position of
your nger during scans when adding a
new ngerprint.
When registering the ngerprint, make
sure the nger and ngerprint sensor
are clean, dry, and free of grease.
Tip

05P
2. MANAGING ACCESS LEVELS AND UNLOCKING ETHODS P3-P8
2.3 REMOVING AN ADMINISTRATOR
① Wake up the keypad, and then press
the followed by key.
② Use a registered Administrator’s
ngerprint / key card / passcode to
enter the "Settings"menu.
③ Follow the voice navigation and press
1 to enter "Administrator Setting".
④ Press to enter "Delete a user".
⑤ Enter the user ID to be deleted.
⑥ Press key to conrm.
⑦ Once deleted successfully, a voice
prompt "Operation success"will be
heard.
You cannot delete the administrator
who entered the setting menu. To delete
all administrators, please perform a
"Factory Reset".
Note
1.Administrator
Setup
2.User Setup 1.Add a user
3.System Setup 2.Delete a user
4.Initialize Mode
Setup
(Reset to Default)
5b. ADDING ADMINISTRATOR
KEY CARDS
① Follow the voice prompts and touch
the card to the card reading area on
the external keypad. You will hear a
success tone indicating the user ID if
you have added the card successfully.
② Please take a note of the user ID and
save it elsewhere.
Please write down the corresponding
User ID or save it in another location,
such as the NOTES application on your
smart device.
Important !
5c. ADDING ADMINISTRATOR
PASSCODES
① Follow the voice prompts to input a
6-8-digit passcode on keypad, then
press the key. Repeat the same
passcode on keypad and press the
· key again to conrm.
② You will hear a success tone
indicating the user ID if you have
added the passcode successfully.
③ Please take a note of the user ID and
save it elsewhere.
Please write down the corresponding
User ID or save it in another location,
such as the NOTES application on your
smart device.
Important !

06
P
2.4 ADDING A USER
① Wake up the keypad, and then press
the followed by key.
② Use a registered Administrator’s
ngerprint / key card / passcode (the
rst time the lock is used, or after
resetting to default, the passcode is
123456) to enter the "Settings"menu.
③ Follow the voice navigation and press
2 to enter "User Setup".
④ Press to enter "Add a user".
⑤ Now add a ngerprint (5a), a key
card (5b), or a passcode (5c). Please
refer to respective steps below for
instructions.
you cannot add a user if no admin has
been registered.
Note
2. MANAGING ACCESS LEVELS AND UNLOCKING ETHODS P3-P8
5a. ADDING USER FINGERPRINTS
① Follow the voice prompts to add a
ngerprint to the lock; you will need
to press your nger against the
sensor about 5 times.
② You will hear a success tone
indicating the user ID if you have
added the ngerprint successfully.
③ Please take a note of the user ID and
save it elsewhere.
Please write down the corresponding
User ID or save it in another location,
such as the NOTES application on your
smart device.
Important !
The ngerprint sensor will need to take
several scans of your ngerprint. We
suggest that you change the position of
your nger during scans when adding a
new ngerprint.
When registering the ngerprint, make
sure the nger and ngerprint sensor
are clean, dry, and free of grease.
Tip
1.Administrator
Setup
2.User Setup 1.Add a user
3.System Setup 2.Delete a user
4.Initialize Mode
Setup
(Reset to Default)

07P
2. MANAGING ACCESS LEVELS AND UNLOCKING ETHODS P3-P8
5b. ADDING USER KEY CARDS
① Follow the voice prompts and touch
the card to the card reading area on
the external keypad (i.e., the Blusafe
logo).
② You will hear a success tone
indicating the user ID if you have
added the card successfully.
③ Please take a note of the user ID and
save it elsewhere.
Please write down the corresponding
User ID or save it in another location,
such as the NOTES application on your
smart device.
Important !
5c. ADDING USER PASSCODES
① Follow the voice prompts to input a
6-8-digit passcode on keypad, then
press the key. Repeat the same
passcode on keypad and press the
· key again to conrm.
② You will hear a success tone
indicating the user ID if you have
added the passcode successfully.
③ Please take a note of the user ID and
save it elsewhere.
Please write down the corresponding
User ID or save it in another location,
such as the NOTES application on your
smart device.
Important !

08
P
2. MANAGING ACCESS LEVELS AND UNLOCKING ETHODS P3-P8
① Wake up the keypad, and then press
the followed by key.
② Use a registered Administrator’s
ngerprint / key card / passcode to
enter the "Settings"menu.
③ Follow the voice navigation and press
- to enter "User Setting".
④ Press to enter "Delete a user".
⑤ Enter the user ID to be deleted.
⑥ Press key to conrm.
⑦ Once deleted successfully, a voice
prompt "Operation success"will be
heard.
2.5 REMOVING A USER
You cannot delete a user if no admin
has been registered.
Note
1.Administrator
Setup
2.User Setup 1.Add a user
3.System Setup 2.Delete a user
4.Initialize Mode
Setup
(Reset to Default)

09P
3.UNLOCKING YOUR CONTOUR SMART LOCK P9-P12
UNLOCKING YOUR CONTOUR SMART LOCK
3.1 UNLOKCING VIA THE FINGERPRINT SENSOR
3.2 UNLOCKING VIA KEY CARD
① Touch the key to wake up the lock,
the keypad will be lit if wake up.
② Use a registered ngerprint to touch
the ngerprint sensor to unlock.
A voice prompt "Unlocked"will be
heard. Now turn the handle to unlock
the door.
③ A voice prompt "Authorization
failed"will be heard if input incorrect
ngerprint.
① Use a registered key card to touch
the card reading area on external
keypad to unlock. A voice prompt
"Unlocked"will be heard. Now turn
the handle to unlock the door.
② A voice prompt "Authorization failed"
will be heard if use an unregistered
card.
• Before setup and after a reset, the
Contour Smart Lock can be opened
by any ngerprint.
• The ngerprint sensor and nger that
touches the sensor should always be
kept clean, dry, and free from grease.
• The ngerprints will remain stored in
the lock regardless of battery power.
Note

10
P
3.3 UNLOCKING VIA PASSCODE
① Touch the key to wake up the lock,
the keypad will be lit if wake up.
② Input your passcode on the keypad,
and then press the key to conrm.
A voice prompt "Unlocked"will be
heard. Now turn the handle to unlock
the door.
③ A voice prompt "Authorization failed"
will be heard if the passcode is
incorrect and the system will enter
sleep mode. Touch the keypad to
awaken it and input the correct
passcode.
A valid passcode contains 6-8 digits.
The lock contains an anti-peeking
feature that allows you to enter
additional of numbers before or after
your valid code so long as the total
numbers input does not exceed 16.
For example, if your passcode is
784512, you can input 123784512123,
and because the correct sequence was
entered and the total numbers input did
not exceed 16, the lock will unlock.
Note
3.UNLOCKING YOUR CONTOUR SMART LOCK P9-P12

11P
3.UNLOCKING YOUR CONTOUR SMART LOCK P9-P12
3.4 UNLOCKING VIA BACKUP KEY
① Rotate the handle cylinder cover 180
degrees to reveal the keyhole.
② Insert the backup key into the keyhole
and rotate 90 degrees.
③ Turn the handle to unlock.

12
P
3.5 UNLOCKING VIA APPLICATION 3.6 UNLOCKING FROM INSIDE
① Your Contour / Contour V Smart
Lock can also be unlocked via
Blusafe Smart Application.
② Please refer to Contour App Setup
Manual for more information.
From inside of the door, push down the
handle to unlock.
3.UNLOCKING YOUR CONTOUR SMART LOCK P9-P12

13P
4. OTHER FUNCTIONS P13-P17
OTHER FUNCTIONS
4.1 DOORBELL 4.2 CHANGE VOLUME
Wake up the keypad and press the
key, a triple doorbell ring will be heard.
Wake up the keypad and press and hold
the key for 6 seconds. It will now
enter the mute / normal volume function.
A double beep will be heard if switch
to mute, or a voice prompt "Operation
success"will be heard if switch to
normal volume.
beep! beep!
Operation success
Jingle x 3
6s

14
P
4. OTHER FUNCTIONS P13-P17
4.3 LOW VOLTAGE WARNING 4.4 BACKUP POWER
A low battery warning prompt will be
heard if the battery remains less than
20%. It is suggested to change all
batteries if a warning is heard.
A mobile power bank can be used to
charge the lock in case of emergency.
Plug the micro-USB cable of a power
bank into the backup power portal
underneath the external lock.
If backup power is needed, it indicates
that the batteries are low on power and
cannot operate the lock. It is therefore
important to replace the internal batteries
as soon as possible.
Important !

15P
4.5 ANTI-PRYING (TAMPER) FUNCTION
If there is an attempt to force the lock open or physically attack the lock, the anti-
prying (tamper) alarm will be triggered. A warning alarm will sound, which will last
for 60 seconds. During this time, unlocking the lock using a registered ngerprint or
key card, or removing the batteries will turn o the alarm.
The Anti-prying (tamper) function is set to CLOSED as default. Please activate the
anti-prying (tamper) function AFTER installation. To activate the anti-prying (tamper)
function, please follow the below steps:
① Wake up the keypad, and then press
the followed by key.
② Use a registered Administrator’s
ngerprint / key card / passcode (the
rst time the lock is used, or after
resetting to default, the passcode is
123456) to enter the "Settings"menu.
③ Follow the voice navigation and press
3 to enter "System Setup".
④ Press to enter "Function Setup".
⑤ Press to enter "Tamper Function
Setup".
⑥ The voice prompt will indicate the
status of the anti-prying setting.
Please choose to turn the setting on
or o.
1.Administrator
Setup
2.User Setup
1.Time Setup
1.Net Setup
4.Function Setup 2.Tamper Function Setup
3.System Setup
2.Verify Mode
Setup
4.Initialize Mode
Setup
(Reset to Default)
3.Passage Setup
4. OTHER FUNCTIONS P13-P17

16
P
4.6 ANTI-PEEKING FUNCTION 4.7 DATE AND TIME SETUP
A valid passcode contains 6-8 digits.
The lock contains an anti-peeking
feature that allows you to enter
additional of numbers before or after
your valid code so long as the total
numbers input does not exceed 16.
For example, if your passcode is
784512, you can input 123784512123,
and because the correct sequence was
entered and the total numbers input did
not exceed 16, the lock will unlock.
① Wake up the keypad, and then press
the followed by key.
② Use a registered Administrator’s
ngerprint / key card / passcode (the
rst time the lock is used, or after
resetting to default, the passcode is
123456) to enter the "Settings"menu.
③ Follow the voice navigation and press
3 to enter "System Setup".
④ Press to enter "Time Setup".
⑤ Enter the date and time in the
following format yymmddhhmmss
yy = two-digit year; 2021 = 21
mm = two-digit month; February = 02
dd = two-digit day of month
hh = hour; 09 = 9 O’clock AM; 17 = 5
O’clock PM
mm = minutes; 01-60
ss = seconds; 01-60
Example: To enter November 15, 2021
5:25PM, enter 211115172500
⑥ Press the keys to conrm.
1.Administrator
Setup
2.User Setup
1.Time Setup
4.Function Setup
3.System Setup
2.Verify Mode
Setup
4.Initialize Mode
Setup
(Reset to Default)
123784512123
Valid passcode
4. OTHER FUNCTIONS P13-P17
3.Passage Setup
Other manuals for Contour
1
This manual suits for next models
1
Table of contents
Other Blusafe Door Lock manuals
Popular Door Lock manuals by other brands

Burg
Burg BSL Master 4.2 operating manual
Kwikset
Kwikset Smartcode 914 Installation and user guide

CRL JACKSON
CRL JACKSON 2086 installation instructions

Kwikset
Kwikset 62873/01 installation guide
Avent Security
Avent Security M600 user manual
Schlage
Schlage COBRA MPM Installation instructions and user guide
Scyan
Scyan X7 user guide

Simplex
Simplex 3000 Series Assembly instructions

Von Duprin
Von Duprin M996L Series installation instructions

IDTECK
IDTECK Star 100W user manual
Simons Voss Technologies
Simons Voss Technologies WaveNet Lock-Node SH 3062 quick guide
WALDIS
WALDIS CAWI SMARTCAM operating instructions
