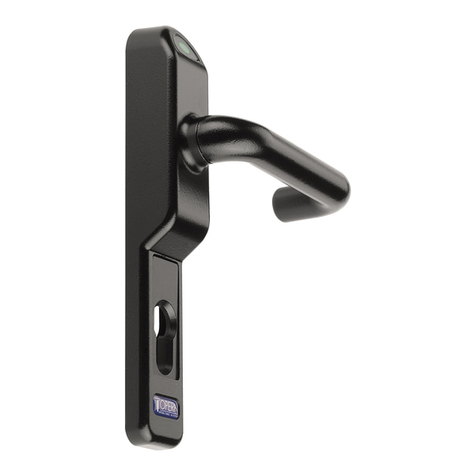
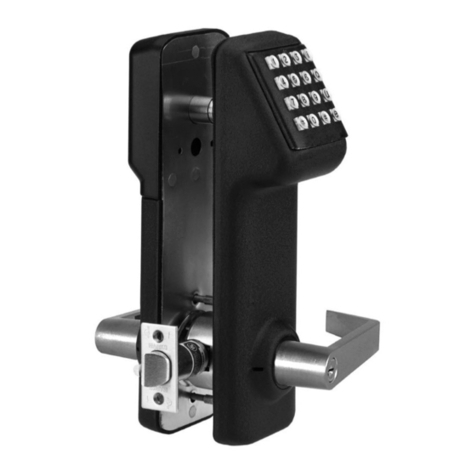
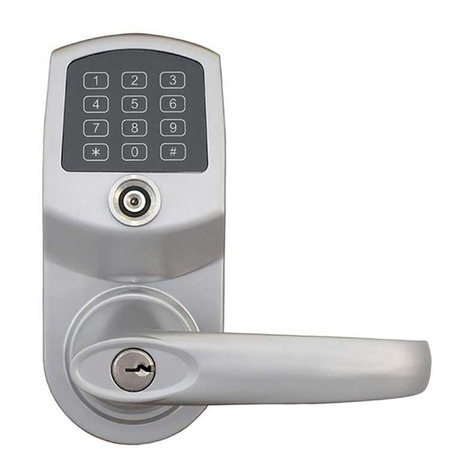
Blusafe Origin Smart User manual

11
Please scan the QR to get newest
manuals on Blusafe Products
Blusafe
Origin Smart
Installation
v1.0

22

33
Origin Smart Handle
Battery Cover
Fingerprint Scanner
Proximity Reader
Wakeup Button and LED
Lever Handle
Louderspeaker Hole
Lever Handle
Thumb Turn
Setting Cover

44
0102030 40 50 60 70 80 90 100 1101020304050607080110 100 90120130140150
OPTION1:�Remove�the�handle,�measure�the�distance�from�the�spindle�centre�to�the�screw�holes�and�mark�on�the�tempIate
OPTION2:�Remove�the�handle,�place�the�template�on�the�door�with�the�spindle�holes�on�the�template
4954 44 39 34
INSERT INTO SLOT FULLY
TO SELECT BAR LENGTH
Box Contents
Key Card
Setting RulerSetting Tool
Mounting PlateInternal Handle External Handle
Fitting Jig
F
G
HL
K
J
A1A2B×4 C D
E
× 3
M N O
× 3 × 3

P001P001
Remove the Existing Handle & Cylinder
Put something in the bottom
of the door to prevent the door
closing and locking itself!
Remove the existing handles
and spindle. If a turn button
cylinder is fitted, remove
the internal handle with the
cylinder.
① Remove the existing
screws,there may be 2 or 3;
② Remove the internal handle;
③ Remove the external handle
and spindle to remove the
locking cylinder;
④ Remove the fixing screw and
turn the key/turn knob whilst
putting gentle pressure on
the opposite cylinderend,
until the cylinder starts to
withdraw. Pull the cylinder
out, if there is no movement,
try turning the key gently,
both ways, left and right.
Tip
• It may be necessary to
use a little force to fully
remove the cylinder if it is
catching on the sides of
the prep hole.
• Some cylinders will only
withdraw to the outside,
some only to the inside,
try both ways.
• If a security clamp is
fitted, it will be necessary
to remove this first, an
Allen key will be needed
to do this. Please see
the FAQ section on the
Blusafe website for help if
you are unsure.
Remove the Cylinder
• Ensure the door is unlocked before removing the handles. Do not close the door until
installation is complete.
Warning!
Remove the Existing Handle
04
04
01
01
01
02
03
03

P002P002
Install Operating Cam
Fix - Reset the cam
If the cam is accidentally turned, re-set it
to vertical by pushing down the brass pin
and turning the cam so the pin is in the
central position.
① Insert the setting tool into the operating cam.
② Push the operating cam into the lock (the hole in which you removed the key/cylinder).
③ Fix it in place with the fixing screw shown in the diagram.
④ Insert the fixing screw but do not overtighten.
⑤ Remove the setting tool.
L
Cam
K
J
Setting Tool
04
05
01
02
03

P003P003
Determine Handle Direction
Depending on which way your door opens, determine which way the handles need to face.
The handles should always point towards the door hinges. Check the Origin/Origin Smart handles
against the current handles.
If the handles need to face the other way, please see next page.

P004P004
Change Internal Handle Direction
If the internal handle direction is not correct, follow the below steps to adjust.
① Insert your screwdriver into the
inside of the handle as shown below.
Push it all the way to the end to
locate the screw.
② Unscrew the handle screw. Remove
it and the spring washer and discard
③ Remove the handle and rotate 180 degrees.
Use the new handle screw and spring washer
(D/E) to fasten the handle
Tip
• For external handle, simply
rotate the handle to the
required position before
inserting spindle.
D E

P005P005
Fitting the Screw Pillars
3 screw pillars are supplied,
but generally only 2 will be
required.
They can be added or removed
where necessary.
The pillars can slide up or
down when loosely tightened
to match the current holes.
Fitting the Screw Pillars
Method 1
Measure the screw holes of
the existing handle. Insert the
old spindle and use the setting
ruler supplied and fit the screw
pillars in the correct positions.
Alternative
Method 2
Use the old internal handle and spindle, join together with
the Origin/Origin Smart outer handle.
Fix the screw pillars loosely - in line with the old handle
screw ports.
Using the old handle screws, pass them through the old
handle into the screw pillars and turn to locate, then gently
tighten the pillars with fingers.
Remove the screws, old handle and spindle and fully tighten
the pillars with the setting tool.
Important!
• Ensure the bottom pillar
is below the electrical
contact wire.
Important!
• Ensure you fully tighten
the screw pillars with the
setting tool or at head
screwdriver.
OLD SPINDLE
Method 1
Setting Tool
Setting Ruler

P006P006
Please measure the total thickness of your
door. Select the spindle and fixing screw pack
as shown below.
Before fitting the handle assembly, please
ensure that the internal and external handle,
backplate, spindle and fixing screws are
removed from the packaging and within easy
reach.
Warning!
• Please make sure the main door lock is
in the unlocked position. If unsure, use
the old handle and spindle and push the
handle down before proceeding.
Door thickness
44-50mm
58-65mm
68-75mm
Measure Your Door Thickness
48mm×3
M·130mm
N·145mm
O·155mm
70mm×3
60mm×3

P007P007
① Fit the spindle into the
external handle.
② From the outside face of
the door, take the leading
tube and put it over the
cable connector head, then
feed the cable through the
bottom fixing hole as shown.
UPVC doors will have 2
internal walls to pass the
cable through as well as
the outer and inner walls.
Push the spindle all the way
through.
③ Make sure the screw pillars
pass through the middle of
the holes in the door.
Gently pull the connector
cable with leading tube
through if necessary and
check it's not caught or
trapped, as this could
damage the cable. Remove
leading tube from the cable.
Hold the external handle in
place and fit the mounting
plate (see next page).
Install External Handle
LEADING TUBE
02
02
03
03
03
NOTE
• Please note, you may need to increase the size of the
bottom fixing hole to allow both the cable and screw to
pass through. Please see FAQ's on Blusafe website.

P008P008
Install Internal Mounting Plate
④ Ensure the mounting plate
is in the correct orientation
with the rubber pad against
the door face (see diagram).
⑤ Feed the electrical connector
and cable through the
bottom slot, you may need
help to do this as you will be
holding the outer handle in
position at the same time.
⑥ Push through and loosely
tighten the fixing screws into
the screw pillars on the outer
handle. Check the mounting
plate is firmly against the
door face. Remember, there
may only be 2 screws not 3.
Warning!
• DO NOT fully tighten the
fixing screws.
×3
M
or
N
or
O
×3
×3
04
05
06
06
06

P009P009
Fit the Drive Bar
Push the setting tool fully into the slot in the
operating cam (see fig.1).
The mark nearest to the face of the backplate
shows the correct bar length to use (see fig.2).
Withdraw the setting tool making sure the slot
in the cam is in the vertical position.
Select the correct length drive bar shown by
the setting tool.
Then, wider square end in first, push the bar
firmly into the slot until it hits the bottom of the
slot.
fig.1
fig.2
fig.3
Bar NO Bar Length (mm)
35
42.5
50
Reading on Setting Tool (mm)
34 - 39
39 - 47
47 - 51
G1
G2
G3

P010P010
Use Fitting Jig to Align
Important!
• Ensure the drive bar is vertical.
Refer to page 2 to re-set the cam if
required.
Important!
The jig MUST be used.
⑦ Slide the black plastic fitting jig over the
spindle as shown and check that the drive
bar is located correctly in the slot.
Move the internal mounting plate slightly if
required until the jig is fully located.
⑧ Tighten up the fixing screws firmly but do
not over tighten.
Remove the fitting jig. Make sure the spindle
and drive bar are in the centre of their holes
respectively.
Drive Bar
07
08
08
08

P011P011
Fix the Mounting Plate
⑨ If the top of the backplate
is not ush with the face of
the door, fit the additional
self-tapping screw A1
supplied.
Some composite doors have
steel skins so it may be
necessary to use a powered
driver with a self-drilling
screw A2 (supplied).
Please be careful to tighten
by hand to avoid stripping
the door skin.
Other optional (OP) fixing
points are available if
required (screws not
provided).
Note
• Screw A1 is a
self-tapping screw.
• Screw A2 is a
self-drilling screw.
OP OP
OP
OP
09 A1 A2

P012P012
Important!
• Make sure the drive bar
is vertical and the cam
slot arrows are vertical
before fitting.
Fitting the Internal Handle
⑩ Check that the handle is
facing the correct way (see
page 3).
⑪ Check the alignment arrows
on the turn cylinder are
facing straight up as shown
below.
⑫ Carefully connect the
connector to the handle as
shown, red side to red side.
10
11
12
RED
RED

P013P013
Fitting the Internal Handle
⑬ Locate the handle onto the
spindle.
⑭ Push the handle in slowly
ensuring that the cable goes
around the thumb turn as
shown in the diagram.
⑮ Check that the drive bar is
fitting into the slot in the
thumb turn cylinder and push
the handle fully home.
Finally, double check that the
handle is seated correctly
on the backplate and that
the cable is not visible (not
caught under the edge of
the handle).
Important!
• Please make sure cable is
tucked into allocated slot
when fitting handle.
13
14
15

P014P014
Fitting the Internal Handle
⑯ Fit the 4 fixing screws
supplied manually (do not
use a power screw driver).
Do not over tighten the
screws.
Warning!
• DO NOT push down or lift
the handle at this stage.
B
16
16
16
16

P015P015
Internal Handle Set Up
⑰ Please insert the 4 AA
batteries supplied with the
handle and fit the cover.
You will hear a ‘beep’ to
confirm that the batteries
are correctly fitted.
You will be instructed to
‘PLEASE PUSH THE LEVER
HANDLE DOWN’. Once
done, you will be instructed
to ‘PLEASE LIFT THE
LEVER HANDLE’.
You should hear the motor
turn and then hear ‘DOOR IS
LOCKING’.
Try to push the handle
down. If the handle has been
correctly fitted, the handle
should not push down.
Important!
• The batteries will work in
the handle for 8 months
depending upon usage
and environment. It is
recommended to change
the batteries every 6
months for optimal
performance.
• When the batteries are
running low, you will
hear a ‘Low Battery’
warning upon each use
of the handle. You will
have approximately 50
warnings before the
battery runs out.
Warning!
• Do NOT turn the thumb
turn until the above
sequence has been
completed.
17

P016P016
Check Thumb Turn
Check the operation of the internal thumb
turn.
⑱ To unlock the door from the inside, press the
thumb turn slightly and it will drop into a slot,
push firmly and turn the thumb turn.
Turn clockwise if the handle is on the left
side of the door.
Turn anti-clockwise if the handle is on the
right side of the door.
You will hear and feel a click, now push the
handle down.
Once you are happy that the thumb turn is
operating easily and isn't sti or sticking,
you can tighten up the cam fixing screw
(Page 2). Be careful not to tighten too much
and still leave a small amount of slack. Once
tightened, lift the handle to lock the door,
then unlock via the thumb turn. Make sure
that this is still operating easily and freely.
To set up the handle please do not fit the
bottom cover yet.
Fix
• If the thumb turn is sticking or is sti to
operate, the cam fixing screw may be
too tight. Undo the screw by 1 turn and
try again.
• If after this it is still sticking, please refer
to the FAQs on the website to see how
to fix this.
18
Other manuals for Origin Smart
1
Other Blusafe Door Lock manuals
