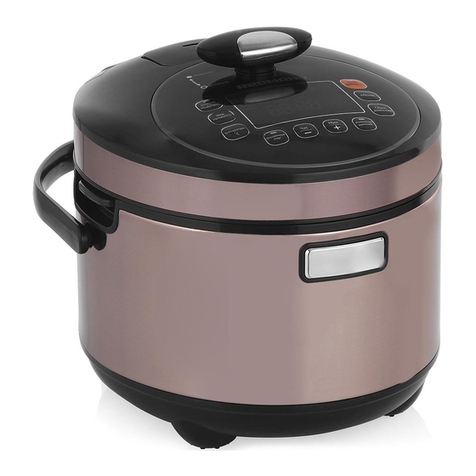
BOJ LIGHTNING-4L User manual

USER MANUAL - MANUAL DE USO - MANUAL DE INSTRUÇÕES -
MANUEL D’UTILISATION - دليل المستخدم
PRESSURE COOKER
LIGHTNING
Olla a presión Lightning - Panela de pressão
Lightning - Autocuiseur Lightning-
ﻂﻐﻀﻟا ةﺮﺠﻨﻃ
4L / 6L

English
- 2 -
TABLE OF CONTENTS
I. Cooker components and specication
II. Safety regulation
III. Safety Device
IV. Operating instructions
V. Maintenance
VI. Trouble shooting
VII. Cooking time
I. COOKER COMPONENTS
Specication:
The pressure cooker has approved by European CE and Germany GS certicate. Cooker body and
lid is made from SUS304, and has triple layered base (SUS304+pure Alu+SUS430).
1. Bonding base
2. Cooker body
3. Flame guard
4. Side handle
5. Silicone ring
6. Safety window
7. Lid
8. Safety valve
9. Pressure regulator
10. Stainless Steel decorative
cover
11. Upper handle
12. Lower handle
13. Flame guard
14. Press button
Model No. Caliber Capacity Working pressure (kPa) Safety pressure (kPa)
1 2 First Second
LIGHTNING-4L 22/24CM 4.0L 70 100 130-170 180-300
LIGHTNING-6L 22/24CM 6.0L 70 100 130-170 180-300
(Fig 1)
1
2
3
4
5
6
7
8
91011
12
13
14

English
- 3 -
II. SAFETY REGULATION
1. Read all instructions and make clear everything in this manual before use.
2. Always keep the regulator, regulator vent pipe, safety valve, sealant ring, lid and cooker body
free of greasy dirt and residue.
3. Do not touch hot surfaces. Use handles or knobs.
4. Close supervision is necessary when the pressure cooker is used near the children.
5. Do not place the pressure cooker on a hot oven.
6. Extreme caution must be used when moving a pressure cooker with pressure inside. Do not
knock, shake, etc.
7. Pressure cookers are for domestic use only, not recommended for any other use.
8. This appliance cooks under pressure. Improper use may result in scalding injury. Make clear
every detail before operate. See “Operating Instructions “.
9. Be aware that inatable foods, such as applesauce, cranberries, pearl barley, oatmeal or other
cereals, split peas, noodles, macaroni, rhubarb can foam, froth, sputter, and clog the pressure
release device (steam vent).
10. Substances such as baking soda, too much vegetable oil and alcohol cannot be cooked with
pressure cooker.
11. When cooking doughy food, gently shake the cooker before opening the lid to avoid food
ejection.
12. Use pressure cooker only on range placed on steady level. Flames should not exceed the plan
wall. lf it’s not for strong re.
13. Check the pressure release device before using, make sure the pressure cooker is in good
working condition.
14. Do not open the pressure cooker until it has cooled and all internal pressure has been
released. lf the handles are difcult to apart, this indicates that the cooker is still pressurized -
do not force it open.
Any pressure in the cooker can be hazardous.
15. Do not use the pressure cooker for pressure frying oil. When the normal operating pressure is
reached, tum the heat down so all the liquid which creates the steam does not evaporate.
16. No dry cooking for the unit.
17. Do not point the safety cavity to people.
18. Do not tamper with any other safety systems beyond the maintenance instructions specied in
the instructions for use.
19. When the cooker is damaged or shows abnormal, stop using immediately. Get it repaired in
the service department.
20. Only use manufacture’s spare parts in accordance with the relevant model. In particular, use a
body and a lid from the same manufacturer indicated being compatible.
BAKING SODA OIL ALCOHOL
BAKING SODA
OIL
ALCOHOL

English
- 4 -
Do not ll the unit over 2/3 full non-expandable foods such as vegetables and meat.
21. When cooking foods that expand during cooking such as rice, legume or dried vegetables, do
not ll the unit over 1/3 full (g. 2)
22. Do not cover the regulator with heavy objects.
23. Save this instruction.
III. SAFETY DEVICE
- Pressure regulator: The pot would pressure relief automatically when working pressure reach its
rated pressure.
- Safety valve: Only close lid properly, pressure can rise and the safety valve go up to lock the lid.
- lf you close lid incorrectly, cooker cannot work, steam will come out everywhere, then you should
stop heating. Check and re-close cooker properly.
- Safety valve can detect the inner pressure automatically. When pressure is lower than 5Kpa,
safety valve will go down and you can open lid.
- Safety valve: when pressure regulator doesn’t work or blocked, the inner pressure will continue to
rise up, then safety valve will open to release extra steam, which make sure the pressure cooker
in cooker is not too high and keep it in a safety condition.
- Safety window: a window on the edge of lid. Regulator and safety valve disable or little time to
relief pressure. The window would open and relief the pressure quickly ensure the safety.
IV. OPERATING INSTRUCTIONS
Read the Owner’s/ Operator’s Manual carefully, especially the second chapter and the fourth
chapter. Clean the unit with detergent before using.
1. Check the safety device before using
Clean the regulator, safety valve, sealant ring, locking indicator, and lid each time before using.
Keep away the unit from greasy dirt and residue. Make sure regulator and safety valve operate
well. lf blocked, remove the dirt with cleaning pin and clean.
2. Closing the lid
Hold the lower handle tightly. Align the mark “ “ on the lid with the mark “ “ on the lower
handle and shut de lid by tuning clockwise the upper handle. It sounds “kick” when it`s closed.
(Fig. 3)
(Fig 2)
2/3 volumen
1/3 volumen

English
- 5 -
CATION: Check the button if it’s on the correct position (Fig.4), if not, please turn it to correct
position. (Fig.5)
3. Lay the regulator
Set the working pressure for different food by turning the regulator. “1” refers to 70±10%Kpa,
“2” refers to 100±10%Kpa (Fig. 6)
4. Heating
Pressure cooker should be at on the burner. When heated by electric furnace, furnace-calibre
can not be larger than the diameter bottom of the cooker. When heated by gas stoves, ame
can not burn the cooker wall (Fig 7).
(Fig 3)
(Fig 4) (Fig 5)
(Fig 6)
low pressure position
high pressure position
(Fig 7)

English
- 6 -
Put pressure cooker on stove, heat cooker on strong re but do remember not too strong!
A moment after heating, small quantity of steam escapes from the safety valve (it’s
normal). When the pressure inside the cooker reach certain level, steam escaping will stop
automatically. When the red safety valve is pushed up and continued steam escaping from
regulator, the strong re should be reduced to moderate re and start the heating time. (Fig 8)
Special remind:
- Please do not touch the high-temperature surface without protection directly. You’d better
wearing gloves by holding1he handles.
- You’d better not leave away when you are cooking and notice if the conditioned normal.
- Keeping the pressure cooker open when cooking the food which is easy spume, lter the
spume then close the lid.
- The pressure cooker is not easy to lose wet, so it is no need to worry about it (It is an another
thing if you keeping boiling in a long time).
- If you want to make the meat colorful, please put more colorful spices to offset the fading
from the high steam.
- You should turn down the heat resource when you nd soup spilling, and cooking with slow
re.
- To ensure safety, you should observe the range of capacity in above, dry cooking will jam the
device.
5. Turn off the re
When cooking is OK, turn off the re, and take off the pressure cooker.
6. Release pressure
1) When remove pressure cooker from stove, please grasp the two sides handle of the cooker,
do not touch the hot surface of body and lid, otherwise you will get burnt.
2) Let the cooker cool down by itself. It means wait until safety valve falls down.
3) F orce releasing pressure: Force cooling down is needed when cook overtime or prevent
overtime-cooking or when the lid has to be opened during cooking. Place the cooker evenly,
ush the cooker with running water. (Fig 9) Be careful not to let cold water enter the cooker
through the safety valve. Wait until the red safety valve fall down. The method can release
pressure rapidly.
(Fig 8)
NOTE: “Heating time” means the period from the time regulator begins to work to the range/
stove is turned off.

English
- 7 -
Besides, turn the regulator to the position” ”can also release the pressure completely and
cool down the cooker in a short time. When use this way, the rapid steam will bring soup out,
so the way is only for dry food in cooker.
7. Open lid
After the safety valve falls down, open the lid by turning handle counterclockwise till the mark
““ on the lid align with the mark “ “ on the lower handle.
V. MAINTENANCE
1. Maintenance of whole cooker body
A). After dining, using abluent clean the dirt on the cooker drastically.
B). After washing, please wipe the water attaching on the cooker to make it dry.
C). Don’t use metal brushes and other hard objects scrub the surface for avoiding injury of the
cooker.
D). Don’t put this cooker together with ironware or other similar type of metal.
(Fig 9)
(Fig 10)
NOTE:
1) Please make sure the safety valve falls down before open lid;
2) When cooking porridge, thick soup, shake the cooker several times before opening the lid.
NOTE: do not put the whole pressure in water.

English
- 8 -
2. Maintenance of Sealing gasket
A). Wipe up the dirt which is adhered on the cooker by using abluent.
B). Wipe up the water to keep it dry
C). Put sealing gasket in lid accurately.
D). Using clean water or abluent to wash Sealing gasket after using it and put it in lid in
accurate position after wiping the water away. Keep it smoothly. Please change it after a
long time using when nd a quality broken.
E). We suggest replace the gasket every 1-2 years according the using rate.
3. Maintenance of pressure regulator.
a) Turn the regulator to release position ” ” Fig 11) slightly lift regulator and counter-
clockwise turn till the “ “ points to the “ “, take out the regulator from the handle and
clean. (Fig 12)
After cleaning, put regulator back to handle by aligning the “ “ to “ “ and clockwise turn
regulator back to working position.
b) If the pressure regulator is blocked by food draft or other eye winker, you can use radical to
wipe them away, at the same time washing it by water. And make sure whether the water
can via it smoothly. Check the lock nut become exible or not, please x it if that matter
happen.
4. Maintenance of safety valve
Shift the boil-stopping safety valve for several times, meanwhile clean it with water, make sure
it is in good working condition. Check if the safety valve is loose. Clamp it when it is loose.
5. Removal of Scorch
a) Please using soft wooden thing such as wooden chopsticks or wooden ladle to reject the
burnt and stick thing.
b) If the burnt is substance, it should be under the blazing sun for quite a ling time and dry it.
Dip the dry stick thing in the oil, and ll with hot water after soaked. Reject it after immerse a
short time. Do not reject by sharp tool such as knife, it will be hurt.
(Fig 11) (Fig 12)
NOTE: do not take out the regulator by force.

English
- 9 -
VI. TROUBLE SHOOTING
If there are some problems when you are cooking, you should put the pressure cooker on the at
oor and cooling it by pouring cold water slowly. Check the problem one by one according the
follow table.
NOTE:
• Check safety valve each time before use and make sure it functions properly.
• It is not permitted to change the safety valve unless needed.
• Use only genuine parts from manufacture, which is available from your local dealer.
Trouble shooting Possible cause Solution
After heating, the red
indicator level doesn’t rise.
(1) The lid is not correctly
closed.
(2) The gasket is not correctly
in place or is dirty.
(3) The sealing gasket is
damaged.
(4) The pressure control valve
is not in place.
(1) Check and reclose the lid.
(2) Turn on the heat.
(3) Wash or replace the
gasket.
(4) Check and put suitable
liquid into it.
After heating, there is sound
from the limited valve, but no
steamer comes out.
(1) The limited valve is
blocked.
(2) The releasing valve is
blocked.
(3) It is dry cooking.
(4) The stove dips.
(1) Clean the dirty.
(2) Clean the dirty by slender
stick.
(3) Add some liquid.
(4) Flat the stove.
Steamer comes out the safety
valve.
(1) Escape pipe is blocked.
(2) Too much food in the
body.
(3) heat power is too large.
(1) Clean the dirty.
(2) Decrease the food and
reheat.
(3) Decrease the power.
Steam is escaping from the
rim of the body.
(1) The lid is not correctly
closed.
(2) The gasket is not correctly
in place or is dirty.
(3) The sealing gasket is
damaged
(4) The cooker body is
dropped mishaped.
(1) Replace lid and try again.
(2) Wash gasket and put in
place.
(3) Replace gasket
(4) Stop using
Open-close lid is not exible.
(1) The gasket is not suitable.
(2) The red indicator of the
limited valve has not
falling down.
(3) You overexert when you
open or close lid, the stop-
open piece is damaged.
(1) Replace same size,
original-produced gasket.
(2) Waiting for the red
indicator falling down.
(3) Never overexert, is
something stop, please
analysis the cause and
x by the professional
person.

English
- 10 -
Special caution:
- Never exchange any part or assembling way, please use original-Produced spare parts.
- If you can’t open lid after the red safety indicator falls down, please use the dredging needle to
insert the small hole (Fig 13) till end, then open lid.
VII. COOKING TIME
The times indicated are meant only as a guide line. You should adjust them according to the
quantity and quantity. Count the following time when the pressure regulator begin to release
steam.
Maintenance Card
(Fig 13)
Foods Cooking time in
minutes Foods Cooking time in
minutes
Asparagus (whole) 3-4 Step 1 Beef (stewed in pieces) 15-20 Step 2
Beans 6-8 Step 1 Chicken (in pieces) 10-15 Step 2
Brussel sprouts 4 Step 1 Duck 15 Step 2
Cabbage 3-4 Step 1 Filet steak 8-10 Step 2
Cauliower 3-4 Step 1 Fish 4-8 Step 2
Pasta 5-6 Step 1 Goose 18-22 Step 2
Porridge 15-20 Step 1 Mutton (in pieces) 10-15 Step 2
Potatoes 4-6 Step 1 Pig’s Knuckle 15-20 Step 2
Rice 4-8 Step 1 Rabbit (in pieces) 13-18 Step 2
Wheat 15-20 Step 1 Turkey 15 Step 2
Customer name: Tel:
Address: Postal Code:
Product: Model:
Purchase Address:
Purchase Date: MM DD YY Salesperson
Sign:

English
- 11 -
Except the situations as below;
1. No guarantee card and sales slip or receipt;
2. No record of purchase;
3. Damages by incorrect use, abuse and intended destroying;
4. Damaged by crash or empty burned;
5. Damages by force majeure like earthquake, etc.

Español
- 12 - - 13 -
ÍNDICE
I. Componentes de la olla y características
II. Normas de seguridad
III. Dispositivo de seguridad
IV. Instrucciones de uso
V. Mantenimiento
VI. Resolución de problemas
VII. Tiempos de cocinado
I. COMPONENTES DE LA OLLA Y CARACTERÍSTICAS
Características:
La olla a presión cuenta con el certicado CE europeo y el certicado GS alemán. El cuerpo y
la tapa de la olla están hechos de SUS304 y tiene una base de triple capa (SUS304+Aluminio
puro+SUS430).
1. Base de jación
2. Cuerpo de la olla
3. Protección contra llamas
4. Asa lateral
5. Aro de silicona
6. Ventana de seguridad
7. Tapa
8. Válvula de seguridad
9. Regulador de presión
10. Cubierta decorativa de
acero inoxidable
11. Asa superior
12. Asa inferior
13. Protección contra llamas
14. Botón de presión
Modelo nº Calibre Capacidad
Presión de
funcionamiento (kPa)
Presión de seguridad
(kPa)
1 2 Primera Segunda
LIGHTNING-4L 22/24CM 4.0L 70 100 130-170 180-300
LIGHTNING-6L 22/24CM 6.0L 70 100 130-170 180-300
(Imagen 1)
1
2
3
4
5
6
7
8
91011
12
13
14

Español
- 12 -
- 13 -
II. NORMAS DE SEGURIDAD
1. Lea las instrucciones y asegúrese de entender todo lo incluido en este manual.
2. Mantenga siempre el regulador, el conducto de ventilación del regulador, la válvula de
seguridad, el aro sellador, la tapa y el cuerpo de la olla libre de suciedad grasienta y residuos.
3. No toque las supercies calientes. Utilice solo las asas o mangos.
4. Cuando la olla a presión se utilice cerca de niños, será necesaria una atenta supervisión.
5. No coloque la olla a presión sobre un horno caliente.
6. Debe tenerse extrema precaución cuando se mueva la olla con presión en el interior. No le dé
golpecitos, no la agite, etc.
7. Las ollas a presión son únicamente de uso doméstico y no se recomiendan para ningún otro
uso.
8. Este aparato cocina a presión. Un uso inadecuado puede causar quemaduras. Asegúrese de
entender todos los detalles antes de usarlo. Vea las «Instrucciones de uso».
9. Tenga en cuenta que los alimentos que se hinchen, como la compota de manzana, los
arándanos, la cebada perlada, la avena u otros cereales, los guisantes secos, los deos, los
macarrones o el ruibarbo pueden hacer espuma, chisporrotear y atascar el dispositivo de
liberación de presión (salida de vapor).
10. En la olla a presión no pueden cocinarse sustancias como el bicarbonato de sodio, demasiado
aceite vegetal o el alcohol.
11. Cuando cocine alimentos pastosos, agite suavemente la olla antes de abrir la tapa para evitar
la expulsión de comida.
12. Utilice la olla a presión únicamente en fogones sobre supercies estables. Las llamas no
deben llegar a las paredes; no utilice fuego demasiado fuerte.
13. Revise el dispositivo de liberación de presión antes de usar la olla a presión y asegúrese de
que esta esté en buenas condiciones.
14. No abra la olla a presión hasta que se enfríe y se libere la presión interior. Si es difícil separar
las asas, signica que la olla todavía está presurizada. No la abra a la fuerza.
Cualquier presión del interior de la olla puede ser peligrosa.
15. No utilice la olla a presión para aceite de freír. Cuando se alcance la presión normal, baje el
fuego para que no se evapore todo el líquido que crea el vapor.
16. No la utilice para cocinar en seco.
17. No dirija la cavidad de seguridad hacia ninguna persona.
18. No manipule ningún otro sistema de seguridad más allá de las instrucciones de
mantenimiento indicadas en las instrucciones de uso.
19. Cuando la olla se dañe o funcione de forma anormal, deje de utilizarla inmediatamente.
Envíela a reparar al departamento de servicio.
20. Utilice únicamente piezas de recambio del fabricante adecuadas para el modelo en cuestión.
En particular, utilice un cuerpo y una tapa del mismo fabricante que sean compatibles.
BICARBONATO DE SODIO ACEITE ALCOHOL
BICARBONATO DE SODIO
ACEITE
ALCOHOL

Español
- 14 - - 15 -
No llene la olla más de 2/3 del volumen cuando cocine alimentos no expansibles como verduras
y carne.
21. Cuando cocine alimentos que se expandan durante el cocinado como arroz, legumbres o
vegetales secos, no llene la olla más de 1/3 del volumen. (Imag. 2)
22. No cubra el regulador con objetos pesados.
23. Guarde estas instrucciones.
III. DISPOSITIVO DE SEGURIDAD
- Regulador de presión: La olla reducirá la presión automáticamente cuando la presión de
funcionamiento alcance la presión nominal.
- Válvula de seguridad: Solo con la tapa bien cerrada podrá aumentar la presión y la válvula de
seguridad subirá para bloquear la tapadera.
- Si cierra mal la tapa, la olla no funcionará, el vapor saldrá por todas partes y deberá apagar el
fuego. Revísela y vuelva a cerrar bien la olla.
- La válvula de seguridad puede detectar la presión interna de forma automática. Cuando la
presión sea inferior a 5 kPa, la válvula de seguridad bajará y podrá abrir la tapa.
- Válvula de seguridad: cuando el regulador de presión no funcione o esté bloqueado, la presión
interna seguirá subiendo y la válvula de seguridad se abrirá para liberar el vapor sobrante, lo que
garantiza que la presión de la olla no sea demasiado alta y esta se utilice de forma segura.
- Ventana de seguridad: una ventana al borde de la tapa. El regulador y la válvula de seguridad
están inhabilitados o hay muy poco tiempo para liberar la presión. La ventana se abrirá y liberará
la presión rápidamente para garantizar la seguridad.
IV. INSTRUCCIONES DE USO
Lea atentamente el Manual de instrucciones, especialmente los capítulos segundo y cuarto.
Limpie la olla con lavavajillas antes de usarla.
1. Compruebe el dispositivo de seguridad antes de usarla
Limpie el regulador, la válvula de seguridad, el aro sellador, el indicador de bloqueo y la tapa
antes de cada uso. Mantenga alejada la olla de suciedad grasienta y residuos. Asegúrese
de que el regulador y la válvula de seguridad funcionan bien. Si están bloqueados, retire la
suciedad con una varilla limpiadora.
2. Cerrar la tapa
Sujete rmemente el asa inferior. Alinee la marca “ “ de la tapa con la marca “ “ del asa
inferior y cierre la tapa girando el asa superior en el sentido de las agujas del reloj. Se oirá un
clic cuando esté cerrada. (Imag. 3)
(imagen 2)
2/3 del volumen
1/3 del volumen

Español
- 14 - - 15 -
ATENCIÓN: Compruebe que el botón está en la posición correcta (Imag. 4). En caso negativo,
colóquelo en la posición correcta. (Imag. 5)
3. Ajustar el regulador
Ajuste la presión para distintos alimentos girando el regulador. «1» se reere a 70+10 % kPa,
«2» se reere a 100+10 % kPa. (Imag. 6)
4. Calor
La olla a presión debe quedar plana sobre el hornillo. Cuando la utilice sobre un hornillo
eléctrico, el calibre de este no puede ser mayor que el diámetro de la base de la olla. Cuando
la utilice sobre un hornillo de gas, la llama no puede llegar a quemar las paredes de la olla.
(Imag. 7)
(Imagen 3)
(Imagen 4) (Imagen 5)
(Imagen 6)
Posición de presión baja
Posición de presión alta
(Imagen 7)

Español
- 16 - - 17 -
Coloque la olla a presión sobre el fogón y caliente la olla a fuego fuerte, ¡pero no demasiado
fuerte! Un momento después de empezar a calentar, saldrá una pequeña cantidad de vapor de
la válvula de seguridad (es normal). Cuando la presión interior de la olla alcance cierto nivel,
la salida de vapor se detendrá automáticamente. Cuando la válvula roja de seguridad se eleve
y salga vapor del regulador de forma continuada, debe bajarse el fuego fuerte a moderado y
empezar el tiempo de cocinado. (Imag. 8)
Recuerde
- No toque directamente la supercie a alta temperatura sin protección. Se recomienda el uso
de guantes cuando coja las asas.
- Se recomienda no marcharse cuando esté cocinando y comprobar que la olla funciona con
normalidad.
- Deje la olla abierta cuando cocine alimentos que creen espuma con facilidad, ltre la espuma
y vuelva a cerrar la tapa.
- Es complicado que la olla a presión pierda humedad, no es algo por lo que deba preocuparse
(sí debe tenerse en cuenta cuando alargue demasiado el tiempo de cocción).
- Si desea darle más color a la carne, utilice especias más coloridas para compensar la
decoloración causada por el vapor.
- Si descubre que el caldo de la olla empieza a derramarse, debe bajar el fuego y seguir
cocinando a fuego lento.
- Para garantizar la seguridad, debe tener en cuenta el nivel de capacidad indicado arriba; el
cocinado en seco puede atascar el equipo.
5. Apagar el fuego
Cuando el cocinado esté a su gusto, apague el fuego y retire la olla a presión.
6. Liberar la presión
1) Cuando retire la olla a presión del fuego, agarre las asas laterales de la olla; no toque la
supercie caliente del cuerpo de la olla y la tapa o se quemará.
2) Deje que la olla se enfríe sola. Esto signica esperar hasta que la válvula de seguridad baje.
3) Forzar la liberación de presión:
El enfriamiento forzado es necesario cuando se pase del tiempo de cocinado, o para evitar que
esto ocurra, o cuando deba abrirse la tapa durante el cocinado. Coloque la olla uniformemente
(Imagen 8)
NOTA: «Tiempo de cocinado» se reere al periodo de tiempo desde que el regulador empieza
a funcionar hasta que se apaga el fuego.

Español
- 16 - - 17 -
y colóquela bajo el agua corriente. (Imag. 9) Tenga cuidado de que no entre agua fría en la olla
a través de la válvula de seguridad. Espere hasta que la válvula roja de seguridad baje. Este
método ayuda a liberar la presión rápidamente.
Además, al girar el regulador a la posición ” ” también puede liberar la presión por completo
y enfriar la olla en poco tiempo. Cuando utilice este método, el vapor hará que el caldo salga
expulsado, por lo que debe utilizarlo únicamente cuando en la olla haya alimentos secos.
7. Abrir la tapa
Cuando baje la válvula de seguridad, abra la tapa girando el mango en el sentido de las agujas
del reloj. Debe alinear la señal “ “ de la tapa con la señal “ “ del mango inferior.
V. MANTENIMIENTO
1. Mantenimiento del cuerpo de la olla
A) Cuando haya terminado, limpie con detergente la suciedad de la olla.
B) Después de lavarla, pase un trapo para retirar el exceso de agua de la olla y secarla.
(Imagen 9)
(Imagen 10)
NOTA:
1) Asegúrese de que la válvula de seguridad ha bajado antes de abrir la tapa;
2) Cuando cocine gachas de avena, sopa espesa, etc., agite la olla varias veces antes de abrir
la tapa.
NOTA: No meta toda la olla en agua.

Español
- 18 - - 19 -
C) No utilice cepillos metálicos u otros objetos agresivos para fregar la supercie, ya que
podría dañar la olla.
D) No coloque esta olla junto con ferretería u otro tipo similar de metal.
2. Mantenimiento de la junta de sellado
A) Pase un trapo con lavavajillas para retirar la suciedad adherida a la olla.
B) Pase un trapo para secar la olla.
C) Coloque la junta de sellado en la tapa correctamente.
D) Limpie la junta de sellado con agua limpia o lavavajillas después de usarla y, una vez seca,
colóquela en la tapa en la posición correcta. Guárdela con cuidado. Cámbiela tras un largo
periodo de uso y cuando note que la calidad ha disminuido.
E) Recomendamos cambiar la junta cada 1-2 años, dependiendo del uso.
3. Mantenimiento del regulador de presión.
A) Gire el regulador a la posición ” ” (Imag. 11) levante ligeramente el regulador y gírelo en el
sentido de las agujas del reloj hasta que el “ “ apunte hacia el “ “, saque el regulador del
mango y límpielo. (Imag. 12)
Después de limpiarlo, vuelva a colocar el regulador en el mango alineando el “ “ con “ “ y
gire el regulador en el sentido de las agujas del reloj hasta su posición de funcionamiento.
B) Si el regulador de presión está bloqueado por algún alimento, puede utilizar productos
más fuertes para retirarlo a la vez que lo limpia con agua. Asegúrese de que el agua puede
atravesarlo sin problema. Compruebe que la tuerca de jación no esté oja. Si fuera el caso,
apriétela.
4. Mantenimiento de la válvula de seguridad
Mueva la válvula de seguridad que detiene la cocción varias veces mientras la limpia con agua;
asegúrese de que se encuentra en buenas condiciones. Compruebe si la válvula de seguridad
está oja. Si fuera el caso, apriétela.
5. Retirar el fondo quemado
a) Utilice un objeto suave de madera, como palillos o un cucharón de madera, para retirar el
fondo quemado.
b) Si lo quemado es una sustancia, debe dejarlo bajo el sol durante un tiempo para que se
seque. Moje la sustancia ya seca con aceite y, una vez empapado, llene la olla de agua
caliente. Retírelo tras unos minutos sumergido. No lo retire con objetos alados, como un
cuchillo, ya que puede dañar la olla.
(Imagen 11) (Imagen 12)
NOTA: No saque el regulador a la fuerza.

Español
- 18 - - 19 -
VI. RESOLUCIÓN DE PROBLEMAS
Si surge algún problema durante el cocinado, debe colocar la olla a presión sobre una supercie
lista y enfriarla vertiéndole agua lentamente. Compruebe los problemas uno a uno en la tabla
siguiente.
NOTA:
• Revise la válvula de seguridad antes de cada uso y asegúrese de que funciona
correctamente.
• No está permitido cambiar la válvula de seguridad a menos que sea necesario.
• Utilice únicamente piezas originales del fabricante; puede encontrarlas en su distribuidor
local.
Resolución de problemas Posible causa Solución
Después de calentarse, el nivel
indicador rojo no sube.
(1) La tapa no está cerrada
correctamente.
(2) La junta no está colocada
correctamente o está
sucia.
(3) La junta de sellado está
dañada.
(4) La válvula de control de
presión no está en su lugar.
(1) Revise y vuelva a cerrar la
tapa.
(2) Encienda el fuego.
(3) Lave o cambie la junta.
(4) Compruébela y métale un
líquido adecuado.
Tras calentar la olla, sale un
sonido de la válvula limitadora
pero no sale vapor.
1) La válvula limitadora está
bloqueada.
(2) La válvula de liberación
está bloqueada.
(3) Es cocción en seco.
(4) El fogón está en pendiente.
(1) Limpie la suciedad.
(2) Limpie la suciedad con un
palo no.
(3) Añada algo de líquido.
(4) Ponga recto el fogón.
Sale vapor por la válvula de
seguridad.
(1) El tubo de escape está
bloqueado.
(2) Demasiados alimentos.
(3) La energía térmica es
demasiada.
(1) Limpie la suciedad.
(2) Reduzca la cantidad de
alimentos y vuelva a
calentar.
(3) Baje la potencia.
El vapor se escapa por el
borde de la olla.
(1) La tapa no está cerrada
correctamente.
(2) La junta no está colocada
correctamente o está
sucia.
(3) La junta de sellado está
dañada.
(4) El cuerpo de la olla se ha
deformado tras una caída.
(1) Cambie la tapa y vuelva a
intentarlo.
(2) Lave la junta y colóquela.
(3) Cambie la junta.
(4) Deje de usar la olla.
La tapa de apertura-cierre no
es exible.
(1) La junta no es adecuada.
(2) El indicador rojo de la
válvula limitadora no ha
bajado.
(3) Hace demasiada fuerza
al abrir o cerrar la tapa, la
pieza de parar-abrir está
dañada.
(1) Cambie la junta por una
original del mismo tamaño.
(2) Espere a que baje el
indicador rojo.
(3) Nunca lo fuerce. Si algo se
detiene, analice la causa y
llévela a que la repare un
profesional.

Español
- 20 - - 21 -
Tenga especial cuidado:
- No cambie nunca ninguna pieza; utilice piezas originales del fabricante.
- Si no puede abrir la tapa después de que baje el indicador rojo de seguridad, introduzca la
aguja de dragado hasta el nal del pequeño agujero (Imag. 13) y abra la tapa.
VII. TIEMPOS DE COCINADO
Los tiempos indicados son meramente orientativos. Usted deberá adaptarlos a las cantidades.
Cuente el tiempo siguiente una vez que el regulador de presión empiece a liberar vapor.
Tarjeta de mantenimiento
(Imagen 13)
Alimentos Tiempo de cocina-
do en minutos Alimentos Tiempo de cocina-
do en minutos
Espárrago (entero) 3-4 Paso 1 Ternera (guisada a trozos) 15-20 Paso 2
Guisantes 6-8 Paso 1 Pollo (a trozos) 10-15 Paso 2
Coles de Bruselas 4 Paso 1 Pato 15 Paso 2
Col 3-4 Paso 1 Filete 8-10 Paso 2
Colior 3-4 Paso 1 Pescado 4-8 Paso 2
Pasta 5-6 Paso 1 Ganso 18-22 Paso 2
Gachas de avena 15-20 Paso 1 Cordero (a trozos) 10-15 Paso 2
Patatas 4-6 Paso 1 Codillo de cerdo 15-20 Paso 2
Arroz 4-8 Paso 1 Conejo (a trozos) 13-18 Paso 2
Trigo 15-20 Paso 1 Pavo 15 Paso 2
Nombre del cliente: Tel:
Dirección: Código postal:
Producto: Modelo:
Dirección de compra:
Fecha de compra: DD MM AA Firma del
vendedor:
This manual suits for next models
1
Table of contents
Languages:
Other BOJ Electric Pressure Cooker manuals


