BOMTECH A-ONE Pro User manual

마스터 부제목 스타일 편집
One-Click Automatic Diagnosis System
A-ONE Pro
Sterilized by UV
–Infection Free
마스터 부제목 스타일 편집
Contents
2
For your beautiful and comfortable life, BOMTECH skin diagnosis system A-ONE
Ⅰ. Introduction
1. Characteristics
2. Composition
3. Specification
Ⅱ. Installation
1. Installation
2. Connection
Ⅲ. Instruction
1. Precaution
2. Diagnosis
①Customer Information
②Diagnosis
③Result
④Product Recommendation
3. Additional Function
4. Product Update
5. Configuration
①Sensitivity Control
②Camera
③Screen Saver
④Logo
⑤Guide line
⑥Display of Standard Value
⑦Usage Count of Flash
⑧Doctor Mode
⑨Outline (Drawing Picture)
⑩Control Mode
⑪Age of Skin
⑫Network
⑬Backup
⑭Restore
Ⅳ. FAQ
Ⅴ. Maintenance & Warranty

마스터 부제목 스타일 편집
3
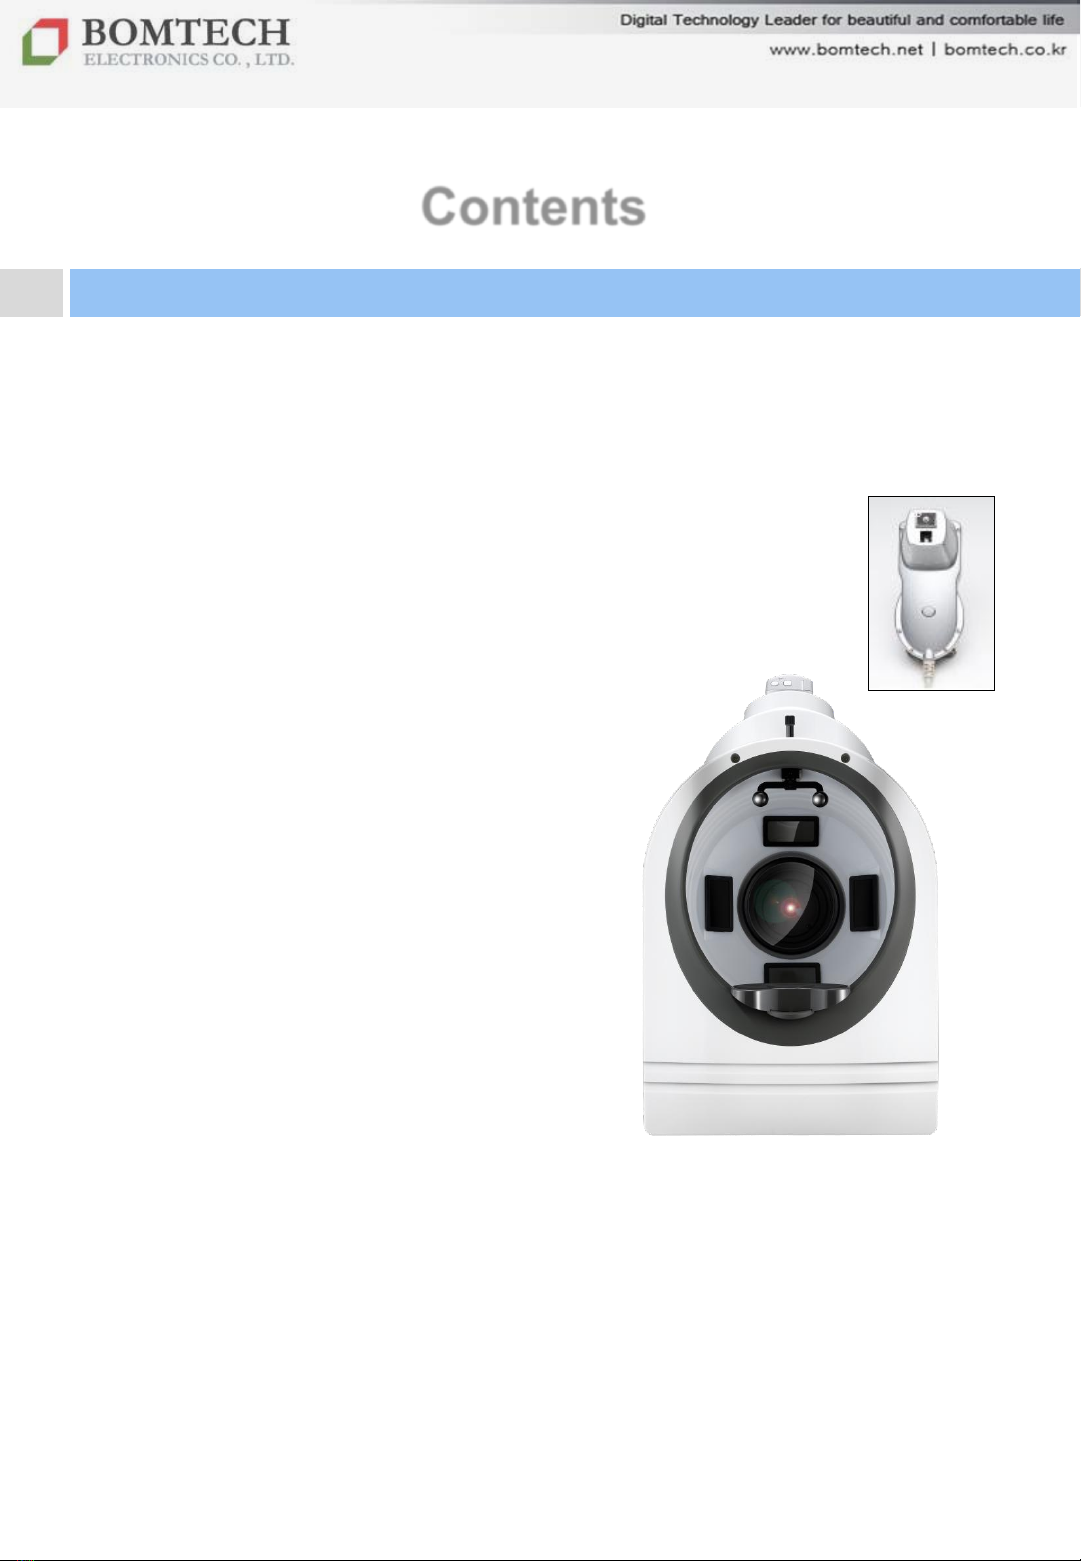
1. Characteristics
High Resolution Cannon Camera
- 14.7 mega pixel: vivid and high resolution image
Automatic, Full-Face Skin Diagnosis
- Scanner: pore, sebum, wrinkle, pigmentation
- P-Sensor: moisture, elasticity, skin tone, skin temperature
Providing High level visual effect: UV & Polarization function
- Accurate sebum quantity and pigmentation measurement
Automatic Recommendation of Product and Treatment
- Based on a client‟s result
AccurateAnalysis
- Accurate understanding on diagnosis result by photos and graphs
** USB cable and power cord included
A-ONE P-sensor Installation
CD Lock Key
For your beautiful and comfortable life, BOMTECH skin diagnosis system A-ONE
Ⅰ. Introduction
2. Composition

마스터 부제목 스타일 편집
3. Specification
For your beautiful and comfortable life, BOMTECH skin diagnosis system A-ONE
Ⅰ. Introduction
Classification
Description
Size
Width
: 302mm, Length: 369mm, Height: 480mm
Weight
7
,800g (Scanner only)
Rated
Input Power
AC 100
-120V, 200-240V
INTERNAL OUTPUT: DC12V (4.2A),DC 5V(10A)
Power
Consumption
50W (Max.)
Weight
7
,800g (Scanner only)
Compatible
Operating
System
Windows
XP/ Vista / 7 / 8
Minimum
Hardware
Requirements
CPU: Over Pentium4
RAM: Over 1G (Recommendation: over 2G)
VGA: Video card memory –over 32MB
HDD: Over 10GB
Monitor: Over 17”, Resolution 1024×768
Graphic
Card
3Dfx Voodoo classes
ATI RageⅡ, Rage Pro, Radeon classes
Matrox classes
Nvidia Riva 128, Riva TNT, Geforce classes
Intel i740
S3 Virge GX/GX2, Trio 3D, Savage 3D classes
마스터 부제목 스타일 편집
5
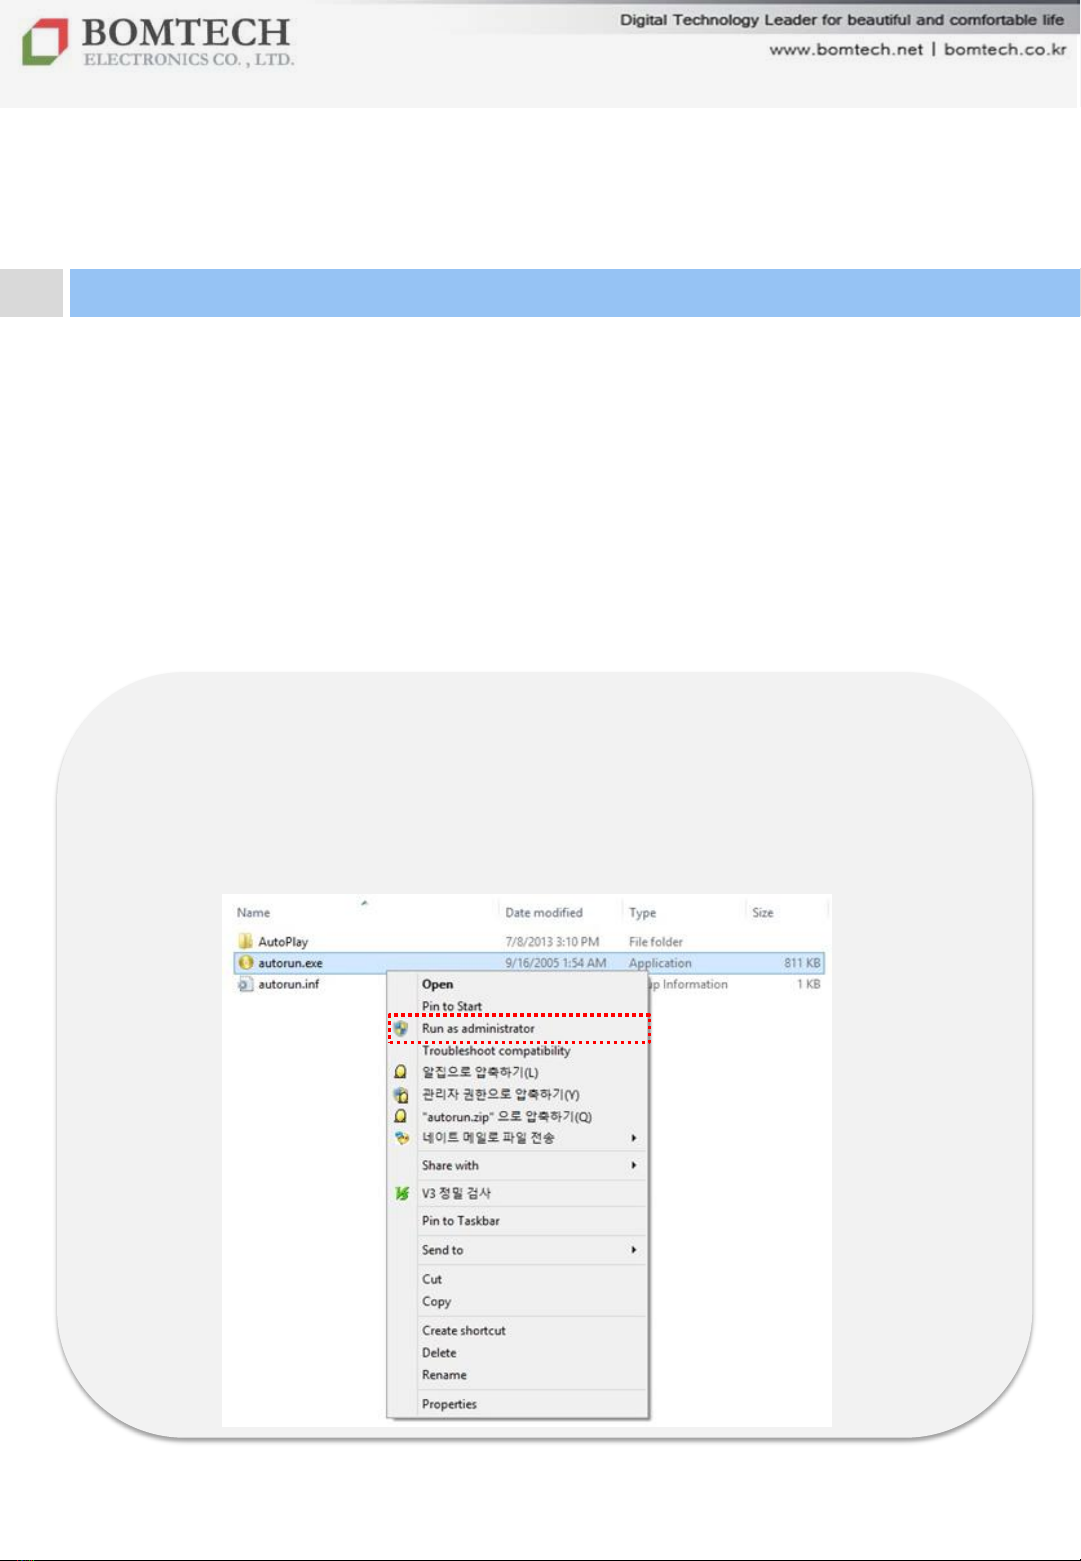
1) Insert program CD into CD-ROM drive.
2) Autorun file is automatically executed.
3) Install software and lock key driver.
** No need to install camera driver and P-Sensor driver as they are
automatically recognized by PC.
** Caution
To install the software on Windows 8, Autorun file should be
executed as administrator. Open CD-ROM drive, right-click the
Autorun.exe file and select „Run as administrator‟.
If unknown publisher security warning pops up, select „Yes(Y)‟.
For your beautiful and comfortable life, BOMTECH skin diagnosis system A-ONE
Ⅱ. Installation
1. Program Installation

마스터 부제목 스타일 편집
6
Click „Setup‟
Click „OK‟
Click „Next‟ Click „Next‟
Click „Next‟
A-One shortcut icon is
automatically created
on desktop.
Ⅱ. Installation
1. Program Installation: Software
마스터 부제목 스타일 편집
7
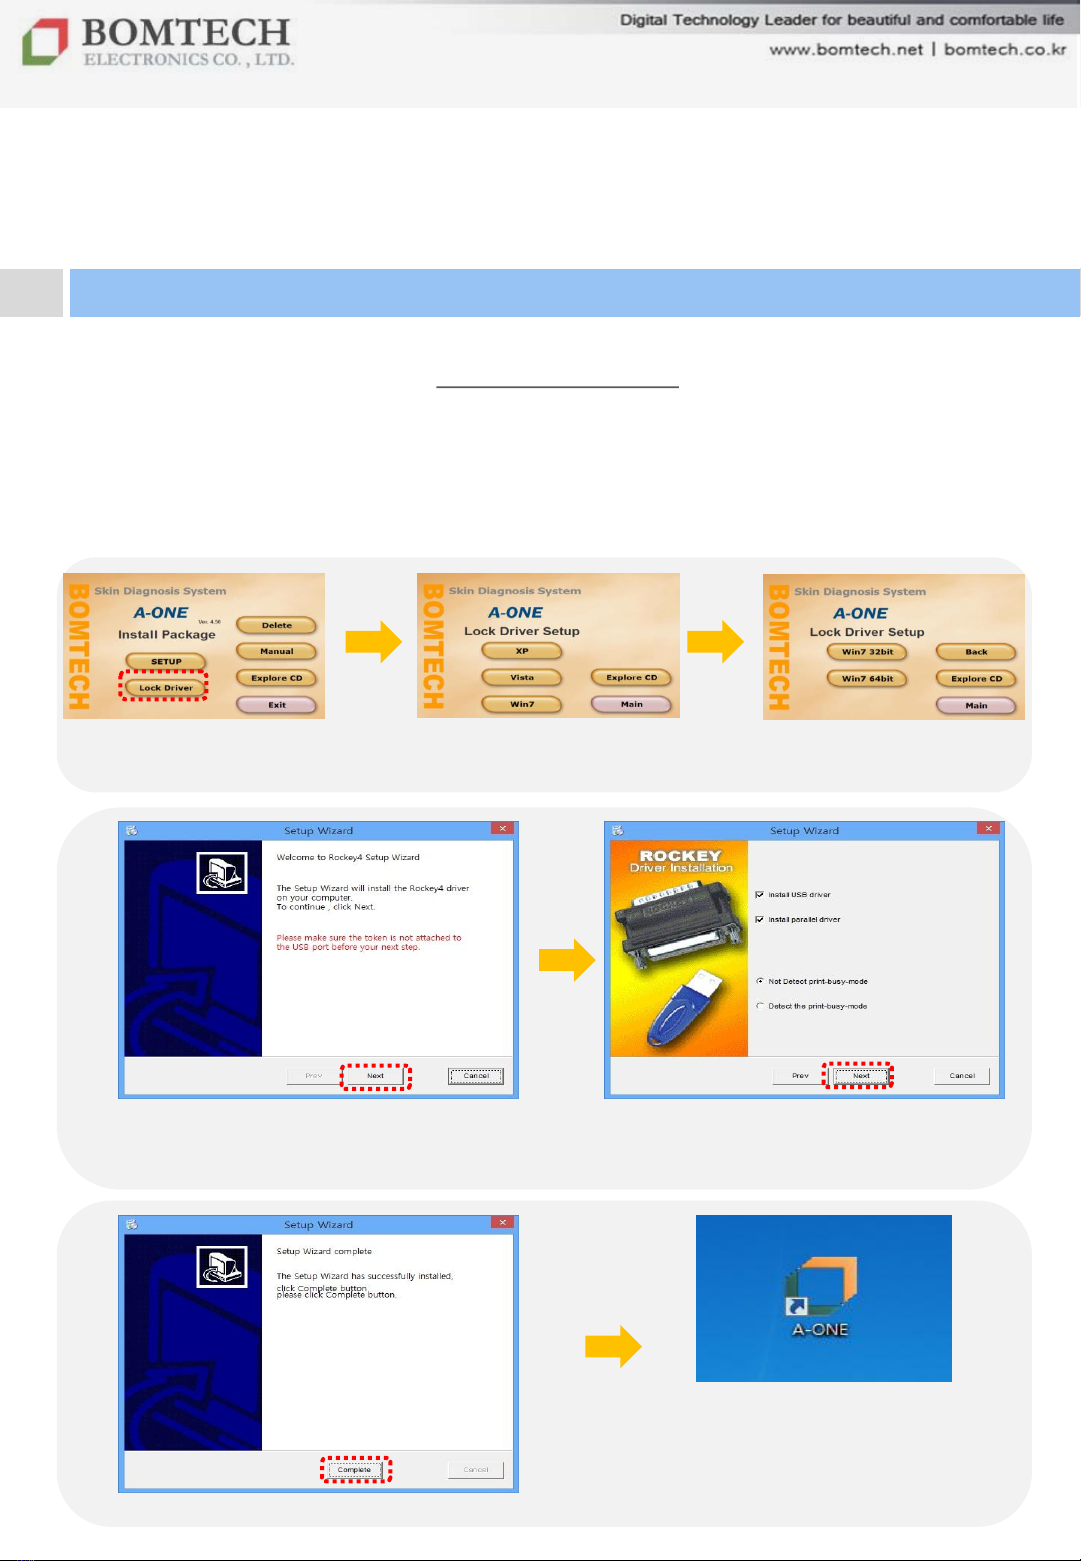
Click „Lock Driver‟ Select „Windows OS‟
(Win 8 user selects Win 7.) In case of Vista/ Win7/ Win8,
select 32bit or 64bit
Click „Next‟
(Lock key should be disconnected to PC
before clicking „Next‟.)
Click Next
Click „Complete‟
Double-click A-One shortcut
icon on desktop to execute the
software.
For your beautiful and comfortable life, BOMTECH skin diagnosis system A-ONE
Ⅱ. Installation
2. Program Installation: Lock Key Driver
There are two kinds of USB lock key:
- Red lock key : It is automatically recognized by PC. No need to install
lock key driver.
- Blue lock key: Install lock key driver following the below instruction.
마스터 부제목 스타일 편집
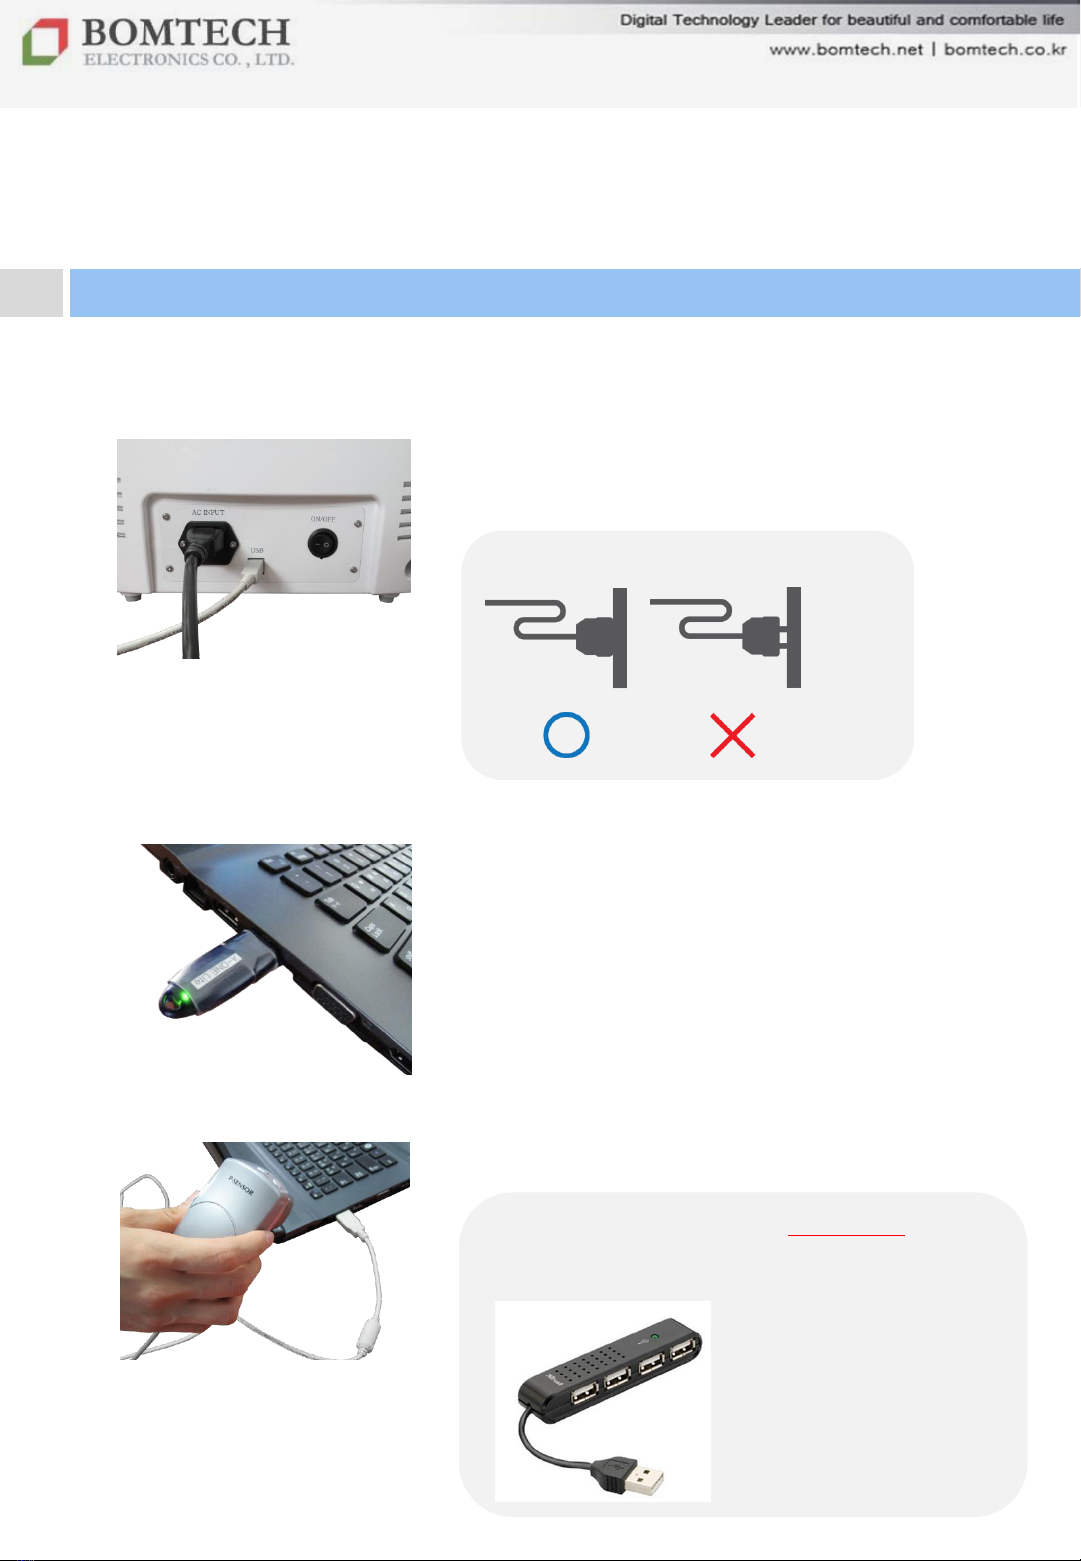
1) Plug in with power cord and connect it to PC
with USB cable.
*** We recommend to use USB hub in case
the number of USB port is not enough or PC
doesn’t support stable USB 2.0.
Ⅱ. Installation
2. Connection
** Check connection of power cord.
2) Plug lock key into PC.
3) Connect P-Sensor to PC.

마스터 부제목 스타일 편집
Please be sure to read the instructions before use and follow as described.
1. Do not use it with other electronic devices.
It may cause malfunction.
2. Do not keep it in the humid place.
It may cause malfunction.
3. Do not use it on the power other than AC 100~120 or 200~240V.
It may cause fires, electric shocks or malfunction.
4. Do not put on the device nearby the containing water.
It may cause fires, electric shocks or malfunction as water flows into it.
If water does flow, stop using it immediately and make sure to inspect it.
5. Do not use it near the place with high temperature, dust or humidity
(Near the humidifier). It may cause electric shock (sparks) and
malfunction.
6. Do not repair, disassemble or alter the main body under unauthorized person.
It may cause malfunction, fires or burns.
7. Do not touch the device or detach the power cords with wet hands.
It may cause electric shock.
8. Do not use the stripped or bent cord by force.
It may cause fires or electric shock (Be sure to replace defective one
with another).
9. Do not run the scanner or sensor into a hard object, or drop it.
It may cause injuries and malfunction.
10. When you don‟t use it for a long time, unplug it from the outlet. 9
For your beautiful and comfortable life, BOMTECH skin diagnosis system A-ONE
Ⅲ. Instruction
1. Precaution
마스터 부제목 스타일 편집
:
:
10
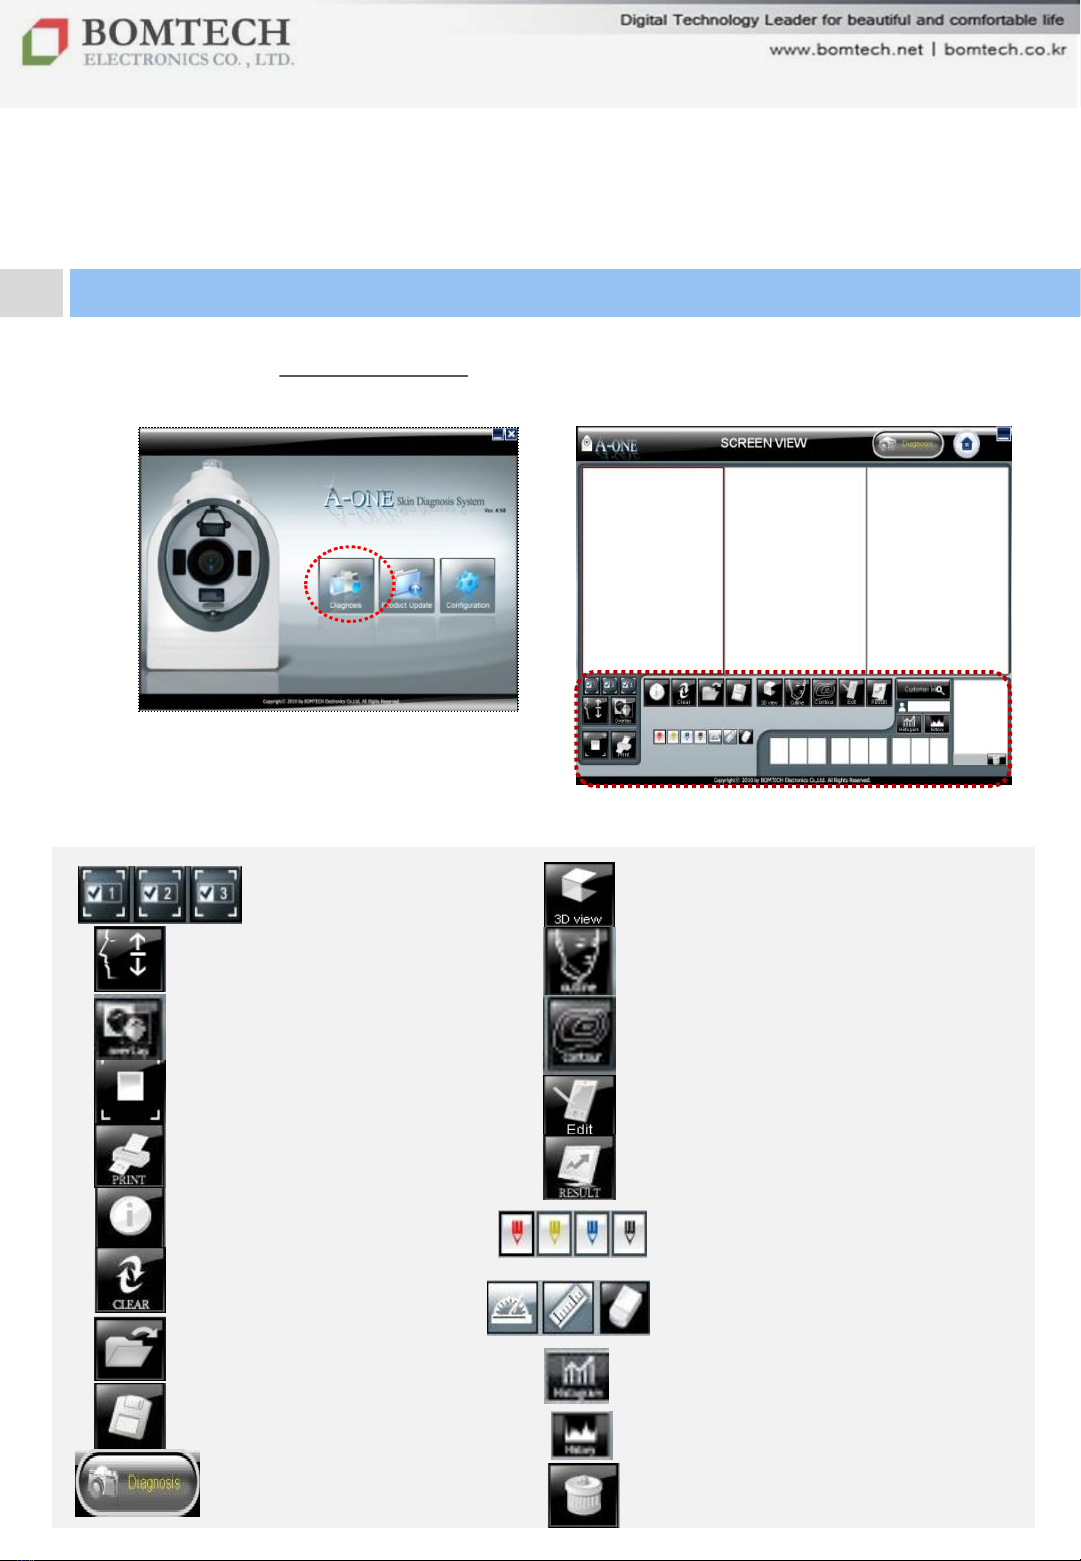
Click „Diagnosis‟ on startup page
to start diagnosis.
Ⅲ. Instruction
2. Diagnosis: Screen View
Select the number of screen Show 3D View of skin
Simulation Outline of face
Comparison of two photos
by overlapping Contour
Full screen with zoom function Edit
Print out image Move to result page
Color pencil function
Protractor, ruler and eraser function
Hide test value
Clear screen view
Open image
Save image
Start diagnosis
Histogram of data
History of photos
Delete diagnosis date list

마스터 부제목 스타일 편집
11
Ⅲ. Instruction
2. Diagnosis Client
Registration Diagnosis Result Product
Recommendation
Click „CUSTOMER INFORMATION‟.
For new client:
①Click „REGISTRATION‟.
②Input the client's name, gender, age
and other information.
** Please enter birth date and gender as
the result is based on age and gender.
③Click „SAVE‟ and move to camera
screen.
For existing client:
Search the name of the client and click
„SELECT‟.

마스터 부제목 스타일 편집
12
Search
Enter name or phone number of the
registered customer.
** If you want to re-diagnose, double-
click the client’s name or click
customer’s name and click ‘select’ .
Edit
To change client information, select
client name on the list and click „edit‟.
After editing, click „save‟.
Delete
To delete a registered client‟s
information and data, select the client„s
name on the list and click „delete‟.
** Note that deleted data cannot be
restored.
Customer Information
: Search / Edit / Delete
Ⅲ. Instruction
2. Diagnosis Client
Registration Diagnosis Result Product
Recommendation

마스터 부제목 스타일 편집
13
For your beautiful and comfortable life, BOMTECH skin diagnosis system A-ONE
Ⅲ. Instruction
2. Diagnosis Client
Registration Diagnosis Result Product
Recommendation
1) To Start,
For Initial Diagnosis:
Register a client‟s
Information, save and
then click „Diagnosis‟.
For Re- Diagnosis:
Bring the client‟s
information and click
„Diagnosis‟.
Headrest
Put your forehead.
** Adjust the height by
turning the screw.
Chin rest
Place your chin.
** Left / Center / Right
2) Place your face referring to the below.

마스터 부제목 스타일 편집
For your beautiful and comfortable life, BOMTECH skin diagnosis system A-ONE
Ⅲ. Instruction
2. Diagnosis Client
Registration Diagnosis Result Product
Recommendation
3) Place your face properly
and click „Shot‟.
Stay still until you finish taking
three shots in a row.
(normal / UV / polarized light)
** You can take front, left and
right side of your face.
4) When you are done,
click „Diagnosis‟ to move
onto result page.
** When re-diagnosing,
fit your face to yellow outline.
It is to compare with the
previous results.
마스터 부제목 스타일 편집
Ⅲ. Instruction
2. Diagnosis Client
Registration Diagnosis Result Product
Recommendation
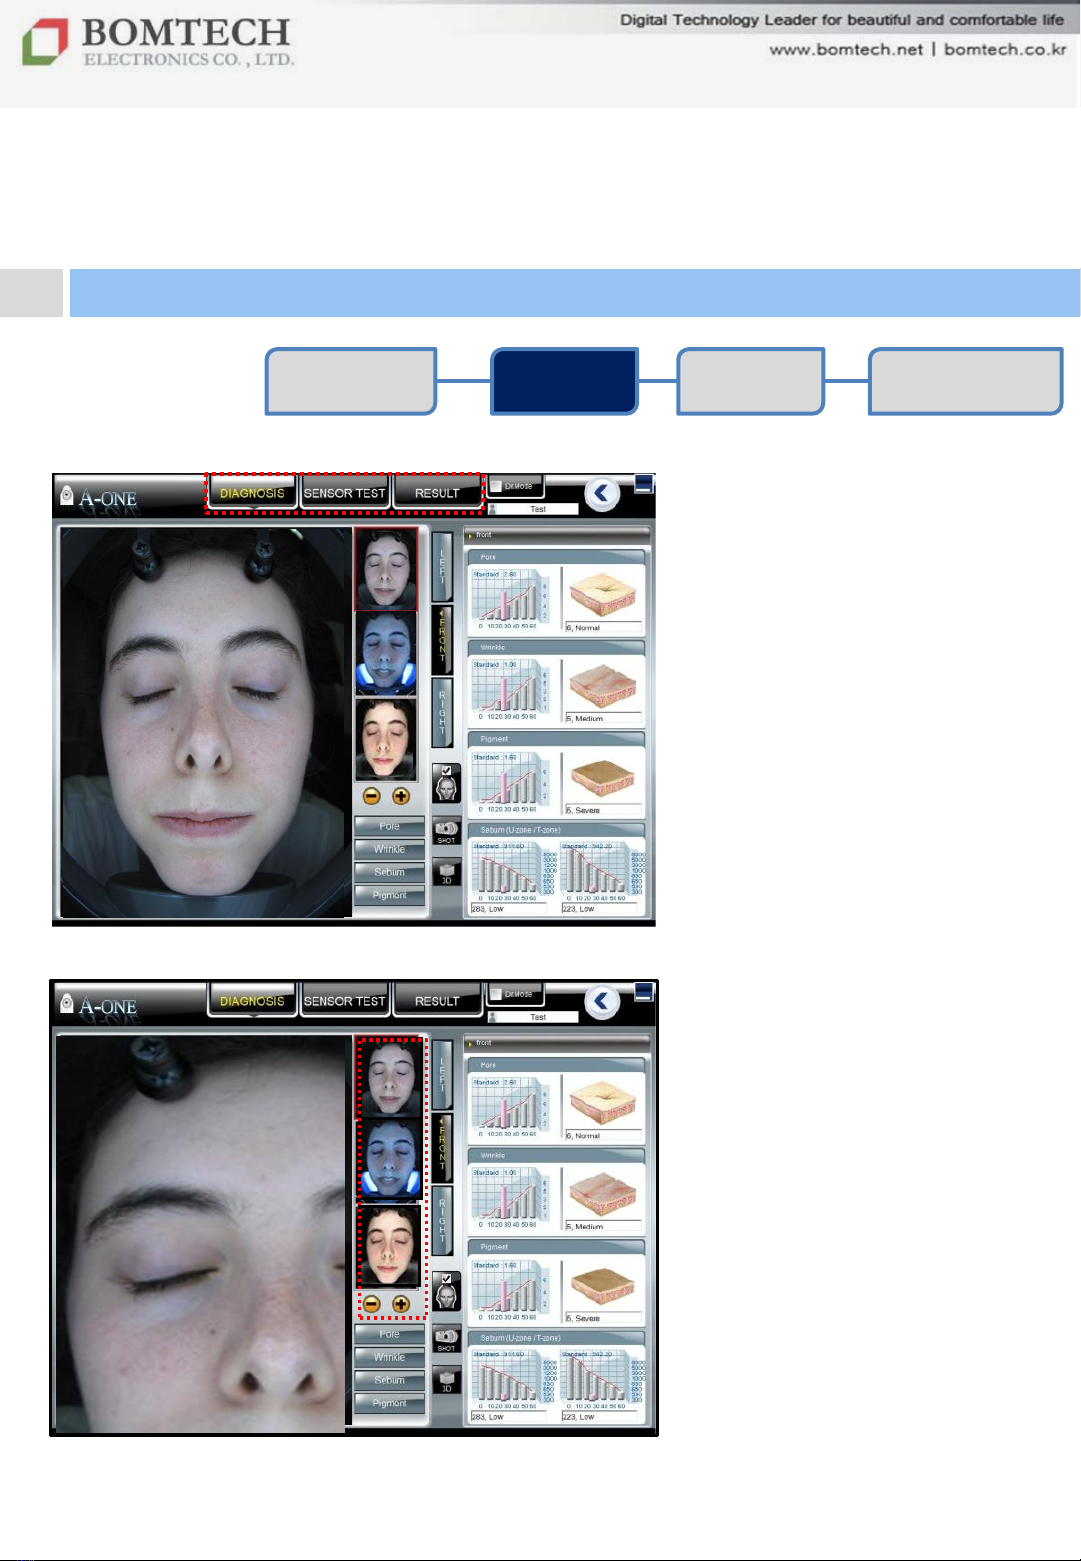
Click below menu.
Diagnosis
Based on scanned images.
Sensor test
Measuring moisture, elasticity,
skin tone and skin temperature
using P-Sensor. (p.19)
Result: Diagnosis result.
- , + button
To magnify or minimize the
selected image.

마스터 부제목 스타일 편집
16
For your beautiful and comfortable life, BOMTECH skin diagnosis system A-ONE
Ⅲ. Instruction
2. Diagnosis Client
Registration Diagnosis Result Product
Recommendation
3D Viewer
To see visualized pore and skin
roughness.
①Select a image and click „3D‟.
②Drag the orange box and
put on the part as you wish.
③Adjust a viewing angle using
direction control keys below.
④Click „Mode Change‟ to see
the contour of the selected part.
Red: High parts of skin
Blue: Low parts of skin
(ex. Pores and wrinkles appear
as blue.)

마스터 부제목 스타일 편집
17
For your beautiful and comfortable life, BOMTECH skin diagnosis system A-ONE
Ⅲ. Instruction
2. Diagnosis Client
Registration Diagnosis Result Product
Recommendation
Click each test:
Pore, Wrinkle, Sebum, Pigment
Pore
Pores appear as black dots.
Wrinkle
①Drag and move the red square
on the face and select an area to
be measured such as around the
eyes and the mouth or forehead.
②Click the wrinkle. Its value
appear on the right side.
③Click „OK‟ to keep the value you
just measured.
Or click „Cancel‟ to keep the
automatically measured value.

마스터 부제목 스타일 편집
18
For your beautiful and comfortable life, BOMTECH skin diagnosis system A-ONE
Ⅲ. Instruction
2. Diagnosis Client
Registration Diagnosis Result Product
Recommendation
Sebum
Select UV image and click „+‟ to see
sebum condition of a specific part.
- Red : Suppurative sebum
- White : Daily sebum
- Blue : Dust
Pigmentation
Pigment condition appears as
brown color in polarized image.

마스터 부제목 스타일 편집
19
Click „SENSOR TEST’ above to
measure moisture, elasticity, skin
tone and temperature.
** How to put P-Sensor
correctly.
Make sure to put it
vertically on the surface
of your skin.
Click either button and wait until it
beeps 5 times.
Correct Use
Incorrect Use
Ⅲ. Instruction
2. Diagnosis Client
Registration Diagnosis Result Product
Recommendation

마스터 부제목 스타일 편집
20
Skin Tone
- After sensor test, one of the balls in the box turns into green.
X axis: skin redness (blood circulation)
Y axis: skin brightness
- Your skin is classified into one of the four groups:
A group: You look bright and red enough.(=very good)
B group: You look bright, but pale with but no redness.
C group: You look a little dark and red.
D group: You look a little dark tone and pale with no redness.
Skin Temperature
Moisture
Elasticity
For your beautiful and comfortable life, BOMTECH skin diagnosis system A-ONE
Ⅲ. Instruction
2. Diagnosis Client
Registration Diagnosis Result Product
Recommendation
Table of contents
Other BOMTECH Diagnostic Equipment manuals


