BONDIS Easylube 150 Classic User manual

BONDIS bvba –Cleydaellaan 16/1 –2630 Aartselaar –BELGIUM
Tel .: +32 3 234 29 18 –Fax: +32 3 233 13 10 –Email: info@bondis.com
ISO 9001:2008 n° 22714 –www.bondis.com
Easylube® 150 Classic –Service
Guide
Re-usable single-point automatic lubricator
Step 1. Preparation:
► If you purchased empty grease cup, fill the cup with lubricant as below.
Caution :
If the cup is being filled for the first time, the red piston must be pressed down to bleedair. Fillthe
empty grease cup until the red piston reaches the top and in a level position.
Step 2. Position the press plate:
►Facing the bottom of the body assembly, turn the press late clockwise until it seats.
► Next, rotate the press plate counterclockwise with a ¾ turn.
► Screw the prefilled grease cup into the body assembly securely and make sure the pressplate
touches the red piston in the cup. If done properly, a small amount of grease is supposed to
discharge when the cup is securely screwed in.
Caution :
Falling to engage the press plate and the red piston will disable the piston movement and result
in zero grease output after start-up.

BONDIS bvba –Cleydaellaan 16/1 –2630 Aartselaar –BELGIUM
Tel .: +32 3 234 29 18 –Fax: +32 3 233 13 10 –Email: info@bondis.com
ISO 9001:2008 n° 22714 –www.bondis.com
Step 3. Test Easylube before installation:
► The Easylube can be tested by setting all four DIP switches to the ON
position. Use a ball pen or similar tool ( small screwdriver).
► In this test mode the Easylube will cycle 7 to 8 seconds moving the red piston
downward automatically. A small amount of grease should be discharged.
► After the test mode is successfully completed, go to step 4.
Caution:
Whenever the red indicator light is flashing during test mode, remove the
battery and reset the DIP switches, then put the battery back to restart.
Step 4. Set/change the dispense period time:
► Remove the battery from the body assembly.
► Set the levers on the switch to correspond to the time perod required.
Table 1. DIP-switch setting for dispense period time
Dispense
period
DIP switch
“ON”
Time span
between cycles
Amount/
cycle
Amount/
day
Amount/
week
Amount/
month
Month
Hours
ml
ml
ml
ml
1
1
2
0.417
5
35
150
2
2
4
2.5
17.5
75
3
1+2
6
1.67
11.67
50
4
4
8
1.25
8.75
37.5
5
1+4
10
1.00
7.00
30
6
2+4
12
0.83
5.83
25
7
1+2+4
14
0.71
5.00
21.43
8
8
16
0.63
4.38
18.75
9
1+8
18
0.56
3.89
16.67
10
2+8
20
0.50
3.50
15
11
1+2+8
22
0.45
3.18
13.64
12
4+8
24
0.42
2.92
12.5
The lubricator can be set to any of 12 (represents months) dispensing periods. It will be emptyat
the end of the chosen setting. Each monthlysetting dispenses the same amount oflubricant per
cycle, but at a different frequency.

BONDIS bvba –Cleydaellaan 16/1 –2630 Aartselaar –BELGIUM
Tel .: +32 3 234 29 18 –Fax: +32 3 233 13 10 –Email: info@bondis.com
ISO 9001:2008 n° 22714 –www.bondis.com
Step 5. Start Easylube:
► Install the battery back into the body assembly to start Easylube.
► The red indicator light on the body illuminates for 5 seconds and then
goes out. This indicates the lubricator has been started correctly.
► Screw the cover onto the body securely.
► Record the following on the cover label :
dispensing period setting
type of lubricant
date of installation
► After the start, Easylube will turn into “sleep” ode and the timer starts to count till each cycle
time is up for the dispensing.
Caution:
Every time the DIP switches are reset, the battery must be removed for approximately 15
seconds to clear the CPU memory.
Step 6. Installation/ preparation:
► Flush the bearing and the pipeline completely with same grease
or compatible with that in the prefilled grease cup.
► The flushing process mustbe done slowly stroke by stroke to
detect any potential blocking in the pipeline or bearing. When a
power stroke is required to push the grease through, this might
indicate a jam or blockage..
►Feed the fresh grease into the bearing until the used grease is
completely purged.
Step 7. Direct mount:
Caution:
If one of the folliwng conditions, please do not direct mount Easylube onto
bearings:
(1) The ambient temperatue is over 60°C.
(2) The bearing pipe thread is 6 mm, 1/16” or less.
(3) Bearings are in difficult to access areas or hazardous environment.
BONDIS bvba –Cleydaellaan 16/1 –2630 Aartselaar –BELGIUM
Tel .: +32 3 234 29 18 –Fax: +32 3 233 13 10 –Email: info@bondis.com
ISO 9001:2008 n° 22714 –www.bondis.com
Installation steps:
1. Remove grease nipple from bearing.
2. Select the right size of adapter and accessories required.
3. Tighten seal tape on the outlet thread of the grease cup and
accessories.
4. Mount the adapter into the bearing’s input hole, if necessary.
5. Manually tighten Easylube into the bearing or the adapter.
6. Put the protection casing back to the body.
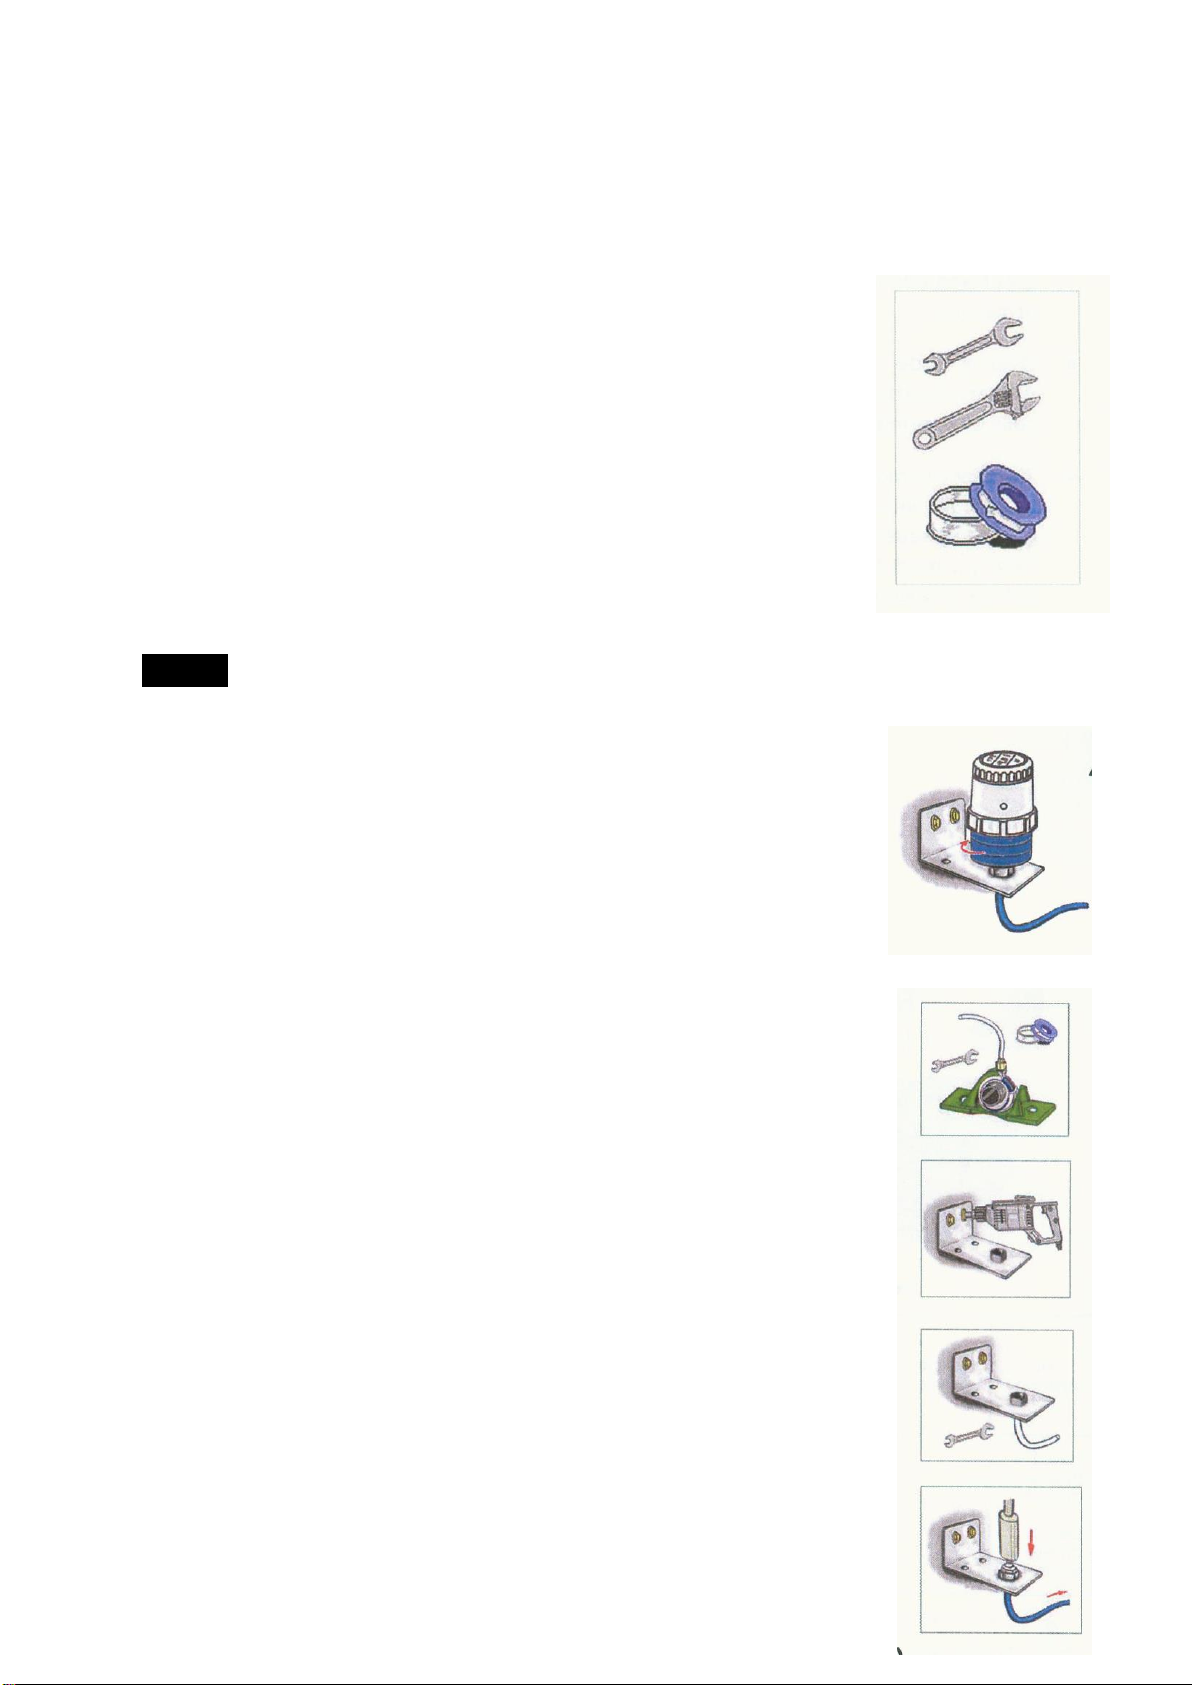
Step 8. Remote mount:
Caution:
Do not install the lubricator in ambient temperature over 60°C or on any
equipment with system pressure of 75 psi (5.2 bar) orhigher.Always keepthe
number of bends and the length of extension line to a minimum.
Important:
Always install the lubricator at a rigid and stable position.
Use copper piping hardware when the bearing temperature exceeds 50°C.
PU tubing harware can be used at bearing temperature lower than 50°C.
Installation steps:
1. Remove grease nipple from bearing.
2. Select the right size of adapter and accessories required.
3. Tighten seal tape on the outlet thread of the grease cup and
accessories.
4. Mount the adapter into the bearing’s input hole.
5. Install the mounting bracket at a rigid and stable position.
6. Connect the piping or tubing between the bearing and the mounting
bracket.
7. Fill the connecting pipeline and the bearing with grease same or
compatible to the prefilled grease.
8. Manually tighten Easylube into the bearing or the adapter.

BONDIS bvba –Cleydaellaan 16/1 –2630 Aartselaar –BELGIUM
Tel .: +32 3 234 29 18 –Fax: +32 3 233 13 10 –Email: info@bondis.com
ISO 9001:2008 n° 22714 –www.bondis.com
9. Put the protection casing back onto the body.
The Easylube can be remote mounted up to 4,5 meter from the application, but only if the
grease properties such as viscosity, consistency and operating temperature range are
suitable.
Battery usage
►The battery pack is designed to use 40% of it’s capacity for grease dispensing and 60% for
the red indicator alarm. The alarm function is the most important feature of Easylubeas it will
inform users when lubricaotr fails to feed grease into the bearing.
►Other single point lubricators without alarm function are unable to warnusers when nogrease
grease or only oil ( through separation from soap) is being fed into the bearing.
►Therefore it is importnt to replace the batteryat the end of adispensing period or anytime the
voltage is below 6V/
Table 3 . Lubricator dispense period compared with DIP switch lever positions and battery life
Dispense
period in
months
DIP
switch
“ON”
Battery life
in days *
Dispense
period in
months
DIP
switch
“ON”
Batery life in
days*
Dispense
period in
months
DIP
switch
“ON”
Battery life
in days *
1
1
87
5
1+4
194
9
1+8
300
2
2
114
6
2+4
221
10
2+8
328
3
1 + 2
140
7
1+2+4
245
11
1+2+8
351
4
4
168
8
8
277
12
4+8
382
Back**
1+4+8
of
2+4+8
Test***
All “On”
OFF
All “Off”
Note: Refer to step 3 for location of DIP switch levers.
* The number of days is approximate and is base don a system counterbalance under 45psi(3bar).
** Back is for dispersing pressure inside of the cup.
*** Test is simulated examination of automatic greasing program control.
Caution:
Always dispose of batteries in compliancewith localenvirmentalprotection laws. Donot puncture
or burn the battery pack. Toxic materials may be emitted and cause injury.

BONDIS bvba –Cleydaellaan 16/1 –2630 Aartselaar –BELGIUM
Tel .: +32 3 234 29 18 –Fax: +32 3 233 13 10 –Email: info@bondis.com
ISO 9001:2008 n° 22714 –www.bondis.com
Troubleshooting
Indications
Possible problems
Solution
Red indicator light begins to
flash
Installation error
Follow the instruction step by
step and test the lubricaotr
before start-up
Empty grease cup
Fill grease cup
Battery voltage is below 6V
Test battery voltage with volt
meter.
Pipeline or bearing blockage
Flush the bearing and the
pipeline manually; operate
the grease gun slowly to
detect any jams or
blockages. Make sure used
grease is completely purged
until fresh grease comes out.
Base oil separation from
soap or viscosity variation
Choose the proper grease or
contact grease manufactuer
for information
Back pressure exceeds 75
psi (5.2 bar)
USe test apparatus to
measure back pressure.
Lubricator lines not
completely filled.
Fill the bearing and pipeline
manually with same or
compatible grease.
Lubrication period incorrectly
set up
Shorten the lubrication period
and observe the changes
Lubricator does not dispense
Weak battery
Verify the output voltage of
battery exceeds 6V, which is
the minimum voltage
requirement for operation.
Always start the lubricator
with a new battery.
Press plate is not properly
engaged with the red
piston in the cup
Follow the instruction step by
step and test the lubricator
before start-up.
Ambient temperature too low
for the viscosity, consistency
and operating temperature.
Chose the proper grease.
Consult grease supplier.
Unable to set DIP switch
levers.
Incorrect tool being used.
Move the levers with a ball
point pen or a small
screwdriver.
Doc: E-Easylube-Service guide/2013-07-11
Table of contents
Popular Lubrication System manuals by other brands

Gruetzner
Gruetzner Lubricus LUB-V1 operating instructions

Groeneveld
Groeneveld TriPlus Trailer General manual

perma-tec
perma-tec NOVA 125 operating instructions

Lincoln
Lincoln SKF KFU2 Series Assembly instructions

SKF
SKF GVP-S-034-3D+924 Installation and operation manual

Bijur Delimon
Bijur Delimon SG-A Operating instruction


