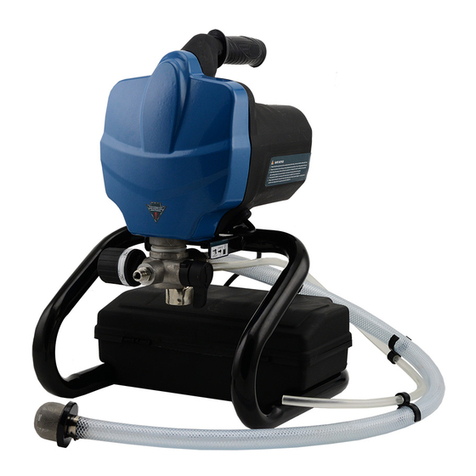
BorMann Pro BAP7000 User manual

Art Nr:
WWW.BORMANNTOOLS.COM
en
el
BAP7000 v2.1
035947

EN
WWW.BORMANNTOOLS.COM
2
Safety instrucons
WARNING! Read this material before using this product. Failure to do so can result in serious injury. SAVE THIS MANUAL.
RETURNS NOT ACCEPTED & WARRANTY VOID if Sprayer is not properly cleaned immediately aer use.
Clean Sprayer immediately to prevent permanent damage.
Save This Manual
Keep this manual for the safety warnings and precauons, assembly, operang, inspecon, maintenance and cleaning procedures. Write the product’s serial
number on the front page of the user’s manual (or month and year of purchase if product has no number). Keep this manual and the receipt in a safe and dry
place for future reference.
Important safety informaon
In this manual, on the labelling, and all other informaon provided with this product:
This is the safety alert symbol. It is used to alert you to potenal personal injury hazards. Obey all safety messages that follow this symbol to avoid
possible injury or death.
DANGER indicates a hazardous situaon which, if not avoided, will result in death or serious injury.
WARNING indicates a hazardous situaon which, if not avoided, could result in death or serious injury.
CAUTION, used with the safety alert symbol, indicates a hazardous situaon which, if not avoided, could result in minor or moderate injury.
NOTICE is used to address pracces not related to personal injury.
CAUTION, without the safety alert symbol, is used to address pracces not related to personal injury.
WARNING! Read all instrucons. Failure to follow all instrucons listed below m ay result in re, serious injury and/or DEATH. The warnings and precauons
discussed in this manual cannot cover all possible condions and situaons that may occur. It must be understood by the operator that common sense and
cauon are factors which cannot be built into this product, but must be supplied by the operator.
* The manufacturer reserves the right to make minor changes to product design
and technical specicaons without prior noce unless these changes signicantly
aect the performance and safety of the products. The parts described / illustrated
in the pages of the manual that you hold in your hands may also concern other
models of the manufacturer's product line with similar features and may not be
included in the product you just acquired.
* Please note that our equipment has not been designed for use in commercial,
trade or industrial applicaons. Our warranty will be voided if the machine is used
in commercial, trade or industrial businesses or for equivalent purposes.
* To ensure the safety and reliability of the product and the warranty validity, all
repair, inspecon, repair or replacement work, including maintenance and special
adjustments, must only be carried out by technicians of the authorized service de-
partment of the manufacturer.
Technical Data
Voltage/Frequency: 230V, 50Hz
Power 1010W
Max.volume ow 1.5L/min
Max spraying pressure: 3000psi
Biggest support nozzle: 415/515
Spray hose: 10m/Ø6.3*12.3"
WARNING! Read all safety warnings and instrucons. Failure to follow the warnings and instrucons may result in serious injury.
Save all warnings and instrucons f or future reference.
1. Work area safety
a. Keep work area clean and well lit. Cluered or dark areas invite accidents
b. Operate only in a well-venlated area. Paint thinners and solvents may be harmful if inhaled.
c. Do not operate the sprayer in explosive atmospheres, such as in the presence of ammable liquids, gases, or dust. The sprayer is able to create sparks result-
ing in the ignion of the dust or fumes.
d. Keep children and bystanders a way while operang a sprayer. Distracons can cause you to lose control.
2. Electrical safety
a. Sprayer plugs must match the outlet. Never modify the plug in any way. Do not use any adapter plugs with grounded sprayers.
Unmodied plugs and matching outlets will reduce risk of electric shock.
b. Avoid body contact with grounded surfaces such as pipes, radiators, ranges and refrigerators. There is an increased risk of electric shock if your body is
grounded.
c. Do not expose sprayers to rain or wet condions. Water entering a sprayer will increase the risk of electric shock.
d. Do not abuse the cord. Never use the cord for carrying, pulling or unplugging the sprayer. Keep cord away from heat, oil, sharp edges or moving parts. Dam-
aged or entangled cords increase the risk of electric shock.
e. When operang a sprayer outdoors, use an extension cord suitable for outdoor use. Use of a cord suitable for outdoor use reduces the risk of electric shock.
f. If operang a sprayer in a damp locaon is unavoidable, use a Ground Fault Circuit In interrupter (GFCI) protected supply. Use of a GFCI reduces the risk of
electric shock.

EN
WWW.BORMANNTOOLS.COM
3
Paint Sprayer Safety Warnings
1. INJECTION HAZARD! Although this paint gun is airless, it sll puts out paint at a very high pressure. Through improper use, paint can be injected through a
person’s skin, leading to serious injury, possibly amputaon. If paint is accidentally injected into someone’s skin, contact a doctor immediately. Do not treat
an injecon injury as a simple cut. Injecon can lead to amputaon and requires immediate surgical treatment.
2. Do not point your sprayer at anyone, including yourself. Do not place your hand in front of Spray Gun’s nozzle or aempt to deect paint s pray with your
hand during use. Gloves and clothing don’t oer adequate protecon from toxic paints, sealers, water-proofers, or stains.
3. Do not come into contact with a uid stream created by a leak in the paint hose.
4. Engage the Spray Gun’s trigger lock when not spraying.
5. Do not leave Paint Sprayer pressurized while unaended.
6. Do not clean Spray Gun p while it is s ll connected to paint hose.
7. Keep the trigger and the electrical cord plug clean and paint-free.
8. Do not run Paint Sprayer while empty. Damage to the unit may occur.
9. Do not use Paint Sprayer to spray asbestos, metallic paints, glazes, red lead, cement, ground chalk, abrasive grainy paints containing lime, or bleach. These
will damage the spray gun and void the warranty.
10. Do not spray ammable materials in vicinity of open ame or near ignion sources. Motors, electrical equipment, and controls can cause electrical arcs
that will ignite a ammable gas or vapor. Do not store ammable liquids or gases in vicinity of this unit.
11. Keep re-exnguishing equipment present and in good-working order.
12. Keep pump away from spray area to avoid contact with solvents and paint fumes.
13. Use Paint Sprayer with water-based or mineral spirit-type materials only.
14. Do NOT use bleach, low-ash naphthalene, acetone alcohol or toluene when cleaning Paint Sprayer equipment.
15. Do NOT use solvents with ash points less than 70° F (21° C) to clean equipment. These may cause an explosion. Examples of acceptable cleaning solvents
are water, mineral spirits and lacquer thinner. Note that some of these solvents may be inappropriate for certain kinds of paint; follow the paint supplier’s
3. Personal safety
a. Stay alert. Watch what you are doing and use common sense when operang the sprayer. Do not use the sprayer while red or under the inuence of drugs,
alcohol, or medicaon. A moment of inaenon while operang the sprayer increases the risk of injury to persons.
b. Dress properly. Do not wear loose clothing or jewellery. Contain long hair. Keep hair, clothing, and gloves away from moving parts. Loose clothes, jewellery,
or long hair increases the risk of injury to persons as a result of being caught in moving parts.
c. Avoid unintenonal starng. Be sure the trigger is o before connecng to the power supply. Do not carry the sprayer with your nger on the trigger or
connect the sprayer to the power supply with the trigger on.
d. Do not overreach. Keep proper foong and balance at all mes. Proper foong and balance enables beer control of the sprayer in unexpected situaons.
e. Use safety equipment. Wear ANSI-approved safety goggles, a NIOSH-approved respirator, heavy-duty work gloves and non-skid
safety shoes when priming, painng, cleaning, or servicing.
4. Sprayer use and care
a. Do not force the sprayer. Use the correct sprayer for your applicaon.
The correct sprayer will do the job beer and safer at the rate for which it was designed.
b. Do not use the sprayer if the switch does not turn it on and o. Any sprayer that cannot be controlled with the switch is dangerous and must be repaired.
c. Disconnect the plug from the power source before making any adjustments, c hanging accessories, or storing sprayers. Such prevenve safety measures
reduce the risk of starng the sprayer accidentally.
d. Store idle sprayers out of the reach of children and do not allow persons unfamiliar with the sprayer or these instrucons to operate the sprayer. Sprayers
are dangerous in the hands of untrained users.
e. Maintain the sprayer. Check for misalignment or binding of moving parts, breakage of parts and any other condion that may aect the s prayer’s operaon.
If damaged, have the s prayer repaired before use. Many accidents are caused by poorly maintained sprayers.
f. Use the sprayer and accessories in accordance with these instrucons, taking into account the working condions and the work
to be performed. Use of the sprayer for operaons dierent from those intended could result in a hazardous situaon.
5. Service
a. Have your sprayer serviced by a qualied repair person using only idencal replacement parts. This will ensure that the safety of the sprayer is maintained.
recommendaons. Contact your supplier to request a Material Safety Data Sheet (MSDS).
16. Follow the material and solvent manufacturer’s safety precauons and warnings.
17. Keep paint hose away from sharp objects. Bursng hoses may cause injury. Examine hoses regularly and replace if damaged.
18. When ushing Paint Sprayer system, use lowest possible pressure seng.
19. All hoses and spray gun accessories used with Paint Sprayer must be pressure rated at or above 3000 PSI.
20. The Paint Sprayer must be plugged into an outlet that is grounded in accordance with all local codes and ordinances.
21. Use cauon while spraying on windy days.
22. Do not use Paint Sprayer without the Spray Gun’s nozzle guard in place.
23. Paint Sprayer’s housing may become hot during use. Do not touch housing unl it has completely cooled.
24. Remove Spray Tip or turn to cleaning posion BEFORE cleaning or ushing Paint Sprayer system.
25. Do not use pliers to ghten or loosen high pressure connecons.
26. Sparks from improper grounding can ignite fumes! Follow all local regulaons regarding the use of uid supply containers and solvent pails used with
ushing the Paint Sprayer. Use only conducve metal pails placed on a grounded (concrete) surface. Do not place pails on nonconducve surfaces (such as
cardboard or paper). Ground all metal pails by clamping one end of a ground wire to the pail and the other end to a grounded structure (such as a nearby
pipe). Maintain grounding, even when ushing or relieving pressure from Paint
Sprayer into metal pail. The force of the spray can knock a metal pail over, so hold down the metal pail and keep the metal part of the spray gun set against
the grounded metal pail when pressing the spray gun trigger.
27. Maintain labels and nameplates on the sprayer. These carry important safety informaon. If unreadable or missing, contact your supplier for a replace-
ment.
28. Avoid unintenonal starng. Prepare to begin work before turning on the sprayer.
29. This product is not a toy. Keep it out of reach of children.
30. People with pacemakers should consult their physician(s) before use. Electromagnec elds in close proximity to heart pacemaker could cause pacemak-
EN
WWW.BORMANNTOOLS.COM
4
er interference or pacemaker failure.
31. WARNING: Some dust created by power sanding, sawing, grinding, drilling, and other construcon acvies, contains chemicals known [to the State of
California] to cause cancer, birth defects or other reproducve harm. Some examples of these chemicals are:
• Lead from lead-based paints
• Crystalline silica from bricks and cement or other masonry products
• Arsenic and chromium from chemically treated lumber your risk from these exposures varies, depending on how oen you do this type of work. To reduce
your exposure to these chemicals: work in a well venlated area, and work with approved safety equipment, such as those dust masks that are specially
designed to lter out microscopic parcles. (California Health & Safety Code § 25249.5, et seq.).
32. WARNING: Handling the cord on this product will expose you to lead, a chemical known to the State of California to cause cancer, and birth defects or
other reproducve harm. Wash hands aer handling. (California Health & Safety Code § 25249.5, et seq.)
SAVE THESE INSTRUCTIONS!
Grounding
TO PREVENT ELECTRIC SHOCK AND DEATH FROM INCORRECT GROUNDING WIRE CONNECTION: Check with a qualied electrician if you are in doubt as to
whether the outlet is properly grounded. Do not modify the power cord plug provided with the s prayer. Never remove the grounding prong from the p lug.
Do not use the sprayer if the power cord or plug is damaged. If damaged, have it repaired by a service facility before use. If the plug will not t the outlet,
have a proper outlet installed by a qualied electrician.
CAUTION! All electrical equipment connecons including the socket and cables of the machine should only be made by a professional electrician or by a
specialist manufacturer of the Service department of the manufacturer, respecvely!
Extension Cords
1. Grounded sprayers require a three wire extension cord. Double Insulated sprayers can use either a two or three wire extension cord.
2. As the distance from the supply outlet increases, you must use a heavier gauge extension cord. Using extension cords with inadequately sized wire causes
a serious drop in voltage, resulng in loss of power and possible sprayer damage.
3. The smaller the gauge number of the wire, the greater the capacity of the cord. For example, a 14 gauge cord can carry a higher current than a 16 gauge
cord.
4. When using more than one extension cord to make up the total length, make sure each cord contains at least the minimum wire size required.
5. If you are using one extension cord for more than one sprayer, add the nameplate amperes and use the sum to determine the required minimum cord size.
6. If you are using an extension cord outdoors, make sure it is marked with the sux “W-A” (“W” in Canada) to indicate it is acceptable for outdoor use.
7. Make sure the extension cord is properly wired and in good electrical condion. Always replace a damaged extension cord or have it repaired by a qualied
electrician before using it.
8. Protect the extension cords from sharp objects, excessive heat, and damp or wet areas.
Descripon of main parts
Spray gun
Spray p
Motor and
transmission
components
Spray hose
ON / OFF switch
Sucon set lter
Sucon tube
Return pipe
Rack components
Return valve
assembly
WARNING:
This pump should not be used
with textured materials, block
ller, or asphalt sealer.
This pump is available in this ma-
chine. All informaon given for
the stand model applies to the
cart models except where indi-
cated.
Important
Some of the graphics in this man-
ual may not exactly match your
sprayer and spray gun. All infor-
maon and instrucons given in
this manual applies to all models
except where noted.

EN
WWW.BORMANNTOOLS.COM
5
Controls and Funcons
ON/OFF Switch: The ON/OFF switch turns the power to the sprayer on and o (O=OFF, l=ON).
Sucon tube: Fluid is drawn through the sucon tube into the pump.
Fluid Secon: A piston in the uid secon moves up and down to create the sucon that draws uid through the sucon tube.
Spray Gun: The spray gun controls the delivery of the uid being pumped. The gun model you have depends on your sprayer model.
Spray Hose: The spray hose connects the gun to the pump.
Return Tube: Fluid is sent back out through the return tube to the original container when PRIME/SPRAY knob is in PRIME posion.
PRIME/SPRAY Knob: The PRIME/SPRAY knob directs uid to the spray hose when set to SPRAY or the return tube when set to PRIME. The arrows on the
PRIME/SPRAY knob shows the rotaon direcons for PRIME and SPRAY. The PRIME/SPRAY knob is also used to relieve pressure built up in the spray hose (see
Pressure Relief Procedure,).
Pressure Control Dial: The pressure control dial regulates the amount of force the pump uses to push the uid.
Oiler: The oiler is designed to provide lubricaon to the uid secon of the pump.
Pusher stem: The pusher stem is designed to keep the inlet valve open and from scking due to dried materials.
Assembly instrucons
Do not plug in the sprayer unl setup is complete. Tools needed for assembly:
1. Two adjustable wrenches
2. 3/16” Allen wrench
3. Extension cord (refer to Important Electrical Informaon
4. Thread the high pressure hose to the spray hose port.
Tighten with a n adjustable wrench.
5. Thread the other end of the hose to the spray gun. Hold
the gun with one adjustable wrench, and ghten the hose nut
with the other.
The spray p should not
be aached unll aer the sprayer
and spray hose have been purged
and primed.
6. Thread the sucon tube onto
the inlet valve and ghten rmly
by hand. Be sure that the threads
are straight so that the ng
turns freely.
7. Press the return tube onto the return tube ng. Squeeze clip
over the return tube ng to secure the return tube.
8. Verify that the seal is present inside the sucon tube. Thread the inlet lter into the end of the sucon tube.

EN
WWW.BORMANNTOOLS.COM
6
Operang instrucons
This secon contains instrucons that will be repeated throughout this manual.
Locking the Spray Gun:
Always lock the trigger o when aaching the spray p or when the spray gun is not in use.
Spray Gun
The gun is locked when the trigger lock is at a 90º angle. (perpendicular to the trigger in
either direcon).
To lock the gun, turn the trigger lock forward
and slightly down unl it stops.
Plugging in the Sprayer
1. Check that the ON/OFF switch is in the OFF (O) posion.
ON/OFF switch
2. Plug the power cord into a grounded outlet or heavy duty
grounded extension cord. Plug in the extension cord. Refer to Im-
portant Electrical Informaon.
Pressure Relief Procedure
Be sure to follow the Pressure Relief Procedure when shung the unit o FOR ANY PURPOSE. This procedure is used to relieve pressure from the
spray hose.
1. Lock the spray gun o (see direcons above).
Flip the ON/OFF switch to the OFF posion.
2. Turn the PRIME/SPRAY knob to PRIME. 3. Unlock the spray gun and trigger
spray gun into the side of the material
bucket. Lock the spray gun.
ON/OFF switch

EN
WWW.BORMANNTOOLS.COM
7
Purging and Priming the Sprayer
All new units are performance-tested at the factory and are shipped with test uid in the uid secon to prevent corrosion during shipment and storage. If you
have already used your pump, some water or solvent used in cleaning may remain in the uid secon. Whether your sprayer is new or if you have already used
it, this uid must be purged and thoroughly cleaned out of the system prior to use. Follow the steps below.
1. Place a full container of spraying material under-
neath the sucon tube (a). Secure the return tube (b)
into a waste container.
2. Turn the pressure control dial to maximum pressure.
Turn the PRIME/SPRAY knob to PRIME.
3. Plug in the sprayer and move the ON/OFF switch to
the ON (l) posion.
4. Switch the pump OFF (O). Remove the return tube
from the waste container and place it in its operang po-
sion above the container of spraying material. Use the
metal
The unit will begin to draw material up the sucon
tube, into the pump, and out the return tube. Let the
unit cycle long enough to remove test uid from the
pump, or unl spray material is coming from the re-
turn tube.
Purging and Priming the Spray Hose
1. Unlock the spray gun and turn the PRIME/SPRAY
knob to PRIME.
The spray p SHOULD NOT be aached to your
spray gun when purging your spray hose.
2. PULL the trigger and aim the spray gun at the side wall of a
waste container. If using oil-based materials, the spray gun must
be grounded while purging (see warning below).
Keep hands clear from uid stream. Ground the gun by holding it
against the edge of a metal container while ushing. Failure to do
so may lead to a stac electric discharge which may cause a re.
3. While pulling the trigger, switch the pump ON (l), AND turn the PRIME/SPRAY knob to SPRAY. Hold the trigger unl all air,
water, or solvent is purged from the spray hose and material is owing freely.
If the PRIME/SPRAY knob is sll on SPRAY,there will be high pressure in the hose and spray gun unl the PRIME/SPRAY knob is
turned to PRIME.

EN
WWW.BORMANNTOOLS.COM
8
4. Release trigger. Turn the PRIME/SPRAY knob to PRIME.
Turn the pump OFF (O). Trigger the gun into the waste con-
tainer to be sure that no pressure is le in the hose.
5. Lock the spray gun o. Make sure the saddle and black seal are in
place inside the p guard nut. Thread the spray p guard assembly
onto the gun. Tighten by hand.
Begin ghtening the p at this angle
To achieve the desired spray angle when
ght
NOTE - Be sure that the paint hose is free of kinks and clear of objects with sharp cung edges.
1. Switch the pump ON (l). Turn the PRIME/SPRAY knob to
SPRAY. Turn the pressure control dial to maximum pressure (+).
The spray hose should sen as paint begins to ow through it.
2. When motor shuts o, unlock the spray gun and spray a test
area to check the spray paern.
The motor will cycle on and o automacally as it needs pres-
sure.
The pressure control dial can be be adjusted up or down to
achieve the desired spray paern.
Good spray paern
Paint tailing paern (pressure too low, clogged p)

EN
WWW.BORMANNTOOLS.COM
9
The key to a good job is an even coang over the enre surface.
This is done by using even strokes. Follow the TIPS, below.
Tip:
Keep the spray gun at right angles to the surface.
This means moving your enre arm back and forth rather than just exing
your wrist.
Tip:
Keep the spray gun perpendicular
to the surface. Otherwise one end
of the paern will be thicker than
the other.
Tip:
Keep the spray gun perpendicular
to the surface. Otherwise one end
of the paern will be thicker than
the other.
Approximately
10 to 12 inches
Approximately
10 to 12 inches
Wrong way
Right way
Light coat
Incorrect Incorrect
Correct
Heavy coat Light coat
Tip: Trigger gun aer starng the stroke.Release the trigger before ending the stroke.The spray gun should be moving when the trigger is
pulled and released. Overlap each stroke by about 30%. This will ensure an even coang.
If you expect to be away from your sprayer for
more than one hour, follow the Short-Term Stor-
age instrucons
Start stroke Pull trigger Move
steadily
Release
trigger
End stroke
Keep stroke
even
Approximately 10
to 12 inches

EN
WWW.BORMANNTOOLS.COM
10
Spraying Troubleshoong - Unclogging the Spray Tip
If the spray paern becomes distorted or stops completely while the gun is triggered, follow these
steps.
Warning! Do not aempt to unclog or clean the p with your nger.
NOTE - Do not use a needle or other sharp pointed instrument to clean the p. The hard tungsten
carbide can chip.
Release the trigger and lock the gun o Rotate the reversible p arrow 180º so that the point of the
arrow is toward the rear of the gun (CLEAN posion).
Under pressure, the spray p may be very dicult
to turn. Turn the PRIME/SPRAY knob to PRIME and
trigger the gun. This will relieve pressure and the
p will turn more easily.
Gun locked
2. Turn the PRIME/SPRAY knob to SPRAY.
3. Unlock the gun and squeeze the trigger, poinng the gun at a scrap piece of wood or cardboard.
This allows pressure in the spray hose to blow out the obstrucon. When the nozzle is clean, material
will come out in a straight, high pressure stream.
If material sll will not spray from the spray p,
follow the Cleaning the spray gun lter instrucons
4. Release the trigger and lock the gun o.
Reverse the p so the arrow points forward again
(SPRAY posion). Unlock the gun and resume spraying.
Gun locked
Spraying Troubleshoong - Cleaning the Spray Gun Filter
The lter must be cleaned every me you use your sprayer. When using thicker spray materials, the lter might need to be cleaned more oen.
1. Perform Pressure Relief Procedure
2a. 1 - Unscrew the ng from the boom of the spray gun using an adjustable wrench, making sure not to lose the spring.
2b. 2 - Unclip the trigger guard from the lter housing by pulling outward from the lter housing. Unscrew the lter housing.
4. Remove the lter from the spray gun housing and clean with the appropriate cleaning soluon (warm, soapy water. for latex paints, mineral spirits for oil-
based materials).
5. Inspect the lter for holes (see inset, right). Replace if holes are found.
NOTE - Never poke the lter with a sharp instrument.
6. Replace the cleaned lter, tapered end rst, into the gun housing. The tapered end of the lter must be loaded properly into the gun. Improper assembly will
result in a plugged p or no ow from the gun.
7. Reassemble the spray gun.

EN
WWW.BORMANNTOOLS.COM
11
2. Using a garden hose, rinse o the sucon
tube, return tube and inlet lter. Empty the
waste container.
Empty waste container
3. Remove the inlet lter from the sucon
tube and place into a waste container (do
not discard).
1. Lock the gun and remove the spray p
assembly. Place the sucon tube and re-
turn tube into an empty waste container.
Verify that the seals arepresent inside the
adapter and sucon tube. Thread the pump
cleaning adapteronto a garden hose . Connect
hose and adapter to the ng on the end of
the sucon tube.
Connued on next page.
Spray gun - 1
Spray gun - 2
Tapered
end (lter
top)
Tapered
end (lter
top)
Hole Hole
Spring
Fing
Filter
Spraying Troubleshoong - Cleaning the Inlet Filter
The lter at the boom of the sucon tube may also need cleaning. Check it every me you change spray
containers.
1. Remove the lter by unscrewing it from the sucon tube. Clean the lter with the appropriate cleaning solu-
on (warm, soapy water for latex materials, mineral spirits for oil-based materials).
2. Thread the lter back into place.
If aer compleng all of the steps in Spraying Troubleshoong you are sll experiencing problems spraying,
refer to the Troubleshoong secon.
Important Cleaning Notes - Read before cleanup
- When using latex materials, clean your sprayer and components with water. When using oil-based materials, use mineral spirits.
- Do not use mineral spirits on latex materials, or the mixture will turn into a jelly-like substance which is dicult to remove.
- No maer which cleaning soluon you use, make sure to dispose of it properly when nished cleaning your sprayer.
- Thorough cleaning and lubricaon of the sprayer is the most important step you can take to ensure proper operaon aer storage.
Warning! Follow these steps whenever cleaning with mineral spirits:
- Always ush spray gun at least one hose length away from spray pump.
• If collecng ushed solvents in one gallon metal container, place it into an empty ve gallon container, then ush.
• Area must be free from vapors.
5. Follow all cleanup instrucons.
• DO NOT use gasoline to clean your sprayer.
Cleanup-Latex materials
Follow these steps if you used latex materials AND if you have a garden hose available. If you do not have a garden hose available, follow the Cleanup for Oil-
Based Materials instrucons.

EN
WWW.BORMANNTOOLS.COM
12
6. Unclip the return tube from the sucon tube and place it into
the waste container. Turn the PRIME/SPRAY knob to PRIME.
10. When cleaning soluon comes from the spray gun, keep
holding the trigger and aim the spray gun into the side of the
waste container.
11. Trigger the gun unl the uid coming out of the gun is clear.
You may need to empty the waste container and connue ush-
ing.
12. Turn the PRIME/SPRAY knob to PRIME and trigger gun once
more to relieve pressure.
Spray into waste container
spray material into original container
Move on to Cleaning the Spray Gun Components.
9. While pulling the trigger, turn the PRIME/SPRAY
knob to SPRAY to purge material from the hose back
into the original container.
Keep holding trigger through next steps.
Hold trigger
Spray
Prime
Waste container
Containers should
be touching
Original
material
container
Hold trigger
7. Turn water supply on. Turn pump ON (l). Water will go
into the sucon tube and out through the return tube. Let
pump run for a few minutes to allow the return tube to be
ushed.
Leave pump running through steps 7 and 8
8. Place the original material container next to the waste con-
tainer. Aim the spray gun into the side of the original material
container and hold the trigger.

EN
WWW.BORMANNTOOLS.COM
13
1. Lock the gun and remove spray p assembly. Submerge
sucon set into a bucket with appropriate cleaning soluon.
Bucket with cleaning soluon
Waste container
Containers should be
touching
Hold trigger
Original
material
container
2. Place a waste container next to the original material container.
Aim the spray gun into the side of the original material container
and hold the trigger.
3. While pulling the gun trigger, turn the pump ON (l), and turn
the PRIME/ SPRAY knob to SPRAY to purge material from the
hose back into the original container.
4. When cleaning soluon comes from the spray gun, keep holding
the trigger and aim the spray gun into the side of the waste
container (ground gun with a metal container if ushing with
ammable solvent).
5. Trigger the gun unl the uid coming out of the gun is clear. You
may need to dispose and obtain new cleaning soluon.
6. Turn the PRIME/SPRAY knob to PRIME and trigger gun once to
relieve pressure.
Spray cleaning soluon
into waste container
Spray material into original
container
Move on to Cleaning the Sucon Set.
Keep holding trigger through next steps.
- Hold trigger
- Turn pump ON(I)
- Turn PRIME/SPRAY knob to SPRAY
Hold trigger
Cleanup - Oil-based materials

EN
WWW.BORMANNTOOLS.COM
14
Cleanup - Cleaning the Sucon Set
1. Lock the gun and turn the pump OFF (O). 2. Remove the sucon hose and return tube and
clean it using the appropriate cleaning soluon. You
should also wipe the threads of the inlet nut (a) and
remove and clean the soluon set inlet lter.
3. When sucon set is clean, thread the sucon tube
back into the inlet valve, and replace the return tube
onto the return tube ng. Replace clip.
5. Turn the PRIME/SPRAY knob to PRIME. Turn the pump
ON (l), and trigger the gun once into a waste container to
relieve pressure.
Note-If you used oil-based material, you
must ush the pump again using water to
prepare it for storage.
Move on to Cleaning the Spray Gun Com-
ponents
2 to 3 minutes
Let the pump circulate cleaning soluon through the
sucon set for 2-3 minutes. Turn the pump OFF.
4. Submerge the sucon set into a bucket of NEW
cleaning soluon.

EN
WWW.BORMANNTOOLS.COM
15
Cleanup - Cleaning the Spray Gun Components
1. Make sure the pump is switched OFF (O). Make
sure the PRIME/SPRAY knob is turned to PRIME.
Unplug the sprayer.
2. Remove spray gun from the paint hose using adjustable
wrenches
3. Remove lter from spray gun (refer to Cleaning the
Spray Gun Filter,
5. Install gun lter tapered-end rst. Reassemble spray
gun.
7. Thread the spray gun back onto the paint hose.
Tighten with a wrench.
6. Install spray p (a), saddle seat (c) and washer (b),
and replace spray guard assembly.
4. Remove spray p (a) from spray guard assembly. Clean
spray p with a so-bristled brush and the appropriate
cleaning soluon. Be sure to remove and clean the washer
(b) and saddle seat (c) located in the rear of the spray guard
assembly.
(b)
(b)
(c)
(c)
(a)
(a)

EN
WWW.BORMANNTOOLS.COM
16
Short-Term Storage (up to 16 hours)
Follow these steps when using latex materials only. If using materials that are oil-based, follow the Cleanup and Long- Term Storage steps.
Shutdown
Startup
1. Lock the spray gun o
2. Turn the PRIME/SPRAY knob to PRIME. Switch
the pump OFF (O). Unplug the sprayer.
1. Remove the gun from the plasc bag. Sr the
water into the paint.
2. Turn the PRIME/SPRAY knob to PRIME. Plug
sprayer in. Turn the switch to ON (I).
3. Turn the PRIME/SPRAY knob to SPRAY. Test the
sprayer on a pracce piece and begin spraying.
3. Pour 1/2 cup water slowly on the top of the
paint to prevent the paint from drying. Wrap the
spray gun assembly in a damp cloth and place
it in a plasc bag. Seal the bag shut. Place the
sprayer in a safe place out of the sun for short-
term storage.

EN
WWW.BORMANNTOOLS.COM
17
Long-Term Storage
Follow these instrucons only aer all cleanup steps have been performed.
1. Fill a cup or other container with separang oil
(approximately 2 ounces) supplied with the unit
and submerge the inlet valve into the oil.
2. Place a rag over the spray hose port,
and turn the switch ON (l). When the oil
has been sucked from the cup,
turn the pump OFF (O).
3. Wipe the enre unit, hose and gun
with a damp cloth to remove accumulated
paint. Replace the high pressure hose
to the paint hose port.
Separang oil

EN
WWW.BORMANNTOOLS.COM
18
Cleaning the Inlet Valve
Cleaning or servicing the inlet valve may be required if the unit has priming problems. Priming problems may be prevented by properly cleaning the sprayer
and following the Long-Term Storage steps.
1. Remove the sucon set. 2. Unscrew the inlet valve assembly (a) from the sprayer. Visually
inspect the inside and outside of the inlet valve assembly. Clean any
paint residue with the appropriate cleaning soluon.
3. Lubricate the O-ring on the inlet valve (b). Replace inlet valve as-
sembly by screwing it into the sprayer. Torque to 23-27 lbs.
If priming problems persist, you may need to replace the inlet
valve assembly. Call Customer Service to order new inlet valve
assembly.
4. Replace sucon set and hand-ghten.
(a)

EN
WWW.BORMANNTOOLS.COM
19
Fluid Secon Seal Replacement Instrucons
WARNING! Always wear protecve eye wear while servicing the pump. Be sure to follow the Pressure Relief Procedure when shung the unit down for any
purpose, including servicing or adjusng. Aer performing the Pressure Relief Procedure, be sure to unplug the unit before servicing or adjusng. Area must
be free of solvents and paint fumes.
Disassembly of the Fluid Secon
1. Remove the sucon set.
2. Remove the front cover and the four screws that secure it using a T20 Torx head driver.
3. using a T20 Torx head driver.
4. Remove the yoke screw and washer that secures the dowel pin. The dowel pin connects the yoke to the piston.
5. a). For this machine, rotate the pump sha so the piston is in the top dead center posion. This can be done by pushing on the yoke. This is required to
disassemble all the parts.
b). For other models, inspect the yoke assembly and piston. In order to remove all the necessary parts, the piston must not be in the boom dead center po-
sion. If the piston is at the boom of the stroke, install the front cover and screws, turn the pump on briey to index the piston, unplug the unit, and repeat
step 2.
6. Unscrew and remove the inlet valve assembly .
7. Remove the piston assembly by pushing down on the piston near the yoke.
8. Unscrew and remove the top nut using and adjustable wrench.
9. Remove the worn seals using a at head screwdriver or punch. Remove the top seal from the top and the boom seal from the boom by pressing against
the side of the seal and popping it out. Be sure not to scratch the housing where the seals are located.
10. Clean the area where the new seals are to be installed.
Assembly of the Fluid Secon
1. Lubricate the new top seal with Separang Oil or light household oil and by hand place the seal (cup side of seal down) into the top port of the housing.
2. Place a small amount of an-seize on the threads of the top nut. Place the top nut into the top of the housing and ghten with an adjustable wrench. This
will drive the top seal into the correct posion.
3. Turn the pump upside down. Lubricate the seal on the piston/seal assembly similar to the top seal. Place the piston/seal assembly into the boom of the
housing. Insert the plasc inseron tool and thread into posion to properly seat the piston/seal. Thread fully unl ght. Remove the inseron tool.
4. Install the new O-ring on the inlet valve assembly, lubricate with Separang Oil, thread into the boom.(inlet) of the housing, and ghten with an adjustable
wrench. This will drive the boom seal into the correct posion.
5. Align the piston with the yoke. Be careful not to damage the piston.
6. Apply any type of household grease to the piston and yoke area to prolong life. Apply to the holes in the yoke where the dowel is inserted.
7. Install the dowel pin to connect the yoke to the piston. The piston may have to be moved up or down to do this.
8. Install the yoke screw and washer to secure the dowel pin.
9. Turn pump right side up and apply a few drops of Separang Oil or light household oil between the top nut and piston. This will prolong the seal life.
10. Install front cover and four (4) screws.
11. Replace inlet valve. Install the sucon set.
Locang sleeve
Steel ball
Lathe dog
O-ring
Valve body
Piston/seal assembly
NOTE- DO NOT
aempt to remove the
seals from the piston
Top nut
Top seal
(cup down)

EN
WWW.BORMANNTOOLS.COM
20
Troubleshoong / Maintenance
Problem Cause Soluon
A. The sprayer does not start. 1. The sprayer is not plugged in.
2. The ON/OFF switch is set to OFF.
3. The sprayer was turned o while
sll under pressure.
4. No voltage is coming from the
wall plug.
5. The extension cord is damaged
or has too low a capacity.
6. A fuse is blown in the sprayer.
7. There is a problem with the
motor
1. Plug the sprayer in.
2. Turn the ON/OFF switch to ON.
3. Turn the pressure control knob to
maximum pressure (+), or relieve
pressure by turning the PRIME/SPRAY
valve to PRIME.
4. Properly test the power supply volt-
age.
5. Replace the extension cord.
6. Take sprayer to Authorized Service
Center.
7. Take sprayer to Authorized Service
Center.
B. The sprayer starts but does not
draw in paint when the PRIME/
SPRAY knob is set to PRIME.
1. The paint bucket is empty or the
sucon tube is not totally im-
mersed in the paint.
2. The sucon set is clogged.
3. The sucon tube is loose at the
inlet valve.
4. The inlet valve is stuck.
5. The outlet valve is stuck.
6. The inlet valve is worn or dam-
aged.
7. The PRIME/SPRAY valve is
plugged.
1. Rell the bucket or immerse the suc-
on tube in paint.
2. Clean the sucon set.
3. Clean the tube connecon and ghten
it securely.
4. Clean the inlet valve. Inlet may be
stuck from old paint. Depress pusher
stem to release.
5. Outlet may be stuck from old paint.
Remove inlet valve. Insert pen or pen-
cil in housing to release.
6. Replace the inlet valve.
7. Take sprayer to Authorized Service
Center.
C. The sprayer draws up paint but the
pressure drops when the gun is
triggered.
1. The spray p is worn.
2. The sucon set screen is clogged.
3. The gun lter is plugged.
4.
5. The paint is too heavy or coarse.
6. The inlet valve assembly is dam-
aged or worn.
7. The sucon tube is loose.
1. Replace the spray p with a new p.
2. Clean the sucon set screen.
3. Clean or replace the proper lter. Al-
ways keep extra lters on hand.
4. Thin or strain the paint.
5. Replace the inlet valve.
6. Tighten the sucon tube.
D. The PRIME/SPRAY valve is on
SPRAY and there is ow through
the return tube.
1. The PRIME/SPRAY valve is dirty
or worn.
1. Take sprayer to Authorized Service
Center.
E. The spray gun leaks 1. Internal parts of the gun are worn
or dirty.
1. Take the sprayer to a Authorized Service
Center.
F. The p guard assembly leaks. 1. The p was assembled incor-
rectly.
2. The washer is worn.
1. Check the p assembly and assemble
properly
2. Replace the washer.
Other manuals for Pro BAP7000
1
This manual suits for next models
1
Table of contents
Languages:
Other BorMann Paint Sprayer manuals

BorMann
BorMann BPG9000 User manual

BorMann
BorMann Life Series User manual

BorMann
BorMann PRO BAP6500 User manual

BorMann
BorMann Lite BPG9100 User manual

BorMann
BorMann BAT6140 User manual

BorMann
BorMann PRO BBP4015 User manual

BorMann
BorMann Lite Series User manual

BorMann
BorMann BPG7000 User manual

BorMann
BorMann BAT1300 User manual

BorMann
BorMann BEA5000 User manual