GPRS/GSM IP Communicator Introduction | en 5
Bosch Security Systems, Inc. Installation and Operation Guide F01U163066 | 01 | 2010.05
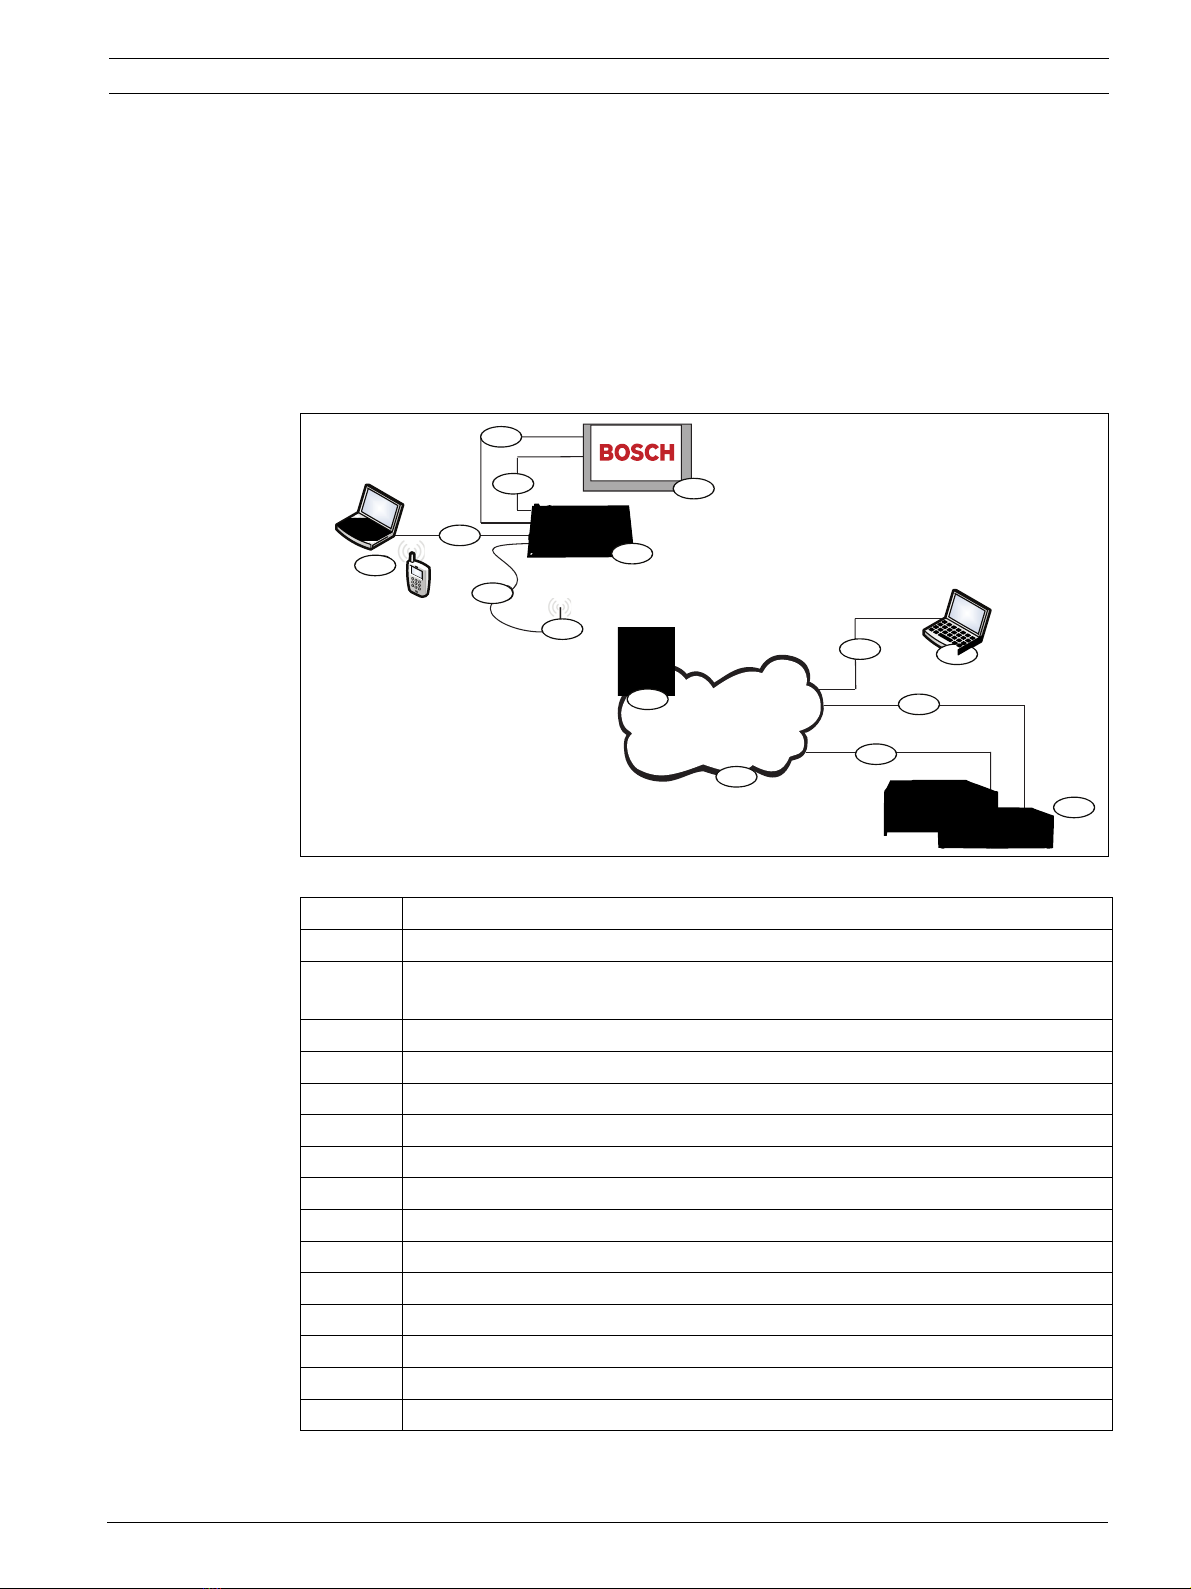
1 Introduction
1.1 Trademarks
– Microsoft, Windows 2000, XP, Vista, and Windows 7 are either registered trademarks or
trademarks of Microsoft Corporation in the United States and/or other countries.
– Molex is a registered trademark of Molex Incorporated.
1.2 Technical Specifications
Electrical
Current (operating) – Standby: 65 mA
–Alarm: 200 mA
Operating Voltage 12 VDC nominal
Maximum Wire Resistance for
Control Panel Connections
1.6 ohms
Maximum Wire Distance GPRS (IP) Mode:
–22 AWG: 30.5 m (100 ft)
–18 AWG: 61 m (200 ft)
GSM (PSTN) Mode:
– Restricted to 6 m (20 ft) in conduit, and within the same room
Ripple/Noise 200 mVpp maximum
PSTN FSX Port 17 V minimum supplied
Radio GSM Quad band radio; 850 MHz and 1900 MHz
Terminals All terminals are power-limited. Separate power-limited wiring from non-power-
limited wiring by 6.4 mm (0.25 in).
Environmental
Environment Indoors
Relative Humidity 5% to 93% non-condensing
Temperature (operating) 0°C to +49°C (+32°F to +120°F)
Mechanical
Dimensions (H x W x D) 133 mm x 80 mm x 23 mm (5.2 in. x3.1 in. x 1 in.)
Antenna – Magnetic base omni-directional antenna
– 2.5 m (8.2 ft) cable with SMA connector
SIM Card 3V/1.8V SIM (compliant with GSM 11.12 recommendation)
USB Mini-B connector (cable not included)
Accessories
AE1 Standard Enclosure Standard gray enclosure made of 1.0 mm cold-rolled steel. Includes a keyed lock.
The dimensions are 35.6 cm x 31.8 cm x 7.6 cm (14 in. x 12.5 in. x 3 in.).
AE2 Standard Enclosure Standard red enclosure made of 1.0 mm cold-rolled steel. Includes a keyed lock.
Measures 35.6 cm x 31.8 cm x 7.6 cm (14 in. x 12.5 in. x 3 in.).
AE4 Large Enclosure Large red enclosure made of 1.2 mm coldrolled steel. Includes a keyed lock.
Measures 52.7 cm x 38.1 cm x 10.8 cm (20.7 in. x 15 in. x 4.25 in.).
D2203 Enclosure Grey steel enclosure measuring 37 cm x 34 cm x 8.9 cm
(14.6 in. x 13.4 in. x 3.5 in.). Includes a lock and accepts an optional tamper
switch.