Brava Win-Duo DM-985 User manual

1
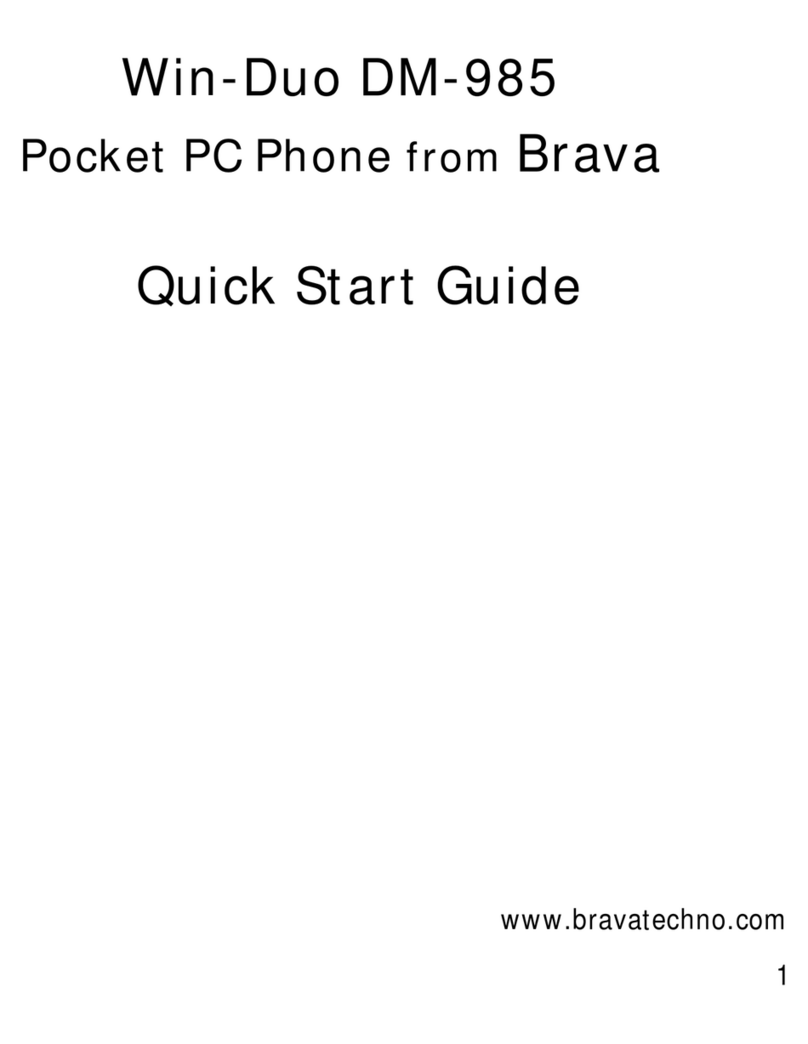
Win-Duo DM-985
Pocket PC Phone from Brava
User Manual
www.bravatechno.com

2
Thank you for purchasing Win-Duo DM-985 from Brava. Your phone is a
communication product running Microsoft® Windows Mobile 6.5
Professional with Dual Mode system GSM/CDMA working simultaneously, in
addition to the support of the CDMA third generation technology 1x-EVDO
Rev. A with data link speed up to 3.1Mbps. To experience the optimum
performance of your mobile phone, please read this users guide thoroughly.
Your phone contains numerous powerful office applications and
entertainment software which help you at work and also to fulfill your spare
time. Please follow the guidelines below:
•To use this phone safely and legally, read the section “Safety
Information” carefully;
•Before the first time use, charge the battery with the original charger
for 8 to 10 hours. A new battery may reach its peak performance only
after two or three cycles of fully charging and discharging.
•Similar to a computer, your phone will perform best when enough
memory is present. Reboot the phone to clear the memory to store it
peak performance.
•Running multiple programs at the same time may prolong the response
time of the phone. If it starts to react slowly, try rebooting the phone
to recover.
•In the event that the contents of this manual are not consistent with
menu options on the phone, follow the prompts on the phone.
•Some services described in this manual may not be supported by all
the networks. Contact your network operator or service provider for
details.
3
1 SAFETY INFORMATION 6
1.1 When carrying the phone 6
1.2 Energy Leak of Radio Frequency 6
1.3 Electromagnetic Radiation 6
1.4 In Public 6
1.5 Compatibility of RF Interference 7
1.6 In Aircraft 7
1.7 Pacemakers 7
1.8 Hearing Aids 7
1.9 Other Medical Equipments 7
1.10 Road Safety 7
1.11 Potentially Explosive Atmospheres 8
1.12 Battery 8
1.13 Others 8
2OVERVIEW 10
2.1 Appearance and Keypad 10
2.2 UIM/SIM Cards 13
2.3 Storage Card 14
2.4 Accessories 14
2.5 The Battery 15
3BASIC FUNCTIONS 17
3.1 Switching On/Off 17
3.2 Home Screen 17
3.3 Lock screen and keypad 20
3.4 Input Method 21
3.5 ActiveSync 22
4CALL FEATURES 24
4.1 Making a Call 24
4.2 Answer a Call 26
4.3 During a Call 26
5CONTACTS 29
5.1 View Contact Details 29
5.2 Edit a Contact 29
5.3 Add New Contact 30

4
5.4 Speed-dial for Contact 30
5.5 Send Contacts via Bluetooth 31
5.6 Delete Contacts 31
5.7 Contact manager 31
6MESSAGING 33
6.1 Text Message 33
6.2 Outlook 36
6.3 MMS 38
6.4 Menu for Messaging and Email 40
6.5 Folders for Messaging and Email 41
7MULTIMEDIA 42
7.1 Windows Media 42
7.2 Camera 46
7.3 FM Radio 49
7.4 Recorder 51
7.5 Pictures and Videos 52
7.6 JAVA 52
7.7 Games 53
8PROGRAMS 54
8.1 Office Mobile 54
8.2 Internet Explorer 56
8.3 Windows Live 57
8.4 ActiveSync 58
8.5 Calendar 61
8.6 Tasks 61
8.7 Notes 61
8.8 Internet Sharing 63
8.9 Calculator 65
8.10 Search 65
8.11 File Explorer 65
8.12 Getting started 66
8.13 Task Manager 66
9SETTINGS 67
9.1 Personal 67

5
9.2 Bluetooth 68
9.3 Lock 69
9.4 Clock & Alarms 70
9.5 Power 70
9.6 Home 70
9.7 Sounds & Notifications 70
9.8 System 70
9.9 Connections 73
10 HELP 77
10.1 Help 77
10.2 Troubleshooting 77
11 MAINTENANCE GUIDE 79

6
1Safety Information
To use your phone safely and effectively, please read these guidelines
carefully.
1.1 When carrying the phone
When you are using the phone, keep it some distance at least 2.5CM away
from your body. In case there is a need of phone slipcover, belt clip, or
other accessories to carry your cell phone, it is important to ensure they are
approved by the manufacturer. Otherwise, it may exceed the upper limit of
radio frequency leakage.
1.2 Energy Leak of Radio Frequency
Your phone is a low-power, wireless transmitter and receiver. After being
powered on, it will periodically send and receive radio signals whilst its
transmission power is controlled by the network. This device complies with
the standards restricting energy leak of radio frequency.
1.3 Electromagnetic Radiation
Your phone fully complies with standards related to wireless irradiation
enacted by the authority of the State and International Health Association.
These limitations are part of the comprehensive regulations and constitute
public wireless irradiation permission standards. These standards are
developed and formed after long-term intensive scientific research by
independent scientific organizations such s ICNIRP (International
Commission on Non-Ionizing Radiation Protection). These standards
contain a large surplus to ensure the safety of all and take the variable
factors of various measurement conditions in consideration.
1.4 In Public
Some public places, such as hospitals, health resorts, or other medical
facilities, post signage prohibiting cell phone usage. Heed such warnings

7
and power off your phone in designated public places.
1.5 Compatibility of RF Interference
Your phone may interfere with other devices that are not properly designed
for RF shielding or configured for RF compatibility.
1.6 In Aircraft
Switch the device off and remove the battery when you are in or near an
aircraft. It’s illegal to use cellular equipment on board aircraft since it may
cause interference to aircraft navigation systems and/or networks. Violators
may be sued or face severe penalties.
1.7 Pacemakers
If you are using a pacemaker, do not carry your phone (while switching on)
in a breast pocket. A minimum separation of 15 cm should be maintained
between the wireless phone and a pacemaker. Use the ear opposite the
pacemaker to minimize the potential for interference. If you have any
reason to suspect that interference is taking place, switch off your phone
immediately.
1.8 Hearing Aids
Wireless phones may interfere with some hearing aids. In the event of such
interference, you may want to consult your service provider.
1.9 Other Medical Equipments
For other personal health care equipments, consult your service provider.
Consult a physician or the manufacturer of the medical device to determine
if they are adequately shielded from external RF energy or if you have any
questions.
1.10 Road Safety
Please comply with local traffic laws and regulations. If the driving

8
condition is getting worse, pull off the road before you make or receive calls.
If your vehicle has airbags, keep your phone away from where the inflated
airbags can reach. Otherwise, you may be seriously hurt by the phone once
the airbags expand.
1.11 Potentially Explosive Atmospheres
Switch off your phone when in any area with a potentially explosive
atmosphere and obey all signs and instructions. These areas include fuel
depots (below deck on boats, fuel or chemical transfer or storage facilities),
areas where the air contains chemicals or particles, such as grain, dust or
metal powders. They are usually marked with signs, but not always so.
1.12 Battery
Any contact of the battery’s exposed electrodes with a conductor, such as
jewelry or keys, may cause damage to possessions or bodily injury.
1.13 Others
The phone is comprised of precise electronic circuits, magnets and a
battery system. Caution is advised when handling the components,
particularly with regard to the following:
Keep the phone and its accessories dry. Your phone is not water-proof.
Keep the phone away from extreme temperatures.
Do not place it near a flame or a lit cigarette.
Do not scratch on it.
Avoid tapping or severe knocking of the phone to prevent damage.
Keep the device away from computer disks, credit cards, traveling cards, or
other magnetic objects, otherwise the message stored in the magnetic disk
or credit card may be affected.
Do not place it on an automobile dashboard, window or anywhere sunshine
can penetrate.
Do not remove the battery when it’s powering on.
Do not discard the battery in fire. It may explode.

9
Do not place the battery in mouth. It may be poisonous.
Do not try to disassemble the phone or its accessories.
Use only approved model-applicable batteries. Incorrect batteries may
cause explosion. Follow the manufacturer’s instructions to dispose used
batteries.
Heat is generated by prolonged usage of the headphones and by prolonged
charging of the cellular device.
A moist or anti-static cloth may be used to wipe or clean the phone. Do not
use a dry cloth that attracts static electricity to avoid damage to the phone.
Do not use a chemical reagent or a cleanser containing abrasives to avoid
damage to the phone’s casing.
The metal material contained in the phone may cause you in hyper
susceptibility, which depends on your physique or health status.
Since that parts such as liquid crystal display and pick-up head belong to
fragile parts, please carefully keep them such that the phone may not be
impacted or squeezed.

10
2Overview
2.1 Appearance and Keypad
4
7
8
1
5
3
2
6
12
10
11
9

11
16
14
17
13
18
15

12
No. Item Function
1 Volume keys Press Volume keys (Volume Up & Volume Down) to
adjust the volume.
2 Power key
Press this key to turn off your device temporarily and
switch the device to sleep mode. Press and hold this
button to turn off your device completely. When your
device is in sleep mode, you can still receive calls;
however, the phone function is off when you turn the
device off completely.
3 Receiver Listen to audio media or phone calls.
4 Front camera Taking pictures.
5 Status light
Remind: flash red light (unanswered call, unread
message, alarm or appointment);
Bluetooth: flash blue light;
Charging: red light;
EVDO/1X or GSM: flash green light.
6 Touch Screen Use to write, draw, or make selections with the stylus.
7 C Call key
Press this key to make a call to the name or number
shown on the screen or to answer a call.
8 G Call key Press this key to make a call to the name or number
shown on the screen or to answer a call.
9 Earphone Jack Plug your earphone into the jack.
10 Mike Talk.
11 Return Key Close or hide the current window.
12 End key
Press this key to end a call or silence the ring from an
incoming call. Also, press this button to return to the
today screen.
13 Back Camera Use this built-in camera to take photos or video clips.
14 Reset Key Press this key can reset celerity.
15 External Speaker Allows you listen to the audio media or hands-free calls.
16 Sync Connector Use this connector for synchronizing data or recharging
the battery. You can insert USB cable or AC adapter
provided with the device to this connector.

13
2.2 UIM/SIM Cards
The UIM and SIM (Subscriber Identification Module) cards contains the
phone number and important information of services. It also may store a
phone book and personal information.
2.2.1 Installation
1.The phone facing down; hold it tightly with both of your hands;
2.Press the battery cover with thumbs and slide it, and then remove the
battery;
3.Insert the UIM and SIM cards into the slot with the beveled corner of
the card fit the one of the slot; The contact area of the card facing
down (“1” slot insert C card, “2” slot insert G card);
4.Place the battery back in the groove and make sure it’s properly
installed;
5.Attach the back cover, slide it until it clicks.
2.2.2 Cautions
If there’s fault with the UIM or SIM card, contact your service provider.
Keep all UIM and SIM cards out of the reach of small children.
UIM/SIM cards and its metal contact are susceptible to scratches and
damaged by bending. Insert and remove the card with care.
Keep the UIM and SIM cards away from static electricity, dust and water.
2.2.3 PIN and PUK
PIN
PIN is an identification code that is provided with the UIM and SIM cards.
You are protected by the PIN from unauthorized use of your UIM and SIM
17 Stylus Use the stylus to write, draw, or select items on the
touch screen.
18 Storage Card Slot Insert a storage card (T-Flash) for storing data.

14
cards. After initiating the PIN protection, you are required to enter the PIN
every time switching on the phone. After three consecutive incorrect PIN
code entries, the UIM and SIM cards is blocked. Nobody can then access
the data in the card or use its services.
PUK
When the UIM/SIM card is locked, a PUK (Personal Unlock Key) is required
to unlock it. Ten consecutive incorrect PUK entries will cause permanent
lockup of the UIM/SIM card. The PUK is usually provided with the UIM/SIM
card. If you have lost your PUK or it’s not provided, contact your service
provider.
2.3 Storage Card
A storage card can be plugged into your phone to expand the storage
capacity.
To install a storage card, simply insert it into the slot.
To remove the card, push it inward with your finger. It will pop out from the
slot. Do not pull it forcefully!
2.4 Accessories
3
2
1

15
ID Item Description
1Battery charger Charging batteries.
2 Stereo earphone Stereo output, the Send key can be used to pick up a call.
3USB cable
Synchronizing with PC; charging batteries
Note: It’s not a recommended way. A battery charger is
preferred.
2.5 The Battery
2.5.1 Battery use
•Your phone is powered by a battery which has a limited life. When a
battery has a significant decrease of working time, replace it.
•Switch off your phone before removing the battery.
•Do not leave the battery on the charger for too long, since it may reduce
the battery’s life.
•Excessively high or low temperature will have impact on the charging
capability. Maintain its working temperature at 0~45℃.
•Do not use the battery for other purposes; do not discard it in fire or in
water.
•Do not try to disassemble or fix a battery. Choose the certificated or
approved batteries by the manufacturer.
•Avoid short circuit. Do not use damaged chargers or batteries.
•Dispose used batteries properly. Do not throw them into a dustbin.
2.5.2 Battery Charge Level
1. Tap the Status Bar on Idle, and choose the battery icon in Shortcut
Icon;
2. To check the charge level, select “Start” -> “Settings”; tap “Power”.
2.5.3 Charging Batteries
If the charge level goes lower than the working voltage, a reminder of low
battery will be prompted on the screen as the alerting sound played. Data
may be lost and the phone will power off if the battery is not being charged

16
or replaced in time.
A Lithium-ion battery comes with this phone. It’s recommended to use the
manufacturer’s charger and batteries for best performance.
1. Plug the charger carefully into the USB charger slot;
2. Connect the charger to the AC outlet while the phone powering on. The
status indicator is in red light; the battery icon on the screen shows
charging progress; while the phone can be used normally. When the
phone is powering off, the screen shows a charging icon.
3. Before the first time use, charge the battery with the original charger
for 8 to 10 hours. A new battery may reach its peak performance only
after two or three cycles of fully charging and discharging.
4. After the charging completes, the status indicator shows the state
before charging. If the phone is off, the screen displays a notified of
completion.
5. Disconnect the charger with the AC outlet and the phone.
Note: A USB cable can be used to charge the battery. The voltage on
the PC’s USB port, however, does not fully meet the requirement for
battery charging, therefore having negative impact on the
battery’s life-span. A battery charger is preferred.

17
3Basic Functions
3.1 Switching On/Off
To switch on or off your phone, press and hold the On/Off key for a couple
of seconds. If your device is running for the first time, the wizard will guide
for screen calibration, setup the regional settings, and date and time.
3.2 Home Screen
After the phone is on, the “Today” screens shows. Use the touch pen to
select your option.
Note All the figures in the manual are for reference only. They may be
different from the actual display on your phone.
Displaying
area
Function
buttons
Start
menu
Status bar

18
3.2.1 The Start Menu
All the functions can be found in the Start menu. Tap on the left corner
of the screen with the touch pen or your finger to display the menu which
includes all functions.
3.2.2 The Status Bar
Icons in the status bar are displayed for working status, including battery
charge level, signal strength, GPRS and Bluetooth. They’re listed below:

19
Icon Description
Indicates the battery is fully charged.
Indicates the battery is very low.
Battery charging.
Sound on.
Sound off.
Ringer in vibration mode.
No UIM or SIM card.
Indicates maximum signal strength of C.
Indicates maximum signal strength of G.
The CDMA UIM card is turned off.
The GSM SIM card is turned off.
Voice call in progress of C.
Voice call in progress of G.
Call on hold of C.
Call on hold of G.
Missed call.
CDMA EVDO and GSM EDGE are available.
GSM EDGE available.
EVDO available.
1X available.
Unread message.
New voice message.
New IM.
Synchronization in progress.

20
Connection is active.
Bluetooth enabled.
Bluetooth voice gateway.
A2DP.
Multiple reminders.
Wi-Fi connected.
3.2.3 The Display
You can see information about the most important functions of your device
on the main screen, such as contacts, messages, calendar, and more. Tap
one of the shown functions to open it.
3.2.4 Selection of Functions
The functions buttons may vary according to the opened application and
the phone status and features.
3.3 Lock screen and keypad
Click start to open start menu, click the lock icon in the bottom to lock the
screen and the keypad then no operation is allowed.
To unlock, click the slide unlock button and slide.
If a call comes in the lock mode, you can answer it without unlocking the
phone by sliding the answer button (you can also reject the call by sliding
the reject buttons). The phone will remain locked after the call is over.
Windows Mobile 6.5 introduces a new Lock screen so you can now respond
to interactive user interface elements even if the device is locked.
Notifications — such as those for missed calls, voice mail, e-mail, text and
calendar items — are more intuitive and actionable on the Lock screen. You
can quickly select whether you want to check your voicemail, read your
e-mail or text message directly from the locked screen.
Other manuals for Win-Duo DM-985
1
Table of contents
Other Brava Cell Phone manuals

Brava
Brava E-SOLO CS-585 User manual

Brava
Brava DM-270 User manual

Brava
Brava SLIK DS-197 User manual

Brava
Brava Win-Duo DM-985 User manual

Brava
Brava Cube1 User manual

Brava
Brava DM-993 User manual

Brava
Brava VEGA II DM-992 User manual

Brava
Brava DM-994 User manual

Brava
Brava SOLO CS-570 User manual

Brava
Brava GARNET DM-976 User manual