4 5
BREVILLE RECOMMENDS SAFETY FIRSTBREVILLE RECOMMENDS SAFETY FIRST
5
At Breville we are very safety conscious. We design and manufacture consumer products with
the safety of you, our valued customer, foremost in mind. In addition we ask that you exercise
a degree of care when using any electrical appliance and adhere to the following precautions.
READ ALL INSTRUCTIONS
BEFORE USE AND SAVE FOR
FUTURE REFERENCE
• Carefully read all instructions before
operation and save for future reference.
• Remove and safely discard any
packaging material and promotional
labels before using the appliance for the
first time.
• To eliminate a choking hazard for young
children, remove and safely discard the
protective cover fitted to the power plug
of this appliance.
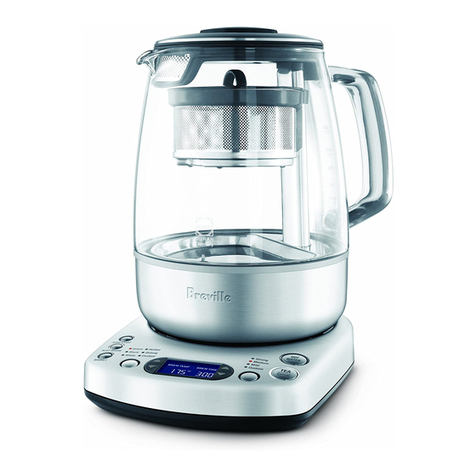
• This appliance has been designed
specifically for the purpose of heating
and boiling quality drinking water and
tea only. Under no circumstances should
this product be used to heat or boil any
other liquids or foodstuffs.
• Do not place the appliance near the edge
of a bench or table during operation.
Ensure that the surface is level, clean
and free of water.
• Do not place the appliance on or near a
hot gas burner, electric element or where
it could touch a heated oven.
• Keep the appliance clear of walls,
curtains and other heat or steam
sensitive materials. Keep a minimum
20cm (8") of space on both sides of the
appliance.
• Do not operate the appliance on a sink
drain board.
• Always ensure the appliance is properly
assembled before connecting to a
power outlet and operating. Follow the
instructions provided in this book.
• The glass jug must be used only with
the power base supplied. Do not use on
a range top.
• The appliance is not intended to be
operated by means of an external timer
or separate remote control system.
• Do not touch hot surfaces. Use the
handle for lifting and carrying the
glass jug.
• Attach the jug lid securely to the glass
jug before operation.
• Do not place anything on top of the
jug lid.
• Do not open the jug lid during operation
as scalding may occur.
• Extreme caution must be used when
moving the glass jug containing
hot liquid.
• Use caution when pouring water from
the glass jug as boiling water and steam
will scald. Do not pour the water too
quickly.
• To avoid scalding, never fill the glass jug
past the ‘WATER MAX’ (when heating
water) or ‘TEA MAX’ (when brewing tea)
line markings.
• Do not operate the appliance without
water. Always fill the glass jug to at least
the ‘MIN’ marking. Should it be
operated without water, the boil-dry
protection will shut the power off
automatically. Allow the appliance to
cool before refilling.
WARNING
To protect against electric shock, do
not immerse the glass jug base, power
base, power cord or power plug in
water or allow moisture to come in
contact with these parts.
Please refer to cleaning instructions on page
30 of the instruction booklet.
• Do not remove the glass jug from the
power base during heating or when
the basket is in operation. Ensure the
appliance has completed the water
heating or tea brewing cycle before
removing the glass jug from the
power base.
• The use of accessory attachments not
recommended by Breville may result in
fire, electric shock or injury to persons.
• To turn OFF the appliance, press the
TEA|Cancel button (when brewing tea)
or the HOT WATER|Cancel button
(when heating water) on the power base.
The appliance is OFF when the button
surround illumination goes out.
• To disconnect from the wall outlet, first
turn OFF the appliance then remove the
power plug from the wall outlet.
• When the appliance is not in use or
when left unattended, disconnect the
power cord from the wall outlet.
• Before attempting to move the appliance
or before assembling or disassembling
parts, cleaning or storing, turn OFF the
appliance, allow to cool and disconnect
from the wall outlet.
• Allow the appliance to cool down in
between brewing cycles.
• Strictly follow the Care and Cleaning
instructions on page 28.
• Do not use harsh abrasives or caustic
cleaners when cleaning this appliance.
• This appliance is not intended for use by
young children or infirm persons unless
they have been adequately supervised
by a responsible person to ensure they
can use the appliance safely.
• Young children should be supervised to
ensure that they do not play with
the appliance.
IMPORTANT SAFEGUARDS
