manuals.online logo
Brands
  1. Home
  2. •
  3. Brands
  4. •
  5. Broil King
  6. •
  7. Food Warmer
  8. •
  9. Broil King WBC-2RT User manual

Broil King WBC-2RT User manual

10/15/09 RV03
4
BroilKing
143 Colebrook River Road, Winsted, CT 06098
(860) 38-2200 l Fax (860) 38-9404
Website: www.broilking.com l E-mail: [email protected]
WBC-4RT, WBC-4SP, WBC-5RT WBC-5SP: 400 Watts / 3.4 amps / 120 Volts / 60 Hz
2 Tempe atu e Cont ols (one pe side: total active heat a ea: 43 x 15)
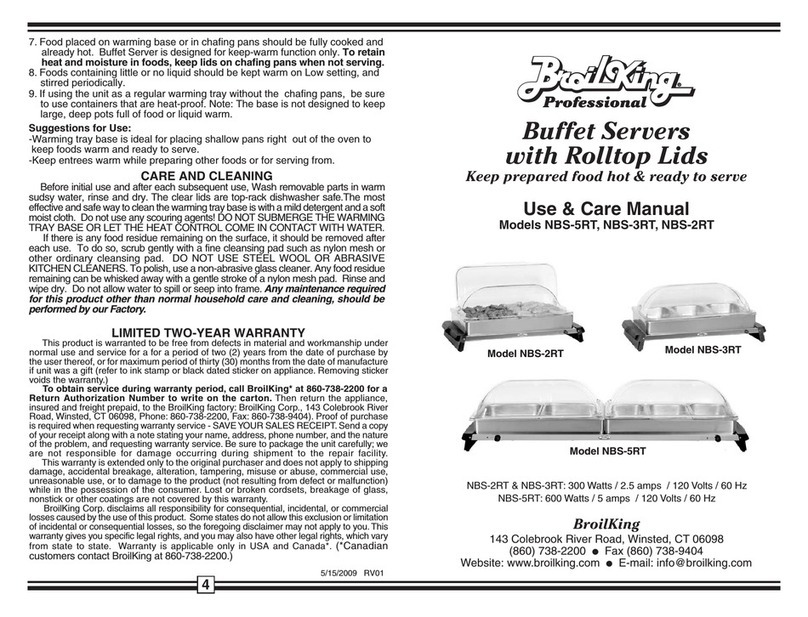
Use & Care Manual
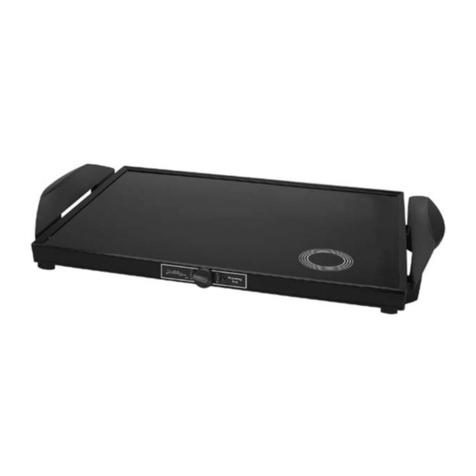
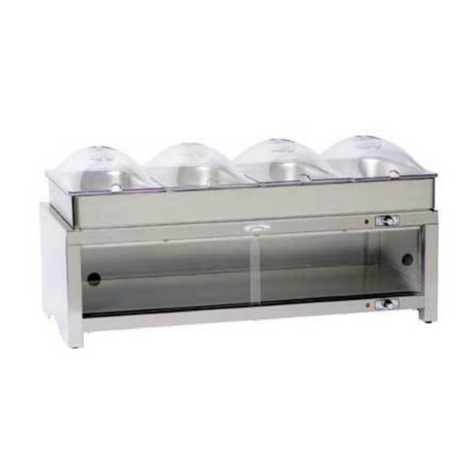
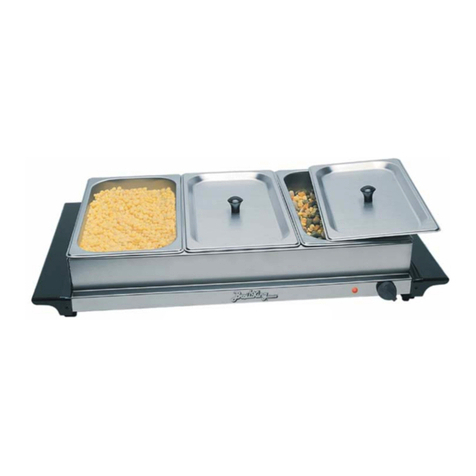
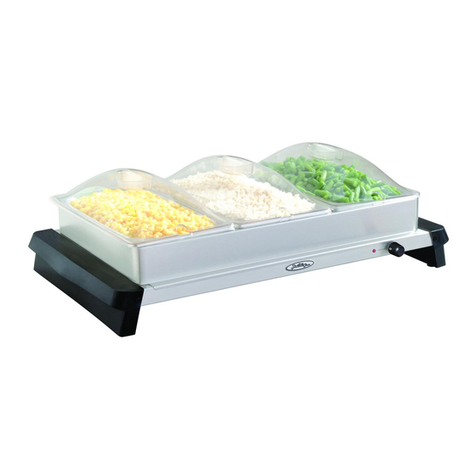
Rolltop Lids Models: WBC-5RT, WBC-4RT, WBC-3RT, WBC-2RT
Clear Individual Lids Models: WBC-5 P, WBC-4 P,
WBC-4 LP, WBC-3 LP, WBC-3 P, WBC-2 P
Keeps prepared food hot & ready to serve
Buffet Warming Carts
Professional
WBC-3SLP & WBC-4SLP:
200 Watts / 1.7 amps / 120 Volts / 60 Hz
1 Tempe atu e Cont ol
(active heat a ea: 27-5/8 x 15)
WBC-4RT WBC-5RT WBC-4SP WBC-5SP
WBC-2RT, WBC-2SP, WBC-3RT WBC-3SP: 200 Watts / 1.7 amps / 120 Volts / 60 Hz
1 Tempe atu e Cont ol (active heat a ea: 22-1/8 x 15)
WBC-2RT WBC-2SPWBC-3RT WBC-3SP
4 Pans &
2 Rolltop Lids
5 Pans &
2 Rolltop Lids
4 Pans &
4 Individual Lids
5 Pans &
5 Individual Lids
2 Pans &
1 Rolltop Lid
3 Pans &
1 Rolltop Lid
2 Pans &
2 Individual Lids
3 Pans &
3 Individual Lids
WBC-3SLP WBC-4SLP
3 Pans & 3 Individual Lids
1 Cutting Boa d
4 Pans & 4 Individual Lids
1 Cutting Boa d
CARE AND CLEANING
Befo e initial use and afte each subsequent use, Wash emovable pa ts in wa m sudsy wate , inse and
d y. The clea lids a e top- ack dishwashe safe.The most effective and safe way to clean the wa ming t ay
base is with a mild dete gent and a soft moist cloth. Do not use any scou ing agents! DO NOT SUBMERGE
THE WARMING TRAY BASE OR LET THE HEAT CONTROL COME IN CONTACT WITH WATER.
If the e is any food esidue emaining on the su face, it should be emoved afte each use. To do so,
sc ub gently with a fine cleansing pad such as nylon mesh o othe o dina y cleansing pad. DO NOT USE
STEEL WOOL OR ABRASIVE KITCHEN CLEANERS. To polish, use a non-ab asive glass cleane . Any
food esidue emaining can be whisked away with a gentle st oke of a nylon mesh pad. Rinse and wipe
d y. Do not allow wate to spill o seep into f ame. NOTE: It is no mal fo the heating su face to eventually
discolo due to heat. Any maintenance required for this product other than normal household care
and cleaning, should be performed by our Factory.
4. If using chafing pans, place the chafing pan holde (s) on the wa ming base befo e placing the
chafing pans in place.
5. The unit comes with stainless chafing pans and clea ployca bonate lid(s). See manual cove
fo specifics of each model. Each smalle (2.6 qua t) pan will hold up to 25 fou ounce se vings;
the la ge (4.3 qua t) pans each hold up to 40 fou ounce se vings. The individual (non- olltop)
clea polyp opylene lids have utensil slots.
6. Stainless chafing pans may be used in an oven, but NOT the lids!!!
7. Food placed on wa ming base o in chafing pans should be fully cooked and al eady hot. Buffet
Ca t is designed fo keep-wa m function only. To retain heat and moisture in foods, keep lids
on hen not serving.
8. Foods containing little o no liquid should be kept wa m on Low setting, and sti ed pe iodically.
9. If using the top level as a egula wa ming t ay without the chafing pans, be su e to use containe s
that a e heat-p oof. Note: The base is not designed to keep la ge, deep pots full of food o liquid
wa m.
LIMITED TWO-YEAR WARRANTY
This p oduct is wa anted to be free from defects in mate ial and wo kmanship unde no mal use and
se vice fo a fo a pe iod of two (2) yea s f om the date of pu chase by the use the eof, o fo maximum
pe iod of thi ty (30) months f om the date of manufactu e if unit was a gift ( efe to ink stamp o black dated
sticke on appliance. Removing sticke voids the wa anty.)
Warranty provides repair of unit. Please note: This appliance is a carry-in service item (except
Grand size models: WBC-4RT, WBC-4SP, WBC-5RT, WBC-5SP, hich have on-site service arranty);
customer is responsible for packaging the unit securely and returning it to BroilKing* or an
authorized service center for service, along with a copy of you o iginal dated pu chase eceipt, a
desc iption of the p oblem, and you name, shipping add ess and phone numbe . (Wa anty p ovides epai
of unit
-If sending it to B oilKing, ship to: B oilKing, Attn: REPAIR, 143 Coleb ook Rive Road, Winsted, CT 06098.
*Call BroilKing at 860-738-2200 for Return Authorization Number BEFORE returning any item
directly to BroilKing for repair. Return Authorization Number MUST be ritten on outside of carton
to track the unit and avoid service delays.
-If not sending it di ectly to B oilKing fo se vice, call us at 860-738-2200 fo the location of you nea est
autho ized se vice cente .
When shipping the unit fo se vice, we ecommend that you insu e it fo its o iginal pu chase p ice. Be
su e to package the unit ca efully; B oilKing is not esponsible fo damage o loss of unit in t ansit to
se vice location. **Save original carton in case required for possible future service needs.
This wa anty is extended only to the o iginal pu chase and does not apply to shipping damage, accidental
b eakage, alte ation, tampe ing, misuse o abuse, commercial use, un easonable use, exte nal se vice o
epai attempts by unautho ized pe sonnel, o damage to the p oduct (not esulting f om defect o malfunction)
while in the possession of the consume . B oken co dsets, b eakage of lids and/o caste s a e excluded f om
this wa anty.
B oilKing disclaims all esponsibility fo consequential, incidental, o comme cial losses caused by the use of
this p oduct. Some states do not allow this exclusion o limitation of incidental o consequential losses, so the
fo egoing disclaime may not apply to you. This wa anty gives you specific legal ights, and you may also have
othe legal ights, which va y f om state to state. Warranty is applicable only in the 48 contiguous US states.
Individual
Lids
To educe the isk of pe sonal inju y o p ope ty damage when using elect ical appliances,
basic safety p ecautions should always be followed, including the following:
1. READ ALL INSTRUCTIONS BEFORE USE.
2.
Do not touch hot su faces! Always Use Handles. Always use hot pads o pot holde s until unit cools.
3.
To p otect against elect ical shock, do not imme se t ay base, co d o plug in wate o othe liquid.
4. Close supe vision is necessa y when any appliance is used by o nea child en.
5. Unplug f om outlet when not in use and befo e cleaning. Allow to cool completely befo e
putting on o taking off pa ts, and befo e cleaning o sto ing the appliance.
6. Do not ope ate any appliance with a damaged co d o plug o afte the appliance malfunctions
o has been damaged in any manne . Call the B oilKing Facto y Se vice Depa tment at 860-
738-2200 fo a Retu n fo Repai Autho ization, o fo the nea est autho ized se vice cente .
**This product has a carry-in service warranty (48 contiguous US states only.) Save carton in
case it is required for possi le future service needs.
7. The use of accesso y attachments not ecommended by the appliance manufactu e may
cause inju ies.
8. Do not use outdoo s.
9. Do not let co d hang ove edge of table o counte o touch hot su faces.
10. Do not place on o nea a hot gas o elect ic bu ne o in a heated oven.
11. It is ecommended that this appliance not be moved when it contains hot oil o othe hot liquid.
12. Do not clean with metal scou ing pads. They can sc atch and uin the finish of you unit.
13. Always attach plug to appliance fi st, then plug co d into the wall outlet. To disconnect, tu n
any cont ol to Off, then emove plug f om wall outlet.
14. Do not use appliance fo othe than intended use.
15.
DO NOT USE PLASTIC DISHES OR PLASTIC WRAP ON WARMING SURFACE .
AVE THE E IN TRUCTION
This product is for household use only.
NOTE: A 72(6) powe supply co d (o co d set) has been p ovided to educe the haza ds
esulting f om becoming entangled in o t ipping ove a longe co d. Longe co d sets o extension
co ds may be used if ca e is p ope ly exe cised in thei use. If a long co d set o extension co d is
used, the ma ked elect ical ating of the co d set o extension co d should be at least as g eat as
the elect ical ating of the appliance. The longe co d should be a anged so that it will not d ape
ove the counte top o table top whe e it can be pulled on by child en o t ipped ove accidentally.
The high-tech wa ming su face will emain unblemished fo a long time with app op iate ca e.
The wa ming su face and high-g ade, long-life stainless chafing pans allow fo an att active
alte native fo keeping appetize s and othe foods wa m. Fo best esults use nylon, plastic, wooden
o ubbe utensils. Metal utensils may be used with ca e but should not be used to cut food on
the cooking su faces.
23
We recommend that you record the following information for warranty
purposes: Model #________
Purchase Date:_____________Dealer:__________________________ Chafing Pan Holder(s)
Utensil
slots
torage shelves
Congratulations on your purchase of a BroilKing Buffet Warming Cart!
Rolltop Lid Models Clear Individual Lids Models
Controls Area
(see Fig. B
for closeup)
Casters
(Brakes on 2)
Warming surface
Rolltop
Lid(s)
(See manual cover for
pan & lid quantities for
each model)
Variable Thermostat Knob Pan Holder
Position Knob
on front of cart
ON/OFF Rocker witch
Light
(Note: Largest models
have 2 sets of controls:
1 at either end of cart.)
Pan Holder
6 Cord & Plug
Casters
Fig. A
Fig. B Fig. C
Notch on
lower edge
of Pan Holder
IMPORTANT AFEGUARD
Assemble Cart
1. Attach the caste s to the bottom of the ca t legs. (Caste s just pop into the bottom of the legs.)
Put the 2 caste s with b akes on f ont legs fo best stability.
2. Place pan holde (s) on the top wa ming su face, with the notched edge(s) positioned ove the
positioning/stabilizing knobs.
3. (When actually using ca t to keep foods wa m) place chafing pans with hot food in the pan
holde s, and put the lid(s) in place.
Initial Use:
Turn unit on by pressing the rocker s itch(es) behind the cart handle(s) to the ON position.
Turn the variable thermostat knob(s) counterclock ise to maximum setting. Heat the wa ming
base without foods on it fo app oximately 10 minutes in o de to seal the special coating. (Only
the top level of the ca t heats up.) Tempo a y smoking is no mal du ing initial use.
Subsequent Use:
1. The heating element is equipped with a va iable the mostat knob, located behind the ca t handle.
(La gest models have 2 knobs, one at eithe end of the ca t. Each knob on the la ge models
cont ols half of the total heating su face.) Heat ange is f om 1550 to 2000 F, to keep foods at
se ving tempe atu es. Fo best esults, use maximum heat setting to quickly each you desi ed
tempe atu e, then adjust to desi ed tempe atu e. Set heat level by tu ning the knob so that the
white line on the knob ma k lines up with the signa (Lo = 1550)l light line.
2. The light will come on only du ing heat cycle. Due to the low wattage necessa y fo wa ming
t ays, it can be 20-30 minutes befo e the light cycles off.
3. You may use the unit eithe fully assembled with chafing pans, o use the wa ming su face alone
as a wa ming t ay.
HOW TO USE
Befo e using fo the fi st time, become familia with the Buffet Ca t featu es, Figu e A. Wash
emovable pa ts in wa m sudsy wate , inse and d y. Clean the wa ming t ay base with a mild
dete gent and a soft moist cloth. Do not use any scou ing agents! DO NOT SUBMERGE THE
WARMING BASE OR LET THE PLUG COME IN CONTACT WITH WATER. Rinse and wipe d y.
Do not allow wate to spill o seep into the f ame.

This manual suits for next models

9

Other Broil King Food Warmer manuals

Broil King MLB-25P User manual

Broil King

Broil King MLB-25P User manual

Broil King LWT-10 User manual

Broil King

Broil King LWT-10 User manual

Broil King TBS-2S User manual

Broil King

Broil King TBS-2S User manual

Broil King MLW-25RT User manual

Broil King

Broil King MLW-25RT User manual

Broil King PROFESSIONAL CDR-1TB User manual

Broil King

Broil King PROFESSIONAL CDR-1TB User manual

Broil King NWT-1B User manual

Broil King

Broil King NWT-1B User manual

Broil King NBS-2SP User manual

Broil King

Broil King NBS-2SP User manual

Broil King PWT-1S User manual

Broil King

Broil King PWT-1S User manual

Broil King NWT-1B User manual

Broil King

Broil King NWT-1B User manual

Broil King NBS-2RT User manual

Broil King

Broil King NBS-2RT User manual

Broil King TBS-3S User manual

Broil King

Broil King TBS-3S User manual

Broil King MLB-CSLP4 User manual

Broil King

Broil King MLB-CSLP4 User manual

Broil King MLW-2 User manual

Broil King

Broil King MLW-2 User manual

Broil King 1480 User manual

Broil King

Broil King 1480 User manual

Broil King 1480 User manual

Broil King

Broil King 1480 User manual

Broil King 1450 User manual

Broil King

Broil King 1450 User manual

Broil King NBS-2SP User manual

Broil King

Broil King NBS-2SP User manual

Broil King MLB-25P User manual

Broil King

Broil King MLB-25P User manual

Broil King MLB-CSLP User manual

Broil King

Broil King MLB-CSLP User manual

Popular Food Warmer manuals by other brands

BKI Fry Warmer HFW Operating & installation

BKI

BKI Fry Warmer HFW Operating & installation

Hatco HYDRO-HEATER FR2-3 Replacement parts list

Hatco

Hatco HYDRO-HEATER FR2-3 Replacement parts list

CookTek MB061-D Installation, operation and owner's manual

CookTek

CookTek MB061-D Installation, operation and owner's manual

Antunes, AJ Series 9100100 owner's manual

Antunes, AJ

Antunes, AJ Series 9100100 owner's manual

APW Wyott GWW Installation and operating instructions

APW Wyott

APW Wyott GWW Installation and operating instructions

True TA1HRT-1S-1S Specifications

True

True TA1HRT-1S-1S Specifications

PARRY 1995 Product instructions

PARRY

PARRY 1995 Product instructions

Hendi 209509 User instructions

Hendi

Hendi 209509 User instructions

IRIS BLW-C2 manual

IRIS

IRIS BLW-C2 manual

BLACKMONT BLM-TECC24L user manual

BLACKMONT

BLACKMONT BLM-TECC24L user manual

Beper RI.434 Use instruction

Beper

Beper RI.434 Use instruction

Vollrath Cayenne 72789 Operator's manual

Vollrath

Vollrath Cayenne 72789 Operator's manual

Hatco Glo-Ray GR2SDH-24 Specifications

Hatco

Hatco Glo-Ray GR2SDH-24 Specifications

Star 3W SERIES Installation and operation instructions

Star

Star 3W SERIES Installation and operation instructions

3M Bair Hugger 675 Checklist

3M

3M Bair Hugger 675 Checklist

Hatco GLOMAX GMFFL Installation and operating manual

Hatco

Hatco GLOMAX GMFFL Installation and operating manual

Hatco HCWBIR Series Installation and operating manual

Hatco

Hatco HCWBIR Series Installation and operating manual

PARRY MFBU manual

PARRY

PARRY MFBU manual

manuals.online logo
manuals.online logoBrands
  • About & Mission
  • Contact us
  • Privacy Policy
  • Terms and Conditions

Copyright 2025 Manuals.Online. All Rights Reserved.