2
Terms of Use .................................................. i
INTRODUCTION .......................................... 1
IMPORTANT NOTICE ................................... 1
IMPORTANT SAFETY INSTRUCTIONS ......... 1
Symbols Used in This Document........................... 1
FEATURES...................................................... 4
Patterns (“Pattern” mode) ...................................... 4
Scanning (“Scan” mode)........................................ 4
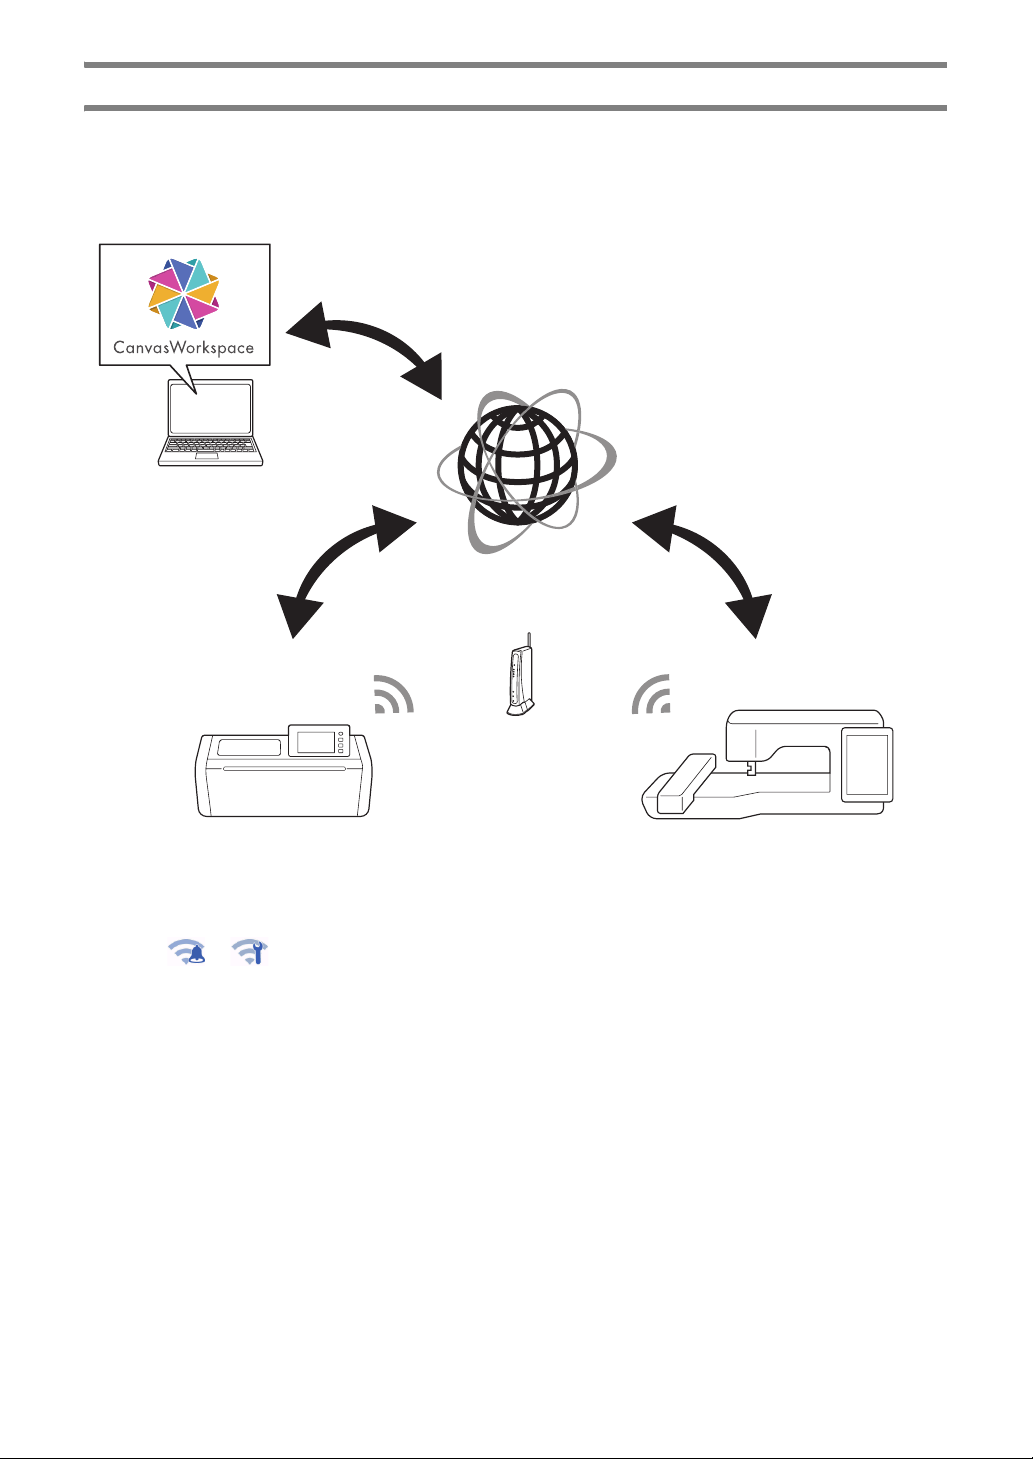
Transferring Data using the Wireless Network
Connection Function.............................................. 5
1 GETTING STARTED............6
PARTS AND FUNCTIONS ............................. 6
Unit Descriptions - Front........................................ 6
Unit Descriptions - Rear......................................... 7
Unit Descriptions - Operation Panel ...................... 7
Included Accessories ............................................. 7
BEFORE USE .................................................. 8
Placing the Machine............................................... 8
Removing the Packing Materials............................ 8
Turning On/Off the Machine................................... 8
Preparing for Feeding the Mat ............................... 9
Operation of LCD Panel ......................................... 9
MACHINE SETTINGS .................................. 10
Settings Screen.................................................... 10
Auto Shutdown..................................................... 12
2 BASIC OPERATIONS........13
FIRST STEPS................................................. 13
Selecting the Mat and Blade Appropriate for the
Material................................................................. 13
Reference Table of Mat, Blade and Material
Combinations ....................................................... 15
Attaching the Material to the Mat......................... 18
Installing and Uninstalling the Holder................... 26
Test Cut (Trial Cut) ............................................... 27
PATTERN CUTTING .................................... 31
Tutorial 1 - Cutting Patterns................................. 31
Tutorial 2 - Cutting Advanced Patterns................ 34
Tutorial 3 - Adding a Weeding Box to a Pattern .. 39
PATTERN SELECTION ................................. 41
Selecting a Single Pattern.................................... 41
Selecting Multiple Patterns .................................. 41
3
ADVANCED OPERATIONS
...43
CUTTING AND EDITING FUNCTIONS ...... 43
Pattern Editing Functions..................................... 43
Pattern Editing Functions - Multiple Patterns ...... 44
Mat Layout Screen............................................... 44
Layout Editing Functions...................................... 45
Object Editing Screen .......................................... 46
Undoing an Operation.......................................... 47
Grouping/Ungrouping Patterns............................ 47
Welding (Merging the Outlines of Multiple Patterns)
............................................................................. 49
Adding an Offset Line to the Pattern.................... 50
Aligning Patterns .................................................. 51
Auto Layout Functions ......................................... 53
Scanning a Background Image............................ 53
Character Input Functions.................................... 55
DRAWING FUNCTIONS .............................57
Drawing ................................................................ 57
Cutting Around Drawings..................................... 58
Using Drawing Functions to Fill Patterns/Make
Outlines Thicker ................................................... 62
MEMORY FUNCTIONS ...............................64
Saving .................................................................. 64
Retrieve Data........................................................ 65
Importing Designs ................................................ 66
4
SCANNING FUNCTIONS
... 67
SCANNING FOR CUTTING (Direct Cut).....67
Tutorial 4 - Scanning and Cutting ........................ 67
Advanced Cutting Functions for “Direct Cut” ...... 71
CREATING CUTTING DATA (Scan to Cut
Data)............................................................73
Tutorial 5 - Creating Cutting Data ........................ 73
Adjusting Image Detection Levels........................ 79
SCANNING IMAGES (Scan to USB).............81
Notes on Scanning............................................... 81
Tutorial 6 - Scanning to USB ............................... 81
Selecting the Area to be Saved............................ 83
Transferring an Image to CanvasWorkspace....... 83
5
WIRELESS NETWORK
CONNECTION FUNCTION
... 85
Machine Wireless Network Connection
Settings ........................................................85
Enable the Wireless Network Function ................ 85
Set up the Wireless Network................................ 85
Check the Wireless Network Setup/Status.......... 88
Using the “Others” Menu ..................................... 88
Register Machine Under
CanvasWorkspace........................................89
6 DATA TRANSFER
FUNCTION ......................... 92
Retrieving Data from CanvasWorkspace......92
Retrieve Transferred Patterns from
CanvasWorkspace (Using a Wireless Network) ... 92
Retrieve Transferred Patterns from
CanvasWorkspace (Using a USB Cable) (compatible
only with Windows) .............................................. 93
Batch Download a Pattern Collection from
CanvasWorkspace (compatible only with the Web
version)................................................................. 94
My Connection Function..............................96
CONTENTS