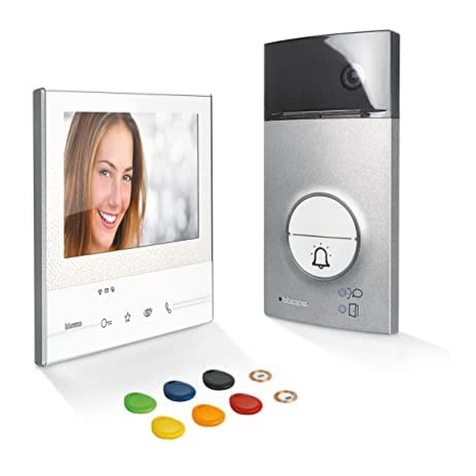
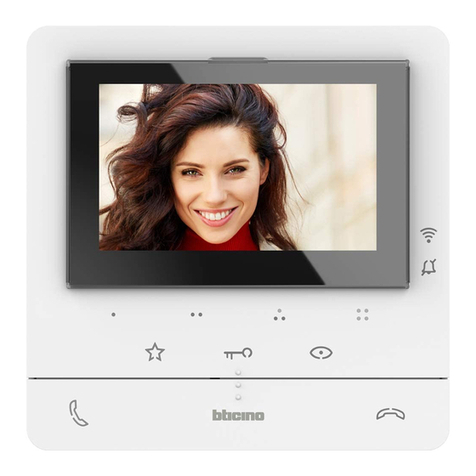
Bticino Classe 300X User manual

Installation Manual
Classe 300X
www.bticino.com

Classe 300X
Installation Manual

3
Classe 300X
Installation Manual
General information 4
Warnings and recommendations 4
Front view 5
Rear view 7
Dimensional data and installation heights 8
Wall-mounted installation 9
Installation on the table-top base 10
Physical configuration 12
Configurators 13
Functions of the M units configurator (Favorites key) 14
Functions of the M tenths configurator (Quick actions) 15
First switching on 19
Settings 21
General settings 21
Ringtones 30
Display 31
Answering machine 33
Quick actions 35
Configuration 37
Advanced Configuration 40
First switching on 40
Configuration 43
General settings 45
Intercom 45
Camera 47
Activation 49
Quick actions 51
Factory configuration 53
TROUBLESHOOTING 54
Contents

Classe 300X
Installation Manual
4
General information
Warnings and recommendations
It is important to read this manual carefully before proceeding with the installation.
The guarantee automatically expires for negligence, misuse, tampering by unauthorized
personnel.
The Classe 300X Video internal unit must only be installed indoors; it must not be exposed to water
drops or splashes; it must be used only on BTicino 2 wire digital systems.
The Classe 300X video internal unit must be connected to a Wi-Fi network with the following
features:
– IEEE 802.11 b/g/n (2,4 GHz) 13 canali
– Metodo di criptazione ed autenticazione supportati:
– IEEE 802.11 b/g/n (2,4 GHz) 13 channels
– Encrypting and authentication methods supported:
– OPEN WPA-PSK networks
– TKIP WPA2-PSK included
– included AES WEP 64 bits (ASCII 5 figure or hexadecimal 10 figure codes)
– WEP 128 bits (ASCII 13 figure or hexadecimal 26 figure codes)
– WPS authentication (supported for WPA2-PSK)
NOTE: a domestic Wi-Fi with internet access is needed for the connection between the Classe 300X
video internal unit and the smartphone.
To use the service, the Customer must acquire the technical equipment which allows access to the
Internet, on the basis of an agreement made by the Customer himself with an ISP (Internet Service
Provider). BTicino plays no part in this.
The customer must install the DOOR ENTRY APP on his smartphone so that he can use some services
which BTicino supplies as extras to the normal basic functions of the Classe 300X.
The services offered by means of the APP require being able to interact with Classe 300X remotely and
through the Internet.
In these cases the integration and good working between Classe 300X and APP may depend on:
– a) quality of the Wi-Fi signal;
– b) type of access contract to the home internet;
– c) type of data contract on the smartphone.
When one of these 3 elements does not conform with the specifications required for product operation,
BTicino accepts no responsibility for any faults.
The product in fact supports a VoIP streaming system. You must therefore check with your smartphone
data network contract that it does not block it.
We would like to inform you that the service provided by BTicino by means of remote use via the APP
involves the use of data. The cost linked to data usage depends on the type of contract which the
customer has with his ISP (Internet Service Provider) and is solely the customer’s responsibility.
Hello, my name is BTTrick and my job is to help you with the device configuration.
In this manual the standard configurations are simple and well explained, but I want to
teach you the “tricks” to use your new Classe 300X at its best.
Hello, my name is BTTrick and my job is to help you with the device configuration.
In this manual the standard configurations are simple and well explained, but I want to
teach you the “tricks” to use your new Classe 300X at its best.
When you find the symbol , move the mouse over it.
Classe 300X
Installation Manual
5
1. 7” touch screen display (16 : 9)
2. Screen OFF key
3. App:
touch to display the information page where you find a QR code that allows the download of
the DOOR ENTRY APP to interact with your device.
It is possible to disable the information page display.
4. Time and date
5. Wi-Fi Connection
6. Device/APP association and enabled/disabled forwarding of calls
7. Ringtone exclusion
8. Professional Studio (Office) activation
9. Microphone
10. Answering machine activation
11. Quick actions
12. Tactile guides
13. Connection key:
The green LED flashes to indicate an incoming call
The green LED comes on steady to indicate that there is an active call
14. Auto-switching on/Scrolling:
the red LED turns on when the key is pressed
Front view
Quick Actions
10:36
Tuesday, 22 April
Activations
Answering machine Cameras Memo
Settings
Intercom
Private camera
Lock
External intercom
Pager
Download the Door Entry App
9
13
14151612 12
19
20
18
17
4 7 8 1021
11
3
Note: The image* shows the device with all its functions enabled.
In this manual check how to enable them.
* The background and icons shown may differ from those on the device.
5 6
Are there controls that are
used more often than others?
Put them in the main page of
your device in order to have
them always at your disposal

Classe 300X
Installation Manual
6
15. Favorites key:
the red LED turns on when the key is pressed
(Basic configuration = STAIRCASE LIGHT. For a different configuration refer to the physical
configuration table)
16. Door lock release key:
the red LED turns on when the key is pressed
17. Wi-Fi Status:
Red LED flashing = Wi-Fi is active but not connected to a network
LED off = disabled or properly functioning Wi-Fi
Green LED steady = the Classe 300X is exchanging data with the DOOR ENTRY APP (forwarding
of call, auto-switching on)
18. Message status:
Red LED flashing = new unread note/s or message/s in the answering machine
19. Bell exclusion Status:
Red LED on = Call ringtone disabled
20. Functions (only the icons for the configured functions are displayed)
Note: when the DOOR ENTRY APP is connected to the system (e.g. answer a call, display an Entrance
Panel, etc.), no operations can be made, with the exception of the door lock release key and Favorite Key
(configured for the Staircase Light or Door Lock Direct Control functions) that continue to operate.
Are you sure that your Router is
switched on?
If the Wi-Fi LED is green
and steady, another user is
connected at home, wait 1
minute before using your
Classe 300X or wait until the
LED is switched off.

Classe 300X
Installation Manual
7
1. Configurator socket
2. Configurator J1: Remove if the additional power supply is present (clamp 1 and 2)
3. Configurator J2: for correct operation do not remove
4. Line termination ON/OFF micro-switch
5. Mini USB socket for device Firmware update using the MyHomeSuite software
Note: the device must be powered (1-2 or BUS)
6. Loudspeaker
7. Additional power supply clamps (1 - 2)
8. 2 WIRE SCS/BUS connection clamps
9. Clamps ( ) for the connection of an external call to the floor pushbutton
10. Additional ringtone connection clamps (1 - 5M)
Point-to-Point connections are required on the clamps of the additional ringtones
Rear view
78910
6
1
6
4
5
23

Classe 300X
Installation Manual
8
Dimensional data and installation heights
160 – 165 cm
135 – 140 cm
Altezza consigliata salvo diversa normativa vigente
25 mm
194 mm
162 mm
Quick Actions
10:36
Lunedì, 22 Aprile
Activations
Answering machine Cameras Memo
Settings
Intercom
Private camera
Lock
External intercom
Pager
Download the Door Entry App

Classe 300X
Installation Manual
9
Wall-mounted installation
1
2
3
4
Caution: avoid fastening the bracket on uneven or irregular surfaces and excessive screw tightening, in
order to prevent any bracket distortion that may compromise the correct installation of the device. The
device must slide in the appropriate bracket rails with a slight pressure and without straining.

Classe 300X
Installation Manual
10
Installation on the table-top base
5 6 7 8
1
2
3
4
5
6
7
8
BUS
1-2
5 6 7 8
1
2
3
4
5
6
7
8
BUS
1-2
8-way socket:
336982/83/84 Livinglight
349414/15/18 Axolute
Position the microswitch on ON to terminate the line.
Quick Actions
10:36
Lunedì, 22 Aprile
Activations
Answering machine Cameras Memo
Settings
Intercom
Private camera
Lock
External intercom
Pager
Download the Door Entry App

Classe 300X
Installation Manual
11
Check the Wi-Fi signal quality from the device display (see the Installer Manual). If it is low or does
not exist, make sure that:
– the device is not installed near large metal objects or electric devices that can generate
electromagnetic field;
– there are fewer possible walls between the router/access point and the Classe 300X.
Note: it is recommended that the Classe 300X is installed near the Wi-Fi router.
Note: it is possible to install just one Classe 300X for each Wi-Fi (SSID) network.
Note: it is possible to install just one Classe 300X for apartment
1
1Suggested
Always check the Wi-Fi signal on the device display before
final installation of the objects.
The device has been correctly connected to the Wi-Fi
network and configured in the appropriate section.
The Wi-Fi signal is not sufficient to ensure the correct
call transfer and other smartphone features.
Check the Wi-Fi installation requirements
Wi-Fi installation requirements
– Partition masonry walls
– Wood walls
– Plasterboard walls
– Walls in reinforced concrete
– Load-bearing walls
– Stone walls
– Metal walls
Install the router in the same
room with your Classe 300X

Classe 300X
Installation Manual
12
Physical configuration
The device must be configured both physically or in advanced mode, the main differences are
shown in the following table:
Available Functions Physical Configuration Advanced Configuration
FAVORITES KEY
Possibility of assigning various functions
See “Functions of the M units
configurator (Favorites key)”
Staircase Light function
QUICK ACTIONS
Private camera
Lock
External intercom
Pager
Preset:
See “Functions of the M tenths
configurator (Quick actions)”
The user can rename, delete and add
back, only the preset functions
Creating quick actions of all
functions
The user can decide the quick
actions to display in the home
page
FUNCTIONS
Cameras
Intercom
Activations
The use of the functions is only available
through quick actions in the home page
See “Functions of the M tenths
configurator (Quick actions)”
Dedicated icons in the home
page and customisable,
configurable functions
See “Configuration”
The configuration must be performed with the device disconnected from the power supply.
Before using it, wait for the LEDs to stop flashing.
Note: the connection of the configurators to the N - P - M sockets precludes the possibility of using the
advanced configuration.
The physical configuration
is faster and it is suitable
for standard systems, e.g.
apartment blocks; use the
advanced configuration for
more complex systems
Are there controls that are
used more often than others?
Put them in the main page of
your device in order to have
them always at your disposal

Classe 300X
Installation Manual
13
Configurators
J1 J2 N P M
1 2 3 4 5
1. J1 = Remove if the additional power supply is present (clamp 1 – 2)
2. J2 = For correct operation do not remove
3. NN = Device address
4. PP = Address of the EP of which you can open the Door Lock with IU idle, and to which you can
send the auto-on command
5. MM = Mode of operation according to the tables on the following pages
M units = Configuration of the FAVORITES capacitive key
M tenths = Configuration of the QUICK ACTIONS in the Home page
Configurator functions
Note: If the device is configured physically, the configuration MUST NOT BE MODIFIED using the menu.
The additional power supply
is necessary for all the devices
but one (main) on which, when
a call arrives, the video picture
and the ringtone switch
on. The main device always
switches off even without
additional power supply. If
instead the simultaneous
switching on of all devices is
not necessary, define the main
(MASTER) and the secondary
(SLAVE) devices with the
appropriate jumpers

Classe 300X
Installation Manual
14
MM =
0
Staircase Light Control
MM =
1
Direct control of P+1 Door lock
P
+1 MOD=9
P
+1
P
+2 MOD=9
P
+2
P
+1
MOD=5
P
+1
P
+1
23
1 32
346210
1
P
+2
MOD=5
P
+2
P
+2
23
1 32
346210
1
P
+3
MOD=5
P
+3
P
+3
23
1 32
346210
1
P
+3 MOD=9
P
+3
MM =
2
Direct control of P+2 Door lock
P
+1 MOD=9
P
+1
P
+2 MOD=9
P
+2
P
+1
MOD=5
P
+1
P
+1
23
1 32
346210
1
P
+2
MOD=5
P
+2
P
+2
23
1 32
346210
1
P
+3
MOD=5
P
+3
P
+3
23
1 32
346210
1
P
+3 MOD=9
P
+3
MM =
3
Direct control of P+3 Door lock
P
+1 MOD=9
P
+1
P
+2 MOD=9
P
+2
P
+1
MOD=5
P
+1
P
+1
23
1 32
346210
1
P
+2
MOD=5
P
+2
P
+2
23
1 32
346210
1
P
+3
MOD=5
P
+3
P
+3
23
1 32
346210
1
P
+3 MOD=9
P
+3
MM =
4
P+1 direct auto-switching on
P
+1 MOD=9
P
+1
P
23
1 32
346210
1
P
+2 MOD=9
P
+2
23
1 32
346210
1
P
+3 MOD=9
P
+3
23
1 32
346210
1
MM =
5
P+2 direct auto-switching on
P
+1 MOD=9
P
+1
P
23
1 32
346210
1
P
+2 MOD=9
P
+2
23
1 32
346210
1
P
+3 MOD=9
P
+3
23
1 32
346210
1
MM =
6
P+3 direct auto-switching on
P
+1 MOD=9
P
+1
P
23
1 32
346210
1
P
+2 MOD=9
P
+2
23
1 32
346210
1
P
+3 MOD=9
P
+3
23
1 32
346210
1
MM =
7
Paging
MM =
8
Internal intercom
MM =
9
Enabling/disabling Professional Studio (Office)
function
Functions of the M units configurator (Favorites key)
J1 J2 N P M

Classe 300X
Installation Manual
15
P
+1 MOD=9
P
+1
P
+2 MOD=9
P
+2
P
P
+1
MOD=5
P
+1
P
+1
23
1 32
346210
1
P
+2
MOD=5
P
+2
P
+2
23
1 32
346210
1
P
+3
MOD=5
P
+3
P
+3
23
1 32
346210
1
P
+4
MOD=5
P
+4
P
+4
23
1 32
346210
1
1–+ 23 4
P
+3 MOD=9
P
+3
1–+ 23 4
23
1 32
346210
1Activation of the EP (configured with P+1) directly without call or
activation of the actuator item 346200/346210 (configured with P+1 and
MOD=9).
P
+1 MOD=9
P
+1
P
+2 MOD=9
P
+2
P
P
+1
MOD=5
P
+1
P
+1
23
1 32
346210
1
P
+2
MOD=5
P
+2
P
+2
23
1 32
346210
1
P
+3
MOD=5
P
+3
P
+3
23
1 32
346210
1
P
+4
MOD=5
P
+4
P
+4
23
1 32
346210
1
1–+ 23 4
1–+ 23 4
P
+3 MOD=9
P
+3
1–+ 23 4
EP door lock release (configured with P+1), directly without call, or
activation of the actuator item 346200/346210 (configured with P+1 and
MOD=5), or activation of door lock actuators item 346230 (configured
with P+1)
P
+1 MOD=9
P
+1
P
+2 MOD=9
P
+2
P
P
+1
MOD=5
P
+1
P
+1
23
1 32
346210
1
P
+2
MOD=5
P
+2
P
+2
23
1 32
346210
1
P
+3
MOD=5
P
+3
P
+3
23
1 32
346210
1
P
+4
MOD=5
P
+4
P
+4
23
1 32
346210
1
1–+ 23 4
1–+ 23 4
P
+3 MOD=9
P
+3
1–+ 23 4
EP door lock release (configured with P+2), directly without call, or
activation of the actuator item 346200/346210 (configured with P+2 and
MOD=5), or activation of door lock actuators item 346230 (configured
with P+2)
P
+1 MOD=9
P
+1
P
+2 MOD=9
P
+2
P
P
+1
MOD=5
P
+1
P
+1
23
1 32
346210
1
P
+2
MOD=5
P
+2
P
+2
23
1 32
346210
1
P
+3
MOD=5
P
+3
P
+3
23
1 32
346210
1
P
+4
MOD=5
P
+4
P
+4
23
1 32
346210
1
1–+ 23 4
1–+ 23 4
P
+3 MOD=9
P
+3
1–+ 23 4
EP door lock release (configured with P+3), directly without call, or
activation of the actuator item 346200/346210 (configured with P+3 and
MOD=5), or activation of door lock actuators item 346230 (configured
with P+3)
P
+1 MOD=9
P
+1
P
+2 MOD=9
P
+2
P
P
+1
MOD=5
P
+1
P
+1
23
1 32
346210
1
P
+2
MOD=5
P
+2
P
+2
23
1 32
346210
1
P
+3
MOD=5
P
+3
P
+3
23
1 32
346210
1
P
+4
MOD=5
P
+4
P
+4
23
1 32
346210
1
1–+ 23 4
1–+ 23 4
P
+3 MOD=9
P
+3
1–+ 23 4
EP door lock release (configured with P+4), directly without call, or
activation of the actuator item 346200/346210 (configured with P+4 and
MOD=5), or activation of door lock actuators item 346230 (configured
with P+4)
Intercom among apartments in systems with apartment interface item
346850.
Intercom inside the apartment, in systems with apartment interface item
346850, or intercom among apartments in systems without apartment
interface.
Internal intercom. It sends the call to all the handsets with the same
address.
Paging, makes a general intercom. It sends the call to all the handsets of
the system.
Functions of the M tenths configurator (Quick actions)
The MM - (tenths) physical configurator decides which are the 4 QUICK ACTIONS icons that appear
on the HOME PAGE, and can be activated by touching the display.
The possible configurations are shown in the following table
J1 J2 N P M

Classe 300X
Installation Manual
16
MP
10
MP
20
MP
30
Poste externe 1
Lock 1
Lock 2
Myself
Camera 1
Lock 1
Lock 2
Pager
Camera 1
Lock 1
Myself
Intercom 1
P
+1
MOD=9
P
+1
23
1 32
346210
1
P
+1
MOD=9
P
+1
23
1 32
346210
1
N=2
N=1
N=1
N=2
P
+1
MOD=5
P
+1
P
+1
23
1 32
346210
1
P
+1
MOD=5
P
+1
P
+1
23
1 32
346210
1
P
+1
MOD=9
P
+1
23
1 32
346210
1
P
+2
MOD=5
P
+2
P
+2
23
1 32
346210
1
P
+2
MOD=5
P
+2
P
+2
23
1 32
346210
1
P
+1
MOD=5
P
+1
P
+1
23
1 32
346210
1

Classe 300X
Installation Manual
17
MP
40
MP
50
MP
60
Lock 2
Lock 1
Intercom 2
Intercom 3
Lock 2
Lock 1
Intercom 2
Intercom 3
Intercom 2
Intercom 3
Intercom 4
Intercom 5
N=3
N=2
N=1
N=1
N=2
N=3
N=2 N=3
N=4 N=5
N=1
N=3
N=1
N=2
N=2
N=1
N=3
N=1 N=4
N=3 N=5
N=2
N=2
N=1
N=3
N=3
N=1
N=2
N=1 N=4
N=2 N=5
N=3
P
+1
MOD=5
P
+1
P
+1
23
1 32
346210
1
P
+1
MOD=5
P
+1
P
+1
23
1 32
346210
1
N=1 N=3
N=2 N=5
N=4
P
+2
MOD=5
P
+2
P
+2
23
1 32
346210
1
P
+2
MOD=5
P
+2
P
+2
23
1 32
346210
1
N=1 N=3
N=2 N=4
N=5

Classe 300X
Installation Manual
18
MP
70
MP
80
MP
90
Intercom 2
Intercom 3
Intercom 4
Intercom 5
Camera 1
Lock 1
Lock 2
Intercom 1
Lock 1
Lock 2
Lock 3
Lock 4
N=2 N=3
N=4 N=5
N=1
P
+1
MOD=9
P
+1
23
1 32
346210
1
P
+1
MOD=5
P
+1
P
+1
23
1 32
346210
1
N=1 N=4
N=3 N=5
N=2 N=2
N=1
N=1
N=2
P
+2
MOD=5
P
+2
P
+2
23
1 32
346210
1
N=1 N=4
N=2 N=5
N=3
P
+1
MOD=5
P
+1
P
+1
23
1 32
346210
1
P
+3
MOD=5
P
+3
P
+3
23
1 32
346210
1
N=1 N=3
N=2 N=5
N=4
P
+2
MOD=5
P
+2
P
+2
23
1 32
346210
1
P
+4
MOD=5
P
+4
P
+4
23
1 32
346210
1

Classe 300X
Installation Manual
19
First switching on
After the device has been configured physically and connected, it is mandatory to perform the
customisations using the menu.
Wait for the LEDS to stop flashing and then touch the display to switch it on.
1. Touch the icon for the desired language.
2. Touch to continue.
3. Touch the icon for the parameter to set (date or time); the icons to increase or decrease the
value appear.
4. Touch to set it.
5. Touch to continue.
11 201310
md y
11 42
m
Time and date
Languages Next
Back Next
3
4
5
Deutsch
Português
Español
Néerlandais
Français
English
Italiano
1
2

Classe 300X
Installation Manual
20
Now it is possible to display information concerning the configuration of the device.
A. Display the configuration parameters.
B. Display if the device has been set as apartment master or slave.
C. Display if an additional power sully is present.
D. Display the firmware version of the device.
E. Display if the Professional Studio function is active.
F. Display if the Answering machine function is active.
7. Touch to proceed with the device customisation in the Settings section.
6. Touch to end the procedure.
Quick Actions
10:36
Tuesday, 22 April
Download the Door Entry App
Settings
Answering machine Memo
Camera 1
Lock 2
Lock 1
Pager
7
Info
1.0.12
Firmware ver.
Power supply Disabled
Professional studio Enabled
Master/Slave Master
Answering machine Enabled
00
P
20
MN
00
Back
B
A
C
D
E
F
End
6
Other manuals for Classe 300X
5
Table of contents
Other Bticino Telephone manuals

Bticino
Bticino 344612 User manual

Bticino
Bticino 363911 User manual

Bticino
Bticino 323001 User manual

Bticino
Bticino Classe 300X User manual

Bticino
Bticino Classe 300X User manual

Bticino
Bticino Terraneo 335022 User manual

Bticino
Bticino 344682 User manual

Bticino
Bticino 365711 User manual

Bticino
Bticino BTI-366511 User manual