English |7
• Priority
In case the door cannot be opened after several attempts with the E-KEY, the
priority of the door can be increased by this function. Conversely, it might be
advisable in such a case to reduce the priority of doors in a direct vicinity.
• Reorganize
The use of this function is recommended when several users have
been deleted.
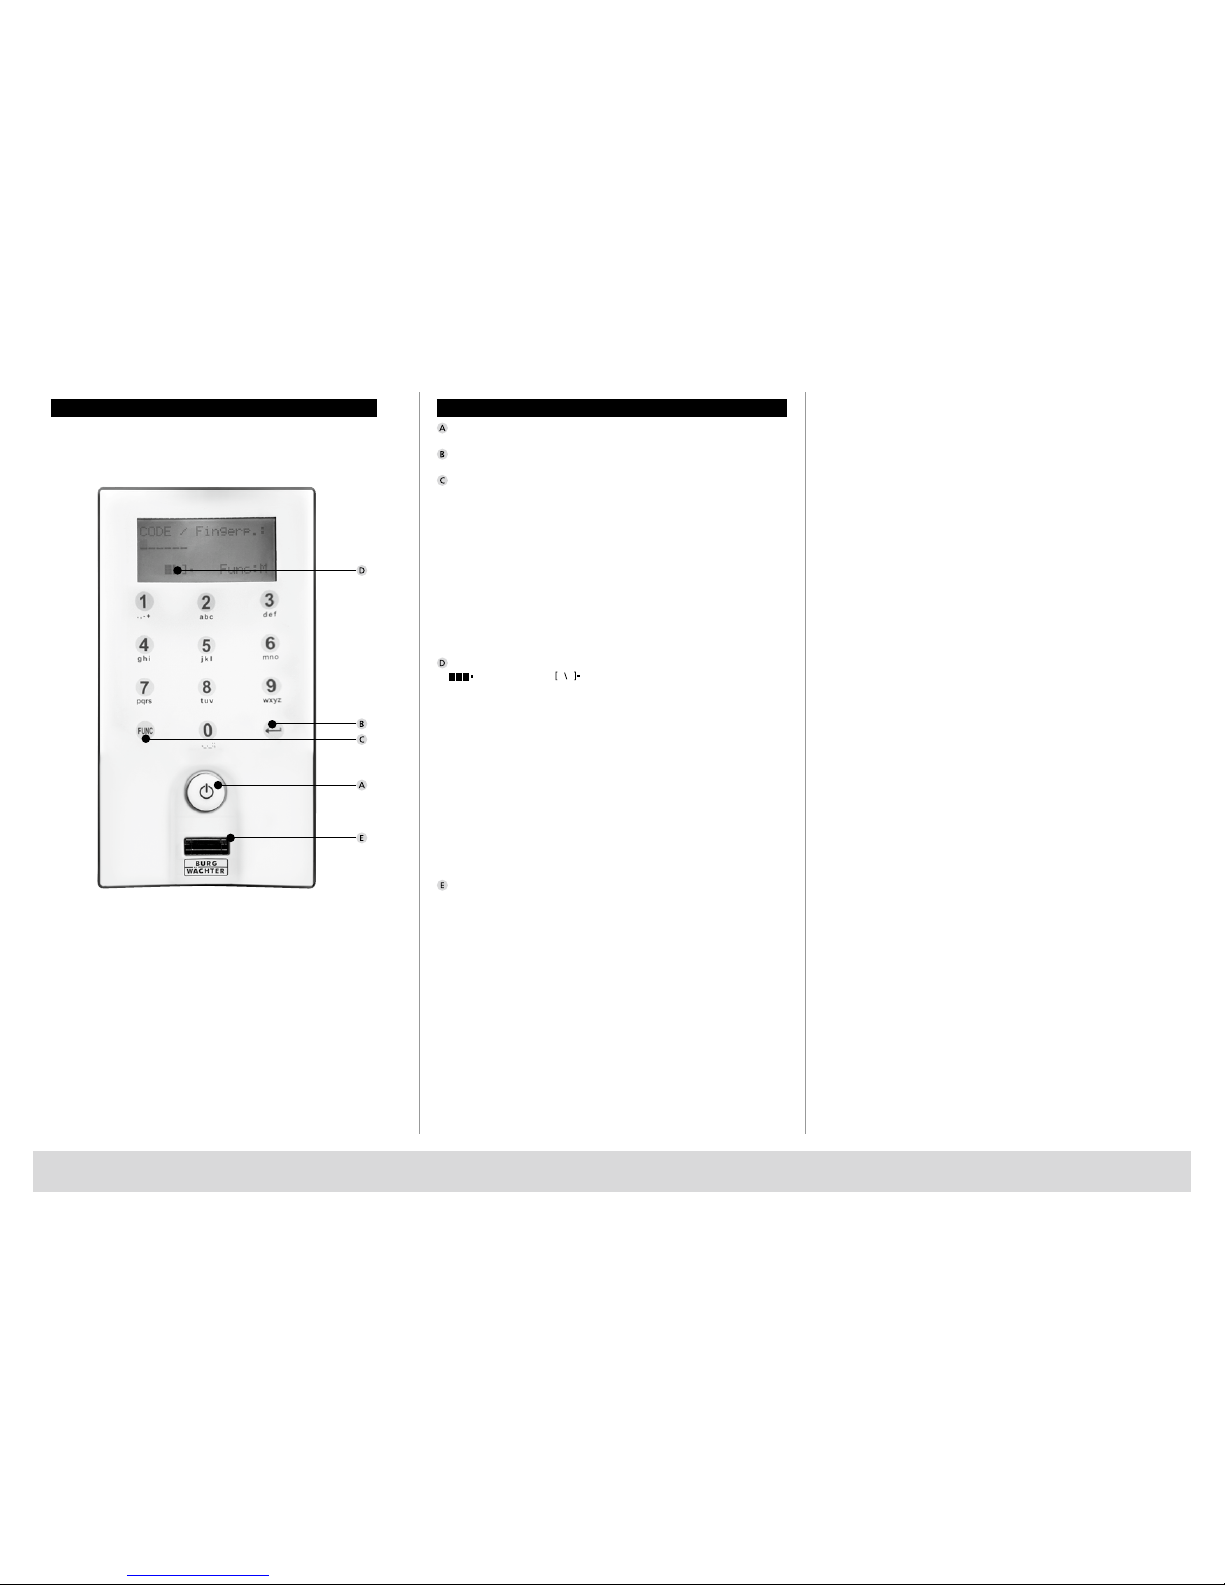
– Activate the keypad using the key
– Then press FUNC, the “Code Change” menu is displayed
– Scroll using the 2 key until reaching the Administrator menu
– Confirm with
– Scroll using the 2 key until reaching the “Admin. TSE Setup” menu item
– Confirm with The “TSE-Setup Reorganise” menu item appears
– Confirm with
– Enter the administrator code in order to acquire the authorisation
for programming “Reorganisation in progress” is displayedt
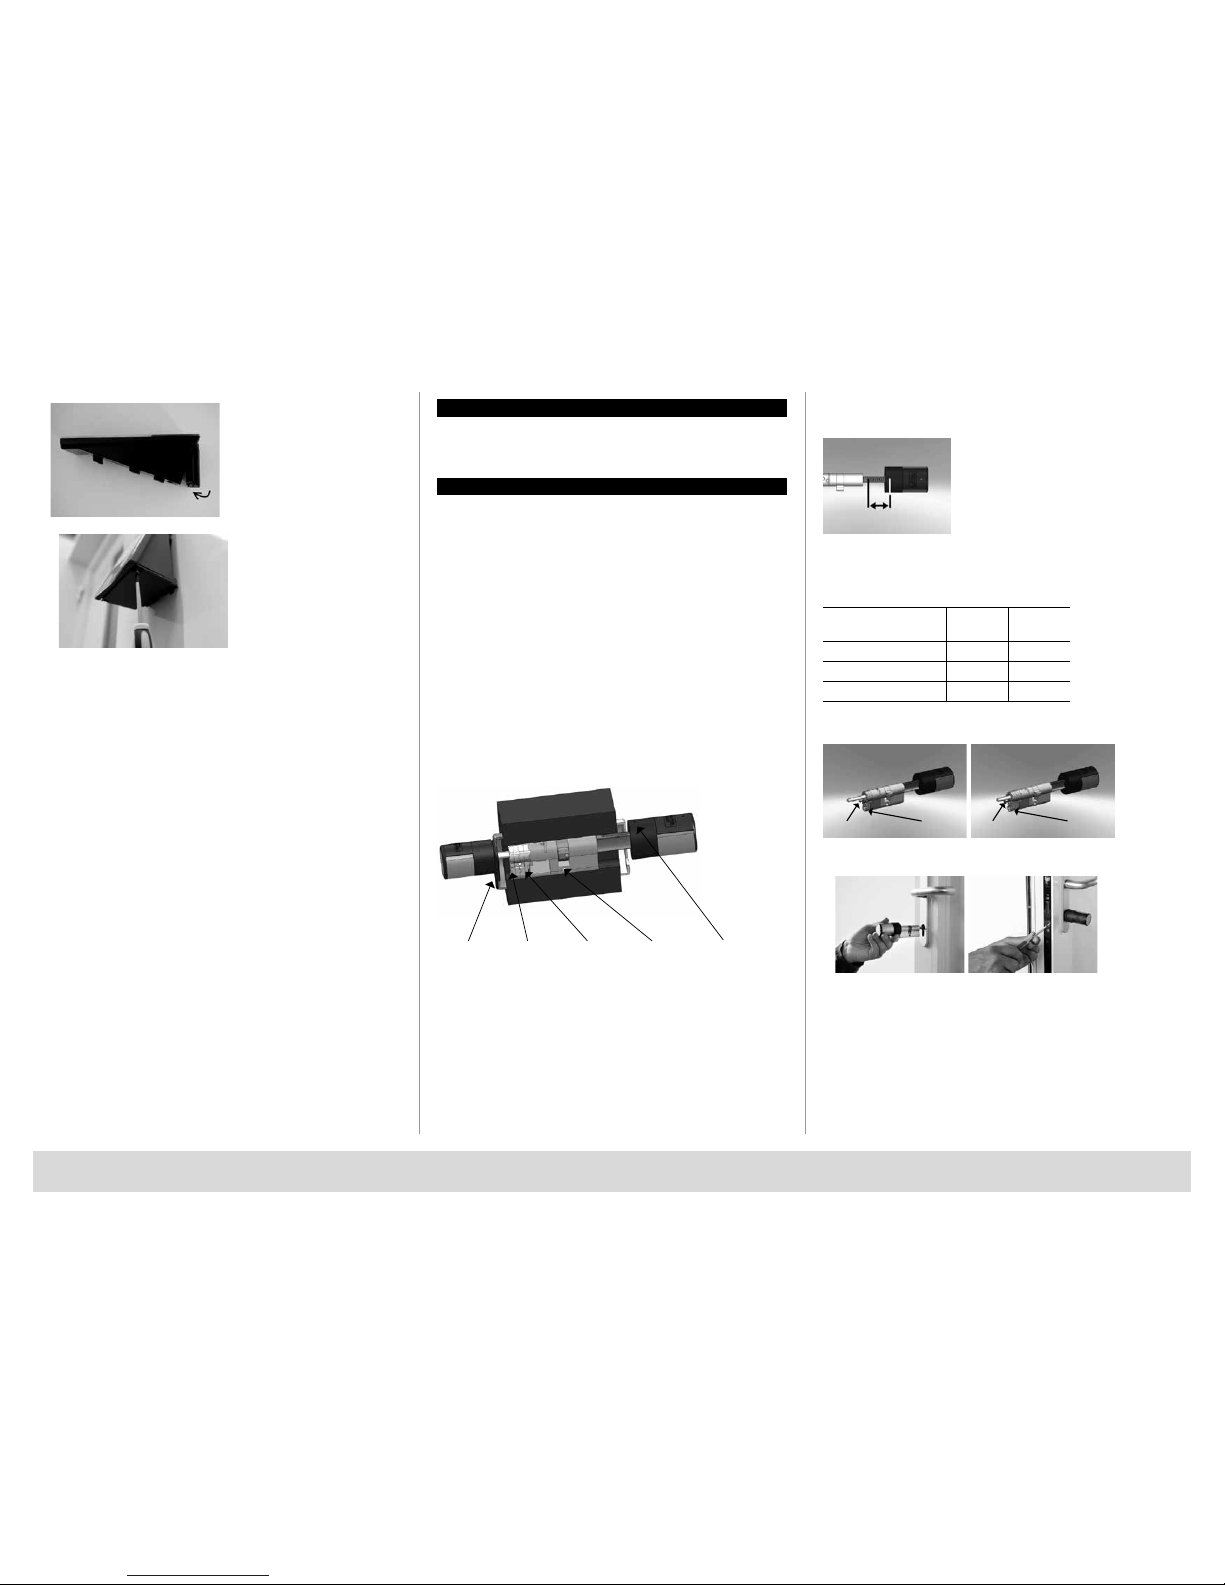
• Register
After a replacement of the cylinder or the keypad, the two units have to be
newly aligned, so that they can resume communication.
Registration of a keypad
– Activate the keypad using the key
– Then press FUNC, the “Code Change” menu is displayed
– Scroll using the 1 or 2 keys until reaching the Administrator menu
– Confirm with
– Now scroll using the 1 or 2 keys until reaching the Admin. TSE Setup menu
– Confirm with
– Now scroll using 1 or 2 keys until reaching the Admin.
TSE Setup Register menu
– Confirm with
– Enter the administrator code in order to acquire the authorisation
for programming
– “Data has been saved” is displayed after a successful registration
Attention: Make sure that no other powered TSE unit is placed within a
direct reach of the device when registering a new keypad of a new cylinder,
as such unit could mistakenly be addressed instead of the intended one.
When in doubt, disconnect such units from power.
• Energy-saving mode
With the setting of the power saving mode, an optimal power consumption
of the units is ensured. The power saving mode can be switched on or off.
If the mode is turned on, no programming of the unit can be performed via
the PC software.
By default upon delivery the power saving mode is turned on,
thus for a possible programming via the PC software it has to be
turned off.
Setting the power saving mode
– Activate the keypad using the key
– Then press FUNC, the “Code Change” menu is displayed
– Scroll using the 1 or 2 keys until reaching the Administrator
menu Confirm with
– Now scroll using the 1 or 2 keys until reaching the Admin. TSE Setup menu
– Confirm with
– Scroll using the button 1 or 2 as long as you reach the menu
„TSE Setup power saving mode“
– Confirm with
– Enter the administrator code for the unit you want to change
– Using the button 1 or 2 you can activate or deactivate the power
saving mode
– Confirm with
– “Data has been saved” is displayed
Submenu FS reset
(Function only active with TSE Fingerprint units)
All stored fingerprints are deleted, however, the corresponding users are
retained. Please select this menu and follow the instructions on the display
in case of repeated errors related to the use of fingerprints.
Menu E-KEY synchronisation
In this menu, the channel of the E-KEY can be adapted to the channel of the
input unit. This function is necessary when the radio channel of the cylinder
is modified, although E-KEYs with the old channel setup are still in use.
– Activate the keypad using the key
– Then press FUNC, the “Code Change” menu is displayed
– Scroll using the 1 or 2 keys until reaching the KEY synchronization menu
– Confirm with
– Enter the administrator code of unit that needs to be synchronised
– “Data has been saved” is displayed after a successful registration
Attention: Make sure that no other powered TSE unit is placed within a
direct reach of the device when registering a new keypad of a new cylinder,
as such unit could mistakenly be addressed instead of the intended one.
When in doubt, disconnect these units from power.
Info menu
The version and serial number of the system are displayed using this
function. For security reasons, the complete serial number is indicated only
in the administrator mode.
– Activate the keypad using the key
– Then press FUNC, the “Code Change” menu is displayed
– Scroll using the 2 key until reaching the Info menu
– Confirm with
– Serial numbers of the keypad (EA) and of the cylinder (AA) are displayed.
Remark: For security reasons, the serial number (AA) of the cylinder is not
completely displayed before the entry of a valid administrator code.
TSE E-KEY user instructions
The E-KEY is intended as radio transmitter for releasing the cylinder. The
E-KEY can be subsequently programmed by means of a keypad or of a
TSE software. The radio range of the E-KEY is up to 3 m. The principle of
its function is similar to that of a car locking system. The cylinder can be
controlled when the button is pressed once.
Functions of E-KEY
Door opening:
– Press 1 x briefly, green LED flashes
– Automatic function (only together with a keypad) Hold the button
pressed for 6 seconds, green LED flashes briefly 2 × in a row
– Permanent mode (only together with optional software) Press the button
2 x, the green LED flashes always 2 x in a row per pressed button
In the automatic mode the door can be opened by pressing the button
on the keypad. For this purpose, the E-KEY must be within the radio range.
This function will be deactivated automatically after a period of 15 minutes.
In the permanent mode, the door is unlocked for a period defined in the
software without the need for entry of a code. When entering an opening
code during this period, the permanent release will be deactivated.
Programming mode:
The programming mode has three purposes:
– Registration of an E-KEY by means of a keypad or of the TSE software
– Synchronization of the radio signal set up in the E-KEY with the
channel set in the lock
– Searching for the E-KEY within the TSE software
Programming E-KEY
When programming the E-KEY for the first time, please press the button
once (green LED flashes) when being required to do so by the keypad or
by the software. When programming the E-KEY later on, please keep the
button pressed for a period of 10 seconds, until the green LED flashes three
times in a row. Then release the button.
Remarks:
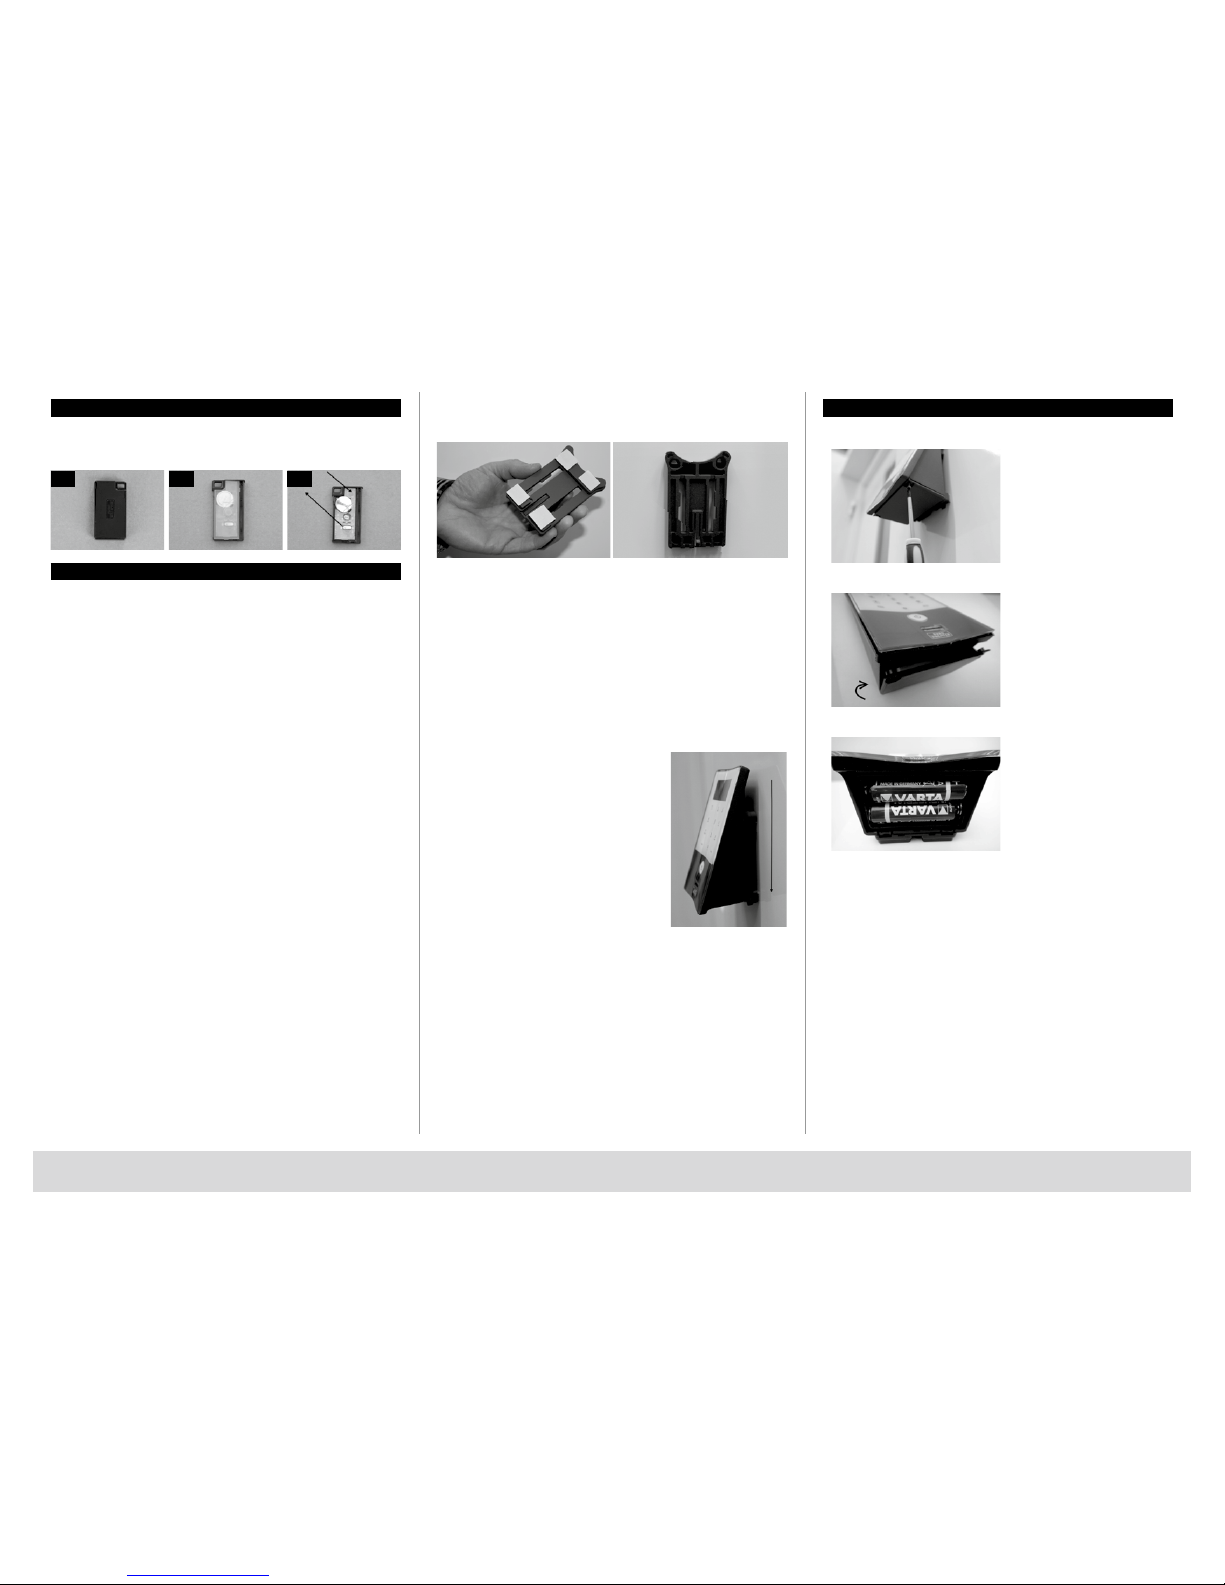
In case the door opens with a delay of 3 to 7 seconds after the button on
the E-KEY is pressed once, and the red LED flashes, the battery (CR2032)
in the E-KEY should be replaced immediately. In case the door opens with
a delay of 3 to 7 seconds after the button on the E-KEY is pressed once,
and the red LED does not flash, the batteries (2x 1.5V LR06 alkaline) in the
cylinder should be replaced. This applies also to the keypad, if installed.