TSE PRIME
TSE E-KEY user instructions
The E-KEY is intended as radio transmitter for releasing the cylinder. The
E-KEY can be subsequently programmed by means of a keypad or of a
TSE software. The radio range of the E-KEY is up to 3m. The principle of
its function is similar to that of a car locking system. The cylinder can be
controlled when the button is pressed once.
Functions of E-KEY
Door opening:
– Press 1xbriefly, green LED flashes
– Automatic function (only together with a keypad) Hold the button
pressed for 6 seconds, green LED flashes briefly 2 x in a row
– Permanent mode (only together with optional software) Press the button
2 x, the green LED flashes always 2xin a row per pressed button
In the automatic mode the door can be opened by pressing the button
on the keypad. For this purpose, the E-KEY must be within the radio range.
This function will be deactivated automatically after a period of 15 minutes.
In the permanent mode, the door is unlocked for a period defined in the
software without the need for entry of a code. When entering an opening
code during this period, the permanent release will be deactivated.
Programming mode:
The programming mode has three purposes:
– Registration of an E-KEY by means of a keypad or of the TSE software
– Synchronization of the radio signal set up in the E-KEY with the
channel set in the lock
– Searching for the E-KEY within the TSE software
Programming E-KEY
When programming the E-KEY for the first time, please press the button
once (green LED flashes) when being required to do so by the keypad or
by the software. When programming the E-KEY later on, please keep the
button pressed for a period of 10 seconds, until the green LED flashes three
times in a row. Then release the button.
Remarks:
In case the door opens with a delay of 3 to 7 seconds after the button on
the E-KEY is pressed once, and the red LED flashes, the battery (CR2032)
in the E-KEY should be replaced immediately. In case the door opens with
a delay of 3 to 7 seconds after the button on the E-KEY is pressed once,
and the red LED does not flash, the batteries (2x 1.5V LR06 alkaline) in the
cylinder should be replaced. This applies also to the keypad, if installed.
E-KEY battery replacement
1Open the housing cover by carefully forcing open the detent lugs.
2Lift the silicon pad and replace the battery.
3
Clap the silicon pad back and close the cover.
1 32
Keypad installation
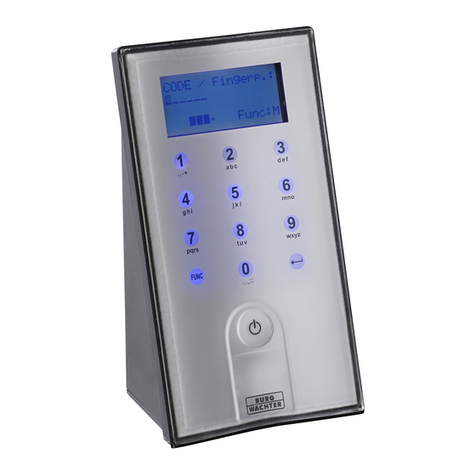
The keypad is only included in TSE Prime PINCODE and TSE Prime
FINGERSCAN sets.
Attention! Please remember that the keypad should not be attached
to the door itself, otherwise it would transmit shocks when the
door is being shut. The membrane affixed to the keypad rear side
should not be sealed with glue and/or any other substance under
any circumstances! Exchange of air must also be possible after the
installation!
– Determine the installation place for the keypad. For that purpose, enter
the opening code (e.g. PIN code, fingerprint,...) at the desired mounting
place and check whether the lock opens.
– Place the keypad correspondingly.
You can then decide whether you want to glue the wall holder directly on
the wall or whether you prefer having it screwed on. The slotted holes in the
wall holder provide for an exact alignment.
If you decide for gluing the wall holder, please be sure to provide for clean
surfaces free from fat, oil and silicon films and any other impurities. Remove
completely the protective film from the included adhesive pads, attach all
the pads on the wall holder and then press the whole firmly to the required
position. When mounting in colder temperatures, please remember that
the full adhesive force cannot be achieved before 72 hours in 20 °C, with
warmth accelerating the process (e.g. in 65 °C, the full adhesive force will be
achieved in one hour).
When gluing the holder plate on the colour sight protection film, the above
described conditions relating to cleanliness of surfaces and firmness of the
adhesive pad should be observed.
To provide for a bubble-free application of the colour sight protection film,
please proceed as follows:
– Pour some water with a couple of drops of dishwashing detergent into a
glass, stir it cautiously free of foam, and then use it to moisture gently the
surface, on which the film is to be applied.
– At an edge, pull off the white protective sheet from 1cm of film and
straighten it out. To change the position, lift this surface carefully and
attach it again as required.
– Then swipe the adhesive film, e.g. with a plastic spatula, out from the
contact surface in the direction of protective sheet still attached.
Attention! Do not use more liquid than absolutely necessary.
– Slide the keypad in from above until the
locking peg of the mounting plate engages
into the keypad housing. In this way, the
keypad is protected against undesired removal.
– Perform a function test of the unit with the
door open. For this purpose, enter repeatedly
a valid opening code (e.g. PIN code,
fingerprint,...).
English | 7


