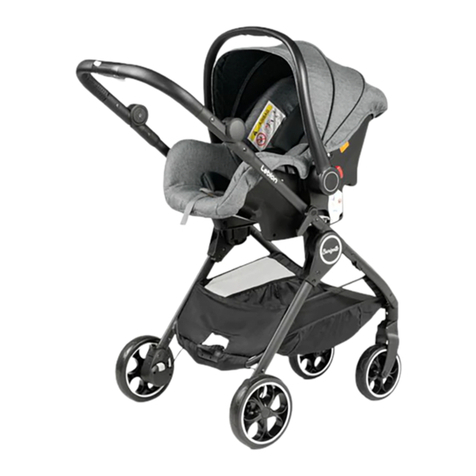
Burigotto leblon User manual

Leblon Carrozzina
IT Istruzioni d’uso
EN Instructions for use
FR Notice d’emploi
DE Gebrauchsanleitung
ES Instrucciones de uso
RU Инструкции по пользованию
HE הוראות שימוש

1
2
1
1
2
1 2
3 4

67
5

8
10
9
11

H
H
H
H
1
2
3
H
12 13
14

15 16
H
A
B
C
D
17 18

19 20
21

8
Grazie per aver acquistato un prodotto
Burigotto.
AVVERTENZE
IMPORTANTE: leggere
attentamente le istruzioni prima
dell'uso e conservarle per futuro
riferimento. La sicurezza del
bambino potrebbe essere messa a
rischio se non si eseguono queste
istruzioni.
• ATTENZIONE: questo prodotto
è adatto per un bambino che
non è in grado di stare seduto
autonomamente.
•
ATTENZIONE: Questo prodotto è
adatto per bambini che non si possono
mettere da soli in posizione seduta,
girarsi e fare leva su mani e ginocchia.
Peso massimo del bambino: 9 Kg.
• ATTENZIONE: usare soltanto su una
superficie stabile, orizzontale, piana
e asciutta.
• ATTENZIONE: Non lasciare che altri
bambini giochino senza sorveglianza
vicino alla navicella.
IT_Italiano • ATTENZIONE: non usare se una
parte della carrozzina è rotta,
strappata o mancante.
• Utilizzare unicamente le parti di
ricambio fornite o consigliate dal
produttore/distributore.
• Non utilizzare l’articolo in vicinanza di
scale o gradini, non utilizzare vicino
fonti di calore, fiamme libere o oggetti
pericolosi che sono alla portata del
bambino.
•
Assemblaggio e preparazione del
prodotto devono essere effettuati da
adulti.
• ATTENZIONE: prima dell’ uso
assicurarsi che tutti i meccanismi
di aggancio siano fissati
correttamente.
• Non inserire le dita nei meccanismi.
• Non utilizzare accessori non approvati
dal costruttore.
• Questo prodotto è progettato per i
bambini dalla nascita fino a un peso di
9 kg.
• ATTENZIONE: Per evitare lesioni o
ferimenti assicurarsi che il bambino sia
a debita distanza durante le operazioni
di apertura e chiusura del prodotto.
WARNING YPSI BASSINET EUROPA

9
• ATTENZIONE: Quando sdraiato,
assicurarsi che la testa del bambino
non sia mai al di sotto rispetto al suo
corpo.
• Prima dell'uso, ispezionare le maniglie
di trasporto e il fondo della culla
per verificare la presenza di segni di
danneggiamento e usura.
• Assicurarsi che il maniglione sia nella
corretta posizione di impiego, prima
di effettuare il sollevamento della
carrozzina.
• Il presente prodotto è progettato per
contenere il neonato quando dorme.
• Non aggiungere o utilizzare
materassini diversi da quello originale.
IN ABBINAMENTO AL TELAIO:
• ATTENZIONE Controllare che
i dispositivi di aggancio della
carrozzina siano correttamente fissati
prima dell'uso.
• ATTENZIONE: Non lasciare mai il
bambino incustodito.
Le immagini riferite ai dettagli tessili potrebbero differire
dalla collezione acquistata.
ISTRUZIONI D’USO
Utilizzo della carrozzina
1 La carrozzina chiusa è facile da trasportare grazie alla
maniglia presente sul prodotto, come illustrato.
2 Per aprire la carrozzina premere il pulsante posto nella
parte posteriore e sollevarla;
3 aprire la parte anteriore dello schienale e la parte
posteriore delle gambe fino a completa apertura.
4 Per completare il montaggio della carrozzina:
abbassare la capottina, premendo il bottone laterale su
entrambi i lati contemporaneamente;
5 togliere il materassino (Fig. a), spingere fino a fine corsa i
ganci fino ad agganciarli ai due blocchi (Fig. b).
6 CAPOTTINA: Sollevare la capottina fino al click. E' dotata di
una spicchio per una maggior copertura.
7 Aprendo la cerniera e sollevando uno spicchio di capottina
abbiamo una finestra per maggior areazione e controllo
del bambino.
8 COPERTINA: Calzare la copertina e abbottonarla
lateralmente ai punti a e b come successivamente illustrato
e spiegato.
9 Agganciare la copertina al velcro laterale della carrozzina
(a)
10 Abbottonare la copertina alla capotta della carrozzina (b).
11 MANIGLIA DI TRASPORTO: il maniglione è dotato della
maniglia di trasporto.
Prima di sollevare la carrozzina assicurarsi che la capottina
sia nella posizione corretta per il trasporto.
12 Per agganciare la carrozzina, posizionarla sul telaio e
premere con entrambi le mani fino al click.
Azionare sempre il freno del telaio prima di agganciare e
sganciare la carrozzina.
IMPORTANTE: Verificare che la carrozzina sia
correttamente agganciata.
13 Per sganciare la carrozzina, sollevare le due leve laterali
poste sullo snodo , prima da un lato e poi dall'altro (freccia
1 e 2) e sganciarla dal telaio (freccia 3).
14 CHIUSURA CARRELLO CON CARROZZINA AGGANCIATA:
- Abbassare completamente la capottina e togliere la
copertina se agganciata.
- Sollevare il materassino (Fig. a)
- Sganciare i due ganci dai blocchi spingendo il gancio verso
l'interno (Fig. b)
10
- Riposizionare il materassino nella carrozzina (Fig. c)
15 Schiacciare la maniglia posta nella parte posteriore e
16 sollevare la carrozzina in avanti per chiuderla
completamente.
17 Spostare verso sinistra il tasto posto davanti sul maniglione
(fig. a) e schiacciare a fondo il tasto centrale posto dietro al
maniglione (fig. b).
18 Chiudere il carrello ruotando in avanti il maniglione (fig. c),
rilasciare i due tasti e abbassare il telaio (fig. d). Il carrello è
chiuso.
19 Per una corretta chiusura, verificare che il gancio laterale sia
innestato.
20 E' possibile trasportarlo comodamente grazie alla maniglia
di trasporto .
INFORMAZIONI DI PRODOTTO
21 Sulla scocca, sotto al tessuto, sono presenti la relative
informazioni del prodotto. Queste informazioni sono
indispensabili in caso di reclamo.
Pulizia del prodotto
• Il vostro prodotto necessita un minimo di manutenzione.
Le operazioni di pulizia e manutenzione devono essere
effettuate solo da adulti.
• Si raccomanda di tenere pulite tutte le parti in movimento
e se occorre, lubrificarle con olio leggero.
• Periodicamente pulire le parti in plastica con un panno
umido, non usare solventi o altri prodotti simili.
• Spazzolare le parti in tessuto per allontanare la polvere.
• Non pulire il dispositivo di assorbimento d’urto in
polistirolo con solventi o altri prodotti simili.
• Proteggere il prodotto da agenti atmosferici, acqua,
pioggia o neve; l’esposizione continua e prolungata al sole
potrebbe causare cambiamenti di colore in molti materiali.
• Conservare il prodotto in un posto asciutto.
• Ricordarsi di arieggiare periodicamente l'interno della Culla.
SERVIZIO ASSISTENZA BURIGOTTO
Se fortuitamente parti del modello vengono perse
o danneggiate, usare solo pezzi di ricambio originali
Burigotto. Per eventuali riparazioni, sostituzioni,
informazioni sui prodotti, vendita di ricambi originali
e accessori, contatta il Servizio Assistenza PegPerego
indicando, il numero seriale del prodotto.
tel. 0039/039/60.88.213
numero verde: 800/147.414
e-mail customerservice@burigotto.com
sito internet www.burigotto.com
Tutti i diritti di proprietà intellettuale relativi ai contenuti di
questo manuale d’istruzione appartengono a PegPerego
S.p.A. e sono tutelati dalle leggi vigenti.

11
Thank you for choosing a Burigotto
product.
WARNING
IMPORTANT: read the
instructions carefully before use
and keep for future reference.
Your child's safety could be at
risk if you do not follow these
instructions.
• WARNING: this product is only
suitable for a child who cannot sit up
unaided.
•
WARNING: this product is suitable
for children who cannot sit unaided,
cannot roll and are unable to raise
themselves on their hands and knees.
Maximum weight of child: 9 Kg.
• WARNING: only use on a firm,
horizontal level and dry surface.
• WARNING: Do not let other children
play unattended near the carry cot.
• WARNING: do not use if any part
of the pram is broken, torn or
missing.
• Only replacement parts supplied or
EN_English recommended by the manufacturer/
distributor shall be used.
• Do not use the item near stairs or
steps, near heat sources, open flames
or dangerous objects that are within
reach of the child.
• Assembly and preparation of the
product must be carried out by
adults.
• WARNING: Before use, make sure
that all the attachment mechanisms
are correctly connected.
• Do not insert fingers into the
mechanisms.
• Do not use accessories which are not
approved by the manufacturer.
• This product is designed for children
from birth up to the weight of 9 kg.
• WARNING: To avoid injury ensure
that the child is kept away when
unfolding and folding this product.
• WARNING: When lying, ensure that the
baby's head is not below the body.
• Before use, inspect handles and the
bottom of the carry cot for checking
presence of signs of damage and wear
• Make sure the handle bar is in the
correct position for use before lifting

12
8 FOOT MUFF: Fit the foot muff and fasten it to the sides at
points a and b as illustrated and explained below.
9 Fasten the foot muff to the Velcro to the side of the pram
(a)
10 Button the foot muff to the pram’s hood (b).
11 CARRY HANDLE: the handlebar comes with a carry handle.
Before lifting the pram, ensure the hood is in the correct
position for carrying.
12 To fasten the pram, position it on the frame and press down
with both hands until it clicks into place.
Always enable the brake on the frame before fastening and
unfastening the pram.
IMPORTANT: Ensure the pram is properly fastened.
13 To release the pram, lift the two side levers on the joints,
first on one side and then on the other (arrows 1 and 2),
and release it from the frame (arrow 3).
14 CLOSING THE CHASSIS WITH THE PRAM ATTACHED:
- Lower the hood completely and remove the foot muff (if
attached)
- Lift the mattress (Fig. a)
- Release the two hooks from the blocks by pushing the
hooks inwards (Fig. b)
- Reposition the mattress in the pram (Fig. c)
15 Press the handle at the far end and
16 fold the pram forwards to close it completely.
17 Move the lever on the front of the handlebar to the left
(Fig. A) and fully press the central key on the rear of the
handlebar (Fig. b).
18 Close the chassis by rotating the handlebar forwards (Fig.
c), releasing the two keys and lowering the frame (Fig. d).
The chassis is now closed.
19 For the chassis to be closed properly, the side hook must
be engaged.
20 It may be carried with ease using the handy carry handle.
PRODUCT INFORMATION
21 Information about the product may be found on the body,
under the fabric. This information is essential in the event
of a claim.
This information is essential in the event of a complaint.
the pram.
• This product is designed to hold a
sleeping baby.
• Do not add or use mattresses
different from the original one.
COMBINED WITH CHASSIS:
• This product is compatible with
the following original PegPerego
products: Ypsi Chassis.
• WARNING: never leave the child
unattended.
The images referring to the textile details may
differ from the collection purchased.
INSTRUCTIONS FOR USE
Using the pram
1 When closed, the pram is easy to carry thanks to the mesh
handle present on the product, as illustrated.
2 To open the pram, press the button at the rear and lift the
pram up;
3 Push the backrest back until the pram is fully open.
4 To finish assembling the pram:
lower the hood, pressing the two side buttons at the same
time;
5 Remove the mattress (Fig. a) and push the hooks all the
way until they fasten to the two blocks (Fig. b).
6 HOOD: Lift the hood until it clicks into place. It comes
with a further section that can be drawn out for more
protection.
7 Open the zip and raise a section of the hood to reveal a
mesh insert ensuring greater ventilation for your child and
enabling you to keep a better eye on your baby.

13
Merci d’avoir choisi un produit Burigotto.
AVERTISSEMENTS
_ IMPORTANT : lire les instructions
suivantes attentivement avant
utilisation et les conserver pour les
besoins ultérieurs de référence. La
sécurité de l’enfant pourrait être
menacée si ces instructions ne sont
pas suivies.
• AVERTISSEMENT : cet article convient
pour un enfant qui ne sait pas
s'asseoir seul.
• AVERTISSEMENT : Ce produit est
adapté pour les enfants qui ne
peuvent pas s’asseoir, se tourner et
s’appuyer sur les mains et les genoux
seuls. Poids maximal de l’enfant : 9 kg.
• AVERTISSEMENT : ne poser que
sur une surface plane, horizontale,
ferme et sèche.
• AVERTISSEMENT : Ne pas laisser
d'autres enfants jouer sans
surveillance à proximité de la nacelle.
• AVERTISSEMENT : ne pas utiliser
si l'un des éléments du landau est
cassé, déchiré ou manquant.
FR_Français
PRODUCT CLEANING
• This product requires a small amount of maintenance.
Cleaning and maintenance must only be carried out by
adults.
• Keep all moving parts clean and if necessary lubricate
them with light oil.
• Clean the plastic parts periodically with a damp cloth. Do
not use solvents or similar substances.
• Brush the fabric parts to remove dust.
• Do not clean the polystyrene shock absorbing device with
solvents or other similar products.
• Protect the product from atmospheric agents: humidity,
rain or snow. Extended exposure to sunshine can cause
colour changes in many materials.
• Store the product in a dry environment.
• Remember to regularly ventilate the interior of the
carrycot.
BURIGOTTO AFTER-SALES SERVICE
If any parts of the item get lost or damaged, only
use genuine Burigotto spare parts. For any repairs,
replacements, information on the products and sales
of genuine spare parts and accessories, contact the
PegPerego Assistance Service and state the serial number
of the product.
tel. 0039/039/60.88.213
website www.burigotto.com
All intellectual property rights on the contents of this
manual are property of PegPerego S.p.A. and are protected
by the laws in force.

14
• N’utiliser que les pièces de rechange
fournies ou conseillées par le
fabricant/distributeur.
•
Ne pas utiliser l’article à proximité
d’escaliers ou de marches ; ne pas l’utiliser
à proximité de sources de chaleur, de
flammes nues ou d’objets dangereux se
trouvant à la portée de l’enfant.
• Le montage et la préparation du
produit doivent être effectués par
des adultes.
•
AVERTISSEMENT :
Avant
l’utilisation, s’assurer que tous les
mécanismes de fixation soient
correctement enclenchés.
• Ne pas mettre les doigts dans les
mécanismes.
• Ne pas utiliser d'accessoires non
approuvés par le fabricant.
• Ce produit est conçu pour les enfants de
la naissance jusqu'à un poids de 9 kg.
•
AVERTISSEMENT : Pour éviter toute
blessure, maintenir l’enfant à l’écart lors
du dépliage et du pliage du produit.
• AVERTISSEMENT : Quand l'enfant est
couché, s'assurer que sa tête ne soit
jamais plus basse que son corps.
• Avant d'utiliser le produit, contrôler
les poignées de transport et le fond
du berceau pour vérifier la présence
de dommages et d'usure.
• S'assurer que l'anse est dans la
bonne position d'utilisation, avant de
soulever Ypsi Bassinet.
• Ce produit est conçu pour contenir
le nouveau-né quand il dort.
• Ne pas ajouter ou utiliser des matelas
différents que l'original.
ASSOCIÉ AU CHÂSSIS :
• AVERTISSEMENT : Contrôler que les
dispositifs d’accrochage du landau
soient correctement fixés avant
utilisation.
• AVERTISSEMENT : Ne jamais laisser
un enfant sans surveillance.
Les images relatives aux détails textiles pourraient
différer de la collection achetée.
MODE D’EMPLOI
Utilisation du landau
1 Le landau plié est facile à transporter grâce à la poignée
présente sur le produit, comme cela est montré sur la figure.
2 Pour déplier le landau, appuyer sur le bouton situé sur la
partie arrière et le soulever.
3 Ouvrir la partie avant du dossier et la partie arrière des
jambes jusqu’à ce que le landau soit entièrement déplié.
4 Pour compléter le montage du landau:
baisser la capote, en appuyant simultanément sur le
bouton latéral de chaque côté.

15
5 Enlever le matelas (Fig. a), pousser les crochets à fond
jusqu’à ce qu’ils s’accrochent aux deux blocs (Fig. b).
6 CAPOTE: soulever la capote jusqu’au déclic. Elle est munie
d’un pan pour offrir une plus grande couverture.
7 En ouvrant la fermeture éclair et en soulevant un pan de
la capote, on trouve une fenêtre pour une plus grande
aération et pour mieux surveiller l’enfant.
8 TABLIER: enfiler le tablier et le boutonner sur les côtés aux
points a e b comme cela est montré et expliqué plus bas.
9 Fixer le tablier au velcro latéral du landau (a).
10 Boutonner le tablier sur la capote du landau (b).
11 POIGNÉE DE TRANSPORT: l’anse est munie d’une poignée
de transport.
Avant de soulever le landau, s’assurer que la capote soit
dans la position correcte pour le transport.
12 Pour fixer le landau, le positionner sur le châssis et appuyer
des deux mains jusqu’au déclic.
Toujours actionner le frein du châssis avant de fixer et de
décrocher le landau.
IMPORTANT: vérifier que le landau soit correctement fixé.
13 Pour décrocher le landau, soulever les deux leviers latéraux
situés sur l’articulation, d’abord d’un côté puis de l’autre
(flèche 1 et 2) et le décrocher du châssis (flèche 3).
14 PLIAGE DU CHÂSSIS AVEC LE LANDAU FIXÉ:
- Baisser complètement la capote et ôter le tablier s’il est
accroché.
- Soulever le matelas (Fig. a)
- Décrocher les deux crochets des blocs en poussant le
crochet vers l’intérieur (Fig. b)
- Remettre le matelas dans le landau (Fig. c)
15 Écraser la poignée située dans la partie arrière et
16 Soulever le landau vers l’avant pour le plier entièrement.
17 Déplacer vers la gauche le bouton situé à l’avant sur
l’anse (fig. A) et appuyer à fond sur le bouton central situé
derrière l’anse (fig. b).
18 Plier le châssis en faisant basculer l’anse vers l’avant (fig. c),
relâcher les deux boutons et baisser le châssis (fig. d). Le
châssis est plié.
19 Pour un pliage correct, vérifier que le crochet latéral soit
enclenché.
20 Il est possible de le transporter commodément grâce à la
poignée de transport.
INFORMATIONS SUR LE PRODUIT
21 Les informations relatives au produit se trouvent sur la
coque, sous le tissu.
Ces informations sont essentielles en cas de plainte.
Nettoyage du produit
• Ce produit requiert un entretien minimum. Les opérations
de nettoyage et d’entretien doivent être effectuées
uniquement par des adultes.
• Il est recommandé de nettoyer régulièrement les parties
mobiles et, si nécessaire, de les lubrifier avec de l’huile légère.
• Nettoyer périodiquement les parties en plastique avec un linge
humide ; ne pas utiliser de solvants ou tout produit similaire.
• Épousseter les éléments en tissu pour chasser la poussière.
• Ne pas nettoyer le dispositif d’absorption des chocs en
polystyrène avec des solvants ou autres produits similaires.
• Protéger le produit des agents atmosphériques (eau, pluie
ou neige) ; une exposition continue et prolongée au soleil
peut provoquer la décoloration de nombreux matériaux.
• Conserver le produit dans un endroit sec.
• Ne pas oublier d’aérer régulièrement l’intérieur de la nacelle.
SERVICE D’ASSISTANCE BURIGOTTO
En cas de perte de pièces ou de rupture de l'une d'elles,
utiliser exclusivement des pièces de rechange originales
Burigotto. Pour toute réparation, remplacement,
informations sur les produits, vente de pièces détachées
d’origine et accessoires, contactez le service après-vente
PegPerego en indiquant, le numéro de série du produit.
tél. 0039/039/60.88.213
Numéro vert pour le SAV en France: 0 800 913 540
e-mail customerser[email protected]
site Internet www.burigotto.com
Tous les droits de propriété intellectuelle relatifs au
contenu de ce manuel appartiennent à PegPerego SpA et
sont protégés par la loi.

16
Vielen Dank, dass Sie sich für ein
Burigotto Produkt entschieden haben.
WARNUNG
WICHTIG: Anleitungen für spätere
Rückfragen aufbewahren. Die
Sicherheit des Kindes könnte
gefährdet werden, sollten diese
Anweisungen ni cht beachtet
werden.
• WARNUNG: Dieses Produkt ist nur
für ein Kind geeignet, das sich noch
nicht selbst aufsetzen kann.
• WARNUNG: Dieses Produkt ist nur
Kinder geeignet, die sich noch nicht
selbst aufsetzen, umdrehen und auf
Hände und Knie stützen können.
Höchstgewicht des Kindes: 9 kg.
• WARNUNG: Nur auf einem
festen, waagerechten, trockenem
Untergrund verwenden.
• WARNUNG: Lassen Sie andere Kinder
nicht unbeaufsichtigt in der Nähe
der Tragetasche spielen.
• WARNUNG: Nicht verwenden,
wenn ein Teil der Kindersitzes
beschädigt oder abgerissen ist
DE_Deutsch oder fehlt.
• Verwenden Sie ausschließlich vom
Hersteller/Händler gelieferte oder
empfohlene Ersatzteile.
• Verwenden Sie den Artikel nicht in der
Nähe von Treppen oder Stufen oder in
der Nähe von Wärmequellen, offenem
Feuer und gefährlichen Gegenständen
in der Reichweite des Kindes.
• Die Montage und Vorbereitung
des Produkts muss durch einen
Erwachsenen erfolgen.
• WARNUNG: Vergewissern Sie
sich vor dem Gebrauch, dass
alle Befestigungsmechanismen
korrekt angebracht sind.
• Nicht mit den Fingern in die
Mechanismen fassen.
• Verwenden Sie keine nicht
vom Hersteller genehmigten
Zubehörteile.
• Dieses Produkt ist für Kinder ab der
Geburt bis zu einem Gewicht von 9
kg ausgelegt.
• WARNUNG: Vergewissern Sie sich,
dass das Kind beim Aufklappen
und Zusammenklappen des
Wagens außer Reichweite ist, um

17
Verletzungen zu vermeiden.
• WARNUNG: Wenn das Kind im
Wagen liegt, sollte der Kopf nie
niedriger als der Körper liegen.
• Vor Gebrauch Tragebügel und
Boden der Kinderwagenwanne
auf Beschädigungen oder
Gebrauchsspuren überprüfen.
• Vergewissern Sie sich, dass der
Tragebügel sich in der korrekten
Position befindet, bevor die
Kindersitzes angehoben wird.
• Dieses Produkt wurde als
Schlafgelegenheit für Neugeborene
konzipiert.
• Keine Matratzen außer der originalen
verwenden oder hinzufügen.
IN VERBINDUNG MIT DEM
GESTELL:
• WARNUNG: Kontrollieren Sie vor dem
Gebrauch, dass die Anbringungen
der Kindersitzes korrekt befestigt
sind.
• WARNUNG: Lassen Sie das Kind
nie unbeaufsichtigt.
Die Abdeckung kann je nach gewählter Kollektion
unterschiedliche Details aufweisen.
GEBRAUCHSANLEITUNG
Nutzung des Kindersitzes
1 Die zusammengeklappte Kinderwagenwanne lässt sich wie
in der Abbildung gezeigt, über den Tragegriff ganz einfach
transportieren.
2 Zum Aufklappen der Kinderwagenwanne drücken Sie den
Knopf auf der Rückseite und klappen Sie sie auf.
3 Klappen Sie den hinteren Teil mit der Rückenlehne
und den vorderen Teil bis zum vollständigen Öffnen
auseinander.
4 So wird die Kinderwagenwarne vollständig montiert:
Verdeck vollständig einklappen, indem die seitlichen
Knöpfe gleichzeitig gedrückt werden.
5 Matratze herausnehmen (Abb. a) und die Haken durch
Drücken an den zwei Blöcken befestigen (Abb. b).
6 VERDECK: Verdeck anheben, bis es mit einem hörbaren
„Klick“ einrastet. Das Verdeck hat ein weiteres Teilstück,
wodurch es noch größer ausgeklappt werden kann.
7 Wird der Reißverschluss geöffnet und ein Teilstück des
Verdecks aufgeklappt, entsteht ein Sichtfenster für eine
bessere Belüftung und damit man das Kind immer im Blick
behält.
8 ABDECKUNG: Abdeckung aufsetzen und seitlich an den
Punkten A und B wie in der Abbildung gezeigt befestigen.
9 Abdeckung am seitlichen Klettverschluss der
Kinderwagenwanne befestigen (a).
10 Abdeckung am Verdeck der Kinderwagenwanne
festknöpfen (b).
11 TRAGEGRIFF: Am Griff kann die Kinderwagenwanne
getragen werden.
Bevor die Kinderwagenwanne hochgehoben wird,
sicherstellen, dass das Verdeck für den Transport richtig
positioniert ist.
12 Um die Kinderwagenwanne anzubringen, diese auf dem
Gestell positionieren und mit beiden Händen bis zum
Klicken andrücken.
Stets die Bremse des Gestells betätigen, bevor die
Kinderwagenwanne angebracht oder gelöst wird.

18
WARNUNG: Vergewissern Sie sich, dass die
Kinderwagenwanne korrekt befestigt ist.
13 Zum Hochnehmen der Kinderwagenwanne die beiden
seitlichen Hebel nacheinander hochziehen (Pfeil 1 und 2)
und die Kinderwagenwanne dann vom Gestell abnehmen
(Pfeil 3).
14 ZUSAMMENKLAPPEN DES GESTELLS MIT MONTIERTER
KINDERWAGENWANNE:
- Verdeck vollständig einklappen und Abdeckung falls
vorhanden abnehmen.
- Matratze herausnehmen (Abb. a)
- Die zwei Befestigungen von den Blöcken lösen, indem der
Haken nach innen gedrückt wird (Abb. b)
- Matratze wieder in die Kinderwagenwanne legen (Abb. c).
15 Hebel auf der Rückseite drücken und
16 Wanne zum vollständigen Schließen nach vorne drücken.
17 Den Schieber oben am Lenkgriff nach links schieben (Abb.
a) und die Taste unter dem Lenkgriff drücken (Abb. b).
18 Wagengestell zusammenklappen, indem der Lenkgriff nach
vorne gedreht wird (Abb. c), dann beide Tasten loslassen
und das Gestell einklappen (Abb. d). Der Kinderwagen ist
jetzt fertig zusammengeklappt.
19 Für einen ordnungsgemäßen Verschluss überprüfen, ob
der seitliche Haken richtig befestigt ist.
20 Über den seitlichen Griff lässt sich der Kinderwagen ganz
einfach transportieren.
PRODUKTINFORMATIONEN
21 Auf der Hartschale unter dem Bezug der
Kinderwagenwanne befinden sich Informationen
zum Produkt. Diese Informationen werden bei einer
Reklamation benötigt.
Reinigung
• Ihr Produkt braucht nur geringe Wartung. Reinigung und
Wartung dürfen nur von Erwachsenen durchgeführt
werden.
• Alle beweglichen Teile unbedingt sauber halten und bei
Bedarf mit einem leichten Öl schmieren.
• Regelmäßig die Kunststoffteile mit einem feuchten Tuch
reinigen, keine Lösungsmittel oder ähnliche Produkte
verwenden.
• Stoffteile mit einer Bürste von Staub befreien.
• Den Stoßdämpfer aus Styropor nie mit Lösungsmitteln
oder anderen ähnlichen Produkten reinigen.
• Das Produkt vor Witterung schützen, vor Wasser, Regen
oder Schnee; wird das Produkt wiederholt und über
längere Zeit der Sonne ausgesetzt, können die Farben
vieler Materialien verblassen.
• Das Produkt trocken aufbewahren.
• Denken Sie daran, das Innere der Babyschale regelmäßig
zu lüften.
KUNDENDIENST BURIGOTTO
Sollten Teile des Modells verloren gehen oder beschädigt
werden, ersetzen Sie diese bitte ausschließlich durch
originale Burigotto-Teile. Für Reparaturen, Ersatzteile,
Produktinformationen und Anbieter von originalen
Ersatzteilen und Zubehör wenden Sie sich bitte an
den PegPerego Kundendienst. Halten Sie hierfür, die
Seriennummer des betreffenden Produktes bereit.
Tel. 0039/039/60.88.213
E-Mail customerservice@burigotto.com
Webseite www.burigotto.com
Alle Rechte geistigen Eigentums bezüglich der Inhalte
dieser Bedienungsanleitung gehören PegPerego S.p.A. und
werden von den geltenden Bestimmungen geschützt.

19
ES_Español
Le agradecemos haber elegido un
producto Burigotto.
ADVERTENCIA
IMPORTANTE: leer las intrucciones
cuidadosamente antes del uso
y mantenerlas para futuras
consultas. La seguridad del niño
podría ponerse en riesgo en
caso de incumplimiento de estas
instrucciones.
• ADVERTENCIA: este producto
solamente es apropiado para niños
que no pueden sentarse por sí solos.
• ADVERTENCIA: Este producto es
apropiado para niños que no pueden
sentarse, girarse ni apoyarse sobre
brazos y rodillas. Peso máximo del
niño: 9 Kg.
• ADVERTENCIA: utilizar solamente
sobre un superficie firme,
horizontal, nivelada y seca.
• ADVERTENCIA: No dejar a otros niños
jugar desatendidos cerca del capazo.
• ADVERTENCIA: no utilice este
producto si falta alguna parte de
paseo, o si alguna parte está rota o
rasgada.
• Utilice exclusivamente los repuestos
provistos o aconsejados por el
fabricante/distribuidor.
• No utilice este artículo cerca de
escaleras o escalones, fuentes de calor,
llamas u objetos peligrosos al alcance
del niño.
• Las operaciones de ensamblaje y
preparación del producto deben ser
efectuadas solo por adultos.
• ADVERTENCIA: Antes del uso,
asegúrese de que todos los
mecanismos de enganche estén
correctamente acoplados.
• No introduzca los dedos en estos
mecanismos.
• No utilice accesorios no aprobados
por el fabricante.
• Este producto ha sido diseñado para
niños desde el nacimiento hasta los 9 kg.
• ADVERTENCIA: Para evitar lesiones,
asegúrese de que el niño se mantiene
alejado durante el desplegado y el
plegado de este producto.
• ADVERTENCIA: Cuando se usa
acostado, asegúrese de que la cabeza
del bebé nunca esté en un nivel por

20
debajo de su cuerpo.
• Antes de su uso, inspeccione las asas
de transporte y la parte inferior de la
cuna para verificar si hay signos de
daños y desgaste.
• Asegúrese de que el asa esté en la
posición de uso correcta antes de
levantar paseo.
• Este producto ha sido diseñado para
contener al recién nacido mientras
duerme.
• No agregue ni use colchones
diferentes del original.
EN COMBINACIÓN CON EL CHASIS:
• ADVERTENCIA: Antes del uso,
Comprobar que los dispositivos
de sujeción de paseo están
correctamente engranados antes del
uso.
• ADVERTENCIA: No dejar nunca al niño
desatendido.
Las imágenes referidas a los detalles textiles
podrían diferir de la colección comprada.
INSTRUCCIONES DE USO
Uso de la silla de paseo
1 El capazo cerrado es fácil de transportar gracias al asa
presente en el producto, como se muestra en la imagen.
2 Para abrir el capazo, pulse el botón ubicado en la parte
posterior y levántelo.
3 Abra la parte delantera del respaldo y la parte trasera de las
piernas hasta que la apertura sea completa.
4 Para completar el montaje del capazo:
baje la capota pulsando el botón lateral en ambos lados al
mismo tiempo.
5 Retire el colchón (Fig. a) y empuje los ganchos hasta el
tope hasta que se enganchen en los dos bloques (Fig. b).
6 CAPOTA: Levante la capota hasta oír un clic. Está equipada
con una sección extra para una mayor cobertura.
7 Al abrir la cremallera y levantar una sección de la capota,
tenemos una ventana para una mayor ventilación y control
del niño.
8 CUBREPIÉS: Introduzca el cubrepiés y abotónelo
lateralmente en los puntos a y b, como se ilustra y explica a
continuación.
9 Enganche el cubrepiés al velcro lateral del capazo (a).
10 Abotone el cubrepiés a la capota del capazo (b).
11 ASA DE TRANSPORTE: el producto está equipado con un
asa de transporte.
Antes de levantar el capazo, asegúrese de que la capota
esté en la posición correcta para el transporte.
12 Para enganchar el capazo, colóquelo sobre el chasis y
empuje con ambas manos hasta oír el clic.
Accione siempre el freno del chasis antes de enganchar o
desenganchar el capazo.
ADVERTENCIA: Compruebe que el capazo esté
correctamente enganchado.
13 Para desenganchar el capazo, levante las dos palancas
laterales situadas en la articulación, primero de un lado y
luego del otro (flechas 1 y 2) y desenganche el capazo del
chasis (flecha 3).
14 CIERRE DEL CHASIS CON EL CAPAZO ENGANCHADO:
- Baje completamente la capota y retire el cubrepiés si está
enganchado.
- Levante el colchón (Fig. a).
- Desenganche los dos ganchos de los bloques empujando
el gancho hacia adentro (Fig. b).
- Vuelva a colocar el colchón en el capazo (Fig. c).
15 Apriete la manija ubicada en la parte posterior.
Other manuals for leblon
2
Table of contents
Languages:
Other Burigotto Stroller manuals

Burigotto
Burigotto PRIMUS K User manual

Burigotto
Burigotto OOP User manual

Burigotto
Burigotto IT User manual

Burigotto
Burigotto UP! IXCA5111 User manual

Burigotto
Burigotto TRAVEL SOUL User manual

Burigotto
Burigotto Ecco IXCA2057 User manual

Burigotto
Burigotto leblon User manual

Burigotto
Burigotto SPLASH XBA3043 User manual

Burigotto
Burigotto copa User manual

Burigotto
Burigotto COSY IXCA5102 Quick setup guide