- 10 -
parapioggia (se presente) in
ambienti chiusi e controllare
sempre che il bambino non sia
accaldato; non collocare mai vicino
a fonti di calore e fare attenzione
alle sigarette. Il parapioggia non
deve essere utilizzato su un
passeggino in assenza di capotta
o parasole in grado di accoglierlo.
Usare la capottina parapioggia solo
sotto la supervisione di un adulto.
Assicurarsi che il parapioggia
non interferisca con nessun
meccanismo in movimento del
carrello o passeggino; togliere
sempre il parapioggia prima
di chiudere il vostro carrello o
passeggino.
Leblon Chassis + seggiolino auto:
è omologato per bambini dalla
nascita, fino a 13 kg di peso.
Usato in combinazione con il
seggiolino auto, questo articolo non
sostituisce la carrozzina o lettino.
Se il bambino necessita di dormire,
dovrebbe essere posto sdraiato in
una carrozzina, culla o lettino.
ATTENZIONE: quando si utilizza il
seggiolino per neonati all’interno
dell'autovettura, assicurarsi che gli
adattatori non siano agganciati al
seggiolino per neonati. Rimuovere
gli adattatori dal seggiolino
per neonati prima di installarlo
nell’autovettura.
Leblon Chassis + Bassinet:
è omologato per bambini dalla
nascita, fino a 9 kg di peso.
Usato in combinazione con la
carrozzina : questo prodotto è
omologato per bambini che non
sono in grado di sedersi da soli,
girarsi e sostenersi sulle mani o sulle
ginocchia per un peso massimo
consentito di 9 kg.
Durante l' uso della carrozzina, tutte
le maniglie di trasporto (se presenti)
devono essere posizionate all'
esterno della carrozzina al di fuori
della portata del bambino.
Le immagini riferite ai dettagli tessili potrebbero
differire dalla collezione acquistata.
ISTRUZIONI D'USO
CHASSIS
1 APERTURA: sganciare gancio laterale di sicurezza
premendo sul pulsante (Fig.a) sollevare maniglione
(Fig.b) e aprire il passeggino. Col passeggino aperto
sollevare la seduta tirandola in dietro (Fig.c) fino a
completa apertura (fig.d).
2 AGGANCIO RUOTE ANTERIORI: Agganciarle nella sua
sede fino click (Fig.a). Per sganciarla premere il pulsante
posto all’interno (freccia 1) e sfilarla verso il basso (freccia
2) - (Fig.b).
3 RUOTE ANTERIORI FISSE O PIROETTANTI: per rendere le
ruote piroettanti tirare la leva frontale verso il basso.
Per rendere le ruote fisse premere la leva verso l’alto.
4 AGGANCIO RUOTE POSTERIORI: Agganciarle nella sua
sede fino click (Fig.a). Per sganciarla premere il pulsante
posto all’interno (freccia 1) e sfilarla (freccia 2) - (Fig.b).
5 FRENO: per frenare il passeggino premere il pedale
centrale, col piede e il passeggino si blocca. Per
sbloccarlo premere col piede la parte piu alta del pedale
e il passeggino si sblocca.
6 CONFIGURAZIONI DI UTILIZZO: E’ possibile agganciare al
telaio oltre alla seduta anche la carrozzina e il seggiolino
auto .
Per agganciare il seggiolino auto è necessario
agganciare gli adattatori dati in dotazione (istruzioni
SEAT: punto 14).
ISTRUZIONI D'USO
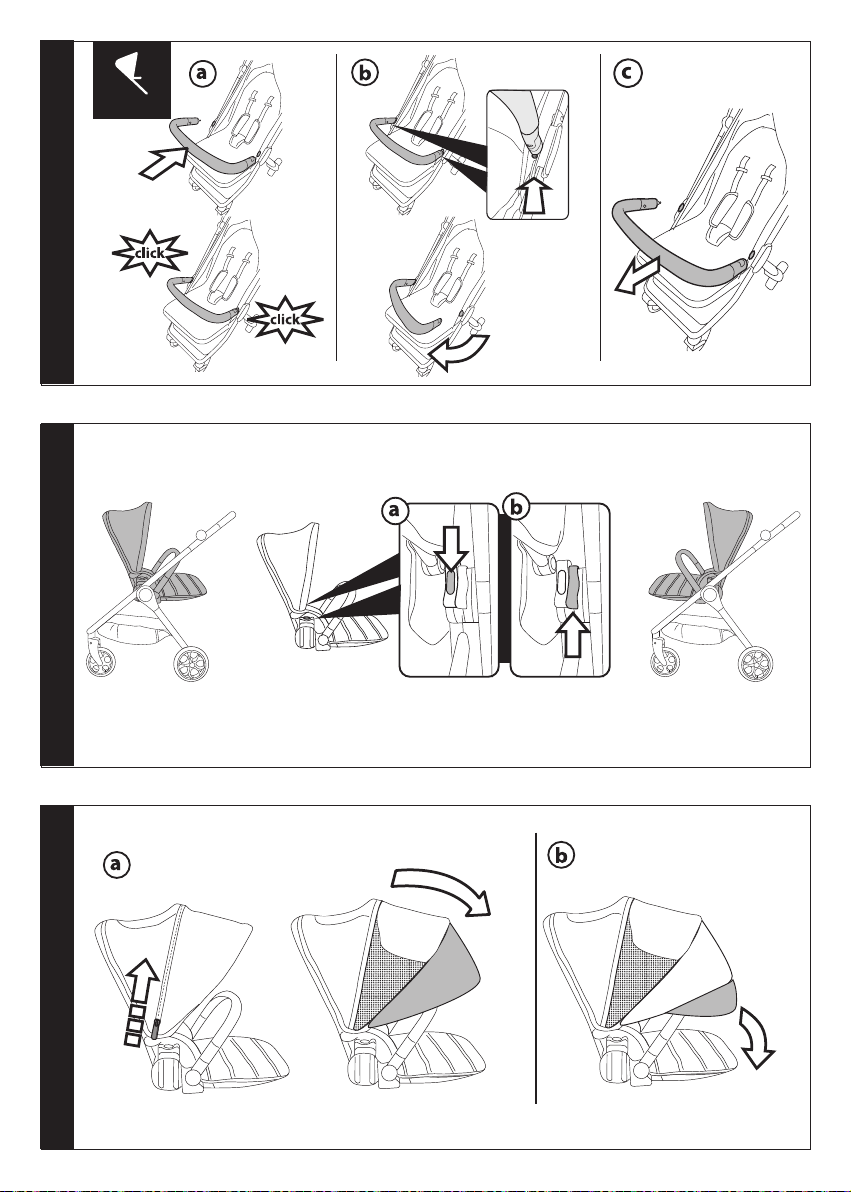
SEAT
1 FRONTALINO: agganciare il frontalino nelle sue sedi fino
al click (Fig.a).
E’ possibile aprirlo solo da un lato, destro o sinistro, per
facilitare l'ingresso del bambino, premendo il bottone
sposto sotto di esso (Fig.b).
E' anche possibile toglierlo completamente, premendo
il bottone posto sotto di esso da entrambe le parti e
sfilarlo (Fig. c).
2 REVERSIBILITA’: il seggiolino è possibile agganciarlo
fronte mamma o fronte mondo. Per cambiare posizione
premere contemporaneamente i tasti laterali (Fig.a) e
sganciare la seduta sollevando le alette laterali accanto
ai bottoni (Fig. b).
3 CAPOTTINA: è estensibile grazie ad una zip (fig a).
E' dotata di uno spicchio nella parte anteriore per
maggiore ombra (fig b).
4 Nello spicchio (Fig. a) è presente una finestra, sollevarla
e legarla come illustrato . Nello spicchio di rete (Fig b) è
possibile alzare il lembo di tessuto come illustrato.
5 Se si desidera togliere la capottina sganciarla dalla sua
sede come illustrato.
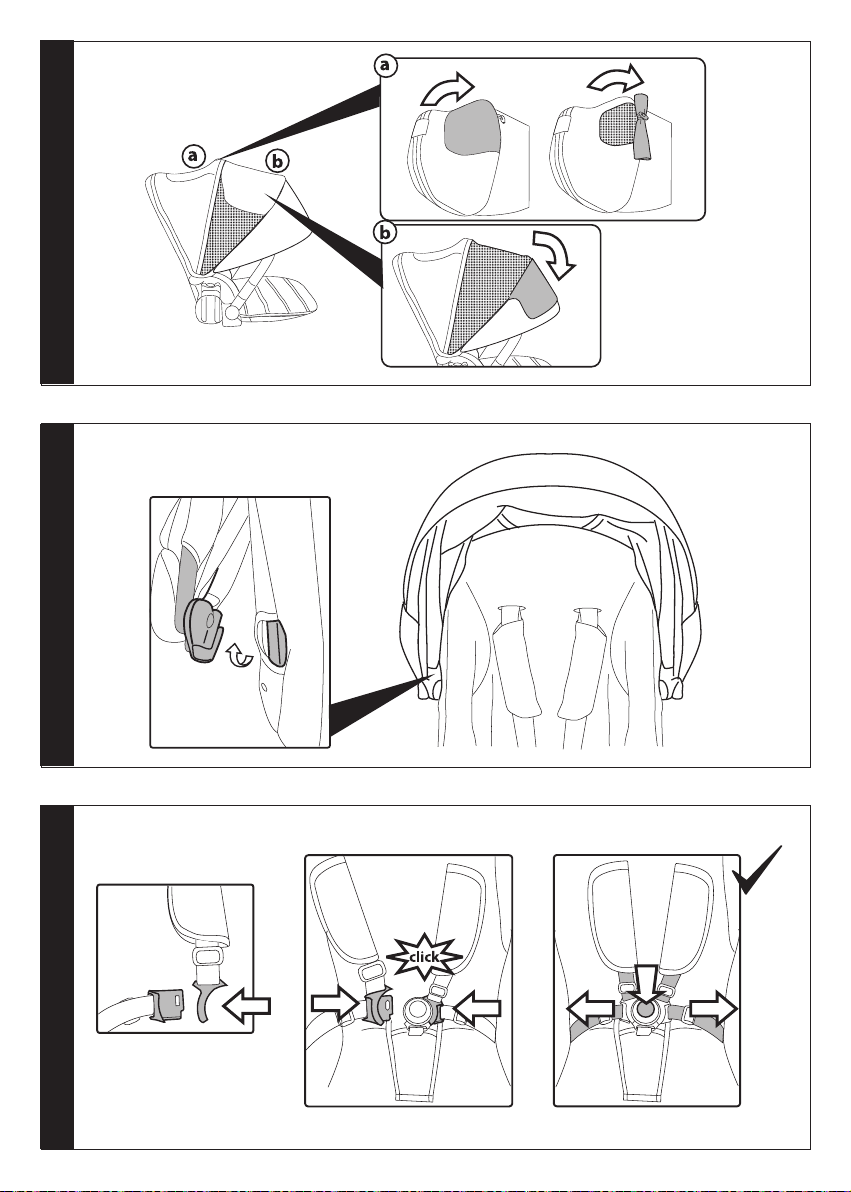
6 CINTURA DI SICUREZZA 5 PUNTI: per agganciarle,
inserire le due fibbie del cinturino girovita (con bretelle
agganciate freccia_1) nel cinturino spartigambe fino al
click (freccia_2). Per sganciare, premere il pulsante tondo
posto centralmente alla fibbia (freccia_3) e tirare verso
l’esterno il cinturino girovita (freccia_4).
7 Per stringere il cinturino girovita tirare, da entrambi i lati,
nel senso della freccia (freccia_5), per allentarlo agire in
senso contrario.
Regolare la lunghezza facendo scorrere le asole in modo
che le cinghie tengano ben fermo il corpo del bimbo
(freccia_6).
8 E’ possibile regolare l'altezza delle cinture di sicurezza in
base all’altezza del bambino.
9 REGOLAZIONE SCHIENALE: è possibile regolare lo
schienale della seduta sollevando la maniglia posta sul