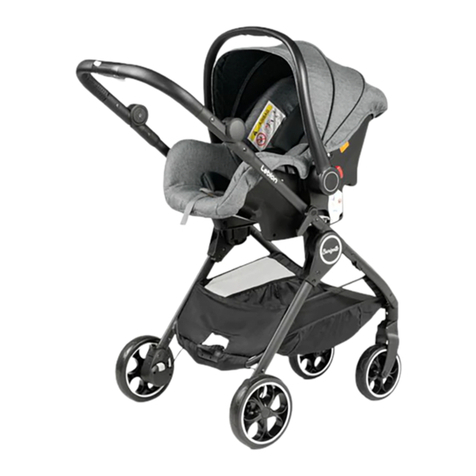
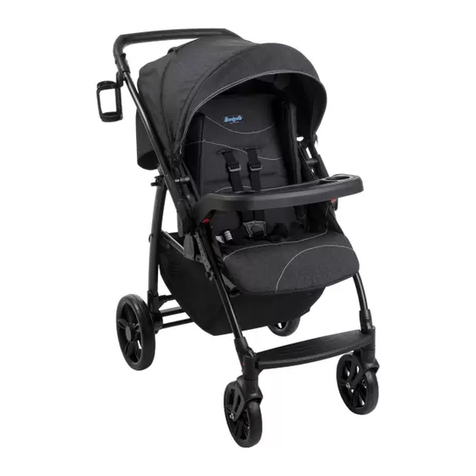
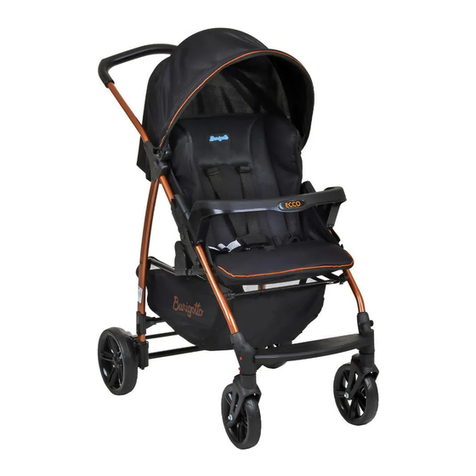
Burigotto OOP User manual

oop
IT Istruzioni d’uso
EN Instructions for use
FR Notice d’emploi
DE Gebrauchsanleitung
ES Instrucciones de uso
RU Инструкции по пользованию

3
2
1
1
2
1
2
1
2
34

5
4
6
2
1

11
2
9
7
8

3
2
1
10
11
22
click
1
2
1
3
12

13
14
15

- 7 -
IT_Italiano
Grazie per aver acquistato un prodotto Burigotto.
ATTENZIONE
_ IMPORTANTE: LEGGERE
ATTENTAMENTE E CONSERVARE
PER FUTURO RIFERIMENTO. La
sicurezza del bambino potrebbe
essere messa a rischio se non si
eseguono queste istruzioni.
_
Questo articolo è stato progettato per
il trasporto di 1 bambino nella seduta.
_ Non utilizzare questo articolo per
un numero di occupanti superiori a
quanto previsto dal costruttore.
_ Questo prodotto è omologato per
bambini dalla nascita sino a 4 anni
di età o peso massimo di 22 kg, a
seconda della condizione che si
presenta prima.
_ ATTENZIONE: utilizzare sempre
il sistema di ritenuta. Utilizzare
sempre la cintura di sicurezza a
cinque punti.
Agganciare sempre il cinturino
girovita al cinturino spartigambe.
_ Per bambini appena nati si
raccomanda di regolare lo
schienale nella posizione più bassa.
_
Il frontalino, se presente, non è
progettato per reggere il peso
del bambino; il frontalino non è
progettato per sollevare la seduta con
il peso del bambino. Il frontalino non
sostituisce il cinturino di sicurezza.
_ ATTENZIONE Prima dell'uso
assicurarsi che tutti i
meccanismi di bloccaggio siano
correttamente agganciati.
_ ATTENZIONE Prima dell'uso
controllare che i meccanismi
di aggancio della seduta, della
navicella o del seggiolino auto
siano correttamente agganciati.
_ ATTENZIONE Per evitare lesioni
o ferimenti assicurarsi che il
bambino sia a debita distanza
durante le operazioni di apertura
e chiusura del prodotto
_ ATTENZIONE Non lasciare che
il bambino giochi con questo
prodotto.
Questo articolo non è un gioco.
_ ATTENZIONE Le operazioni di
assemblaggio e di preparazione
dell’articolo devono essere
effettuate solo da adulti.
_ Non utilizzate questo articolo se
presenta parti mancanti o rotture.
_ ATTENZIONE Non lasciare mai il
bambino incustodito.
_ Azionare sempre il freno quando si
è fermi e durante le operazioni di
carico e scarico del bambino.
_ Non inserire le dita nei meccanismi.
_ Prestare attenzione alla presenza
del bambino quando si effettuano
operazioni di regolazione dei
meccanismi (maniglione, schienale).
_
Qualsiasi carico applicato all’impugnatura
e/o allo schienale e/o lateralmente al
prodotto può compromettere la stabilità
del prodotto.
_ Non introdurre nel cestello carichi
per un peso superiore a 5 kg. Non
inserire nei portabibite (se presente)
pesi superiori a quanto specificato
nel portabibite stesso e mai
bevande calde. Non inserire nelle
tasche delle capotte (se presenti)
pesi superiori a 0.2 Kg.
_ Non utilizzare l'articolo in vicinanza
di scale o gradini; non utilizzare
vicino a fonti di calore, fiamme libere
o oggetti pericolosi a portata delle
braccia del bambino.
_ Utilizzare unicamente le parti di
ricambio fornite o consigliate dal
produttore/distributore.
_ ATTENZIONE Questo prodotto
non è adatto per correre o
pattinare.
_ ATTENZIONE Non aggiungere alcun
materassino non approvato dal
costruttore.
_ Non utilizzare accessori non
approvati dal costruttore.
Le immagini riferite ai dettagli tessili potrebbero
differire dalla collezione acquistata.

- 8 -
ISTRUZIONI D'USO
1 APRIRE IL PASSEGGINO: togliere il passeggino dalla
scatola e lasciarlo nella posizione originale (fig.1).
Sbloccare i ganci di chiusura, tirare verso l’alto il
manico del passeggino (fig. 2, 3, 4) e raddrizzarlo (fig.
3).
Afferrare il manico da entrambi i lati (leggermente al di
sotto dell’imbottitura) e sollevare il passeggino fino a
udire un clic.
ATTENZIONE: accertarsi che il freno sia sganciato prima
di spingere il passeggino.
2 MONTAGGIO E SMONTAGGIO DELLE RUOTE ANTERIORI:
Montaggio: inserire le ruote sull’asse anteriore come
mostrato. Si deve sentire un clic se sono inserite
correttamente (fig. a). Smontaggio: premere la parte
metallica d’argento (sotto il blocca ruote) e rimuovere
la ruota come mostrato (fig. b).
3 MONTAGGIO E SMONTAGGIO DELLE RUOTE
POSTERIORI:
Montaggio: inserire la ruota posteriore con filo freno
sul tubo posteriore come mostrato. Assicurarsi che la
ruota con pedale ROSSO/VERDE sia sul lato destro del
passeggino. Si deve sentire un clic se le ruote sono
inserite correttamente (fig. a).
Smontaggio: premere il perno 1 e rimuovere la ruota
come mostrato (fig. b).
4 MONTAGGIO E SMONTAGGIO DELLA FODERA:
Montaggio: inserire l’asta della fodera nel suo
alloggiamento e agganciare l’elastico sul gancio come
mostrato. Ripetere questa operazione sull’altro lato
della fodera.
Smontaggio: sganciare l’elastico, sollevare l’attacco
dall’alloggiamento della fodera ed estrarre l’asta.
5 MONTAGGIO E SMONTAGGIO DEL MANIGLIONE
FRONTALE:
Montaggio: inserire le due estremità del maniglione
nell’alloggiamento. Si sentirà un suono se sono
correttamente inserite.
Smontaggio: premere i due pulsanti su entrambi i lati
dell’alloggiamento e rimuovere il maniglione come
mostrato.
6 RUOTE ANTERIORI PIROETTANTI
Ruote anteriori fisse: abbassare la leva blocca ruote
fino a sentire un clic.
Ruote anteriori piroettanti: sollevare la leva blocca
ruote per rendere le ruote piroettanti. Per bloccare
le ruote, abbassare il pedale come mostrato. Per
sbloccarle, sollevare il pedale.
7 USO DELLA CAPOTTINA:
Spostare in avanti o indietro l’asta della capottina per
aprirla o chiuderla (fig. a).
È possibile aprire la finestrella osserva bimbo della
capottina (a seconda del modello), (fig. b).
8 REGOLAZIONE DELLO SCHIENALE
Reclinare lo schienale:
Premere il blocco di regolazione dello schienale e
abbassarlo all’angolazione desiderata.
Sollevare lo schienale: Premere il blocco di regolazione
dello schienale, tirare l’anello fissato alla cinghia fino a
raggiungere l’inclinazione desiderata.
9 Per bloccare: premere il pedale ROSSO (fig.a).
Per sbloccare: premere il pedale VERDE (fig.b).
ATTENZIONE: Accertarsi di inserire il freno ogni volta
che il passeggino è fermo.
10 Il passeggino è dotato di cintura di sicurezza a cinque
punti. Agganciare le due cinghie nella fibbia centrale.
Si dovrà sentire un clic se sono inserite correttamente.
11 Per sganciare le cinture, premere al centro della fibbia
(fig.b).
Per regolare le bretelle, far scorrere l’asola all’altezza
desiderata (fig. c).
Regolare la lunghezza facendo scorrere le asole in
modo che le cinghie tengano ben fermo il corpo del
bimbo.
12 CHIUDERE IL PASSEGGINO:
Inserire il freno e chiudere la capottina.
Premere il pulsante di chiusura e il secondo blocco
del manico, nel frattempo spingere il manico in avanti
e verso il basso per ripiegare il passeggino, infine
bloccarlo con il gancio di chiusura. Una volta chiuso, il
passeggino può stare in posizione verticale.
13 REGOLAZIONE DEL POGGIAGAMBE
Per abbassare il poggiagambe, tirare
contemporaneamente le due levette sottostanti verso
l’esterno e spingere il poggiagambe verso il basso.
Per sollevare il poggiagambe, basta rialzarlo.
14 BORSA DI TRASPORTO:
In dotazione viene fornita una borsa per trasportare
il passeggino Oop, utilizzabile in base alle esigenze,
come borsa o come zaino.
INFORMAZIONI DI PRODOTTO
15 Informazioni del prodotto.
Queste informazioni sono indispensabili in caso di reclamo.
PULIZIA E MANUTENZIONE
Le operazioni di pulizia devono essere effettuate solo
da adulti.
MANUTENZIONE DELL'ARTICOLO: proteggere da
agenti atmosferici: acqua, pioggia o neve; l’esposizione
continua e prolungata al sole potrebbe causare
cambiamenti di colore in molti materiali; conservare
questo articolo in un posto asciutto. Eseguire controlli
ed interventi di manutenzione sulle parti principali ad
intervalli regolari.
PULIZIA DEL TELAIO: periodicamente pulire le parti in
plastica con un panno umido senza utilizzare solventi
o altri prodotti simili; mantenere asciutte tutte le parti
in metallo per prevenire la ruggine; mantenere pulite
tutte le parti in movimento (meccanismi di regolazione,
meccanismi di aggancio, ruote...) da polvere o sabbia e
se occorre, lubrificarle con olio leggero.
PULIZIA DELLE PARTI IN TESSUTO: Spazzolare le parti in
tessuto per allontanare la polvere;
• Per il lavaggio attenersi all'etichetta cucita sulla sacca
del prodotto.
• non candeggiare al cloro;
• non stirare;
• non lavare a secco;
• non smacchiare con solventi;
• non asciugare a mezzo di asciugabiancheria a tamburo
rotativo.
SERVIZIO ASSISTENZA BURIGOTTO
Se fortuitamente parti del modello vengono perse
o danneggiate, usare solo pezzi di ricambio originali
Burigotto. Per eventuali riparazioni, sostituzioni,
informazioni sui prodotti, vendita di ricambi originali
e accessori, contatta il Servizio Assistenza PegPerego
indicando, il numero seriale del prodotto.
tel. 0039/039/60.88.213
numero verde: 800/147.414
e-mail [email protected]
sito internet www.burigotto.com
Tutti i diritti di proprietà intellettuale relativi
ai contenuti di questo manuale d’istruzione
appartengono a PegPerego S.p.A. e sono tutelati dalle
leggi vigenti.
- 9 -
EN_English
Thank you for choosing a Burigotto product.
WARNING
_ IMPORTANT: READ THE
INSTRUCTIONS CAREFULLY
BEFORE USE AND KEEP FOR
FUTURE REFERENCE. The child’s
safety could be at risk if these
instructions are not followed.
_ This product was designed for the
transport of 1 child in the seat.
_ Do not use this product for a
number of occupants greater than
that intended by the manufacturer.
_ Pliko Mini is suitable from birth up to
22 kg or 4 years, whichever comes
firts.
_ WARNING: Always use the
restraint system. Always use the
five-point safety harness.
Always lock the waist strap with the
crotch strap.
_ For new born babies is
recommended to use the backrest
in the most reclined position
_ The front bar(if present)has not
been designed to support the
child’s weight; the front bar has
not been designed to lift the seat
with the child's weight. The front
bar does not replace the seat belt.
_ WARNING Ensure that all the
locking devices are engaged
before use.
_ WARNING Check that the pram
body or seat unit or car seat
attachment devices are correctly
engaged before use.
_ WARNING To avoid injury ensure
that the child is kept away
when unfolding and folding this
product.
_ WARNING Do not let the child
play with this product.
This product is not a toy.
_ WARNING The assembly and
preparation of the product must be
carried out by an adult.
_ Do not use this product if there are
parts missing or signs of breakage.
_ WARNING Never leave the child
unattended.
_ Always apply the brake when
stationary and when loading or
unloading children.
_ Do not insert fingers into the
mechanisms.
_ Be careful not to hurt the child
when adjusting the mechanisms
(handlebar, backrest … ).
_ Any load applied to the handle and/
or the backrest and/or laterally to
the product can compromise the
stability of the product.
_ Do not load the baskets over 5
Kg. Do not put weight in the cup
holder (if present) in excess of
those indicated on the cup holders
themselves and never hot drinks. Do
not put loads of more than 0.2 Kg in
the hood pockets (if present).
_ Do not use the product near to
stairs or steps, heat sources, naked
flames or dangerous objects within
reach of the child.
_ Only replacement parts supplied or
recommended by the manufacturer/
distributor shall be used.
_ WARNING This product is not
suitable for running or skating.
_ WARNING Do not add any
mattress are not approved by the
manufacturer.
_ Do not use accessories which are
not approved by the manufacturer.
The images referring to the textile details may
differ from the collection purchased.
INSTRUCTIONS
1 UNFOLD STROLLER: remove the stroller from the
box and leave it in its original position (fig.1). Unlock
the folding hook, lift the stroller handle upwards
(fig.2,3,4) straighten the stroller handle (fig.3).
Grab both sides of the handle (slightly down from the
handle foam ) and lift the stroller up until your hear a
Click sound.
WARNING: ensure brake is disengage before
attempting to push the stroller.
2 ASSEMBLY AND DISASSEMBLY OF FRONT WHEELS:
Assembly: insert the wheel into the front axle as
shown. You will hear a click sound when it is correctly
inserted (fig.a). Disassembly: press the silver metal
part ( below the wheel lock) and pull the wheel out as
shown (fig.b).
3 ASSEMBLY AND DISASSEMBLY OF REAR WHEELS:

- 10 -
Assembly: insert the rear wheel with link brake into
the rear leg as shown. Please make sure the wheel
with RED/GREEN pedal is on the right side of the
stroller. You will here a Click sound when the wheel is
correctly inserted (fig.a).
Disassembly: press the pin 1 and pull out the wheel as
shown (fig.b) .
4 ASSEMBLY AND DISASSEMBLY OF CANOPY:
Assembly: insert the canopy rod into the canopy
housing and hook up the elastic strap onto the hook
as shown. Repeat this step for the other side of the
canopy.
Disassembly: unhook the elastic strap, lift up the
catch from the canopy housing and pull the rod out.
5 ASSEMBLY AND DISASSEMBLY OF BUMPER BAR:
Assembly: insert the two ends of the bumper bar
into the housing. There will be a sound once both are
correctly inserted.
Disassembly: press the two buttons on both side of
the housing and remove the bumper bar as shown.
6 FRONT WHEEL SWIVEL
Front wheel orientation: press down the swivel lock
until you hear click sound.
Front wheel swivel: release swivel lock and front
wheels can be swivelled. Step or press the pedal
downwards as shown to lock the swivel wheel. To
release, lift upwards.
7 USE OF CANOPY:
Move the front canopy rod forward or backward to
unfold or fold the canopy (fig.a).
The canopy window can be opened for child-viewing
on the go (varies with model), (fig.b).
8 ADJUSTMENT OF BACKREST
Recline downwards position:
Press the recline adjustment lock and pull it
downwards to your desired angle.
Recline Upwards position: Press the recline
adjustment lock, pull the ring attached on the strap
backwards to you desired angle.
9 To lock: step onto the RED pedal (fig.a).
To unlock: step on the GREEN PEDAL (fig.b).
WARNING: Ensure the brake is engaged whenever the
stroller is stationary.
10 The stroller is equipped with a 5-point harness. Join
the loose ends of the belt straps on both sides into
the center buckle. You will hear a click sound if it is
correctly inserted.
11 To unbuckle press onto the center buckle to release
the straps (fig.b).
To adjust the shoulder belt, pull the slider to the
desired length (fig.c).
Adjust the belt according to your child's size by
pulling the slider so the belts are wrapped snugly
around child's body.
12 FOLDING THE STROLLER:
Engage the brake and fold the canopy.
Press down the fold button and second lock of the
handle meanwhile, push the handle forward and
press down to fold the stroller, secure the stroller with
the folding hook. This stroller can stand upright after
being folded.
13 ADJUSTMENT OF LEG REST
To lower the leg rest, simultaneously puii both levers
below the leg rest outwards and push the leg rest down.
To lift up the leg rest, simpy lift it back up.
14 CARRY BAG:
The Oop stroller is supplied with a bag, which can be
used either as a carry bag or as a backpack, according
to need.
PRODUCT INFORMATION
15 Product information.
This information is essential in the event of a
complaint.
CLEANING AND MAINTENANCE
Cleaning must only be carried out by adults.
PRODUCT MAINTENANCE: protect from the weather:
water, rain, or snow; prolonged and continuous
exposure to bright sunlight may give rise to colour
changes of various different materials; store this
product in a dry place. The maintenance have to be
regularly.
CLEANING THE CHASSIS: periodically clean all plastic
parts with a damp cloth. Do not use solvent or
similar cleaning products; keep all metal parts dry to
prevent rusting; keep moving parts clean (adjustment
mechanisms, locking mechanisms, wheels, ...) and free
of dust and sand and, if necessary, lubricate with light
machine oil.
CLEANING FABRIC PARTS: Brush the fabric parts to
remove dust.
• When washing, closely follow the instructions stated
on the label sewn into the cover.
• Do not use chlorine bleach.
• Do not iron.
• Do not dry clean.
• Do not remove stains with solvents.
• Do not tumble dry.
BURIGOTTO AFTER-SALES SERVICE
If any parts of the item get lost or damaged, only
use genuine Burigotto spare parts. For any repairs,
replacements, information on the products and sales
of genuine spare parts and accessories, contact the
PegPerego Assistance Service and state the serial
number of the product.
tel. 0039/039/60.88.213
e-mail [email protected]
website www.burigotto.com
All intellectual property rights on the contents of
this manual are property of PegPerego S.p.A. and are
protected by the laws in force.

- 11 -
FR_Français
Merci d’avoir choisi un produit Burigotto.
AVERTISSEMENTS
_ IMPORTANT: LIRE LES
INSTRUCTIONS SUIVANTES
ATTENTIVEMENT AVANT
UTILISATION ET LES CONSERVER
POUR LES BESOINS ULTÉRIEURS
DE RÉFÉRENCE.
La sécurité de
l’enfant pourrait être menacée si
ces instructions ne sont pas suivies.
_ Cet article a été conçu pour
transporter 1 enfant sur le siège.
_ Ne pas utiliser lorsque le nombre
d’occupants est supérieur aux
prescriptions du fabricant.
_ Ce produit est homologué pour les
enfants de la naissance jusqu'à 4 ans
ou pesant au maximum 22 kg.
_
AVERTISSEMENT: toujours utiliser le
système de retenue. Toujours utiliser
la ceinture de sécurité à 5 points.
Toujours accrocher la ceinture ventrale
à la sangle d’entrejambes.
_ Pour les nouveaux-nés, il est
recommandé d'abaisser le dossier
dans la position la plus inclinée.
_ La barre frontale, le cas échéant, n’a
pas été conçue pour supporter le
poids de l’enfant ; elle n’a pas non plus
été conçue pour soulever l’assise avec
le poids de l’enfant. La barre frontale
ne remplace pas la sangle de sécurité.
_ AVERTISSEMENT S’assurer
que tous les dispositifs de
verrouillage sont enclenchés
avant utilisation
_ AVERTISSEMENT Vérifier que
les dispositifs de fixation de
la nacelle, du siège ou du
siège-auto sont correctement
enclenchés avant utilisation.
_ AVERTISSEMENT Pour éviter
toute blessure, maintenir l’enfant
à l’écart lors du dépliage et du
pliage du produit
_ AVERTISSEMENT Ne pas laisser
un enfant jouer avec ce produit.
Ce produit n'est pas un jouet.
_ AVERTISSEMENT Les opérations
d’assemblage et de préparation de
l’article doivent être effectuées par
des adultes.
_ Ne pas utiliser cet article si des
pièces sont manquantes ou cassées.
_ AVERTISSEMENT Ne jamais laisser
un enfant sans surveillance.
_ Toujours actionner le frein à l'arrêt
et lorsque l’enfant est installé dans
l’article ou qu’il en est retiré.
_ Ne pas mettre les doigts dans les
mécanismes.
_ Prêter attention à la position de
l’enfant lors des opérations de réglage
des éléments mobiles (anse, dossier).
_ Toute charge appliquée à la poignée
et/ou au dossier et/ou de côté sur
le produit peut compromettre la
stabilité du produit.
_ Ne pas utiliser le panier pour
transporter des charges supérieures
à 5 kg. Ne pas introduire dans le
porte-boissons (le cas échéant)
des charges supérieures à celles
indiquées sur le porte-boissons lui-
même; ne jamais y introduire de
boissons chaudes. Ne pas introduire
dans les poches de la capote (le cas
échéant) des objets dont le poids
excède 0,2 kg.
_ Ne pas utiliser l’article à proximité
d’escaliers ou de marches; ne pas
l’utiliser à proximité de sources de
chaleur, de flammes directes ou
d’objets dangereux se trouvant à la
portée de l’enfant.
_ N’utiliser que les pièces de rechange
fournies ou conseillées par le
fabricant/distributeur.
_ AVERTISSEMENT Ce produit ne
convient pas pour faire du jogging
ou des promenades en rollers.
_ AVERTISSEMENT Ne pas ajouter de
matelas qui ne soit pas approuvé
par le fabricant.
_ Ne pas utiliser d'accessoires non
approuvés par le fabricant.
Les images se référant aux détails textiles
pourraient être différentes de la collection achetée.

- 12 -
INSTRUCTIONS D’UTILISATION
1 DÉPLIEZ LA POUSSETTE: sortez la poussette de la
boîte et laissez-la dans sa position d’origine (fig.1).
Déverrouillez le crochet de pliage, soulevez l’anse de la
poussette vers le haut (fig.2,3,4) et redressez l’anse de la
poussette (fig.3).
Saisissez les deux côtés de l’anse (légèrement en
dessous de la mousse de l’anse) et soulevez la
poussette jusqu’à ce que vous entendiez un déclic.
AVERTISSEMENT: vérifiez que le frein est débloqué
avant d’essayer de pousser la poussette.
2 MONTAGE ET DÉMONTAGE DES ROUES AVANT:
Montage: introduisez la roue dans l’essieu avant
comme cela est montré. Vous entendrez un
déclic lorsqu’elle sera correctement insérée (fig.a).
Démontage: appuyez sur la partie en métal argenté
(sous le verrouillage de la roue) et tirez sur la roue pour
l’enlever comme cela est montré (fig.b).
3 MONTAGE ET DÉMONTAGE DES ROUES ARRIÈRE:
Montage: introduisez la roue arrière avec le frein à
bielle dans le support arrière comme cela est montré.
Assurez-vous que la roue avec la pédale ROUGE/
VERTE se trouve sur le côté droit de la poussette. Vous
entendrez un déclic lorsque la roue sera correctement
insérée (fig.a).
Démontage: appuyez sur la goupille 1 et tirez sur la
roue pour l’enlever comme cela est montré (fig.b).
4 MONTAGE ET DÉMONTAGE DE LA CAPOTE:
Montage: introduisez la tige de la capote dans le
logement de la capote et accrochez la sangle élastique
sur le crochet comme cela est montré. Répétez cette
opération de l’autre côté de la capote.
Démontage: décrochez la sangle élastique, soulevez
le cliquet du logement de la capote et tirez sur la tige
pour la sortir.
5 MONTAGE ET DÉMONTAGE DE L’ARCEAU DE SÉCURITÉ:
Montage: introduisez les deux extrémités de l’arceau
de sécurité dans le logement. Vous entendrez un
bruit lorsque les deux extrémités seront correctement
insérées.
Démontage: appuyez sur les deux boutons des deux
côtés du logement et enlevez l’arceau de sécurité
comme cela est montré.
6 ROUE AVANT PIVOTANTE
Orientation de la roue avant: appuyez sur le verrou
pivotant jusqu'à ce que vous entendiez un déclic.
Roue avant pivotante: débloquez le verrou pivotant et
les roues avant pourront pivoter. Appuyez sur la pédale
comme cela est montré pour bloquer la roue pivotante.
Pour la débloquer, soulevez la pédale.
7 UTILISATION DE LA CAPOTE:
Déplacez la tige de la capote avant vers l’avant ou
l’arrière pour déplier ou plier la capote (fig.a).
Il est possible d’ouvrir le hublot de la capote pour
surveiller l’enfant pendant la promenade (varie en
fonction du modèle) (fig.b).
8 RÉGLAGE DU DOSSIER
Inclinez-le vers le bas:
Appuyez sur le verrouillage du réglage de l’inclinaison
et tirez-le vers le bas avec l’angle souhaité.
Inclinez-le vers le haut: Appuyez sur le verrouillage
du réglage de l’inclinaison, tirez sur l’anneau fixé sur la
sangle vers l’arrière jusqu’à l’angle souhaité.
9 Pour verrouiller: appuyez sur la pédale ROUGE (fig.a).
Pour déverrouiller: appuyez sur la PÉDALE VERTE (fig.b).
AVERTISSEMENT: Vérifiez que le frein est enclenché
lorsque la poussette est à l’arrêt.
10 La poussette est équipée d’un harnais 5 points. Joignez
les extrémités libres des sangles des deux côtés dans la
boucle centrale. Vous entendrez un déclic lorsqu’elles
seront correctement insérées.
11 Pour les détacher, appuyez sur la boucle centrale pour
libérer les sangles (fig.b).
Pour régler la sangle d’épaule, tirez la coulisse jusqu’à la
longueur souhaitée (fig.c).
Réglez la sangle en fonction de la taille de l’enfant
en tirant la coulisse de manière à ce que les sangles
retiennent parfaitement le corps de l’enfant.
12 PLIAGE DE LA POUSSETTE:
Débloquez le frein et pliez la capote.
Appuyez sur le bouton de pliage et sur le second
verrouillage de l’anse simultanément, poussez l’anse
vers l’avant et appuyez pour plier la poussette. Mettez
le crochet de pliage pour sécuriser la poussette. Cette
poussette peut tenir debout après avoir été pliée.
13 RÉGLAGE DU REPOSE-JAMBES
Pour baisser le repose-jambes, tirez simultanément sur
les deux leviers sous le repose-jambes vers l’extérieur
et poussez le repose-jambes vers le bas.
Pour soulever le repose-jambes, soulevez-le tout
simplement.
14 SAC DE TRANSPORT:
Un sac est fourni pour transporter la poussette Oop
et peut être utilisé comme sac ou sac-à-dos selon les
besoins.
INFORMATIONS SUR LE PRODUIT
15 Informations sur le produit.
Ces informations sont essentielles en cas de plainte.
NETTOYAGE ET ENTRETIEN
Les opérations de nettoyage doivent être effectuées
uniquement par un adulte.
ENTRETIEN DE L’ARTICLE: protéger l’article des agents
atmosphériques (eau, pluie ou neige); une exposition
continue et prolongée au soleil pourrait entraîner
un changement de couleur de nombreux matériaux;
ranger cet article dans un lieu sec. Effectuer des
contrôles et des interventions d’entretien sur les
pièces principales à des intervalles réguliers.
NETTOYAGE DU CHÂSSIS: nettoyer régulièrement les
pièces en plastique à l’aide d’un linge humide; ne
pas utiliser de solvants ou autres produits similaires.
Veiller à ce que toutes les pièces métalliques restent
sèches pour prévenir la formation de rouille. Maintenir
le bon état de propreté de toutes les pièces mobiles
(mécanismes de réglage, mécanismes de fixation,
roues, etc.) en enlevant poussière ou sable; graisser
avec une huile légère si nécessaire.
NETTOYAGE DES ÉLÉMENTS EN TISSU: brosser les
éléments en tissu pour éliminer la poussière.
• Pour le lavage, suivre les instructions figurant sur
l’étiquette cousue sur la sacoche du produit.
• ne pas blanchir au chlore ;
• ne pas repasser ;
• ne pas laver à sec ;
• ne pas utiliser de solvants pour enlever les taches ;
• ne pas sécher dans un sèche-linge à tambour rotatif.
SERVICE D’ASSISTANCE BURIGOTTO
En cas de perte de pièces ou de rupture de l'une
d'elles, utiliser exclusivement des pièces de
rechange originales Burigotto. Pour toute réparation,
remplacement, informations sur les produits,
vente de pièces détachées d’origine et accessoires,
contactez le service après-vente PegPerego en
indiquant, le numéro de série du produit.
tél. 0039/039/60.88.213
Numéro vert pour le SAV en France: 0 800 913 540
e-mail [email protected]
site Internet www.burigotto.com
Tous les droits de propriété intellectuelle relatifs au
contenu de ce manuel appartiennent à PegPerego
SpA et sont protégés par la loi.

- 13 -
DE_Deutsch
Vielen Dank, dass Sie sich für ein Burigotto Produkt
entschieden haben.
WARNUNG
_ WICHTIG: ANLEITUNGEN
FÜR SPÄTERE RÜCKFRAGEN
AUFBEWAHREN.
Die Sicherheit
des Kindes könnte gefährdet
werden, sollten diese Anweisungen
ni cht beachtet werden.
_ Dieser Artikel wurde für den Transport
eines Kindes auf dem Sitz ausgelegt.
_ Diesen Artikel nicht für eine größere
Anzahl Kinder verwenden, als vom
Hersteller vorgesehen.
_ Dieses Produkt ist für Kinder von der
Geburt an bis zu einem Alter von vier
Jahren oder bis zu einem Gewicht
von maximal 22kg zugelassen.
_ WARNUNG: Verwenden Sie immer
das Rückhaltesystem. Stets
den 5-Punkte-Sicherheitsgurt
verwenden.
Befestigen Sie immer den Bauchgurt
am Schrittgurt.
_ Für Neugeborene wird empfohlen,
die Rückenlehne vollkommen nach
unten zu neigen.
_ Der Rückhaltebügel (falls vorhanden)
ist nicht darauf ausgelegt, dem
Gewicht des Kindes standzuhalten.
Er ist nicht darauf ausgelegt, das
Kind im Sitz hochzuheben und
ersetzt nicht den Sicherheitsgurt.
_ WARNUNG Vergewissern Sie
sich vor Gebrauch, dass alle
Verriegelungen eingerastet sind.
_
WARNUNG Vergewissern Sie sich
vor der Verwendung, dass der
Kinderwagenaufsatz oder der
Sitzeinheit oder die
Befestigungselemente des
Autositzes korrekt eingerastet sind.
_ WARNUNG Vergewissern Sie sich,
dass das Kind beim Aufklappen
und Zusammenklappen des
Wagens außer Reichweite ist, um
Verletzungen zu vermeiden.
_ WARNUNG Lassen Sie Ihr Kind
nicht mit dem Produkt spielen.
Dieses Produkt ist kein Spielzeug.
_ WARNUNG Die Vorgänge zur
Montage und Vorbereitung
des Artikels dü rfen nur von
Erwachsenen ausgeführt werden.
_ Diesen Artikel nicht verwenden,
wenn fehlende Teile oder Brüche
festgestellt werden.
_ WARNUNG Lassen Sie das Kind
nie unbeaufsichtigt.
_ Wenn der Wagen steht und
während des Hereinsetzens und
Herausnehmens des Kindes immer
die Bremse betätigen.
_ Achten Sie darauf, die Finger nicht in
die Mechanismen einzuklemmen.
_ Auf das Kind achten, wenn Vorgänge
zum Einstellen der Mechanismen
vorgenommen werden (Griff,
Rückenlehne).
_ Jegliche Belastung von Griff und/
oder Rückenlehne bzw. seitliche
Belastungen des Produkts
können die Stabilität des Produkts
beeinträchtigen.
_ Den Korb mit nicht mehr als 5 kg
Gewicht belasten. Geben Sie in den
Flaschenhalter (falls vorhanden)
keine Gewichte, die über den
Angaben auf dem Flaschenhalter
selbst liegen und nie warme
Getränke. Geben Sie in die Taschen
des Verdecks (falls vorhanden) keine
Gewichte von mehr als 0,2 kg.
_ Den Artikel nicht in der Nähe von
Treppen oder Stufen verwenden.
Nicht in der Nähe von Wärmequellen,
offenem Feuer oder gefährlichen
Gegenständen in Reichweite der
Arme des Kindes verwenden.
_ Verwenden Sie ausschließlich vom
Hersteller/Händler gelieferte oder
empfohlene Ersatzteile.
_ WARNUNG dieses produkt ist
nicht zum joggen oder skaten
geeignet.
_ WARNUNG Keinerlei nicht vom
Hersteller genehmigte Matratzen
hinzufügen.

- 14 -
_ Verwenden Sie keine nicht vom
Hersteller genehmigten Zubehörteile.
Die Abbildungen in Bezug auf die Textildetails
können von der gekauften Kollektion abweichen.
GERAUCHSANWEISUNG
1 BUGGY AUFKLAPPEN: Holen Sie den Buggy aus der
Verpackung und lassen Sie ihn in seiner ursprünglichen
Stellung (Abb.1). Lösen Sie den Sperrhebel, ziehen Sie
den Lenkgriff nach oben (Abb. 2,3,4) und stellen Sie ihn
waagerecht ein (Abb.3).
Ergreifen Sie beide Seiten des Lenkgriffs (etwas
unterhalb des Schaumgummis) und heben Sie den
Buggy hoch, bis es klickt.
WARNUNG: Prüfen Sie, ob die Bremse gelöst ist, bevor
Sie den Buggy schieben.
2 MONTAGE UND ABNEHMEN DER VORDERRÄDER:
Montage: Stecken Sie das Rad wie gezeigt in die
Vorderachse. Wenn es richtig eingesetzt ist (Abb. a),
hören Sie ein Klicken. Abnehmen: Drücken Sie auf das
silberne Metall (unter dem Radschloss) und ziehen Sie
das Rad wie gezeigt (Abb.b) heraus.
3 MONTAGE UND ABNEHMEN DER HINTERRÄDER:
Montage: Setzen Sie das Hinterrad wie gezeigt mit
der Bremsverbindung ein. Achten Sie darauf, dass das
Rad mit dem ROTEN/GRÜNEN Pedal rechts am Buggy
befestigt ist. Wenn es richtig eingesetzt ist (Abb. a),
hören Sie ein Klicken.
Abnehmen: Drücken Sie den Stift 1 und ziehen Sie das
Rad wie gezeigt (Abb.b) heraus.
4 MONTAGE UND ABNEHMEN DES VERDECKS:
Montage: Führen Sie den Stab des Verdecks in die
Halterung ein und befestigen Sie den Gummizug
wie gezeigt am Haken. Wiederholen Sie dies auf der
anderen Verdeckseite.
Abnehmen: Lösen Sie den Gummizug und die Halterung
am Verdeck und ziehen Sie das Verdeck heraus.
5 MONTAGE UND ABNEHMEN DES RÜCKHALTEBÜGELS:
Montage: Stecken Sie die beiden Enden des
Rückhaltebügels in die Halterung. Wenn beide richtig
eingesetzt sind, hört man ein Geräusch.
Abnehmen: Drücken Sie die beiden Knöpfe auf
beiden Seiten der Halterung und entfernen Sie den
Rückhaltebügel wie gezeigt.
6 SCHWENKBARKEIT DES VORDERRADS
Festgestelltes Vorderrad: Drücken Sie die
Feststellbremse bis zum Klicken nach unten.
Schwenkbares Vorderrad: Lösen Sie die Feststellbremse
und die Vorderräder sind frei beweglich. Um das
schwenkbare Rad zu blockieren, treten oder drücken
Sie das Pedal wie gezeigt nach unten. Zum Lösen
ziehen Sie es nach oben.
7 VERWENDUNG DES VERDECKS:
Bewegen Sie den vorderen Teil des Verdecks nach
vorne oder hinten, um das Verdeck aus- oder
einzuklappen (Abb.a)
Das Verdeckfenster kann (je nach Modell) unterwegs
geöffnet werden (Abb.b).
8 EINSTELLEN DER RÜCKENLEHNE
Rückenlehne nach unten zurückklappen:
Drücken Sie die Sperre der Rückenlehne und ziehen
Sie diese im gewünschten Winkel nach unten.
Rückenlehne nach oben klappen: Drücken Sie die
Sperre der Rückenlehne und ziehen Sie den am Riemen
befestigten Ring bis zum gewünschten Winkel zurück.
9 Zum Sperren: auf das ROTE Pedal (Abb.a) treten.
Zum Lösen der Sperre: auf das GRÜNE Pedal (Abb.b)
treten.
WARNUNG: Prüfen Sie, ob die Bremse gezogen ist,
wenn der Buggy steht.
10 Der Buggy hat einen 5-Punkt-Sicherheitsgurt. Setzen
Sie die losen Enden der Gurtriemen auf beiden Seiten
in die mittlere Schnalle ein. Wenn sie richtig eingesetzt
sind, hören Sie ein Klicken.
11 Um den Gurt zu lösen, drücken Sie auf die Mitte der
Schnalle (Abb.b).
Ziehen Sie den Schieber auf die gewünschte Länge,
um den Schultergurt einzustellen (Abb.c).
Passen Sie die Gurt an die Größe des Kindes an, indem
Sie den Schieber so einstellen, dass der Gurt eng am
Körper des Kindes anliegt.
12 ZUSAMMENKLAPPEN DES BUGGYS:
Treten Sie die Bremse und klappen Sie das Verdeck ein.
Drücken Sie den Knopf zum Zusammenklappen und
die zweite Sperre am Griff gleichzeitig. Drücken Sie
den Griff nach vorne, klappen Sie den Buggy ein und
sichern Sie ihn mit dem Haken. Dieser Buggy kann
nach dem Zusammenklappen aufrecht stehen.
13 ANPASSEN DER BEINABLAGE
Um die Beinablage zu senken, drücken Sie beide Hebel
unter der Ablage gleichzeitig nach außen und drücken
Sie die Ablage nach unten.
Um die Beinablage anzuheben, ziehen Sie sie einfach
nach oben.
14 TRANSPORTTASCHE:
Im Lieferumfang des Buggy OOP ist eine Tragetasche
enthalten, die als Umhängetasche oder Rucksack
verwendet werden kann.
PRODUKTINFORMATIONEN
15 Produktinformationen.
Diese Informationen werden bei einer Reklamation
benötigt.
REINIGUNG UND PFLEGE
Die Reinigung sollte ausschließlich durch Erwachsene
erfolgen.
PFLEGE DES ARTIKELS: vor Witterungseinflüssen
schützen: Wasser, Regen oder Schnee; eine längere
Bestrahlung durch die Sonne kann zu Farbänderungen
der verschiedenen Materialien führen; diesen Artikel
an einem trockenen Ort aufbewahren. Führen Sie in
regelmäßigen Abständen Wartungen der wichtigsten
Bauteile durch.
REINIGUNG DES GESTELLS: die Kunststoffteile
regelmäßig mit einem feuchten Lappen reinigen
– keine Lösungsmittel oder ähnliche Produkte
verwenden; sämtliche Metallteile trocken halten,
um einem eventuellen Rosten vorzubeugen; alle
beweglichen Teile (Einstellungsmechanismen,
Befestigungsmechanismen, Räder,…) von Staub oder
Sand unbedingt sauber halten und, wenn nötig, mit
Leichtöl schmieren.
REINIGUNG DER STOFFTEILE:
Die Stoffteile abbürsten, um Staub zu entfernen.
• Zum Waschen beachten Sie bitte das in den
Produktbezug eingenähte Etikett.
• Nicht bleichen.
• Nicht bügeln.
• Nicht Trockenreinigen.
• Nicht mit Lösungsmitteln behandeln.
• Nicht im Wäschetrockner mit rotierender Trommel
trocknen.
KUNDENDIENST BURIGOTTO
Sollten Teile des Modells verloren gehen oder
beschädigt werden, ersetzen Sie diese bitte
ausschließlich durch originale Burigotto-Teile. Für
Reparaturen, Ersatzteile, Produktinformationen
und Anbieter von originalen Ersatzteilen und
Zubehör wenden Sie sich bitte an den PegPerego
Kundendienst. Halten Sie hierfür, die Seriennummer
des betreffenden Produktes bereit.

- 15 -
Tel. 0039/039/60.88.213
E-Mail [email protected]
Webseite www.burigotto.com
Alle Rechte geistigen Eigentums bezüglich der Inhalte
dieser Bedienungsanleitung gehören PegPerego S.p.A.
und werden von den geltenden Bestimmungen geschützt.
ES_Español
Le agradecemos haber elegido un producto Burigotto.
ADVERTENCIA
_ IMPORTANTE: LEER
LAS INTRUCCIONES
CUIDADOSAMENTE ANTES
DEL USO Y MANTENERLAS
PARA FUTURAS CONSULTAS.
La seguridad del niño podría
ponerse en riesgo en caso
de incumplimiento de estas
instrucciones.
_ Este artículo ha sido diseñado para
transportar a 1 niño en el asiento.
_ No utilizar este artículo para un
número de ocupantes superior al
previsto por el fabricante.
_ Este producto está homologado
para niños desde el nacimiento a
los 4 años de edad o con un peso
máximo de 22 kg.
_ADVERTENCIA Usar siempre
el sistema de retención. Usar
siempre el cinturón de seguridad
de 5 puntos
Enganchar siempre la correa de la
cintura a la correa de separación de
las piernas.
_ Para los bebés se recomienda el
uso del respaldo en la posición más
reclinada.
_ La barra frontal, si está presente, no
está diseñada para sostener el peso
del niño; la barra frontal no está
diseñada para levantar el asiento
con el peso del niño. La barra
frontal no sustituye al cinturón de
seguridad.
_ ADVERTENCIA Asegurarse de que
todos los dispositivos de cierre
están engranados antes del uso.
_ ADVERTENCIA Comprobar que
los dispositivos de sujeción del
capazo, del asiento o de la silla
de coche están correctamente
engranados antes del uso.
_ ADVERTENCIA Para evitar
lesiones, asegúrese de que el
niño se mantiene alejado durante

- 16 -
el desplegado y el plegado de
este producto.
_ ADVERTENCIA No permita que el
niño juegue con este producto.
Este producto no es un juguete.
_ ADVERTENCIA Las operaciones
de ensamblaje y preparación del
artículo deben ser efectuadas solo
por adultos.
_ No utilizar este artículo si alguna de
sus partes falta o está averiada.
_ ADVERTENCIA No dejar nunca al
niño desatendido.
_ Accione siempre el freno cuando no
se está en movimiento y mientras
sienta y retira al niño del producto.
_ No introduzca los dedos en estos
mecanismos.
_ Preste atención a la presencia
del niño al efectuar operaciones
de regulación de los diferentes
mecanismos (asa, respaldo).
_ Cualquier carga aplicada al mango,
a la parte posterior o al lateral
del producto puede perjudicar la
estabilidad del mismo.
_ No coloque cargas que pesen más
de 5 kg en la cesta. No introduzca
bebidas calientes ni pesos
superiores a los especificados en el
portabebidas (si corresponde). No
introduzca pesos superiores a 0,2
kg en los bolsillos de las capotas (si
corresponde).
_ No utilice este artículo cerca de
escaleras o escalones, fuentes de
calor, llamas u objetos peligrosos al
alcance del niño.
_ Utilice exclusivamente los repuestos
provistos o aconsejados por el
fabricante/distribuidor.
_ ADVERTENCIA Este producto no
es adecuado para correr o patinar.
_ ADVERTENCIA No añadir ningún
colchón no aprobado por el
fabricante.
_ No utilice accesorios no aprobados
por el fabricante.
Las imágenes referidas a los detalles textiles
pueden diferir de la colección comprada.
INSTRUCCIONES DE USO
1 ABERTURA LA SILLA DE PASEO: saque la silla de paseo
de la caja y déjela en su posición original (fig.1).
Desbloquee el gancho de cierre, tire del asa de la silla de
paseo hacia arriba (fig.2,3,4) y enderece el asa (fig.3).
Agarre el asa por ambos lados (un poco por debajo
de la espuma) y levante la silla de paseo hasta oír un
chasquido.
ADVERTENCIA: asegúrese de que el freno esté inactivo
antes de intentar empujar la silla de paseo.
2 MONTAJE Y DESMONTAJE DE LAS RUEDAS
DELANTERAS:
Montaje: inserte las ruedas en el eje delantero como
se muestra en la imagen. Cuando las haya introducido
correctamente, oirá un chasquido (fig.a). Desmontaje:
pulse la pieza metálica plateada (debajo del bloqueo
de la rueda) y extraiga las ruedas como se muestra en
la imagen (fig.b).
3 MONTAJE Y DESMONTAJE DE LAS RUEDAS TRASERAS:
Montaje: inserte las ruedas traseras con freno en
las patas traseras como se muestra en la imagen.
Asegúrese de que la rueda con el pedal ROJO/VERDE
esté en el lado derecho de la silla de paseo. Cuando
haya introducido correctamente las ruedas, oirá un
chasquido (fig.a).
Desmontaje: presione el pasador 1 y extraiga las
ruedas como se muestra en la imagen (fig.b).
4 MONTAJE Y DESMONTAJE DE LA CAPOTA:
Montaje: inserte la varilla de la capota en el armazón
de la capota y enganche la correa elástica en el gancho
como se muestra en la imagen. Repita este paso en el
otro lado de la capota.
Desmontaje: desenganche la correa elástica, levante el
pestillo del armazón de la capota y saque la varilla.
5 MONTAJE Y DESMONTAJE DE LA BARRA FRONTAL:
Montaje: inserte los dos extremos de la barra frontal
en el chasis. Cuando haya introducido ambos
correctamente, oirá un chasquido.
Desmontaje: pulse los dos botones de ambos lados del
chasis y retire la barra frontal como se muestra en la
imagen.
6 RUEDAS PIVOTANTES DELANTERAS
Ruedas delanteras rectas: presione hacia abajo el
bloqueo del pivote hasta que oiga un chasquido.
Ruedas delanteras pivotantes: suelte el bloqueo del
pivote y las ruedas delanteras podrán girar. Pise o
presione el pedal hacia abajo como se muestra en la
imagen para bloquear la rueda pivotante. Para soltarla,
levante hacia arriba.
7 USO DE LA CAPOTA:
Mueva la varilla delantera de la capota hacia adelante
o hacia atrás para abrir o cerrar la capota (fig.a).
La ventanilla de la capota se puede abrir para ver al
niño mientras camina (varía según el modelo), (fig.b).
8 AJUSTE DEL RESPALDO
Reclinar hacia abajo:
Presione el seguro de ajuste de reclinación y tire hacia
abajo hasta el ángulo deseado.
Reclinar hacia arriba: Presione el seguro de ajuste
de reclinación y tire hacia atrás del anillo atado en el
cordel hasta el ángulo deseado.
9 Para bloquear: pise el pedal ROJO (fig.a).
Para desbloquear: pise el pedal VERDE (fig.b).
ADVERTENCIA: Asegúrese de que el freno esté activado
siempre que la silla de paseo esté quieta.
10 La silla de paseo está equipada con un arnés de 5
puntos. Una los extremos sueltos de las correas del
cinturón de ambos lados en la hebilla central. Cuando
las haya introducido correctamente, oirá un chasquido.
11 Para desabrochar, presione la hebilla central para soltar
las correas (fig.b).
Para ajustar la correa del hombro, tire de la pieza
deslizante hasta la longitud deseada (fig.c).
Ajuste el cinturón de acuerdo con el tamaño del niño
tirando de la pieza deslizante hasta que los cinturones
se ajusten perfectamente alrededor del cuerpo del
niño.

- 17 -
12 CIERRE DE LA SILLA DE PASEO:
Accione el freno y cierre la capota.
Pulse el botón de plegado y el segundo bloqueo del
asa, empuje el asa hacia adelante y presione hacia
abajo para plegar la silla de paseo. A continuación,
asegure la silla de paseo con el gancho de cierre.
Después de cerrarla, esta silla de paseo se puede
colocar en posición vertical.
13 AJUSTE DEL REPOSAPIÉS
Para bajar el reposapiés, tire hacia afuera y a la vez
de las dos palancas que se encuentran debajo del
reposapiés y empuje el reposapiés hacia abajo.
Para elevar el reposapiés, levántelo de nuevo.
14 BOLSA DE TRANSPORTE:
Incluye una bolsa de transporte para la silla de
paseo Oop, que se puede utilizar según las propias
necesidades como bolsa o como mochila.
INFORMACIÓN SOBRE EL PRODUCTO
15 Información sobre el producto.
Esta información es indispensable en caso de
reclamación.
LIMPIEZA Y MANTENIMIENTO
Las operaciones de limpieza siempre deben realizarse
por personas adultas.
MANTENIMIENTO DEL PRODUCTO: proteger contra
agentes atmosféricos (agua, lluvia o nieve). Una
exposición contínua y prolongada al sol podría causar
cambios de color de muchos materiales. Conservar
este producto en un lugar seco. Realizar controles e
intervenciones de mantenimiento habituales en las
partes principales.
LIMPIEZA DEL CHASIS: Limpiar periódicamente las
partes de plástico con un paño húmedo sin usar
solventes u otros productos similares. Mantener secas
todas las partes de metal para prevenir la oxidación.
Mantener limpias todas las partes móviles (dispositivo
de regulación, de enganche, ruedas...) quitando el
polvo o la arena y, en caso necessario, engrasarlas con
aceites ligeros.
LIMPIEZA DE LAS PARTES DE TEJIDO:
Cepillar las partes de tejido para protegerlas del polvo.
• Para el lavado atenerse a la etiqueta cosida a la bolsa
del producto.
• No utilizar lejía a base de cloro.
• No planchar.
• No lavar en seco.
• No eliminar las manchas con disolventes.
• No secar en secadoras con tambor rotativo.
SERVICIO DE ASISTENCIA BURIGOTTO
Si se pierden o dañan algunas partes del modelo,
utilizar únicamente repuestos originales Burigotto.
Para cualquier reparación, sustitución, información
acerca de los productos, venta de repuestos originales
y accesorios, contactar con el Servicio de Asistencia
PegPerego indicando, el número de serie del producto.
tel. 0039/039/60.88.213
e-mail [email protected]
sito internet www.burigotto.com
Todos los derechos de propiedad intelectual sobre
los contenidos de este manual de instrucciones
pertenecen a PegPerego S.p.A. y están protegidos por
las leyes vigentes.
RU_Pусский
Благодарим вас за то, что вы выбрали продукцию
компании Burigotto.
ПРЕДУПРЕЖДЕНИЕ
_ ВАЖНО! ВНИМАТЕЛЬНО
ПРОЧИТАЙТЕ ЭТИ
ИНСТРУКЦИИ И СОХРАНИТЕ
ИХ ДЛЯ ПОСЛЕДУЮЩЕГО
ИСПОЛЬЗОВАНИЯ.
Невыполнение этих инструкций
может поставить под угрозу
безопасность ребенка.
_ Данное изделие предназначено для
перевозки в коляске 1 ребенка.
_ Не используйте данное
изделие для большего числа
пассажиров, чем предусмотрено
производителем.
_ Данное изделие предназначено
для детей с рождения и до 4 лет
или весом до 22 кг.
_ ВНИМАНИЕ Всегда пользуйтесь
системой предохранительного
крепления. Всегда используйте
систему ремней с пятиточечным
креплением.
Всегда блокируйте поясной ремень
с помощью лямки, проходящей
между ногами.
_ Для младенцев мы рекомендуем
раскладывать спинку полностью.
_ Передний бампер (при
наличии) не предназначен для
выдерживания веса ребенка.
Он не предназначен для
поднимания сиденья вместе
с сидящим в нем ребенком
и не заменяет собой ремень
безопасности.
_ ВНИМАНИЕ Перед
пользованием убедитесь,
что задействованы все
фиксирующие приспособления.
_ ВНИМАНИЕ Перед
пользованием убедитесь
в правильности установки
устройств на корпусе коляски,
сиденья и автокресла.
_ ВНИМАНИЕ Во избежание

- 18 -
травм при раскладывании и
складывании коляски убедитесь,
что ребенка в ней нет.
_ ВНИМАНИЕ Не разрешайте
ребенку играться с изделием.
Данное изделие не является
игрушкой.
_ ВНИМАНИЕ Сборку и подготовку
изделия должен выполнять
взрослый.
_ Не пользуйтесь данным изделием
в случае отсутствия каких-
либо деталей или при наличии
признаков неисправности.
_ ВНИМАНИЕ Никогда не
оставляйте ребенка без
присмотра.
_ Всегда активируйте тормоз,
оставляя коляску в неподвижном
состоянии, а также усаживая
ребенка в коляску и вынимая его.
_ Не вставляйте пальцы в механизмы.
_ Будьте осторожны, чтобы не
травмировать ребенка при
регулировке механизмов (ручки,
спинки и т.п.).
_ Любая нагрузка, оказываемая
на ручку и/или на спинку, и/
или сбоку на изделие, может
негативно отразиться на его
устойчивости.
_ Не нагружайте корзины весом
свыше 5кг. Не вставляйте в
держатель стаканчика (при его
наличии) вес, превышающий
значение, указанное
непосредственно на держателе,
а также никогда не наливайте
в стаканчик горячие напитки.
Не помещайте в карманы
капюшона (при их наличии) вес,
превышающий 0,2кг.
_ Не пользуйтесь изделием вблизи
лестниц или ступенек, источников
тепла, открытого пламени или
опасных предметов, находящихся
в пределах досягаемости ребенка.
_ Используйте только запасные
части, поставляемые или
рекомендуемые производителем/
дистрибьютором.
_
ВНИМАНИЕ Данное изделие
не предназначено для
использования во время
пробежек или катания на коньках.
_ ВНИМАНИЕ Не следует класть в
изделие матрац, не одобренный
производителем.
_ Не следует использовать аксессуары,
не одобренные производителем.
Иллюстрации, на которых изображены
элементы из ткани, могут не соответствовать
приобретенной коллекции.
ИНСТРУКЦИЯ ПО ЭКСПЛУАТАЦИИ
1 РАСКЛАДЫВАНИЕ КОЛЯСКИ: выньте коляску из
коробки и положите в исходном виде (рис.1).
Отстегните удерживающий крючок, поднимите
ручку коляски вверх (рис.2,3,4), раскладывая
ручку (рис.3).
Возьмитесь за ручку с обеих сторон (немного ниже
пенного покрытия) и подымайте коляску, пока не
раздастся щелчок.
ВНИМАНИЕ! Прежде чем перемещать коляску,
убедитесь, что тормоз разблокирован.
2 УСТАНОВКА И СНЯТИЕ ПЕРЕДНИХ КОЛЕС:
Установка: установите колесо на переднюю ось,
как показано на рисунке. Если колесо установлено
правильно, вы услышите щелчок (рис.a). Снятие:
нажмите на серебристую металлическую деталь
(ниже блокиратора колеса) и потяните колесо
наружу, как показано на рисунке (рис.b).
3 УСТАНОВКА И СНЯТИЕ ЗАДНИХ КОЛЕС:
Установка: установите заднее колесо с тормозным
соединением на заднюю опору коляски, как
показано на рисунке. Удостоверьтесь, что колесо
с КРАСНОЙ/ЗЕЛЕНОЙ педалью установлено с
правой стороны коляски. Если колесо установлено
правильно, вы услышите щелчок (рис.a).
Снятие: нажмите на штифт 1 и снимите колесо, как
показано на рисунке (рис. b).
4 УСТАНОВКА И СНЯТИЕ КАПЮШОНА:
Установка: вставьте дугу капюшона в основную
его часть и застегните резинку на крючке, как
показано на рисунке. Повторите это действие для
другой стороны капюшона.
Снятие: отстегните резинки, поднимите фиксатор
на основной части капюшона и вытяните дугу.
5 УСТАНОВКА И СНЯТИЕ БАМПЕРА:
Установка: вставьте два конца бампера в гнезда на
коляске. При правильной вставке обоих концов
бампера вы услышите звук.
Снятие: нажмите на две кнопки на обеих сторонах
коляски и снимите бампер, как показано на
рисунке.
6 ПОВОРАЧИВАЮЩИЕСЯ ПЕРЕДНИЕ КОЛЕСА
Зафиксированные передние колеса: нажмите на
фиксатор поворота, пока не прозвучит щелчок.
Поворачивающиеся передние колеса:
разблокируйте фиксатор поворота, чтобы
передние колеса могли вращаться. Рукой или
ногой нажмите педаль вниз, чтобы заблокировать
вращение колес. Чтобы разблокировать эту
функцию, поднимите педаль.
7 ПОЛЬЗОВАНИЕ КАПЮШОНОМ:
Двигайте дугу капюшона вперед или назад, чтобы
разложить или сложить капюшон (рис.a).
Окошко капюшона можно открыть, чтобы следить
за ребенком на ходу (зависит от модели) (рис.b).
8 РЕГУЛИРОВКА СПИНКИ:

- 19 -
Раскладывание спинки:
Нажмите на фиксатор регулировки наклона и
потяните спинку назад до нужного угла.
Поднимание спинки: Нажмите на фиксатор
регулировки наклона и потяните за кольцо на
ремне назад до нужного угла наклона спинки.
9 Активация тормоза: надавите ногой на КРАСНУЮ
педаль (рис.a).
Разблокирование тормоза: надавите ногой на
ЗЕЛЕНУЮ педаль (рис.b).
ВНИМАНИЕ! Когда коляска не перемещается,
следует удостовериться, что тормоз активирован.
10 Коляска оснащена 5-точечными ремнями
безопасности. Соедините свободные концы
поясных ремней с обеих сторон в центральной
пряжке. Если они вставлены правильно, вы
услышите щелчок.
11 Для расстегивания ремней нажмите на
центральную пряжку (рис.b).
Для регулировки плечевых ремней переведите
ползунок в положение, соответствующее
требуемой длине (рис. c).
Ремни нужно отрегулировать в соответствии с
размерами тела ребенка, переведя на них ползуны
таким образом, чтобы ремни плотно прилегали к
телу.
12 СКЛАДЫВАНИЕ КОЛЯСКИ:
активируйте тормоз и сложите капюшон.
Нажмите на кнопку складывания и одновременно
на второй фиксатор на ручке, толкая ручку вперед
и нажимая на нее вниз для складывания коляски,
фиксируя коляску удерживающим крючком. Эта
коляска может стоять в сложенном виде.
13 РЕГУЛИРОВКА ПОДСТАВКИ ДЛЯ НОГ:
Чтобы опустить подставку, одновременно
толкните рычаги под подставкой для ног наружу и
потяните подставку вниз.
Чтобы поднять подставку для ног, просто снова
потяните ее вверх.
14 СУМКА ДЛЯ ТРАНСПОРТИРОВКИ:
В комплектацию коляски Oop входит чехол для
транспортировки, который по необходимости
можно использовать как сумку или как рюкзак.
ИНФОРМАЦИЯ ОБ ИЗДЕЛИИ
15 Информация об изделии.
Данные сведения требуются при представлении
рекламации.
ЧИСТКА И УХОД
Операции по чистке должны выполнять только
взрослые.
УХОД ЗА ИЗДЕЛИЕМ: защитите изделие от
атмосферных осадков - снега или дождя.
Постоянная и продолжительная подверженность
солнечным лучам может вызвать цветовые
изменения многих материалов. Храните это изделие
в сухом месте. Регулярно осуществляйте осмотр и
техобслуживание основных частей устройства.
ЧИСТКА ШАССИ: периодически очищайте
пластмассовые детали влажной тряпкой, без
использования растворителей и сходных веществ.
Держите металлические части изделия сухими,
чтобы предотвратить образование ржавчины.
Поддерживайте чистоту всех движущихся деталей
(регулировочные и соединительные детали, колеса
и т.д.), удаляя пыль и песок. При необходимости,
смажьте их легким маслом.
ЧИСТКА ТКАНЫХ ЧАСТЕЙ:
Почистите тканевые детали щеткой, чтобы удалить
пыль.
• При стирке точно следуйте инструкциям на
этикетке, вшитой в чехол изделия.
• Не использовать хлорный отбеливатель.
• Не гладить.
• Не подвергать химической чистке.
• Не удалять пятна растворителями.
• Не сушить в сушке.
СЛУЖБА ОБСЛУЖИВАНИЯ
BURIGOTTO
В случае утери или порчи аксессуаров, применяйте
только фирменные запасные части производства
компании Burigotto. Для выполнения ремонта,
замены запасных частей и получения информации об
устройстве обращайтесь в службу послепродажного
обслуживания PegPerego, сообщив, серийный номер
продукта:
Срок службы: 3 года
Гарантийный срок: 12 месяцев
тел.: 0039/039/60.88.213
e-mail [email protected]
сайт в интернете: www.burigotto.com
Изготовитель: PEGPEREGO S.P.A.
(Пег Перего С.П.А.); Адрес: Via de Gasperi 50 - 20862
ARCORE (MB), Italy (Виа де Гаспери 50,
20862 Аркоре (МБ), Италия).
Страна производства: Италия
Соответствует требованиям
технического регламента ТР ТС
007/2011

IMPORTED AND DISTRIBUITED BY:
PEGPEREGO S.p.A.
VIA DE GASPERI 50, 20862 ARCORE MB ITALIA
tel. 0039 039 60881 fax 0039 039 615869
Servizio Post Vendita - After Sale: tel. 0039 039 6088213
www.burigotto.com
FI001902I309
Tutti i diritti di proprietà intellettuale relativi ai contenuti di questo manuale d’istruzione appartengono a PegPerego
S.p.A. e sono tutelati dalle leggi vigenti.
All of the intellectual property rights for the contents of this instruction manual belong to PegPerego S.p.A. and are
protected by the laws in force.
This manual suits for next models
1
Table of contents
Languages:
Other Burigotto Stroller manuals

Burigotto
Burigotto Ecco IXCA2057 User manual

Burigotto
Burigotto IT User manual

Burigotto
Burigotto leblon User manual

Burigotto
Burigotto AT6 K User manual

Burigotto
Burigotto UP! IXCA5111 User manual

Burigotto
Burigotto leblon User manual

Burigotto
Burigotto SPLASH XBA3043 User manual

Burigotto
Burigotto TRAVEL SOUL User manual

Burigotto
Burigotto COSY IXCA5102 Quick setup guide

Burigotto
Burigotto AIR User manual