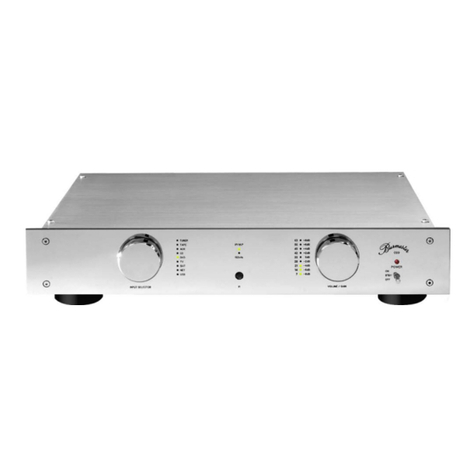
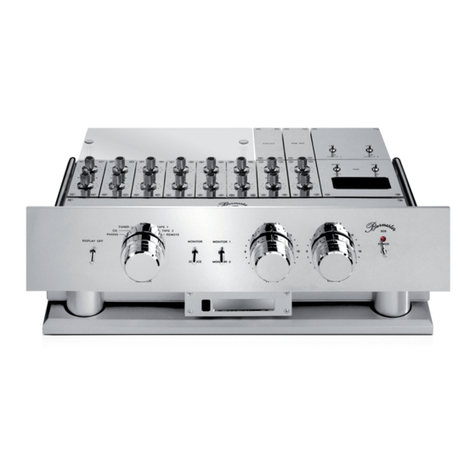
Burmester 011 User manual

OWNER’S MANUAL
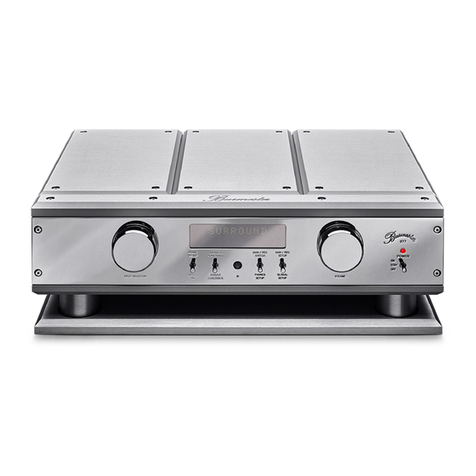
PREAMPLIFIER
011
HIGH END MADE IN GERMANY
BURMESTER AUDIOSYSTEME GMBH · Kolonnenstraße 30g · 10829 Berlin
Phone + 49/30/78 79 68-0 · Fax + 49/30/78 79 68-68 · E-MAIL: mail@burmester.de, www.burmester.de


2
Dear Audiophile,
Athank you for choosing this Burmester audio component. We sincerely appreciate your trust in us.
You have purchased a preamp which excells in musical fidelity and combines uncompromising manufacturing
quality with technical innovation and the highest degree of operating flexibility.
We urge you to read this user manual in its entirety before setting up the 011 for the first time. It will enable you to
make full use of all capabilities of this outstanding audiophile instrument.
For any further questions, please contact your dealer or us directly.
Enjoy your enhanced listening pleasure.
Your Burmester-Team

4
ON OFF
≈
230 V 50 Hz 25 W
MA INS
HANDM ADE IN
GERM ANYPREAMP 011
SNR
RE MOT E
OU TPUT 1
RE MOT E
OU TPUT 2
TAP E OU T
TAP E OU T
TAP E IN
TAP E IN
AU X 4
AU X 4
AU X 3
AU X 3
AU X 2
AU X 2
AU X 1
AU X 1
TUNE R
TUNE R
CD
CD
PHONO
PHONO
GN D
SURROU N D
SURROU N D
BA LANCE D
BA LANCE D
R
L
UNBAL
UNBAL
WARNUNG
VOR ÖFFNEN
NETZSTECKER ZIEHEN
CAUTION
RISK OF ELEC TRIC SHO CK
DO NOT O PEN
PHONES
BURLINK
T
R
IN PUT S I NPUT SOU TPUTS O U TPUTS
(1) POWER switch
(2) POWER LED
(3) VOLUME control knob
(4) SCHELLACK LED
(5) SCHELLACK/RIAA switch
(6) VOLUME indicator
(7) MONO/STEREO switch
(8) MONO LED
(9) Infrared signal receiver
(10) STAND-BY - LED
(11) MONITOR/SOURCE switch
(12) Universal function display window
(13) SURROUND/PRE AMP switch
(14) MONITOR LED
(15) SURROUND LED
(16) INPUT selector knob
(17) Vibration-isolating housing foot
(18) AC mains input
(19) AC mains switch
(20) BURLINK interface
(21) HEADPHONE output
(22) REMOTE / TRANSMIT LED
(23) REMOTE Output 1 for remote on/off-
switching of Burmester power amps
(24) REMOTE Output 2 for remote on/off-
switching of Burmester power amps
(25) UNBAL unbalanced output, left channel
(26) UNBAL unbalanced output, right channel
(27) BALANCED output, left channel
(28) BALANCED output, right channel
(29) TAPE OUT unbalanced, left channel
(30) TAPE OUT unbalanced, right channel
(31) TAPE IN unbalanced, left channel
(32) TAPE IN unbalanced, right channel
(33) AUX 4 unbalanced input, left channel
(34) AUX 4 unbalanced input, right channel
(35) SURROUND balanced input, left channel
(36) SURROUND balanced input, right channel
(37) AUX 3 balanced input, left channel
(38) AUX 3 balanced input, right channel
(39) AUX 2 balanced input, left channel
(40) AUX 2 balanced input, right channel
(41) AUX 1 balanced input, left channel
(42) AUX 1 balanced input, right channel
(43) TUNER balanced input, left channel
(44) TUNER balanced input, right channel
(45) CD balanced input, left channel
(46) CD balanced input, right channel
(47) PHONO balanced input, left channel
(48) PHONO balanced input, right channel
(49) Mass screw for phono cable grounding
3
4
Standard supply
Packaging
Setting up
General hints
AC terminal
Power switch
Infrared receiver
The inputs
Phono
Surround
CAUTION:
START - UP PROCEDURE
The preamp 011comes with the following:
·1 Shipping carton
·1 Owner's manual
·1 Power cord
·1 Warranty card and registration
We recommend keeping the original packaging material in case of a move or future shipping.
Carefully remove the preamp from the shipping carton and set it up in an appropriate location. Make
sure that the vent openings on the sides are not covered up and that there is sufficient cooling air
circulation around the unit.
Connection procedure
Make sure your stereo system is completely switched off while you are connecting the various com-
ponents to the preamplifier.
Make sure the AC mains switch (19) is set to OFF. Connect the power cord with the AC terminal (18)
and plug the power cord into the AC wall outlet. The correct phase polarity has been marked on the
plug of the supplied AC cord.
The AC mains switch (19), which disconnects the preamplifier from AC power, is located above the
AC mains input (18) on the rear panel. By setting the switch to ON only the transformer is connected to
AC power. The POWER switch (1) on the right side of the front panel activates all functions.
The infrared receiver (9) for signals from the IR remote control must not be covered up.
The 011preamplifier offers seven pairs of balanced inputs: PHONO (47/48), CD (45/46), TUNER (43/44),
AUX 1 (41/42), AUX 2 (39/40), AUX 3 (37/38) as well as SURROUND (35/36).
Furthermore, it offers two pairs of unbalanced inputs: AUX 4 (33/34) und TAPE-IN (31/32).
Caution: If several unbalanced components are to be connected and the number of standard unbalanced
inputs do not suffice, it is of course possible to operate the balanced inputs as unbalanced by using
XLR-RCA adapter plugs. These adapters can be supplied by your dealer.
The preamp is set up for MC (Moving Coil) phono cartridges. Custom loading for the correct impe-
dance is done using the configurations menu. Also, cartridges may be used that are fit for playing
old shellac records. Switching between regular and shellac records is done using the SHELLAC/RIAA
switch (5) on the front panel. To connect a turntable with an RCA-terminated tone arm cable, please
use XLR-RCA adapter plugs.
Please note that standard MM (Moving Magnet) cartridges may not be connected .
The input marked SURROUND is for hooking-up surround processors or surround decoders. With the
SURROUND/PREAMP switch (13) the decoded signal from the processor can be routed directly to
the outputs of the 011. In this operating mode the preamp has no further function, but to pass the signal
through. Thus makes it easy to integrate surround components into an existing hifi system without
cumbersome re-connecting of cables.
Only connect components with their own volume control to this input, since the signal is routed
directly to the power amp.


5
Burlink
The outputs
CAUTION:
TAPE OUT
Headphones
CAUTION:
Remote
Connection procedure (cont.)
The Burmester Link interface (20) does not have a function at this time. It is intended for an expansion
module that will provide additional functions in the future. The LEDs (22) marked Tand R (for Transmit
and Receive) connected with this interface at the rear panel are also not yet functioning. In the future,
they will indicate the exchange of digital data.
For the connection with power amplifiers the 011offers two sets of outputs, BALANCED (27/28) as well as
unbalanced UNBAL (25/26). For sound reasons we recommend using the output BALANCED (27/28).
The pin polarity of the XLR terminals is as follows:
1 = (GND) , 2 = (Negative), 3 = (Positive)
The value of the output voltage may be adjusted by using the configurations menu of the 011. The setting
HI increases the output voltage for optimal control of power amplifiers with low input sensitivity. With
Burmester power amps we recommend using the LO setting.
The TAPE OUT (29/30) terminals are used to connect a tape recorder. Their signal output is independent
of the volume control. The signal source to be taped is selected with the INPUT selector knob (16).
The 6.3 mm output jack marked PHONES (21) is for the connection of headphones with an impedance
higher than 100 ohms.
When headphones are connected, playback through the loudspeakers is not automatically switched off.
However, a function that automatically deactivates the speakers can be set using the configurations
menu of the 011.
The two terminals, REMOTE OUTPUT 1 (23) and REMOTE OUTPUT 2 (24), are for switching Burmester
power amplifiers on and off from the preamp. When a connection with the REMOTE CABLE has been
made the preamp takes on the master function.
Since every customer needs a different length of cable we do not supply it as standard. However, we gladly
supply you free of charge with a custom length of cable that you may order from your Burmester dealer.


6
VOLUME control
INPUT selection
SURROUND/
PRE AMP switch
CAUTION:
MONITOR/SOURCE
switch
MONO/STEREO
switch
SCHELLACK/RIAA
switch
CAUTION:
THE OPERATING CONTROLS AND THEIR FUNCTIONS
The VOLUME control knob (3) serves to adjust the volume level in 60 precise steps from 00 (off) to 60
(full volume). The various volume levels are indicated by the VOLUME display (6). If the VOLUME
control knob (3) is turned slowly the volume will change in single steps, if turned rapidly volume levels
will change in large increments. The VOLUME control knob (3) is also used to set functions via the
configurations menu.
The various signal inputs of PHONO, CD, TUNER, AUX 1, AUX 2, AUX 3, AUX 4 and TAPE can be
easily selected by turning the INPUT selector knob (16). Whichever input has been chosen will be
indicated in the universal function display window (12). The INPUT selector knob (16) is also used
to set functions via the configurations menu.
Bringing the SURROUND/PRE AMP switch (13) into the upper (SURROUND) position the preamp
is set to its surround function. This will be indicated by illumination of the red SURROUND LED (15)
as well as the letters SURROUND in the universal function display window (12). In this operating
mode the signals coming from the connected surround processor are looped directly through to the
preamp's outputs.
In this operating mode all other functions of the 011are deactivated. The preamp functions can be turned
back on by bringing the SURROUND/PRE AMP switch (13) into the lower PRE AMP position.
Bringing the MONITOR/SOURCE switch (11) into the upper MONITOR position will suppress the signal
path from the source and replay the just recorded signal from the tape. The monitor function is indicated
by an illuminated red MONITOR LED (14). Setting the MONITOR/SOURCE switch (11) into the down
SOURCE position will open the normal signal path from the source again.
Moving the MONO/STEREO switch (7) into the up MONO position will add the signals from right and
left channel to a monophonic signal which will be available at the outputs. The MONO-operating mode
is indicated by an illuminated red MONO LED (8). Moving the switch down to the STEREO position
will reactivate the normal operating mode.
By bringing the SHELLACK/RIAA switch (5) into the up (SCHELLACK) position the preamp is set for
replaying shellac records. This operating mode is indicated by an illuminated red SCHELLACK LED (4).
In order to replay records the INPUT selector knob (16) must be set to PHONO.
Setting the switch to the lower RIAA position will allow the playback of regular vinyl LPs conforming to
the RIAA recording standard.


7
Configurations
menu
Accessing the menu
CAUTION:
Leaving the menu
Functions
CAUTION:
Special Functions
The configurations menu of the 011allows an easy and comfortable pre-setting of certain basic
functions as well as configuring special functions.
You can access the configuration menu by executing the following steps:
1) Set AC MAINS switch (19) at the rear panel to ON
2) Set POWER switch (1) to OFF
3) Set SURROUND/PREAMP switch (13) to SURROUND
4) Set MONITOR/SOURCE switch (11) to MONITOR
5) Set MONO/STEREO switch (7) to MONO
6) Set SCHELLACK/RIAA switch to SCHELLACK
Finally, without delay, set the POWER switch (1) to ON.
While the POWER switch (1) is in standby position the universal function display window (12) will
show CONFIG? If the POWER switch is not switched to ON within app. 5 seconds the configuration
menu will not be activated and the preamp goes back into normal operating mode. Accordingly, the
green STANDBY LED (10) illuminates.
To terminate programming and save the new configuration the POWER switch (1) must be set to
STBY or OFF. At least one of the switches (5), (7), (11) or (13) must be set back to its lower position
in order to avoid getting back into the configurations menu when the unit is switched back on.
The following table shows all functions that may be changed using the configurations menu.
The INPUT selector knob (16) is used to select the function to be re-configured (indicated in the left
side of the universal display window) and the VOLUME control knob (3) is used to change the res-
pective setting (indicated in the right side of the universal display window).
While in the configurations menu the volume level of the 011may be adjusted using the VOLUME +
and - buttons of the remote control.
PROGRAM
Scroll with INPUT
selector knob (16)
L-PH (Level Phono)
L-CD (Level CD)
L-TU (Level Tuner)
L-A1 (Level Aux1)
L-A2 (Level Aux2)
L-A3 (Level Aux3)
L-A4 (Level Aux4)
L-TP (Level Tape)
FUNCTION
Scroll with VOLUME
selector knob (3)
-6 bis + 6
-6 bis + 6
-6 bis + 6
-6 bis + 6
-6 bis + 6
-6 bis + 6
-6 bis + 6
-6 bis + 6
EXECUTED FUNCTION
Volume pre-set for PHONO input
Volume pre-set for CD input
Volume pre-set for TUNER input
Volume pre-set for AUX 1 input
Volume pre-set for AUX 2 input
Volume pre-set for AUX 3 input
Volume pre-set for AUX 4 input
Volume pre-set for TAPE input
Caution: The pre-adjustment of volume levels of the
individual inputs serves to avoid jarring jumps in volume
when switching between the various signal inputs.


8
Remote control When the POWER switch (1) is set to STBY the POWER button on the optional system remote con-
trol may be used to switch the preamp on or back into standby mode.
Volume may be adjusted by pressing the VOLUME + or - buttons. Inputs can be selected by pressing
the designated buttons on the remote. The different AUX inputs may be scrolled through by repeatedly
pressing the AUX button. Each time a button is pressed a red control LED will light up.
All other buttons on the remote control do not affect the operation of the preamp 011.
PROGRAM
Scroll with INPUT
selector knob (16)
DISP (Display)
LINK (Burlink)
MSTR (Master)
VOL (Volume)
OUT
(Output
amplification)
HP
(Headphone
output)
PHLD
(Phono load)
PH
(Phono
amplification)
FUNCTION
Scroll with VOLUME
selector knob (3)
OFF
ON
OFF
ON
OFF
ON
0 bis 20
L(last)
HI
LO
OFF
ON
10 bis 1 K
0
+ 6
EXECUTED FUNCTION
Switches the universal function display window (12)
off. It will only illuminate (Output amplification)
briefly when controls and switches are being used.
Switches the universal function display window (12) on again.
Deactivates the Burmester Link interface (20)
Activates the Burmester Link interface (20)
Remote function for Burmester power amps deactivated
Remote function for Burmester power amps activated
Determines the initial volume (0=no signal)
Starts the unit up with the same volume it was turned off
Increases the output voltage for power amps with low
sensitivity
Reduced the output voltage (recommended for
Burmester power amps)
Activates the preamp output if headphones are plugged
into the phones jack
Deactivates the preamp output if headphones are
plugged into the phones jack
Impedance fine-tuning for phono cartridges in the following
steps:10 Ω, 15 Ω,50 Ω,68 Ω,120Ω,180Ω,390Ωand 1 kΩ
Standard amplification factor for phono cartridges with
normal output voltage
Increased amplification factor for phono cartridges with
low output voltage


9
Reset
Lightning strikes
Interconnect cables
Fuses
CAUTION:
PLEASE NOTE:
GENERAL INSTRUCTIONS
If the preamp does not react to the control buttons, it can easily be reset to normal operating conditions
by switching it off and back on using the POWER switch (1).
During the summer months malfunctions often occur due to voltage spikes in the power lines after
lightning strikes. Completely unplugging the power cord offers the only effective protection. Merely
switching the AC mains switch (19) off does not suffice since voltage spikes are able to arc over
separated contacts.
We supply custom-made balanced as well as unbalanced interconnect cables of any length to ensure
the best sound quality of your pre-amplifier 011. The impedance of our cables is ideally matched with
all BURMESTER audio components.
For the cleanest power supply we recommend our triple-shielded power cord BURMESTER-POWER.
The fuses are located inside the housing and should be changed by an expert only.
The AC cord must be unplugged before removing the cover! Danger of electric shock! Do not
look into the laser beam when the cover has been removed!
TECHNICAL SPECIFICATIONS
Power consumption: OFF: 6 W
STBY: 6 W
ON: 25 W
Line gain: LO: 12 dB
HI: 15 dB (bei Volume = 60)
Dimensions (WxHxD): 482x95x345mm (inkl. Stecker)
Weight: 9,6kg
The dimensions do not include the space needed for the plugs of interconnect cables.
Table of contents
Other Burmester Amplifier manuals

Burmester
Burmester Classic Series User manual

Burmester
Burmester Top Line Phono preamp 100 User manual

Burmester
Burmester 218 User manual

Burmester
Burmester 082 User manual

Burmester
Burmester 808 MK5 User manual

Burmester
Burmester 036 User manual

Burmester
Burmester Classic Series User manual

Burmester
Burmester 159 User manual

Burmester
Burmester Classic 101 User manual

Burmester
Burmester 088 User manual