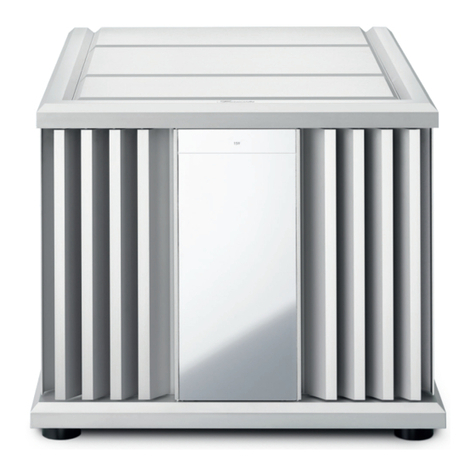
Burmester 909 MK5 User manual

OWNER 'S MANUAL
REFERENCE LINE
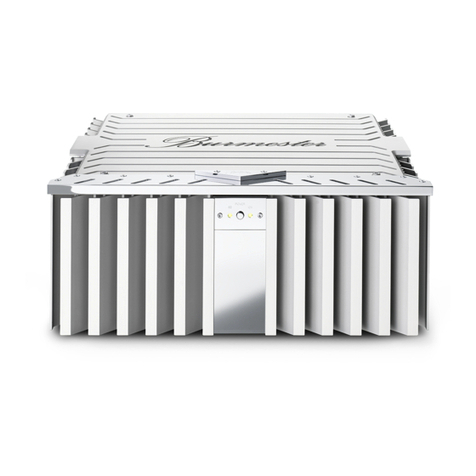
POWER AMP
909 MK5
HIGH END MADE IN GERMANY
BURMESTER AUDIOSYSTEME GMBH • WILHELM-KABUS-STRAßE 47 • 10829 BERLIN • GERMANY
FON +49/(0)30/78 79 68 – 0 • FAX +49/(0)30/78 79 68 – 68 •E-MAIL: mail@burmester.de •www.burmester.de

VERSION 1.2 FROM March 24
th
, 2011

Dear Audiophile,
Thank you for choosing this Burmester audio component. We sincerely appreciate your trust in us.
You have purchased a unit which excels in musical fidelity and combines uncompromising manufacturing
quality with technical innovation and the highest degree of operating flexibility.
We recommend reading this user manual at least once in its entirety before initial operation. This will enable
you to make full use of all capabilities of this outstanding audiophile instrument.
Should you have any further questions, please contact your dealer or us directly.
Talk to us about your special requests, even if they seem out of the ordinary. We happily accept technically
reasonable challenges.
Enjoy your enhanced listening pleasure.
Your Burmester Team

C O N T E N T S
UNPACKING and SET-UP POSITION 1
VIEWS OF UNIT 2-3
CONNECTING 4
OPERATING CONTROLS 5
PROTECTIVE CIRCUITS 5
WIRING DIAGRAMS 6-8
STEREO operation 6
MONO operation 7
BI-AMPING operation 8
GENERAL INSTRUCTIONS 9-10
TECHNICAL DATA 11

1
UNPACKING and SETTING UP
CAUTION: The power amp 909 is very heavy. To avoid injuries while unpacking it is suggested that only
personnel with experiences in heavy weights unpack the units.
CAUTION: The unit is shipped inside a plastic protective cover. Make sure that children do not play with it to
avoid the danger of suffocation.
Unpacking To avoid damaging the housing, please do not use pointed or sharp tools to open the box.
Please make sure that the content of the box is complete. If something is missing or you
notice any damage while unpacking, do not hook up the unit. Instead, contact your
authorized dealer.
Content of the box The box contains the following:
•1 power amp 909
•1 power cord
•2 adapter plugs (XLR – RCA)
•1 REMOTE cable
•1 owner’s manual
Packaging We recommend keeping the original packaging material in case of a move or future
shipping.
Setting up Too low or too high temperatures may cause damage inside of the power amp.
Therefore we recommend you leave the unit to adapt to room temperature, before
using it for the first time.
Carefully remove the unit from its packaging and set it up in an appropriate location. To
protect the power amp 909 from overheating make sure that the location offers sufficient air
circulation around the unit. Also, avoid excessive exposure to sun, dust and humidity.
Please make sure that your desired location for the power amp is stable enough to carry its
weight.
Ventilation ducts and openings in the housing serve to keep the unit cool. They must not be
covered up with magazines, tablecloth, curtains etc.
If the power amp has to be operated in an extremely warm environment it may be
necessary to supply additional ventilation. Avoid operating the unit in an excessively
humid environment like bathrooms etc.

2
VIEWS OF UNIT
FRONT VIEW
(1) STAND BY LED (3) POWER LED
(2) POWER button (4) ERROR display

3
REAR VIEW
(5) Input, right channel (11) AC mains input
(6) REMOTE output (12) Loudspeaker output, left channel, negative
(7) Loudspeaker output, right channel, positive (13) Loudspeaker output, left channel, positive
(8) Loudspeaker output, right channel, negative (14) REMOTE input
(9) AC mains switch (15) Input, left channel
(10) Fuse carrier

4
CONNECTING
The connectors of the power amp 909 are located on the rear panel. We strongly recommend leaving all
components switched off while connecting the power amp. For optimal connections also pay attention to the manual
of the driving unit.
AC mains input Before connecting the power amp please check that the input voltage of the 909 is
equal to the local voltage of your wall outlet.
The AC mains input (11) is located on the rear panel. Make sure that the AC mains
switch (9) is set to OFF. Connect the power cord with the AC mains input (11) and plug it
into the wall outlet.
Inputs The 909 offers two balanced Inputs (5) and (15), which will be connected to the
corresponding outputs of your pre amplifier/surround processor.
The pinning of the balanced inputs (XLR 3pin) is: PIN1=GND, PIN2=NEG, PIN3=POS.
We strongly recommend using balanced connections to take full advantage of the
extraordinary sound quality.
If necessary, the inputs can be converted to unbalanced mode by using the supplied
adapter plugs.
CAUTION: Do only connect a unit with its own volume control to these inputs.
Otherwise serious damage to your ears and equipments may occur.
Binding posts We utilize the same binding posts for our power amplifiers as for our loudspeakers. These
high-grade terminals for speaker cables have proven their sonic excellence and functional
convenience a thousand times over. Speaker cables can be connected via pure-copper
spade plugs or via banana plugs. We recommend using pure copper spade plugs.
CAUTION: The binding posts of power amplifiers may carry dangerously high voltages. Do
not touch them while the power amp is switched on.
Outputs CAUTION: We strongly recommend leaving all components switched off while connecting
the power amp. This will avoid shorting out cables that have not yet been completely
hooked up. Connect the speaker cables to the power amplifier only after ensuring that they
are hooked up correctly to the speakers.
Before turning the amp back on, make sure that all cables have been connected firmly and
correctly with respect to polarity (POS, NEG) as well as frequency (LOW, HIGH/MID). After
a new hook-up, we recommend increasing the volume slowly until you are sure that
everything is connected correctly.
IMPORTANT: Only connect the speaker cables to the intended binding posts of the power
amp/loudspeakers. Never insert the speaker cables into a wall socket / AC mains.
Remote Connecting REMOTE OUT (6) to the corresponding REMOTE IN-jack of another
BURMESTER-unit offers to switch on or off this other unit simultaneous by the 909. In this
case, the 909 has the master function.
Connecting REMOTE IN (14) to the corresponding REMOTE OUT-jack of another
BURMESTER-unit offers to switch on or off the 909 simultaneous by the other unit. In this
case, the 909 has the slave function.
5
OPERATING CONTROLS
The operating controls are located on the front panel except for the AC mains switch.
AC mains switch The AC mains switch (9) is located on the rear panel and connects the 909 from the AC
supply when it is switched to ON.
When it is set to OFF the unit is completely disconnected and the LEDs on the front panel
remains dark.
Switching to ON activates the stand by mode and the Stand by LED (1) on the front panel
illuminates.
POWER button The POWER button (2) on the front panel switches the 909 into operating mode or back
into stand by mode. In operating mode the Stand by LED (1) and the POWER LED (3) are
illuminated. In stand by mode only Stand by LED (1) lights up.
After switching to operating mode the protective circuits of the 909 take a few seconds to
check all circuits of the power amp before enabling the speaker outputs.
PROTECTIVE CIRCUITS
The protective circuits of the 909 operate outside the signal path. When the amp is on, these circuits constantly
check for errors with respect to temperature, DC offset and overload.
Temperature In the event that one of the channels of the power amp exceed their maximum allowable
temperature the overheat protection switches off the output relays and the POWER LED (3)
goes out. The unit is switched into stand by mode and the ERROR display (4) shows a 1.
As a precaution, we recommend to lower the volume and wait a while before turning the
909 back on by pressing the POWER button (2). The 909 can only be switched back on
after the temperature has fallen below the allowable limit.
DC offset If the DC voltage at the speaker outputs of the 909 exceeds the allowable limit, the speaker
relays will be switched off and the ERROR display (4) shows a 2. In this case we
recommend to lower the volume level. The 909 will re-enable the speaker outputs
automatically as soon as the DC offset falls within the allowable limit.
NOTICE: If both errors (temperature and DC offset) occur at the same time, the ERROR display (4) shows a 3.
In both cases the upper error display refers to the right channel, the lower error display to the left channel.
Overload If the current, which is flowing through the power transistors of the 909, exceeds the
allowable limit, the speaker relays will be switched off and the 909 automatically switches
into standby mode after a few seconds.
In this case we recommend to lower the volume level and check all connections from the
909 to the speakers. Usually a shorted connection is the reason for this error.
The 909 can only be switched back on by pressing the POWER button (2)

6
WIRING DIAGRAMS
STEREO operation In STEREO mode each channel will be connected with the corresponding channel of the
stereo signal.
To use the 909 in STEREO mode make the following connections:
(5) input, right channel
(7) positive loudspeaker binding post, right channel
(8) negative loudspeaker binding post, right channel
(15) input, left channel
(13) positive loudspeaker binding post, left channel
(12) negative loudspeaker binding post, left channel

7
MONO operation In MONO mode a MONO adapter is required which is available on request at your local
dealer.
To use the 909 in MONO mode make the following connections:
(5) MONO adapter, red side
(7) positive loudspeaker binding post
(8) not connected
(15) MONO adapter, blue side
(13) negative loudspeaker binding post
(12) not connected

8
BI-AMPING operation In BI-AMPING mode a BI-AMPING adapter is required which is available on request at your
local dealer.
To use the 909 in BI-AMPING mode make the following connections:
(5) BI-AMPING adapter, red side
(7) positive loudspeaker binding post, high/mid
(8) negative loudspeaker binding post, high/mid
(15) BI-AMPING adapter, blue side
(13) positive loudspeaker binding post, low
(12) negative loudspeaker binding post, low

9
GENERAL INSTRUCTIONS
Please read the owner’s manual carefully and keep it safely. If you have any questions, we ask you to contact
your local authorized dealer.
Operating temperature An operating temperature that is too high or too low may cause malfunctioning. We
therefore recommend letting the unit settle for a while after unpacking before connecting
and operating it.
Setting up When choosing a place for your equipment please observe the following:
- Avoid direct sunlight.
- Do not expose the equipment to excessive heat, cold, humidity or dust.
- Provide adequate air circulation; avoid placing the equipment in enclosures.
- Slots and other openings in the housing are for ventilation. They must not be covered up.
- Please make sure that the component is not exposed to dripping water or splash water,
also don’t place boxes with liquid onto your component.
- Open flames like candles must not be placed on top of any electronic unit.
Mains voltage Check before operating the unit to see if the mains voltage setting shown on the back panel
below the AC mains input conforms to the voltage of your household power supply. Any
changes should only be done by an expert only.
For AC connection please use only the three-pronged power cable provided.
The grounding pin should not be bypassed under any circumstances. Connect the
component only to a wall outlet with fully functional grounding pin.
Comm. operation Before installation, switch off all other components of your hifi system. Switch them back on
only after making sure that all connections have been made correctly and completely.
Never try to operate the equipment when it has obviously been damaged or if liquid has
gotten into it.
Terminals The pins of the connecting terminals on the back panel must not be touched under any
circumstances. Static discharges may damage the electronic circuitry inside the unit.
Interconnects We supply custom-made balanced as well as unbalanced interconnect cables and speaker
cables of any length to ensure highest-quality signal paths for our components. The
impedance of our cables is ideally matched to all BURMESTER components.
For the cleanest power supply we recommend our triple-shielded power cord BURMESTER-
POWER.
Heat development Be careful when touching the housing – it may get quite warm during operation.
Reset If the unit does not react when pressing the control keys on the front panel it may be reset
to normal operation by switching it off and back on using the AC mains switch in the back.

10
!
Lightening strikes During the summer months, malfunctions often occur due to voltage spikes in the power
lines after lightning strikes. Completely unplugging the power cord offers the only effective
protection. Merely switching the unit off does not suffice since voltage spikes are able to arc
over separated contacts.
Fuses The fuses are located inside the unit and should only be changed by a qualified technician.
Warranty We offer a warranty of 3 years for this unit. It is a precondition that the unit has been
hooked-up and operated correctly and is mechanically undamaged.
Opening the unit, modifying it or dismantling outlets will void the warranty instantly.
Care Never clean the housing with a wet cloth or chemical cleaning agent. Always make sure that
no liquid gets into the housing.
This symbol on the equipment points to important notes, which can be found in the owner´
s manual.
This symbol on or inside the equipment warns of dangerously high voltage.
If the unit is to be put out of operation definitively, take it to a local recycling plant for a
disposal, which is not harmful to the environment.
CAUTION: The unit must only be opened by qualified experts. Opening the unit provides the
chance of encountering dangerously high voltage. Therefore the power cord must
always be unplugged before opening the equipment.

11
TECHNICAL DATA
Dimensions Width x Height x Depth 482 x 500 x 485mm
(19.0 x 19.7 x 19.1 inches)
Weight app. 80kg
(app. 176 lbs)
Mains voltage and fuses for 200V – 254V 50/60Hz
F1, F3: slow 2.5A E
F2, F4: slow 1.0A E
Unit fuse 2x slow 16A E
for 100V – 127V 50/60Hz
F1, F3 slow 3.15A E
1F2, F4 slow 2.0A E
Unit fuse 2x slow 16A E
Power consumption max. 1.500W
idling 60W
stand by 4W
Output power at 4Ohm 2 x 600W; 1x 1930W
at 1Ohm 2 x 1250W; 1x 3200W
PLEASE NOTE: The dimensions do not include the length of binding posts and the space needed for
plugs of interconnect cables.
The technical data and design of this product are subject to change without notice.
Table of contents
Other Burmester Amplifier manuals

Burmester
Burmester 099 User manual

Burmester
Burmester Classic 101 User manual

Burmester
Burmester 911 MK3 User manual

Burmester
Burmester 035 User manual

Burmester
Burmester Classic Series User manual

Burmester
Burmester 036 User manual

Burmester
Burmester 011 User manual

Burmester
Burmester 159 User manual

Burmester
Burmester Classic Series User manual

Burmester
Burmester 082 User manual

Burmester
Burmester 077 User manual

Burmester
Burmester 808 MK5 User manual

Burmester
Burmester 218 User manual

Burmester
Burmester 088 User manual

Burmester
Burmester 077 User manual

Burmester
Burmester Top Line Phono preamp 100 User manual

Burmester
Burmester 159 User manual

Burmester
Burmester 911 MK 3 User manual