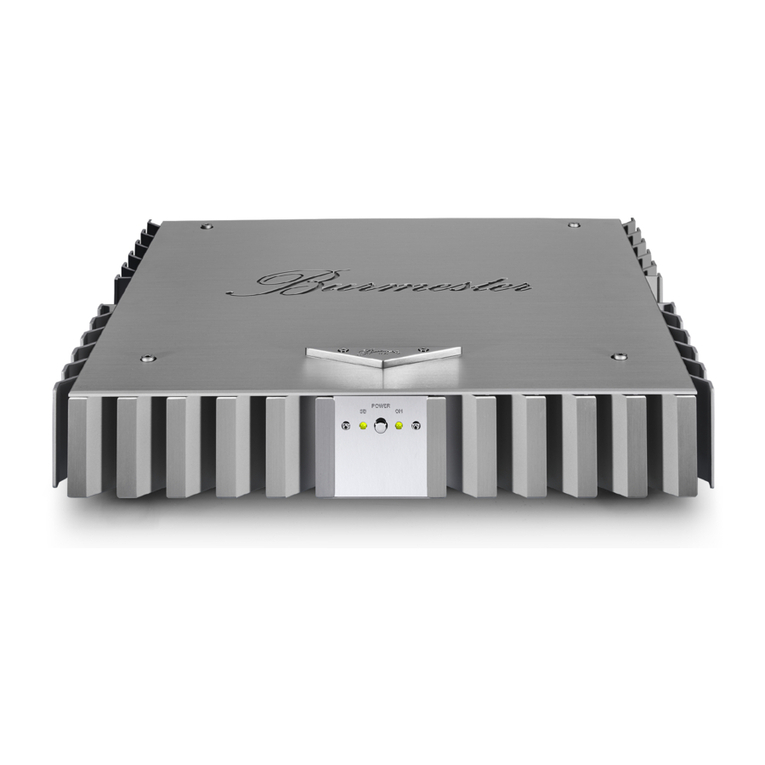
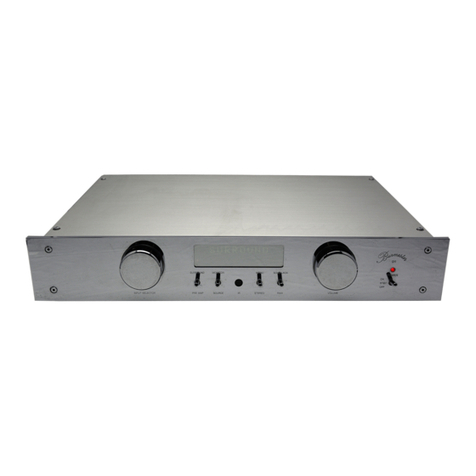
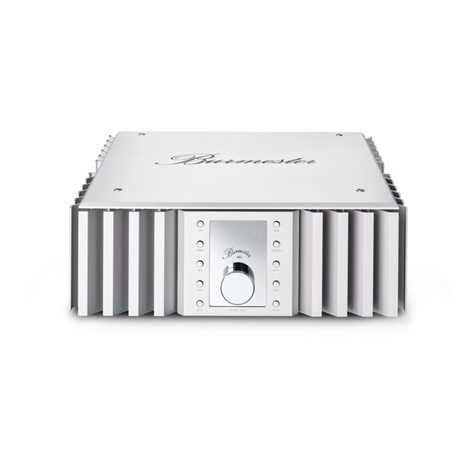
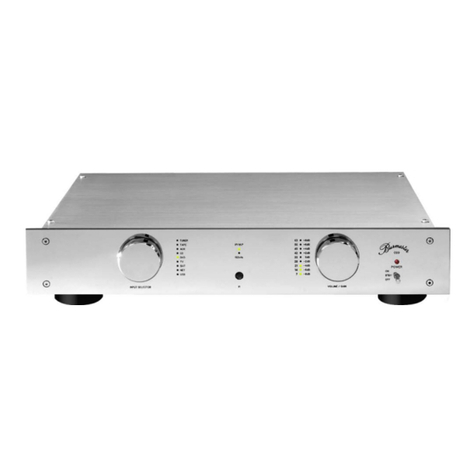
Burmester 077 User manual

OWNER´S MANUAL
REFERENCE LINE
PREAMP
077
HIGH END MADE IN GERMANY
BURMESTER AUDIOSYSTEME GMBH • KOLONNENSTR. 30G • 10829 BERLIN • GERMANY
TEL +49/(0)30/78 79 68 – 0 • FAX +49/(0)30/78 79 68 – 68 •E-MAIL: [email protected] •www.burmester.de

VERSION: 1.4FROM 5/7/2009

Dear Audiophile,
Thank you for choosing this Burmester audio component. We sincerely appreciate your trust in our
products. You have purchased a unit, which excels in musical fidelity and combines uncompromising
manufacturing quality with technical innovation and the highest degree of operating flexibility.
We recommend reading this user manual in its entirety before initial operation. It will enable you to make full
use of all capabilities of this outstanding audiophile instrument. Should you have any further questions,
please contact your dealer or us directly.
Talk to us about your special requests, even if they seem out of the ordinary. We happily accept technical
reasonable challenges.
Enjoy your enhanced listening pleasure.
Your Burmester Team

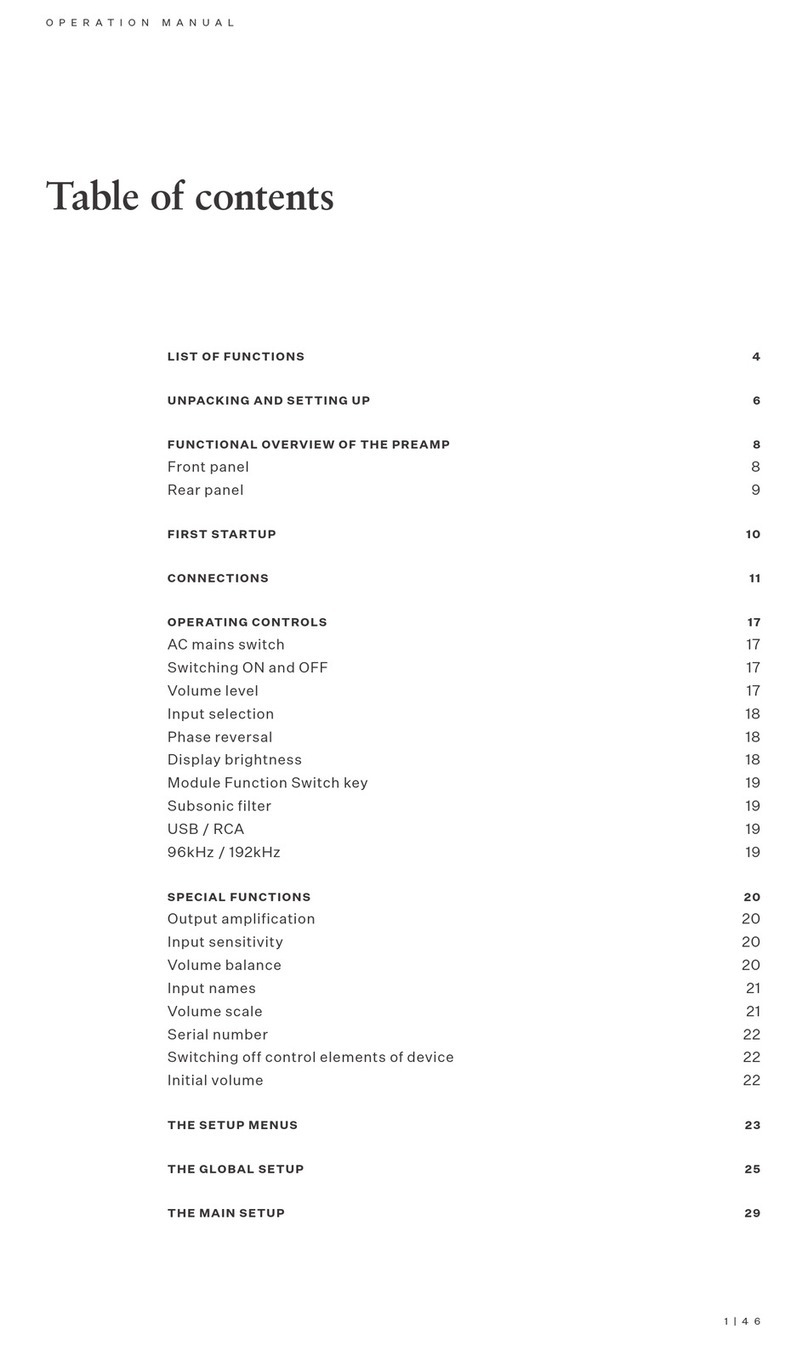
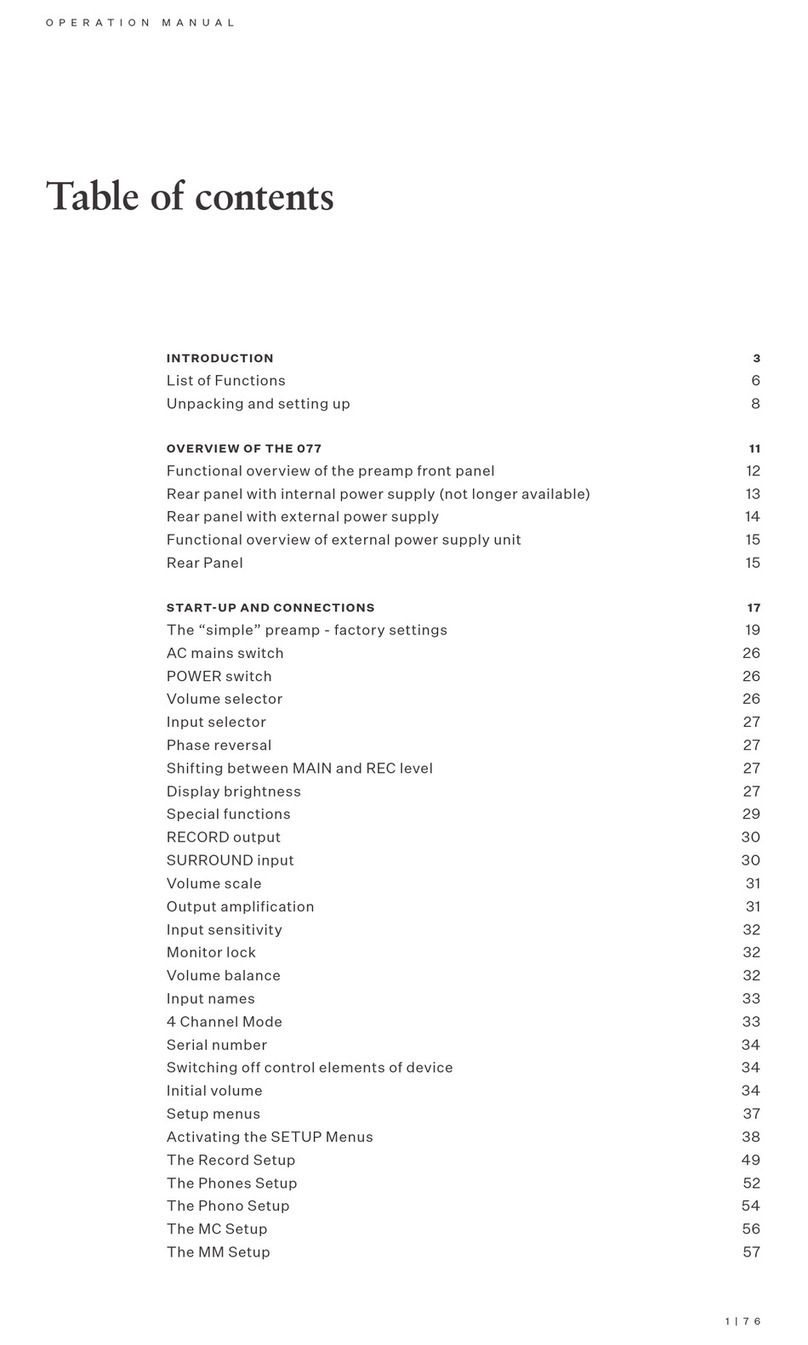
T A B L E O F C O N T E N T S
LIST OF FUNCTIONS 1
UNPACKING AND SETTING UP 2
FUNCTIONAL OVERVIEW OF THE PREAMP 3
FRONT PANEL 3
REAR PANEL WITH INTERNAL POWER SUPPLY 4
REAR PANEL WITH EXTERNAL POWER SUPPLY 5
FUNCTIONAL OVERVIEW OF EXTERNAL POWER SUPPLY UNIT 6
FRONT PANEL 6
REAR PANEL 6
FIRST STARTUP 7
CONNECTIONS 8
THE SIMPLE PREAMP - FACTORY SETTINGS 8
OPERATING CONTROLS 12
AC mains switch 12
POWER switch 12
Volume selector 12
Input selector 12
Phase reversal 13
Shifting between MAIN and RECORD level 13
Display brightness 13
SPECIAL FUNCTIONS 14
RECORD output 14
SURROUND input 14
Volume scale 14
Output amplification 14
Input sensitivity 14
Monitor lock 15
Volume balance 15
Input names 15
4 Channel Mode 15
Serial number 16
Switching off control elements of device 16
Initial volume 16
THE SETUP MENUS 17
THE GLOBAL SETUP 18
THE MAIN SETUP 22
THE RECORD SETUP 25
THE PHONES SETUP 27
THE PHONO SETUP 28
THE MC SETUP 30
THE MM SETUP 31
REMOTE CONTROL 32
BURLINK 34
CONNECTIONS 34
COMMANDS 34
GENERAL INSTRUCTIONS 36
TECHNICAL SPECIFICATIONS 38

1
LIST OF FUNCTIONS
Through factory settings a lot of functions are disabled to operate the 077 as a simple preamp. With the menus you
are comfortably able to activate the numerous options the 077 offers. In daily use these functions are hidden. If
wanted, factory settings can be reestablished.
The most important facts of the factory settings are:
• The output MAIN OUT is the primary output of the preamp to connect to a power amp or active
loudspeakers. This output has an adjustable volume (VARIABLE).
• The output RECORD OUT is preset as a recording output to be connected to the input of a recording unit
e.g. of an analogue tape deck. This output in factory settings will deliver the maximum volume to the
output of the selected input (FIX).
CAUTION: Never connect a power amp or active loudspeakers to this output in FIX mode. Serious
damage to your ears and equipments may occur.
• The Input 6 / SURROUND is supposed to be connected to the front-speakers output of a volume
adjustable surround decoder. The incoming signals on this input will be put through to the output MAIN
OUT with maximum volume bypassing the volume control of the 077.
CAUTION: With these settings never connect a unit to this input without a volume-control. Serious
damage to your ears and equipments may occur.
Characteristics and functions of the preamp 077:
• 6 balanced input terminals, XLR 3pins. On demand operable as unbalanced inputs by using adapter
plugs.
• Surround throughput for ideal integration in home theatre systems
• Module slots for:
o Line module (standard configuration), with unbalanced inputs, RCA
o Phono MC module (optional), with balanced XLR 3pins inputs, input sensitivity and input resistance are
selectable; connectable subsonic filters; automatic channel calibration for ideal channel equality
o Phono MM module (optional), with balanced XLR 3pins inputs, input sensitivity and input impedance are
selectable; connectable subsonic filters; automatic channel calibration for ideal channel equality
o D/A – converting module (optional), with S/P-DIF input (RCA) and USB slave input, 069-technology with up
sampling to 96kHz and 192kHz selectable
• 2 balanced output terminals, XLR 3pins, with selectable source, RECORD level programmable for 2-Zone-
Mode or TAPE-Record-Mode
• MAIN output terminals supplied with X-AMP MK2 modules
• 2 headphone terminals, audio jack 6,3mm, with selectable source and volume preset for 2-Zone-Mode
• Global SETUP menu for individual setup of basic functions:
o Input sensitivity adjustable from -6dB to +12dB for each input allowing better volume control
o Input names may be programmed individually
o Display of serial number adjustable
o 4 Channel Mode, select both levels, MAIN and RECORD as one preamp
o Device control elements can be switched off manually to eliminate operating error (child lock)
o Reset to factory settings
• Separate SETUP-Menus for individual preset of every zone:
o Volume balance adjustable for every zone
o Start up volume adjustable for every zone
o Volume control and volume display adjustable in BURMESTER steps or dB steps for every zone
o Output amplification for MAIN output may be selected between LOW and HIGH to adjust to connected power
amps or active loudspeakers
o Input 6 for MAIN zone may be programmed as a regular input or Surround Throughput
o RECORD output may be programmed with fixed volume for TAPE-Record-Mode or with variable volume for 2-
Zone-Mode
o Monitor lock selectable for every input during TAPE-record-Mode to eliminate audio feedback
• Display brightness adjustable in four steps, Display-Off-Function
• Remote power up of other devices possible, Master/Slave over DC IN/OUT connection
• BURmester LINK module for external control via RS232 and USB1.1

2
UNPACKING AND SETTING UP
CAUTION: The preamplifier 077 and the external power supply unit (if existent) are very heavy. To avoid
injuries while unpacking it is suggested that only personnel with experiences in heavy weights unpack the
units.
CAUTION: The preamp 077 is shipped inside a plastic protective cover. Make sure that children do not play
with it to avoid the danger of suffocation.
Unpacking To avoid damaging the housing, please do not use pointed or sharp tools to open the box.
Please make sure that the content of the box is complete. If something is missing or you
notice any damage while unpacking, do not hook up the unit. Instead, contact your
authorized dealer.
Content of boxes The two boxes should contain the following:
•1 box with the preamp 077
•1 Base plate with 4 carbon fiber damping discs for the preamp
•1 AC BURMESTER power cord 2.5mm²
•4 Input adapter plugs XLR – RCA
•1 remote control 005
•1 owner’s manual
•1 box with the power supply unit (only with external power supply)
•1 Base plate with 4 carbon fiber damping discs for the power supply unit (only with
external power supply)
•1 multi-pin power cord for connecting the power supply unit to the preamp (only with
external power supply)
Packaging We recommend to keep the original packing in case the unit needs to be shipped in the
future.
Setting up Too low or too high temperatures may cause damage inside of the preamp. Therefore
we recommend you leave the unit to adapt to room temperature, before using it for
the first time.
Carefully remove the unit from its packaging and set it up in an appropriate location. To
protect the preamp 077 from overheating make sure that the location offers sufficient air
circulation around the unit. Also, avoid excessive exposure to sun, dust and humidity.
Please make sure that your desired location for the preamp is stable enough to carry its
weight.
Ventilation ducts and openings in the housing serve to keep the unit cool. They must not be
covered up with magazines, tablecloth, curtains etc.
If the preamp has to be operated in an extremely warm environment it may be
necessary to supply additional ventilation. Avoid operating the unit in an excessively
humid environment like bathrooms etc.
Set up variations The feet of the preamp and of the power supply unit are constructed as spikes. They can
either be placed directly on the aluminum of the base plate or on the supplied carbon fiber
damping discs. Using the Kevlar fiber damping discs additionally decouples the entire
housing acoustically from the ground surface.

3
FUNCTIONAL OVERVIEW OF THE PREAMP
FRONT PANEL
(1) Input selector (8) POWER switch to switch the unit on & off
(2) PHASE LED lights up when phase is180˚ (9) Base plate
between active input and output (10) Foot – constructed as spike
(3) AUDIO LED shows up sampling of 192kHz, if (11) PHASE/DISPLAY switch key switches the phase
a D/A converter module is equipped and toggles display brightness
(4) Alphanumeric display shows the selected (12) MODULE FUNCTION switch key functions
input and the volume depend on installed module
(5) REC/MAIN LED lights up when REC is selected (13) IR receiver for commands of remote control
(6) Volume selector controls the playback volume (14) RECORD/PHONES switch key
(7) POWER LED lights up red when the unit is on (15) SETUP switch key to enter or leave
GLOBAL, RECORD and MAIN SETUP

4
REAR PANEL WITH INTERNAL POWER SUPPLY
(17) BURLINK interface RS-232 with check LEDs (24) High level inputs INPUT 1 to INPUT 5,
(18) BURLINK interface USB with check LEDs balanced
(19) Phones jack PHONES 1 (25) Module input as ordered
(20) Phones jack PHONES 2 (26) GROUND screw for ground cable of record
(21) MAIN output balanced preamp output player, only with PHONO modules
(22) RECORD output balanced output for recording (27) REMOTE output
or second preamp output (28) REMOTE input
(23) SURROUND or high level input, INPUT 6 (32) AC Mains Terminal
balanced (33) AC Mains Switch

5
REAR PANEL WITH EXTERNAL POWER SUPPLY
(16) POWER SUPPLY terminal (23) SURROUND or high level input
(17) BURLINK interface RS-232 with check LEDs INPUT 6, balanced
(18) BURLINK interface USB with check LEDs (24) High level inputs INPUT 1 to INPUT 5,
(19) Phones jack PHONES 1 balanced
(20) Phones jack PHONES 2 (25) Module input as ordered
(21) MAIN output balanced preamp output (26) GROUND screw for ground cable of record
(22) RECORD output balanced output for recording player, only with PHONO module
or second preamp output (27) REMOTE output
(28) REMOTE input

6
FUNCTIONAL OVERVIEW OF EXTERNAL POWER SUPPLY UNIT
FRONT PANEL
(29) Base plate (31) POWER LED lights up red when the unit is on
(30) Foot – constructed as spike
REAR PANEL
(32) AC mains terminal (34) POWER SUPPLY terminal
(33) AC mains switch

7
FIRST STARTUP
CAUTION: Before connecting the unit, please check if the input voltage data on the rear panel, underneath the AC
mains terminal (32) is equal to the local voltage of your wall outlet.
In case of doubt contact a licensed electrician or your power supply company.
• With external power supply: Connect both components with the multi-pin power cord. To do this, plug any of
the two ends (watch out for the guided grove) of the cord carefully into the POWER SUPPLY terminal (16) of the
preamp and screw down the connector.
• With external power supply: Use the same procedure to connect the other end into the POWER SUPPLY
terminal (34) of the power supply unit.
• Connect your preferred in- and outputs of the preamp with your HiFi system. Please refer to the chapter
CONNECTIONS.
• Make sure, that the AC mains switch (33) on the rear panel of the 077 or on the external power supply unit is
set to OFF position.
• Connect the AC power cord into the AC mains terminal (32) and plug it into the wall outlet.
• Switch the AC mains switch (33) to ON position.
• With the POWER switch (8) on the front panel the unit is switched on.
• Detailed information about the manifold functions of the preamp, are available in the following chapters of this
owner’s manual.

8
CONNECTIONS
THE “SIMPLE“ PREAMP - FACTORY SETTINGS
All connection terminals are located on the rear panel. While connecting the preamp, all components of the music
system must be turned off.
Through factory settings a lot of functions are disabled to operate the 077 as a simple preamp. With the menus you
are comfortably able to activate the numerous options the 077 offers. In daily use these functions are hidden. If
wanted, factory settings can be reestablished.
Inputs To connect source components like CD-Player, FM-Tuner, Tape deck etc. the standard
version of the preamp provides five balanced inputs (XLR) named INPUT 1 to INPUT 5
(24) and one unbalanced module input (RCA) named INPUT LINE (25). For the best
sound we recommend using the balanced inputs whenever possible.
Instead of the LINE module the preamp may be equipped alternatively with Phono MC
module, Phono MM module or with a D/A converter module.
The pinning of the balanced inputs is: PIN1=GND, PIN2=NEG, PIN3=POS.
SURROUND input The two front channels (right front / left front) of a surround sound processor or decoder
must be connected to the INPUT 6/SURR (23). In this configuration the signal is sent
directly to the MAIN outputs (not to the RECORD outputs), bypassing volume control.
Therefore connect only components with their own volume control to the SURROUND
input!
This input allows the easy integration of surround sound components into an existing two-
channel hifi system.
The SURROUND input cannot be selected over the RECORD level.
The pinning of the SURROUND input is: PIN1=GND, PIN2=NEG, PIN3=POS.
CAUTION: Never connect a unit to this input without its own volume control. Serious
damage to your ears and equipments may occur.
Adapter Plugs If your stereo components should only offer unbalanced outputs, you are able to use our
balanced inputs with the adapter plugs as unbalanced inputs. In these adapter plugs the
Pins 2 (negative input) and Pin 1 (ground pin) are connected (see graphic below). 4 XLR-
RCA adapters plugs are delivered with the units, allowing you to use 2 inputs as
unbalanced inputs. If you need further plugs you may get them at your authorized dealer.
NOTICE: Please do only use BURMESTER XLR-RCA adapter.
Wiring of the Adapter Plugs
RCA XLR
2
1
3
GROUND
SIGNAL
!
!

9
Module input The module input (25) may be equipped alternatively with 4 different modules:
•
••
•LINE module
The standard version of the preamp is equipped with a LINE module. In this case the
module input is an unbalanced high-level input.
NOTICE: Subsequent installation of other modules must only be done by your authorized
dealer or by Burmester Audiosysteme GmbH.
•
••
•PHONO MC module
With a PHONO MC module the module input is a balanced PHONO MC input to connect
a record player with moving coil pickup (no high output MC).
If your pickup has an unbalanced output, the balanced PHONO MC input can be
converted to unbalanced mode by using XLR-RCA adapter plugs.
The input resistance and the amplification of the PHONO MC module can be attuned to
your pickup with the MC SETUP. For detailed instruction please refer to the chapter THE
SETUP MENUS / MC SETUP.
The PHONO SETUP offers an automatic channel calibration, which verifies the channel
equality of your pickup and adjusts it, if necessary. The PHONO SETUP also offers the
chance to switch on a subsonic filter to eliminate low frequency noise.
The pinning of the balanced PHONO MC input is: PIN1=GND, PIN2=NEG, PIN3=POS.
On request the PHONO MC modules and the adapter plugs are available at your local
dealer.
NOTICE: Subsequent installation of other modules must only be done by your authorized
dealer or by Burmester Audiosysteme GmbH.
•
••
•PHONO MM module
With a PHONO MM module the module input is a balanced PHONO MM input to connect
a record player with moving magnet pickup or high output moving coil pickup.
If your record player has an unbalanced output, the balanced PHONO MM input can be
converted to unbalanced mode by using XLR-RCA adapter plugs.
The input capacitance and the amplification of the PHONO MM module can be attuned to
your pickup with the MM SETUP. For detailed instruction please refer to the chapter THE
SETUP MENUS / MM SETUP.
The PHONO SETUP offers an automatic channel calibration, which verifies the channel
equality of your pickup and adjusts it, if necessary. The PHONO SETUP also offers the
chance to switch on a subsonic filter to eliminate low frequency noise.
The pinning of the balanced PHONO MM input is: PIN1=GND, PIN2=NEG, PIN3=POS.
On request the PHONO MM modules and the adapter plugs are available at your local
dealer.
NOTICE: Subsequent installation of other modules must only be done by your authorized
dealer or by Burmester Audiosysteme GmbH.

10
•
••
•D/A converter module
With the D/A converter module you get two inputs for digital audio signals – an
unbalanced RCA input, which can receive signals in S/P-DIF format up to a sample rate
of 192kHz, and a USB slave input.
The RCA input cannot decode multichannel signals such as DTS™ or Dolby Digital™.
Unfortunately these signals cannot be detected as invalid signals, thus they are played
back as noise.
The USB slave input will be connected to a personal computer. The PC will interpret the
D/A converter module as a sound card. So the volume level of the operating system has
an effect on the volume level of the preamp. This input is supported by all established
operating systems. Controlling playback can only be done by your personal computer.
Switching between the inputs RCA and USB can be done by pushing down the switch key
MODULE FUNCTION (12) on the front panel or by longer pushing (approx. 2 seconds)
the AUDIO button on your remote control. The active input will be shown in the display.
Switching the sample rate between 96kHz and 192kHz can be done by pulling up the
switch key MODULE FUNCTION (12) on the front panel of the unit or by shortly pushing
the AUDIO button on your remote control. If the sample rate is 192kHz, the AUDIO LED
(3) illuminates.
The volumes of the inputs RCA and USB are separately adjustable. (see THE SETUP
MENUS / GLOBAL SETUP)
NOTICE: Subsequent installation of other modules must only be done by your authorized
dealer or by Burmester Audiosysteme GmbH.
GROUNDING screw When using the PHONO input as an unbalanced input for a record player it is necessary to
connect the GND wire of your record player to the GND screw (26). Loosen the GND
screw, clamp the GND wire of your turntable between the two washers and tighten the GND
screw. The GND-screw is only assembled when a Phono module is equipped.
Don’t use any other tools but your hand to tighten the GND screw! This way you avoid
overwinding the screw.
MAIN output To connect power amps or active loudspeakers the preamp provides the OUTPUT MAIN
(21) as a regular balanced preamp output.
This output provides the volume-controlled signal of the selected input of the MAIN level.
The pinning of the OUTPUT MAIN is: PIN1=GND, PIN2=NEG, PIN3=POS.

11
RECORD output The output terminal OUTPUT REC (22) must be connected to the recording input of an
analog recording device (mostly named TAPE IN or REC).
This output provides the signal of the selected input of the RECORD level at maximum
volume level. Signals from the inputs TAPE and SURROUND cannot be taken from the
RECORD output.
Through factory settings, volume controls have no bearing on the signal at the RECORD
output.
If no recording is desired, the RECORD output may be used as a second volume controlled
preamp output. (see chapter RECORD SETUP)
The pinning of the OUTPUT REC is: PIN1=GND, PIN2=NEG, PIN3=POS.
CAUTION: Never connect a power amp or active loudspeakers to this output with
these settings. Serious damage to your ears and equipments may occur.
Headphone jacks The headphone jacks PHONES 1 (19) and PHONES 2 (20) require headphones with a
6,3mm stereo plug and an impedance of 16
or more. Each of the phones output can
playback the MAIN and the RECORD level. The PHONES MENU gives you the option to
choose your favorite settings. The volume level is being reduced to 01 respectively -79dB
while inserting or pulling off the phones plug. With the volume selector (6) on the front
panel or with the buttons VOLUME + and. VOLUME – on your remote control you select the
volume level of the phones outputs.
NOTICE: The signal at the MAIN or RECORD output will be interrupted while inserting a
headphone plug into the headphone jacks.
REMOTE Connecting DC OUT (27) to the corresponding DC IN-jack of another BURMESTER-unit
offers the function to switch on or off this other unit simultaneous by the 077. In this case,
the 077 has the master function.
Connecting DC IN (28) to the corresponding DC OUT-jack of another BURMESTER-unit
offers the function to switch on or off the 077 simultaneous by the other unit. In this case,
077 has the slave function.
BURLINK To the BURmester-LINK interface plugs (17), (18) a computer system e.g. PC,
CRESTRON, AMXcan be connected to the preamp 077. The computer system allows a
comfortable control of your High End system using for example an individual programmable
touch panel. With the LEDs beside the plugs named Tand R(Transmit and Receive) you
are able to monitor whether data exchange is working.
You will find the commands to control the 077 in the chapter BURLINK.
!
!

12
OPERATING CONTROLS
With the exception of the AC mains switch, which is located on the rear panel of the power supply unit, all operating
controls are located on the front panel of the preamp.
AC mains switch The AC mains switch (33) which completely disconnects the AC power to the unit is
located on the rear panel of the 077 or on the rear panel of the external power supply unit
above the AC mains terminal. By switching to the ON position the standby transformer is
powered up.
POWER switch The POWER switch (8) switches the preamp on and off, presuming the AC mains switch is
in the ON position.
With the POWER switch (8) set to “OFF“ all functions of the preamp are powered down.
Flipping the POWER switch (8) from “OFF“ to “STBY“, the POWER LED (7) lights up
orange. This shows that the unit is in standby mode.
When the POWER switch is in “STBY“ position the unit can be switched on and off by
pulling up the POWER switch, pushing the POWER button on the BURMESTER remote
control, the Burlink interface or by the DC IN jack.
In operating mode (ON) the POWER LED (7) lights up red and all functions of the preamp
are activated.
PLEASE NOTICE: Always switch off the preamp with the POWER switch first before
bringing the AC mains switch into OFF position.
Volume selector The Volume selector (6) controls the volume level in 61 steps from 00 (mute) to 60
(maximum volume) or in dB-step from MUTE to +5dB (maximum volume with LOW
amplification) or + 21dB (maximum volume with HIGH amplification). The volume setting
can be selected separately for MAIN and RECORD level. To change between MAIN and
RECORD level pull the RECORD/PHONES switch key (14) up at the or push the MODE
button on your remote control. If the REC/MAIN LED (5) lights up, you are controlling the
RECORD level.
The selected volume level will be shown in the alphanumeric display (4).
The volume selector also controls functions in the SETUP menus.
Input selector With the input selector (1) you select the input you want to listen to. The input selection
can be done separately for MAIN and RECORD level. To change between MAIN and
RECORD level push the RECORD/PHONES switch key (14) up or push the MODE button
on your remote control. If the REC/MAIN LED (5) lights up, you are controlling the
RECORD level, if it doesn’t light up you are controlling the MAIN level.
The selected input will be shown in the alphanumeric display (4).
The input selector also controls functions in the SETUP menus.

13
Phase reversal In factory settings the preamp 077 passes incoming signals without phase reversal to the
MAIN and RECORD outputs. If the pin polarity of a reproducer differs from the pin polarity of
power amps or active speakers connected to the output terminals (see also owner `s
manual PINS 2 and 3) there is the possibility to reverse the phase of the according input
by 180˚.
The phase reversal is activated or deactivated by pulling the switch key PHASE/DISPLAY
(11) up, or by longer pressing the DIM button (approx. 2 seconds) on your remote control. If
the phase reversal is activated (180˚), the PHASE LED (2) illuminates.
Every input needs to be preset separately for the MAIN and RECORD level. The presetting
will be maintained.
NOTICE: Please be advised that each input can be reversed separately. A phase
reversal of the outputs is not intended.
Shifting between All presets like input selection, volume, input level, phase shift, volume display etc. are
MAIN and REC level separately selectable. Switching between MAIN and RECORD level is done by moving the
switch key RECORD/PHONES (14) upwards or by shortly pressing the MODE button on
your remote control. When the MAIN/REC LED (5) illuminates, the device is in RECORD
level. If the LED is off, the device is in MAIN level.
Display brightness By pushing the switch key PHASE/DISPLAY (11) down, or by shortly pressing the DIM
button on your remote control you can adjust the brightness of your display in four steps
from “maximum brightness” to “off”.
If modus “off” is chosen, the display illuminates when the device is operated to indicate that
a function is controlled, and dims out after a few seconds.
In modus “off”, the device shifts to maximum brightness in SETUP-mode. The display will
stay illuminated until you leave the SETUP-mode.

14
SPECIAL FUNCTIONS
The preamp 077 offers a variety of special functions in order to allow a personalized configuration of the device.
Most functions are adjustable in the SETUP MENUS.
RECORD output Through factory settings the OUTPUT REC (22) of the preamp 077 is preset to be
connected to an analog tape recorder. Meaning, the recording volume is fixed.
If required, this setting can be changed. The RECORD output can be programmed as
additional volume controllable preamp output. In this setting, it is possible to provide a
second room with music. The REC output is able to reproduce a different source than the
MAIN output and is volume controllable in itself.
To change the output from FIXED to VARIABLE you have to go to the RECORD SETUP in
submenu REC.
For specific instructions please refer to THE SETUP MENU/ RECORD SETUP.
SURROUND input Through factory settings the SURR/INPUT 6 (23) of the preamp 077 is preset as a
SURROUND input. The signal is transported directly to the MAIN output, avoiding volume
control and all amp stages.
If you prefer not to connect a surround decoder, you can use the input as regular high-level
input with volume control (like INPUT 1 to 5). Adjustment options are available in the MAIN
SETUP in submenu M-IN6.
For specific instructions please refer to THE SETUP MENUS / MAIN SETUP.
PLEASE NOTICE: In RECORD level INPUT 6 is always a regular high-level input.
Volume scale Through factory settings the volume steps are set to the BURMESTER curve. The volume
indicator is divided into steps between 0 (mute) to 60 (maximum volume).
You may change the setting to dB steps. This can be adjusted individually for the MAIN and
RECORD level.
Adjustment options are available in the MAIN SETUP in submenu M-SCALE. The
adjustment for the RECORD level can be found in the RECORD SETUP in submenu R-
SCALE.
For specific instructions please refer to THE SETUP MENUS/ MAIN SETUP and RECORD
SETUP respectively.
Output amplification Through factory settings the entire volume of the preamp 077 is set to a maximum
amplification of +5dB (factor 1.8). This preset should be maintained if you are operating
your system with BURMESTER power amps, which have a high input sensitivity. If you are
operating the preamp 077 with power amps or active speakers with low input sensitivity, it is
possible to change the maximum amplification to +21 dB (factor 11.2).
Adjustment options are available in the MAIN SETUP in submenu M-OUT.
For specific instructions please refer to THE SETUP MENUS/ MAIN SETUP.
NOTICE: The RECORD level has a maximum amplification of +5dB (factor 1.8) when set to
preamp function. The amplification of the RECORD level cannot be adjusted.
At fixed volume the signal is put through to the RECORD output without any influence of the
preamp.
Input sensitivity Through factory settings all inputs are set to the same input sensitivity. As experience has
shown, connected reproducers deliver different output levels. Therefore, it is possible to
decrease every input of the preamp 077 up to -6 dB (factor 2) or to increase it up to 12 dB
(factor 4) in order to adjust the different volumes of your sources.
Adjustment options are available in the GLOBAL SETUP in submenu INPUT LEVEL.
For specific instructions please refer to THE SETUP MENUS/ GLOBAL SETUP.

15
Monitor lock Through factory settings the OUTPUT REC (22) of the preamp 077 is preset to be
connected to an analogue tape recorder. The INPUT 3 = TAPE cannot be chosen for
recording, because of the audio feedback that would result of this connection.
If your analogue recording device is connected to another input, it is possible to activate the
monitor lock for this input and lift the locking for INPUT 3.
Adjustment options are available in the RECORD SETUP in submenu LOCK.
For specific instructions please refer to THE SETUP MENU/ RECORD SETUP.
This option cannot be chosen if the volume control for the RECORD level is variable.
Volume balance Some spatial arrangements require shifting the volume conditions for each reproducing
channel. The volume shift is realized by reducing one of the two stereo channels. It is
possible to reduce one channel of the preamp 077 up to 9 dB (factor 2.8) in steps of 1 dB,
and for specific situations to switch off completely.
Adjustment options are available in the MAIN SETUP in submenu M-BAL. For the
RECORD level adjustment options are available in the RECORD SETUP in submenu R-
BAL. If the volume is fixed for the RECORD level, the balance setting has no effect.
For specific instructions please refer to THE SETUP MENU/ MAIN SETUP and RECORD
SETUP respectively.
Input names Through factory settings all inputs of the preamp 077 are assigned with specific names. You
may, however label the inputs 1 through 6 with other names. We provide a range of names.
It is of course possible to choose an individual name, e.g. the type of your device.
Adjustment options are available in the GLOBAL SETUP in submenu INPUT NAMES.
For specific instructions please refer to THE SETUP MENU/ GLOBAL SETUP.
Factory setting assigns the following names:
• INPUT 1 CD
• INPUT 2 TUNER
• INPUT 3 TAPE
• INPUT 4 AUX1
• INPUT 5 AUX2
• INPUT 6 AUX3
• MODULE INPUT LINE (if equipped with LINE MODULE)
PH-MC (if equipped with PHONO MC MODULE)
PH-MM (if equipped with PHONO MM MODULE)
DA USB(if equipped with D/A-CONVERTER MODULE)
DA RCA(if equipped with D/A CONVERTER MODULE)
Restoring factory settings will reset all the input names to the ones above.
4 Channel Mode This option allows you to use both, the MAIN and RECORD level, as one preamp. When
activated only the MAIN level is operable. The RECORD level will automatically reproduce
the selected input of the MAIN level. Also the volume will be adjusted for both levels.
However you have the option to fade the volume of the RECORD level in reverence to the
MAIN level.
For the 4 Channel Mode the activation option is available in the GLOBAL SETUP in
submenu 4CH-MODE.
For specific instructions please refer to THE SETUP MENUS / GLOBAL SETUP.
For the FADER option please refer to THE SETUP MENUS / MAIN SETUP

16
Serial number In order to view the serial number of your preamp 077 after switching on the device, the
function needs to be activated.
You will find the activation options in the GLOBAL SETUP in submenu SNR.
For specific instructions please refer to THE SETUP MENUS/ GLOBAL SETUP.
Switching off control In order to prevent undesired control of the preamp 077, it is possible to lock all controlling
elements of device elements on the front panel (except the POWER switch). Then all functions are only
operable via remote control. This provides a child proof lock option.
This option can be found in the GLOBAL SETUP in submenu FRONT-P.
For specific instructions please refer to the SETUP MENUS/ GLOBAL SETUP.
Initial volume After switching on your preamp 077, a certain volume is set. It is possible to set the volume
separately for MAIN level and RECORD level.
The range of this setting extends from volume 01 and -79 dB respectively up to 20 and -60
dB respectively. If the setting LAST is chosen, the volume that was last selected will be
used. For security reasons, this is only possible up to a maximum volume of 20 and. -60 dB
respectively.
For the RECORD level this setting is only valid if the REORD level is set to adjustable
volume.
You will find the adjustment options for the MAIN level in the MAIN SETUP in submenu M-
VOL. For the RECORD level Adjustment options are available in the RECORD SETUP in
submenu R-VOL.
For specific instructions please refer to THE SETUP MENUS/ MAIN SETUP and RECORD
SETUP respectively.
The different functions of the headphones are available in the SETUP MENU / PHONES SETUP.
The different functions of the Phono MC and Phono MM module are available in THE SETUP MENU / PHONO
SETUP, THE SETUP MENUS / MC SETUP respectively THE SETUP MENUS / MM SETUP.
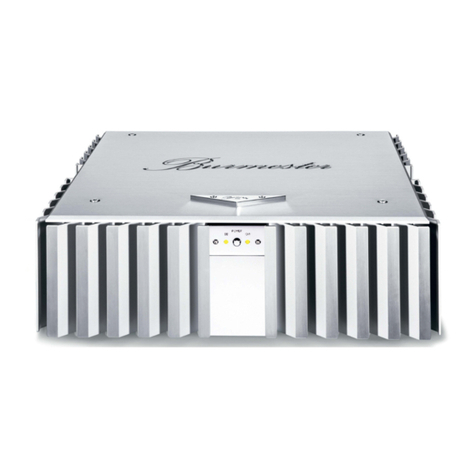
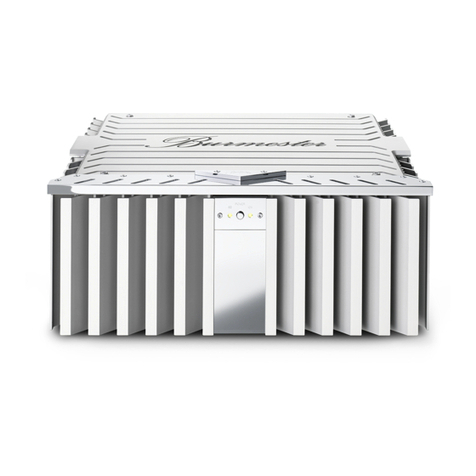
Other manuals for 077
1
This manual suits for next models
1
Table of contents
Other Burmester Amplifier manuals

Burmester
Burmester 077 User manual

Burmester
Burmester Classic Series User manual

Burmester
Burmester 808 MK5 User manual

Burmester
Burmester 911 MK 3 User manual

Burmester
Burmester 909 MK5 User manual

Burmester
Burmester Top Line Phono preamp 100 User manual

Burmester
Burmester 036 User manual

Burmester
Burmester 159 User manual

Burmester
Burmester Classic Series User manual

Burmester
Burmester 911 MK3 User manual