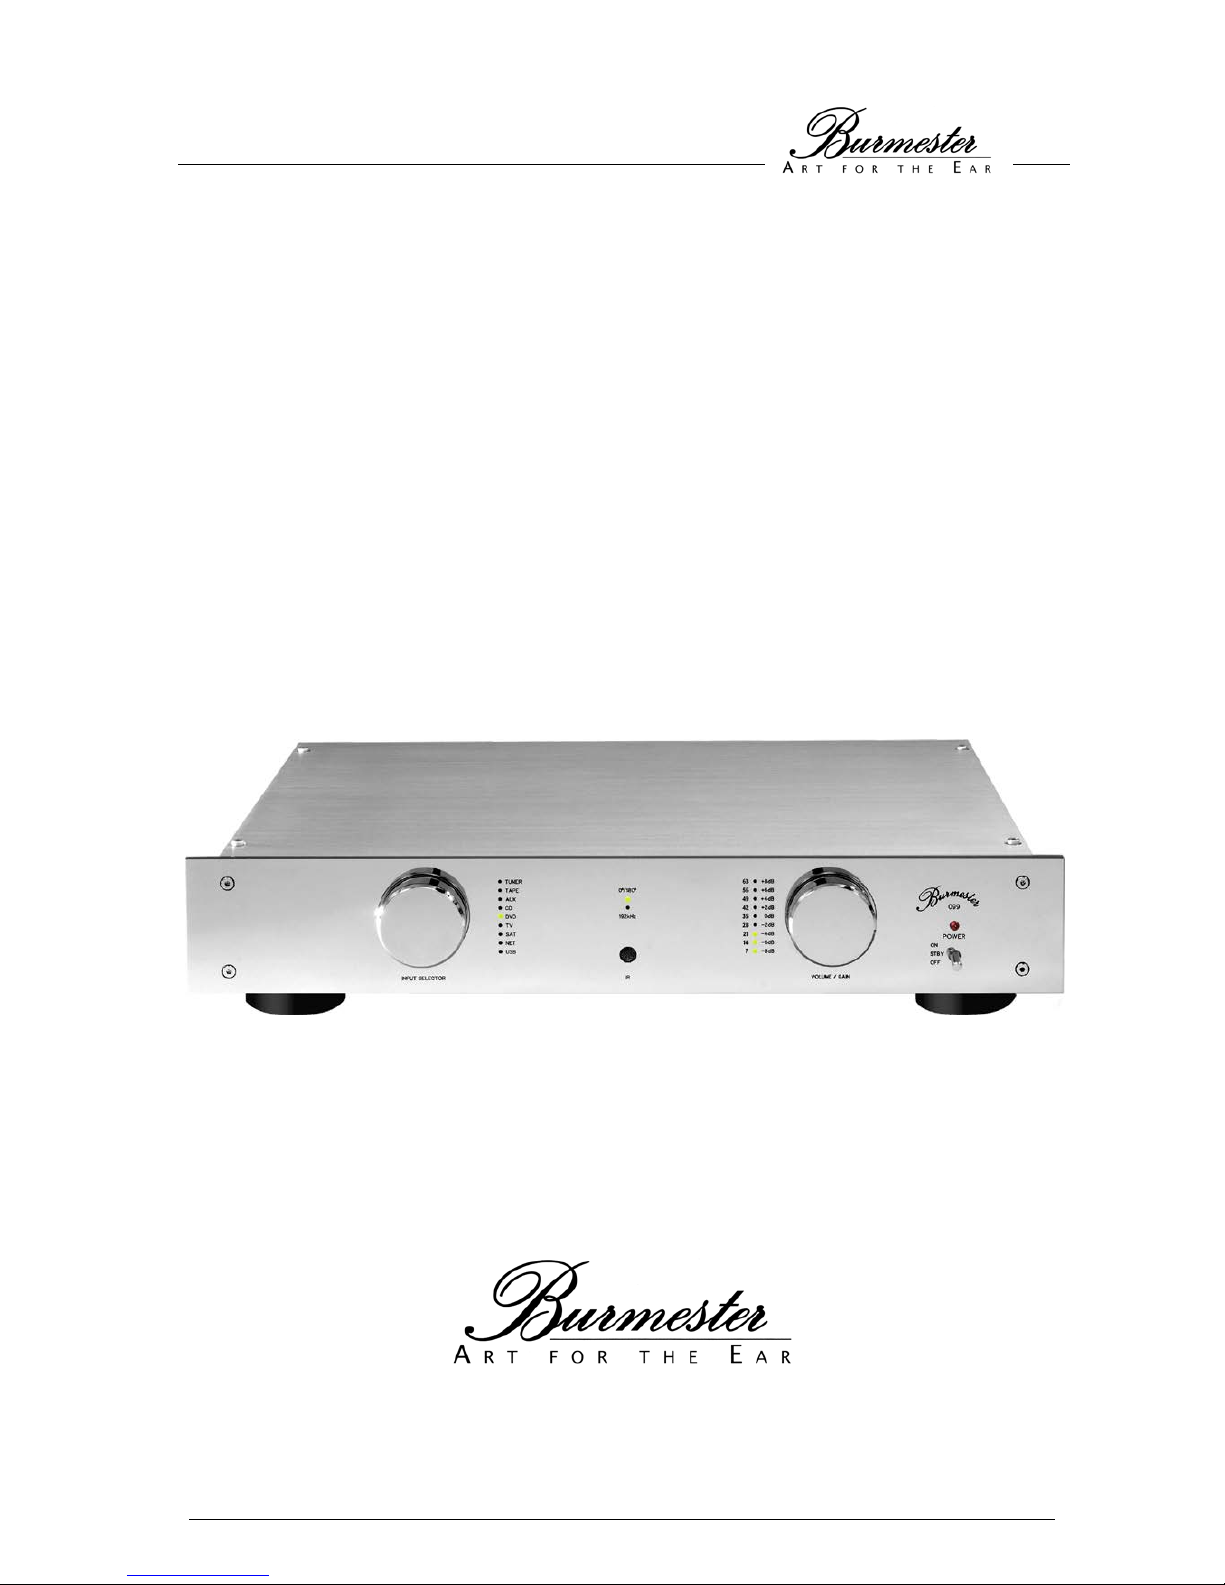
Burmester 099 User manual

OWNER’S MANUAL
CLASSIC LINE
099 PREAMPLIFIER
HIGH END MADE IN GERMANY

VERSION: 1.2 from August 15th 2018

Dear Audiophile,
Thank you for choosing this Burmester audio component. We sincerely appreciate your trust in our
products. You have purchased a unit, which excels in musical fidelity and combines uncompromising
manufacturing quality with technical innovation and the highest degree of operating flexibility.
We recommend reading this user manual in its entirety before initial operation. It will enable you to make full
use of all capabilities of this outstanding audiophile instrument. Should you have any further questions,
please contact your dealer or us directly.
Talk to us about your special requests, even if they seem out of the ordinary. We happily accept technical
reasonable challenges.
Enjoy your enhanced listening pleasure.
Your Burmester Team

CONTENT
INTRODUCTION 1
UNPACKING AND INSTALLATION 3
FRONT AND REAR VIEW OF THE 099 4
The Front Panel 4
The Rear Panel 5
THE REMOTE CONTROL 6
FREQUENTLY ASKED QUESTIONS 8
TROUBLESHOOTING 10
GETTING STARTED 11
CONNECTIONS 12
Analog Inputs 12
Adapter Plugs 12
Digital Inputs 12
USB Port 13
Analog Output 13
Digital Output 13
Headphones Output 14
Remote 14
Burlink 14
OPERATION AND CONTROL FEATURES 15
AC Mains switch 15
Switching On/Off 15
Volume Control 15
Input Selection 15
Phase Modification 15
Sampling Rate 15
SETUP MENU 16
Input Level 17
Startup Volume 17
Input Selection via Remote 17
Disabling the Control Knobs 18
Output gain adjustment 18
Fixed Output Level 19
Factory Default Settings 19
BURLINK 20
Connections 20
Commands 20
TECHNICAL SPECIFICATIONS 22

1
INTRODUCTION
Please read the operating instructions for your audio component in their entirety and retain them for further
reference. If you have any questions please contact your authorized Burmester dealer.
Operating temperature An operating temperature that is either too high or too low may cause malfunction.
Therefore, we recommend letting the unit sit for a while after unpacking before connecting
and operating it.
Placing When choosing a location for the unit you should keep the following in mind:
- Avoid exposure to direct sunlight.
- Avoid exposure to extreme heat, cold, humidity or dust.
- Ensure sufficient air circulation around the housing. Do not place the unit in an enclosed
space.
- Slots and openings of the unit are designed for air circulation. They must not be covered
up.
- Please make sure that the unit is not in range of dripping or splattering water. Do not put
containers with liquid on top of it.
- Open fire sources such as burning candles must never be put on top of the unit.
AC power Use only the supplied three-core power cable to connect the 099 to your AC outlet. The
ground lead must not be disabled under any circumstances and the unit should only be
connected to a grounded AC outlet. The power supply of the unit automatically adjusts to
the available voltage in your household. Therefore, the 099 may be connected without
problem to any established AC voltage.
Getting started Switch off all components of your audio system before installing the preamp. Switch them
back on only after you have made sure that every component has been correctly and
completely connected.
Do not try to operate the unit if it obviously has been damaged or liquid has penetrated it.
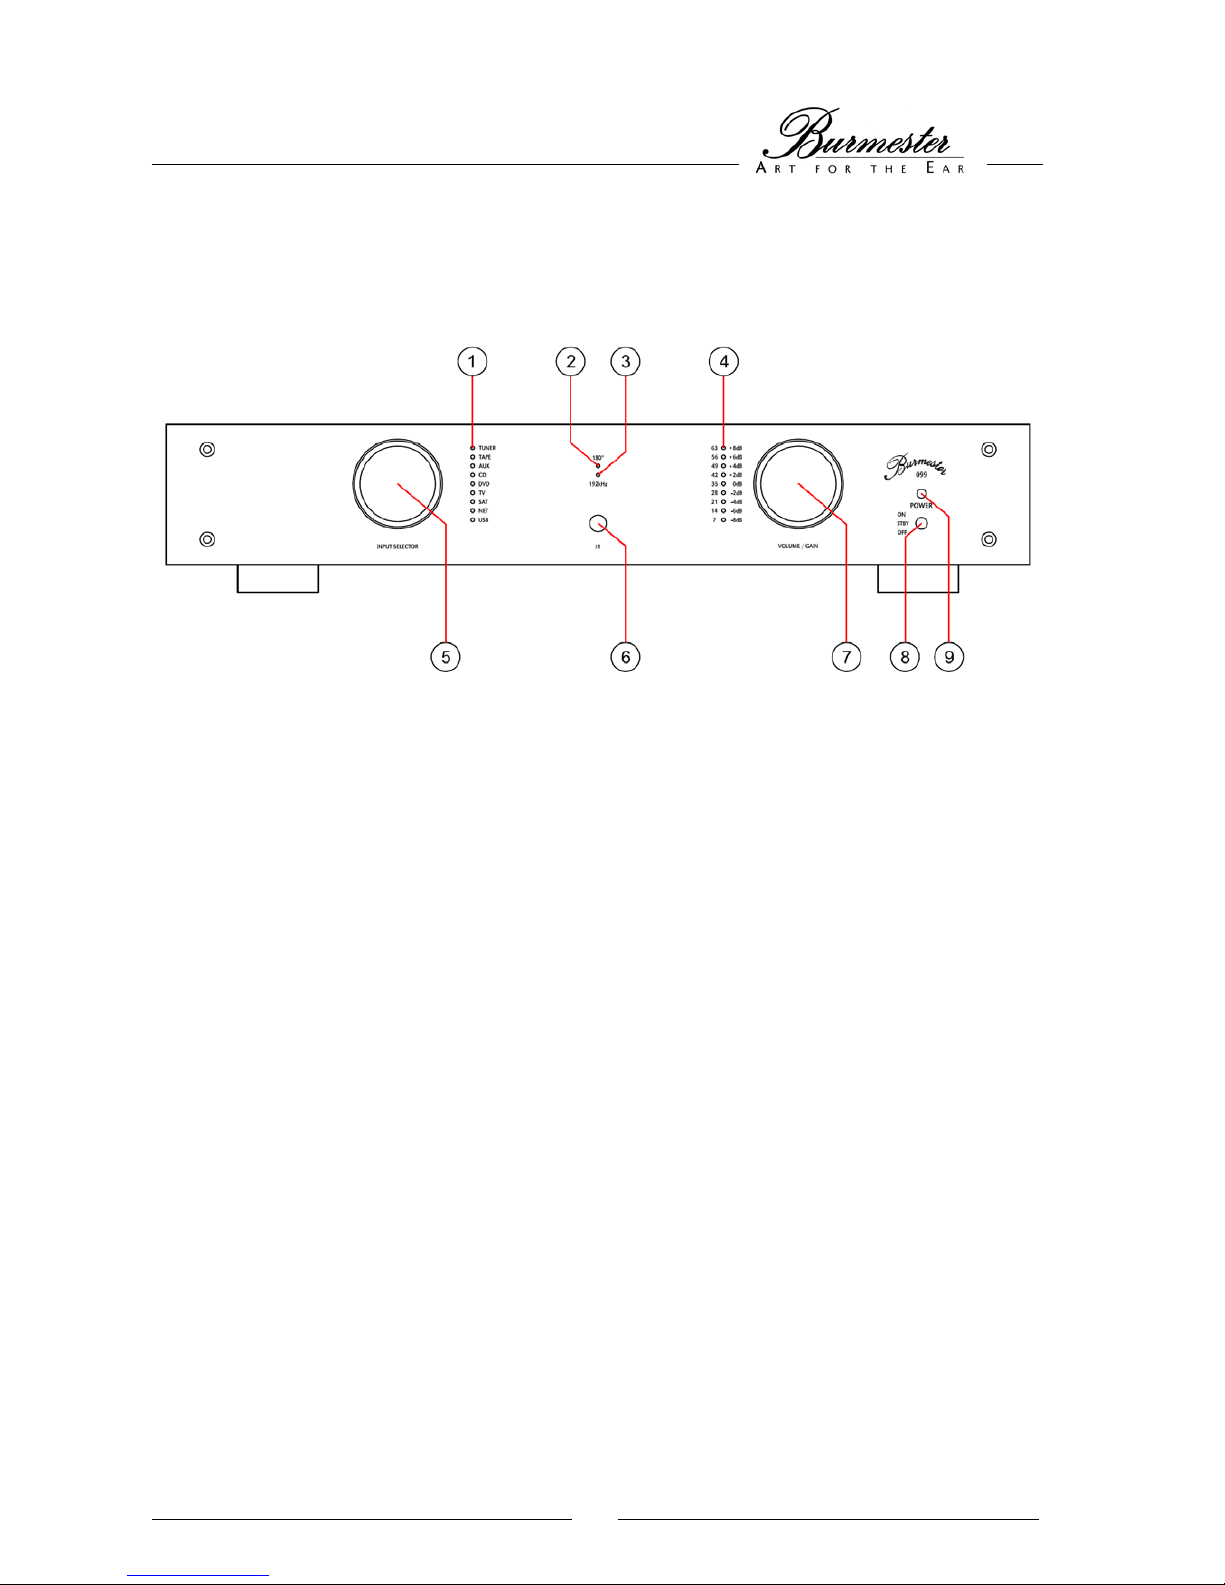
Terminals The pins of the terminals on the rear panel must not be touched. Contact with fingers could
cause static discharge and damage the unit’s sensitive electronics.
Connecting cables We manufacture balanced and unbalanced interconnects and speaker cables in any desired
length. The impedance of our cables has been optimized for all BURMESTER components
to ensure the finest sound quality.
For best AC hookup we recommend our triple-shielded BURMESTER POWER cable.
IR sensor The IR sensor accepts signals from the remote control and should not be covered up by
objects.
Heat generation Be careful when touching the unit during operation. The housing may get warm.

2
Reset If the preamp does not respond to command inputs it can be reset by switching it off and
back on using the AC mains power switch on the rear panel.
Lightening strikes During the summer months, malfunctions often occur due to voltage spikes in the power
lines after lightening strikes. Unplugging the unit from the AC outlet offers the only effective
protection. Switching the unit off using the mains switch does not suffice since voltage
spikes can arc over separated contacts.
Fuses The fuses are located inside the unit and should be changed only by a qualified technician.
Warranty We offer a warranty of 3 years for this unit. It is a precondition that the unit has been
hooked-up and operated correctly and is mechanically undamaged.
Opening the unit, modifying it or dismantling outlets will void the warranty instantly.
Maintenance Never wipe the housing with a wet cloth or use chemical cleaning agents for routine care.
Always make sure that no liquid enters the housing.
This symbol on your unit points to the fact that the owner’s manual contains important
operating instructions.
This symbol on or in your unit warns of dangerously high voltage.
EU law states that this unit may not be discarded in regular household trash. It has to be
delivered to special recycling places for electronic equipment.
PLEASE NOTE: Only a qualified technician may open the preamp. Opening the unit creates the danger of coming in
contact with dangerously high voltages. Therefore, the unit must always be unplugged before removing the lid.

3
UNPACKING AND INSTALLATION
PLEASE NOTE: To protect its surface the 099 preamplifier is being shipped in a sturdy plastic bag. Please
keep children away from this plastic bag to avoid the danger of suffocation.
Unpacking To avoid damaging the finish of the housing, do not use sharp or pointy tools to open the
packaging. Please make sure that the content of the box is complete. Should anything be
missing or if you notice any damage to the unit while unpacking it please do not install the
preamp. Immediately contact your authorized dealer.
Content of box The box contains:
•1 099 preamplifier in protective packaging
•1 Power cable
•4 Input adapters stereo jack to RCA
•1 Remote control
•1 Owner’s manual
Packing material We recommend retaining the original packing material in case you need to transport the unit
in the future.
Setting up If the operating temperature is too low as well as too high it may cause malfunction.
Therefore, we recommend letting the unit sit for a while after unpacking before
connecting it and turning it on.
Carefully remove the unit from the packaging and set it up in an appropriate location. To
protect the 099 from overheating make sure that the location offers sufficient ventilation.
Avoid direct sunlight as well as unusual amounts of dust and humidity. Make sure that the
location is sturdy enough to accommodate the weight of the equipment.
Slots and other openings in the housing are designed for ventilation and must not be
covered up by magazines, tablecloth, curtains and the like.
If the unit has to be operated in an extremely warm environment it may be necessary
to provide additional ventilation. Do not operate the unit in an extremely humid
environment such as a bathroom or some similar location.

4
FRONT AND REAR VIEW OF THE 099
THE FRONT PANEL
(1) Input selection LEDs (5) Input selector knob switches between inputs
(2) PHASE LED illuminates in case of a 180˚ phase (6) IR sensor for remote commands
shift for each input (7) Volume control knob adjusts the playback
(3) AUDIO-LED illuminates at 192kHz sampling rate if a volume
digital input has been selected (8) POWER switch for ON/OFF switching
(4) Volume level LEDs (9) POWER LED indicates the operating state

5
THE REAR PANEL
(10) AC mains terminal (20) USB input port
(11) AC mains switch (21) REMOTE output socket
(12) BURLINK interface RS-232 with control LEDs (22) REMOTE input socket
(13) BURLINK interface USB port with control LEDs (23) balanced preamp output
(14) Headphones preamp output right channel XLR
(15) Headphones socket for 6.3mm jack (24) unbalanced pre-amp output RCA
(16) digital TOSLINK Throughput output (25) balanced preamp output
(17) digital RCA output SRC converted left channel XLR
(18) digital inputs RCA (26) balanced input AUX
(19) digital inputs TOSLINK (27) balanced input TAPE
(28) balanced input TUNER

6
THE REMOTE CONTROL
All functions of the 099 may be controlled by remote. Just point the remote directly at the IR sensor (6) and press the
appropriate buttons.
*If this function has been activated in the menu
POWER button
switches the
preamplifier on or
off
STATION buttons
advance through the
inputs sequentially *
Input selection
buttons activate
selected inputs
VOLUME buttons
raise or lower the output
volume of the 099
DIM button
Pressed shortly, it turns
the front panel
illumination on or off
Held down, it changes
the phase angle
NUMERICAL buttons
activate the
corresponding input *
AUDIO button
Pressed shortly:
changes the sampling
rate
Pressed longer:
changes the USB class
Navigation
buttons guide you
through the menu
MENU button turns
menu function on or
off
OSD button
switches between
headphones and XLR
output

7
POWER button The POWER button switches the preamp on or off, provided the AC mains switch on the
rear panel has been switched ON and the POWER toggle on the front panel has been set to
STBY.
Input selection The buttons TUNER and TAPE activate the two inputs Tuner and Tape. Pressing the DISC
button activates either CD or DVD input, depending on which has been used last. Pressing
DISC repeatedly switches back and forth between CD and DVD input
The AUX button activates whichever auxiliary input has been used last. Pressing the button
repeatedly switches between the inputs AUX, TV, SAT, NET and USB.
The numerical buttons 1 to 9 activate the designated inputs. The mapping of the input
numbers corresponds to the top-to-bottom sequence of inputs engraved on the front panel,
i.e.: 1=TUNER, 2=TAPE, 3=AUX and so forth.
You may also navigate sequentially through the inputs by pressing the STATION+ and
STATION-buttons, with STATION+ in increasing and STATION-in decreasing order.
REMEMBER: To be able to select the various inputs using the buttons STATION +/-or the
numerical buttons you must first activate the function “input selection by remote control” in
the SETUP MENU.
VOLUME buttons The buttons VOLUME + and VOLUME – raise or lower the playback volume. Volume levels
are indicated by the Volume LEDs (4) on the front panel. Briefly pressing the respective
button changes the volume level in small increments. Holding it down changes the level
quickly.
DIM button Pressing the DIM button briefly switches the illumination on the front panel on or off. If “off”
has been selected the illumination will light up only temporarily after each change of
settings. If you choose MENU the LEDs will stay lit as long as you navigate the menu and
go out again shortly after you leave the MENU function.
Pressing the DIM button longer (app. 2 seconds) inverts the phase angle of the activated
input between 0˚ und 180˚. A phase inversion by 180˚ is indicated by an illuminated PHASE
LED (2).
AUDIO button If a digital input has been selected you can switch the sampling rate of the Sample Rate
Converter between 192kHz (AUDIO LED (3) illuminated) and 96kHz (AUDIO LED (3) is
dark) by shortly pressing the AUDIO button.
Pressing the AUDIO button longer (app. 2 seconds) changes the USB Audio class. To be
able to do so, the USB input has to be selected.
To confirm the USB Audio Class you have to check back with your operating system on the
PC.
OSD button If headphones have been connected, the 099 offers the possibility to switch between the
Headphones jack (15) and the Output terminals (23), (24) and (25) back and forth. With
headphones plugged in briefly press the OSD button. This activates the analog outputs and
mutes the headphones output. To return to headphones output, briefly press the OSD
button again. For details please refer to headphones output in the chapter CONNECTIONS.
MENU button The MENU button activates and deactivates the MENU function. Whenever the MENU
function is active, both the Phase LED (2) and the Audio LED (3) on the front panel are
blinking.
Navigation buttons To navigate through the menu and select different options you may use the buttons
► ◄ ▲ ▼ and OK on the remote control of the 099. For details about using the menu
please refer to the chapter SETUP MENU.

8
FREQUENTLY ASKED QUESTIONS
What kind of sources can I connect to the inputs of the 099?
Analog sources with high-level outputs such as CD players, FM tuners, tape decks or phono preamplifiers may be
connected to the analog inputs TUNER (28), TAPE (27) and AUX (26).
If your analog sources do not provide balanced XLR output terminals please use the supplied stereo jack-to-RCA
adapters.
The digital RCA input terminals SAT (18) and NET (18) accept the RCA outputs of digital sources such as CD
players, DVD players, DVB receivers, DAT recorders or music servers with a maximum sampling rate of 192kHz.
The digital TOSLINK input terminals CD (19), DVD (19) and TV (19) accept optical outputs from digital sources such
as CD players, DVD players, music servers etc. with a maximum 96kHz/24Bit sampling rate.
A personal computer can be hooked up to the digital port USB-IN (20). Your PC will recognize the preamplifier as a
sound card with the symbol „099-DAI“.
What kind of components can I connect to the outputs of the 099?
The balanced preamplifier output terminals (23), (25) as well as the unbalanced preamplifier output (24) can be
connected directly to a power amplifier (operating mode VARIABEL) or to another preamplifier (operating mode FIX).
The 6,3mm Headphones socket (15) accepts any kind of headphones. The RCA Headphones terminals (14) are
provided for the connection of an external headphones amplifier (recommended in the operating mode FIX).
The two digital outputs accept components with digital inputs such as DAT recorders. The digital RCA output (17)
provides the data stream of the selected digital input in either 96kHz or 192kHz sampling rate. The optical output
(16) directly passes the data of the selected input up to a rate of 96kHz.
How can I turn the 099 on and off?
To have power at all, the AC mains switch (11) on the rear panel must be switched on. The POWER switch (8) on
the front panel provides for three operating modes:
1. If the POWER switch (8) is set to off the preamp is switched off.
2. If the POWER switch (8) is set to Standby and the Power LED (9) lights up orange the unit is in standby
mode. It can now be switched on by toggling the switch briefly upwards, by remote control, by the Remote
In jack or by using the BURLINK interface. The 099 switches to active operating mode and the color of the
Power LED (9) changes to red.
3. If the POWER switch (8) is set to Standby and the Power LED (9) shines red, the unit is in active operating
mode. If it is switched off by toggling the switch briefly upward, by using the remote control, the Remote In
jack or the BURLINK interface the operating mode passes into standby and the Power LED (9) changes its
color to orange.
How can I adjust the volume?
You can adjust the playback volume for selected input by using the Volume control (7) or the VOL + and VOL –
buttons on the remote control.
How can I select a playback source?
For source selection you can use either the Input selector knob (5) on the front panel or the buttons TUNER, TAPE,
DISC and AUX on the remote control.
You also have the option to select inputs using the STATION +/-buttons or the numerical buttons on the remote.
However, it requires this function to be activated via the MENU. For details refer to the chapter SETUP MENU
starting on page 16.

9
Why, for example, does my CD player sound louder than my DVD player?
It is perfectly normal for source equipment from different manufacturers to have dissimilar output levels. With the 099
preamplifier you are able to adjust these output levels. We recommend using the loudest source as reference and
raising quieter sources to the same level. How to adjust input levels is described in the chapter SETUP MENU
starting on page 16.
Why is the output level always so low when I switch the 099 on?
The 099 preamplifier has been set up in the factory to always start up in the same lowest volume level. You can
change the start-up volume level using the menu. How to do it is described in the chapter SETUP MENU starting
page 16.
Why does my system not play very loud despite high volume settings?
Some power amplifiers have high input impedance. To provide these amps with a sufficiently strong signal you can
raise the overall output level of the 099. The how-to you can find in the chapter SETUP MENU starting page 16.
When should I switch the volume control of the 099 off?
The idea of a pre-preamplifier is not new. This is a component without its own volume control that combines various
signal sources and at a unified level passes them on to a high-quality preamplifier offering only a limited number of
inputs. The 099 can play the role of a pre-preamplifier and has the additional advantage of not only combining analog
but also digital input signals and passing them on to a preamp in highest audiophile quality. How to switch the
volume control of the 099 off is described in the chapter SETUP MENU starting page 16.
I don’t remember the changes I made in the menu. Can I reset my settings?
Yes. The SETUP MENU describes how to return the 099 to the default factory settings.
What are the BURLINK interfaces for?
The BURmester-Link interfaces are proved for remotely controlling the preamp via PC, CrestronTM or AMXTM
systems. You may control all Burmester components via this interface and, thus, do not need many different
handheld remotes. Please ask your dealer for details about these control systems. BURLINK commands can be
found on page 20.
Can I listen to music over my speakers even when headphones are connected to the
stereo jack?
Yes. The 099 is the first preamplifier from Burmester that offers this possibility. For safety reasons it is usually not
possible to play music via the speakers when headphones are connected to the headphones socket. As a
consequence of this either/or you always had to unplug the headphones to listen to your speakers. With the 099
preamp you can make this change by pressing a button on the remote. Details are described in the chapter
Headphones output on page 14.

10
TROUBLESHOOTING
The 099 does not power up
-Have you set the AC mains switch to ON?
-The POWER LED is blinking green. This indicates either a defective fuse F1 or that the voltage supplied by
your AC outlet does not conform to standards. Please contact your authorized dealer.
-The POWER LED is blinking orange. This indicates that a fuse in your 099 is defective.
The unit is switched on but I cannot change the volume
-Most likely the SETUP MENU function has been activated. If both the AUDIO and the PHASE LEDs are
blinking you can exit the SETUP MENU function by pressing the MENU button on your remote control.
-If you have selected the USB interface as input make sure the volume level in your PC is not set to 0.
Why do some input LEDs blink and others do not?
-All digital inputs blink when they do not detect a usable signal at the input terminal. This way the unit
indicates if it receives correct digital data at the input. In other words, the input LED on the front panel starts
blinking if a digital input has been selected without the corresponding terminal on the rear panel being
connected to a source. Hence, the blinking is normal operating procedure.
I cannot activate the fixed output level
-To avoid the accidental setting of a fixed output level that may damage your power amp or active speakers
the fixed output level setting has to be confirmed with a code. You will find the details how to do it in the
chapter SETUP MENU.
I cannot switch the unit on and the POWER LED is blinking orange
-The power supply is unable to provide voltage to the main transformer. Using the AC Mains switch (11)
turn the 099 off and wait for app. 30 seconds before turning it back on. If nothing happens try it again. If the
error persists it is most likely that one of the fuses is defective. Please contact your authorized dealer.
The 099 does not play back music via USB port
-Please check the USB cabling and connection.
-Please check if the 099 is set as the active sound device in your computer’s operating system.
-Make sure that the volume of the operating system and the software music player is not set to zero.
-Please use a music player software on your computer to play music via the 099 sound device.
-Make sure that the operating system of your computer is able to handle the desired USB audio class. Try to
adjust the audio class by longer pressing the Audio button on the remote control.

11
GETTING STARTED
The 099 preamplifier sports the BURMESTER GREEN power supply. This power supply automatically adjusts to the
available AC voltage. Therefore, it is possible to operate this equipment in any country that supplies electricity within
the voltage limits printed on the rear panel of the unit.
•Connect the desired in- and outputs of the preamplifier with the other components of your playback system. For
details please refer to the chapter CONNECTIONS.
•Make sure the AC mains switch (11) on the rear panel has been set to OFF.
•Connect the power cord to the AC mains terminal (10) and plug the AC plug into the wall outlet.
•Make sure the POWER switch (8) on the front panel is also OFF.
•Switch the AC mains switch (11) on the rear panel to ON. The POWER LED (9) will light up green for about
two seconds. During this time the power supply recognizes the available voltage and adjusts to it. After this
procedure has been concluded the POWER LED (9) will go dark again.
•Now you can switch the preamplifier fully on using the POWER switch (8) on the front panel.
The following chapters of this Owner’s Manual will provide detailed instructions about the extraordinary possibilities
and capabilities of the 099 preamplifier.

12
CONNECTIONS
All input terminals of the 099 preamplifier are located on the rear panel. During the connecting procedure all
individual components of your playback system must be turned off.
As delivered from the factory the 099 will function as a simple straightforward preamplifier because some of its more
sophisticated features have not yet been activated. However, the manifold possibilities to adjust and customize your
099 are easy to access and execute via a setup menu. If desired, the 099 can be easily reset to the factory settings.
Analog inputs Line-level sources such as CD player, FM tuner, tape decks etc. can be connected to the
preamp using three balanced inputs marked AUX (26), TAPE (27) and TUNER (28). The
connection can be made with XLR plugs as well as with 6,3mm stereo jacks. The labeling
on the rear panel corresponds to the designation of the inputs on the front panel.
The balanced XLR inputs have the following pin polarity:
PIN1=GND, PIN2=NEG, PIN3=POS.
The balanced input sockets for jacks have the following polarity:
Tip=POS, Ring=NEG, Sleeve=GND.
Adapter plugs In case your source components offer only unbalanced outputs you may still connect to the
balanced inputs by using jack-to-RCA adapters. Four adapters are supplied as standard,
enabling you to connect two unbalanced source components. If you need more they can be
obtained at your authorized dealer.
Digital inputs To connect digital sources like CD players, DVD players, Satellite Receivers or TV sets the
099 offers two digital RCA inputs (18) and three digital TOSLINK inputs (19). The
labeling of the inputs on the rear panel corresponds to the designation of the inputs on the
front panel.
Please note: The digital TOSLINK inputs (19) can only process signals up to 96kHz/24Bit. If
a 192kHz/24Bit input signal is received no music will play.

13
USB port For the audio connection of computers, the 099 provides a USB input (20). This input
supports class 1 audio (up to 96kHz/24Bit) as well as class 2 audio (up to 192kHz/24 Bit)
depending on the operating system of the computer. Since the USB input is a slave input,
you cannot connect USB sticks or hard disc drives to it.
USB connection When the 099 is connected to a Microsoft®based computer for the very first time, the driver
for USB Class 1 audio will be installed automatically. Afterwards you are able to choose the
Burmester Class 1 audio output in your system settings of the operating system. If you now
play any music on your computer, it will be transmitted to the 099.
Unfortunately problems might occur with PCs working with Microsoft operating systems.
Thus we recommend using Class 1 audio with Microsoft PCs.
The Apple®operating systems support both, USB Class 1 and USB Class 2 audio. Both
systems are recognized automatically. Simply choose the setting you like by longer pressing
the Audio button on the remote control. The system settings now offers the option of which
sample rate you want to choose.
USB-quality The 099 supports two types of USB connections: USB Class 1 audio and USB Class 2
audio. The two settings differ in their transfer quality. USB Class 1 audio supports up to 96
kHz / 24 Bit. Class 2 audio supports up to 192 kHz / 24 Bit
The 099 only supports the USB 2.0 standard.
Please note: You may control the playback volume with the PC as well as with the 099.
Hence, if the volume level on the PC has been set to 0 the 099 receives no input signal.
Analog output To connect power amps or active speakers the 099 preamplifier offers a balanced preamp
output (23), (25) as well as an unbalanced preamp output (24).The signal from a selected
source at these outputs is subject to the volume control.
The XLR output terminal has the following pin polarity: PIN1=GND, PIN2=NEG, PIN3=POS.
Digital outputs The 099 offers the possibility to process incoming digital signals in the digital domain. It has
two digital outputs available. However, these two outputs have different functions. While the
digital TOSLINK output (16) simply passes signals through irrespective of the selected
input, the digital RCA output (17) passes signal in either 96kHz/24Bit or 192kHz/24Bit.
Example: If the digital input receives a 44.1kHz signal, the optical output will also be
44.1kHz, while the digital RCA output (17) will supply either 96kHz or 192 kHz (see also the
chapter about sampling rates on page 15).
You can change the sampling rate with the remote control. By pressing the AUDIO button
on the remote you can easily switch between 96kHz and 192 kHz.
Please note: The digital TOSLINK output (16) can only process signal up to 96kHz. A
192kHz signal cannot be fed through to the optical output.

14
Headphones output The 099 offers two outputs for headphones. A Headphones Preamplifier output (14) and
a conventional Headphones socket (15) for 6,3mm stereo jacks.
The Headphones Preamplifier output (14) is designated for headphone amplifiers or
wireless headphones. These outputs always receive the output signal, regardless whether
headphones have been connected to the Headphones socket (15) or not.
The Headphones socket (15) accepts headphones with a 6,3mm stereo jack and
impedance greater than 16Ω.
CAUTION: To avoid any damage the playback via the two preamplifier outputs RCA (24)
and XLR (23), (25) is cut off automatically when a headphones jack is plugged in. For safety
reasons the volume is adjusted to its lowest level when plugging the jack in or pulling it out
of its socket. The playback volume of the headphones can be adjusted with the Volume
control knob (7) on the front panel or with the VOLUME + and VOLUME – buttons on the
remote.
However, you do have the possibility to listen to music via the preamplifier outputs RCA (24)
and XLR (23), (25) without having to unplug your headphones. By briefly pressing the OSD
button on the remote you can switch between the Headphones jack (15) and the two
preamplifier outputs RCA (24) and XLR (23), (25). For safety reasons the volume is
adjusted down to the lowest level at each switch. The Headphones Preamplifier output
(14) is not affected by these changes. It is always on.
REMOTE By connecting the DC OUT (21) socket with a corresponding DC IN socket of another
Burmester component you enable the 099 to remotely switch this other component on or off.
In this operating mode the 099 functions as master.
By connecting the DC IN (22) socket with the corresponding DC OUT socket of another
Burmester component the preamplifier can be remotely switched on or off by this other
component. In this case the 099 preamp functions as slave.
BURLINK The ports for BURmester-Link interfaces (12), (13) will accept all kinds of control systems
(for example PC, CRESTRON, AMXetc.). These systems offer a convenient way to
control your complete playback system, for example using a programmable touch panel.
The LEDs next to these ports marked Tand R(for Transmit and Receive) indicate data
exchange activity.
The commands for controlling the 099 preamp can be found in the chapter BURLINK.

15
OPERATING AND CONTROL FEATURES
The operating controls of the 099 preamplifier are located on the front panel. The AC mains switch is located on the
rear panel of the preamp.
AC mains switch The AC mains switch (11), which completely separates the preamp from AC power, is
located on the rear panel above the AC mains input. Setting it to ON powers up the Standby
transformer.
Switching On/off The POWER switch (8) switches the 099 on or off, provided the AC mains switch on the
rear panel has been set to ON.
If the POWER switch (8) is set to „OFF“ all functions of the preamp have been disabled. If
you toggle the POWER switch (8) from „OFF“ to „STBY“ the POWER LED (9) will light up
orange and the preamp is in standby operating mode.
Once in „STBY“ mode, the unit can be switched into full operating mode by toggling the
POWER switch (8) briefly upward, by pressing the POWER button on the remote, by using
the BURLINK interface or by the DC IN connection to another Burmester component.
A red POWER LED (9) indicates full operating mode (ON). In this mode all functions of the
preamplifier are powered up.
CAUTION: Always switch the preamp off using the POWER switch (8) (Position OFF) first
before you switch the AC mains switch (11) to OFF.
Volume control Using the Volume control knob (7) the playback volume can be adjusted in 64 increments
from 0 (off) to 63 (full volume). The selected volume level is indicated by Volume level
LEDs (4) on the left side of the volume control knob.
If a fixed output level has been selected in the SETUP Menu, the Volume control knob (7)
is automatically disabled. In this setting the top LED of the Volume level LEDs (4) remains
lit.
The Volume control knob (7) is also used to change functions in the SETUP Menu.
Input selection Use the Input selector knob (5) to select the input that you want to play back via the
outputs. The selected input is indicated by a lit Input selection LED (1) on the right side of
the Input selector knob.
The selected input signal passes not only to the analog outputs but also to the digital
outputs and the headphones outputs.
The Input selector knob (5) is also used to change functions in the SETUP Menu.
Phase modification Not all manufacturers use the same pin polarity for XLR terminals. To account for these
differences the 099 offers the possibility to switch the phase on each individual input. This
modification can only be done by remote and is activated or deactivated by pressing and
holding the DIM button. When the phase of an input has been switched the PHASE LED (2)
will illuminate.
Sampling rate For each digital input the 099 offers the possibility to individually select the sampling rate for
D/A conversion as well as for the signal at the digital RCA output. You can activate or
deactivate this function by briefly pressing the AUDIO button on the remote. Choose the
setting that sounds best to you.
If the sampling rate of 192kHz/24Bit has been selected for an input the AUDIO LED (3) will
illuminate.

16
SETUP MENU
The 099 preamplifier offers a whole range of special settings and functionalities that enable you to customize the unit
according to your individual requirements. Use the SETUP MENU to navigate and choose special settings.
Activate the menu by pressing the MENU button on the remote. When the menu function has been chosen the
Phase LED (2) and the Audio LED (3) start blinking to indicate that the preamp is in menu mode.
To navigate through the menu items use the Input selector knob (5) or the ► ◄buttons on the remote. To change
menu options use the Volume control knob (7) or the ▲ ▼buttons on the remote.
While in menu mode the Input selection LEDs (1) highlight the menu items and the Volume level LEDs (4) the
different options for the menu items.
While you are navigating the menu and customize your settings the music from the selected source keeps playing.
Thus you can hear the immediate sound effect of the changes you’ve made.
Please note: In our following instructions we assume that you’ve already activated the menu mode with the remote
and that both LEDs (2) and (3) are blinking.
Here is an overview over all menu items. The columns Input selection LED (1) and Volume level LED (4) explain
how the 099 visualizes the different menu options. The following pages explain each item in detail.
MENU ITEMS OPTIONS Input selection LED (1) Volume level LED (4)
Input level Page 17
Separate input level adjustment
for each input The LED of the selected input
is illuminated
LEDs on the front panel
indicate level boost or
reduction
Startup volume Page17 Sets the volume level at which
the preamp starts up All LEDs illuminate The bottom three LEDs
indicate the startup volume
level
Input selection by
remote control Page17
Deactivates the STATION +/–
buttons and the numerical
buttons on the remote
The TUNER LED goes dark, all
other LEDs illuminate LED on = activated
LED off = deactivated
Turn controls on or
off Page18
Enables or disables the control
knobs on the front panel of the
099
The TAPE LED goes dark, all
other LEDs illuminate LED on = activated
LED off = deactivated
Output gain
adjustment Page18
Changes the overall gain of the
099 between High und Low The AUX LED goes dark, all
other LEDs illuminate LED off = low (+0dB)
LED on = high (+6dB)
Volume control Page19 Adjustable volume or fixed
output level The CD LED goes dark, all
other LEDs illuminate LED off = variable
LED on = fixed level
Factory default
settings Page19
Restoring the factory settings
(Default settings as shipped) The DVD LED goes dark, all
other LEDs illuminate LED blinks when the default
settings are restored
Table of contents
Other Burmester Amplifier manuals

Burmester
Burmester 911 MK3 User manual

Burmester
Burmester 911 MK 3 User manual

Burmester
Burmester Top Line Phono preamp 100 User manual

Burmester
Burmester Classic Series User manual

Burmester
Burmester 036 User manual

Burmester
Burmester 035 User manual

Burmester
Burmester 082 User manual

Burmester
Burmester 909 MK5 User manual

Burmester
Burmester 011 User manual

Burmester
Burmester Classic 101 User manual