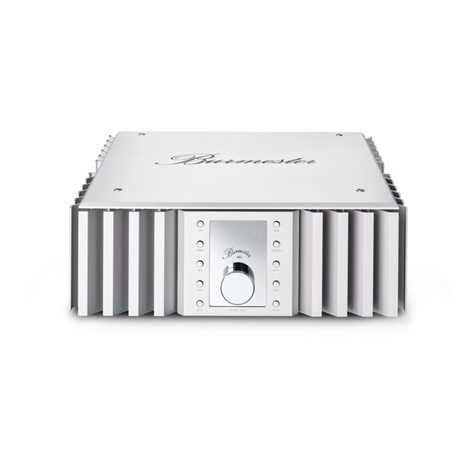
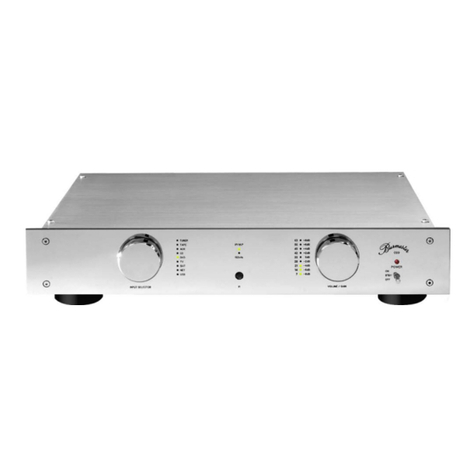
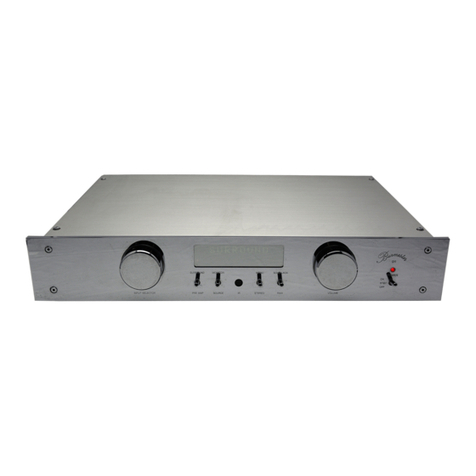
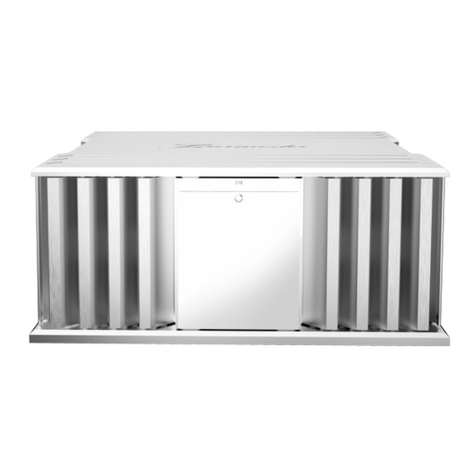
Burmester 088 User manual

1 | 46
OPERATION MANUAL
Table of contents
LIST OF FUNCTIONS 4
UNPACKING AND SETTING UP 6
FUNCTIONAL OVERVIEW OF THE PREAMP 8
Front panel 8
Rear panel 9
FIRST STARTUP 10
CONNECTIONS 11
OPERATING CONTROLS 17
AC mains switch 17
Switching ON and OFF 17
Volume level 17
Input selection 18
Phase reversal 18
Display brightness 18
Module Function Switch key 19
Subsonic filter 19
USB / RCA 19
96kHz / 192kHz 19
SPECIAL FUNCTIONS 20
Output amplification 20
Input sensitivity 20
Volume balance 20
Input names 21
Volume scale 21
Serial number 22
Switching off control elements of device 22
Initial volume 22
THE SETUP MENUS 23
THE GLOBAL SETUP 25
THE MAIN SETUP 29

3 | 46
2 | 46
OPERATION MANUAL 088 PREAMP
Dear Audiophile,
Thank you for choosing this
Burmester audio component.
We sincerely appreciate your trust in our products. You have
purchased a unit, which excels in musical fidelity and combines
uncompromising manufacturing quality with technical innovation
and the highest degree of operating flexibility. We recommend
reading this user manual in its entirety before initial operation.
It will enable you to make full use of all capabilities of this
outstanding audiophile instrument. Should you have any further
questions, please contact your dealer or us directly. Talk to
us about your special requests, even if they seem out of the
ordinary. We happily accept technical reasonable challenges.
Enjoy your enhanced listening pleasure.
Your Burmester Team
THE MC SETUP 31
THE MM SETUP 33
REMOTE CONTROL 35
BURLINK 38
CONNECTIONS 38
COMMANDS 38
GENERAL INSTRUCTIONS 41
TECHNICAL SPECIFICATIONS 45

5 | 46
4 | 46
OPERATION MANUAL 088 PREAMP
List of Functions
Through factory settings a lot of functions are disabled to operate the
088 as a simple preamp. With the menus you are comfortably able to
activate the numerous options the 088 offers. In daily use these functions
are hidden. If wanted, factory settings can be reestablished.
The most important facts of the factory settings are:
• The output MAIN OUT is the primary output of the preamp to connect to a power
amp or active loudspeakers. This output has an adjustable volume.
• The output TAPE OUT is preset as a recording output to be connected to the
input of a recording unit e.g. of an analogue tape deck. This output will deliver
the maximum volume to the output of the selected input.
CAUTION: Never connect a power amp or active loudspeakers to this
output. Serious damage to your ears and equipments may occur.
• The SURROUND input is supposed to be connected to the front-speakers
output of a volume adjustable surround decoder. The incoming signals on this
input will be put through to the MAIN output with maximum volume bypassing
the volume control of the 088.
CAUTION: Never connect a unit to this input without a volume-control.
Serious damage to your ears and equipments may occur.
Characteristics and functions of the preamp 088:
• 5balanced input terminals, XLR 3pins. On demand operable as unbalanced
inputs by using adapter plugs.
• Surround throughput for ideal integration in home theatre systems
• Module slots for:
$Line module, with unbalanced inputs, RCA
$
Phono MC module (optional), with balanced XLR
3
pins inputs, input sensitivity
and input resistance are selectable; connectable subsonic filters
$Phono MM module (optional), with balanced XLR 3pins inputs, input sensitivity
and input impedance are selectable; connectable subsonic filters
$D/A – converting module (optional), with S/P-DIF input (RCA) and USB slave
input, 069-technology with up sampling to 96kHz and 192kHz selectable
• 1volume controlled balanced output with XLR 3pins terminals, supplied with
X-AMP MK2modules
• 1balanced TAPE output, XLR 3pins, with fixed volume for analogue tape
recording
• 1headphone terminal, audio jack 6.3mm (1/4")
• Global SETUP menu for individual setup of basic functions:
$Input sensitivity adjustable from -6dB to +12dB for each input allowing
better volume control
$Input names may be programmed individually
$Display of serial number adjustable
$Device control elements can be switched off manually to eliminate operating
error (child lock)
$Reset to factory settings
• Separate SETUP-Menus for individual presets:
$Volume balance adjustable
$Start up volume adjustable
• Volume control and volume display adjustable in BURMESTER steps or dB steps
• Output amplification for MAIN output may be selected between LOW and HIGH
to adjust to connected power amps or active loudspeakers
• Display brightness adjustable in four steps, Display-Off-Function
• Remote power up of other devices possible, Master/Slave over DC IN/OUT
connection
• Burmester LINK module for external control via RS232 and USB

7 | 46
6|46
OPERATION MANUAL 088 PREAMP
PLEASE NOTE:
The preamp
088
is shipped inside a plastic protective
cover. Make sure that children do not play with it to avoid the danger of
suffocation.
Unpacking
To avoid damaging the housing, please do not use pointed or sharp tools to open
the box.
Please make sure that the content of the box is complete. If something is
missing or you notice any damage while unpacking, do not hook up the unit.
Instead, contact your authorized dealer.
Content of boxes
The box should contain the following:
• 1preamp 088
• 1power cord
• 4input adapter plugs XLR – RCA
• 1owner’s manual
• 1remote control
Packaging
We recommend keeping the original packing in case the unit needs to be shipped in
the future.
Unpacking and setting up
Setting up
NOTICE: Too low or too high temperatures may cause damage inside of
the preamp. Therefore we recommend you leave the unit to adapt to room
temperature, before using it for the first time.
Carefully remove the unit from its packaging and set it up in an appropriate location.
To protect the preamp 088 from overheating make sure that the location offers
sufficient air circulation around the unit. Also, avoid excessive exposure to sun,
dust and humidity.
Please make sure that your desired location for the preamp is stable enough to
carry its weight.
Ventilation ducts and openings in the housing serve to keep the unit cool.
They must not be covered up with magazines, tablecloth, curtains etc.
If the preamp has to be operated in an extremely warm environment it may be
necessary to supply additional ventilation. Avoid operating the unit in an
excessively humid environment like bathrooms etc.

9 | 46
8|46
OPERATION MANUAL 088 PREAMP
FRONT PANEL
Functional overview of the preamp
1. Input selector
2. PHASE LED lights up when phase is180˚
between active input and output
3. AUDIO-LED shows up sampling of 192kHz,
if and toggles display brightness a D/A
converter module is equipped
4. Alphanumeric display shows the selected
input and the volume
5. HIGH/LOW LED indicates high
amplification
6. Volume selector controls the playback
volume
7. POWER LED lights up red when the unit
is on
8. POWER switch to switch the unit on & off
9. PHASE/DISPLAY switch key switches the
phase and toggles display brightness
10. MODULE FUNCTION switch key functions
depend on installed module
11. IR receiver for commands of remote control
12. OUTPUT/SCALE switch key
13. SETUP switch key to enter or leave
GLOBAL and MAIN SETUP
REAR PANEL
14. AC Mains Terminal
15. AC Mains Switch
16. BurLink interface RS-232 with check LEDs
17. BurLink interface USB with check LEDs
18. Phones jack PHONES
19. MAIN output balanced preamp output
20. TAPE output balanced recording output
21. SURROUND input, balanced
22. High level inputs INPUT 1 to INPUT 5,
balanced
23. Module input as ordered
24. GROUND screw for ground cable of record
player, only with PHONO modules
25. REMOTE output
26. REMOTE input

11|46
10|46
OPERATION MANUAL 088 PREAMP
First Startup Connections
PLEASE NOTE: Before connecting the unit, please check if the input
voltage data on the rear panel, underneath the AC mains terminal (14) is
equal to the local voltage of your wall outlet. In case of doubt contact
a licensed electrician or your power supply company.
• Connect your preferred in- and outputs of the preamp with your HiFi system.
Please refer the chapter CONNECTIONS.
• Make sure, that the AC mains switch (15) on the rear panel of the 088 is set to
OFF position.
• Connect the AC power cord into the AC mains terminal (14) and plug it into the
wall outlet.
• Switch the AC mains switch (15) to ON position.
• With the POWER switch (8) on the front panel the unit is switched on.
• Detailed information about the manifold functions of the preamp, are available
in the following chapters of this owner’s manual.
All connection terminals are located on the rear panel. While connecting the preamp,
all components of the music system must be turned off.
Through factory settings a lot of functions are disabled to operate the
088
as
a simple preamp. With the menus you are comfortably able to activate the
numerous options the
088
offers. In daily use these functions are hidden.
If wanted, factory settings can be reestablished.
Inputs
To connect source components like CD-Player, FM-Tuner, Tape deck etc.
the standard version of the preamp provides five balanced inputs (XLR) named
INPUT 1 to INPUT 5 (22) and one unbalanced module input (RCA) named
INPUT LINE (23). For the best sound we recommend using the balanced inputs
whenever possible.
The preamp may be equipped Instead with a LINE module, Phono MC module,
Phono MM module or with a D/A converter module.
The pinning of the balanced inputs is: PIN1=GND, PIN2=NEG, PIN3=POS.
SURROUND input
The two front channels (right front / left front) of a surround sound processor or
decoder must be connected to the SURROUND input (21). The signal incoming into
the SURROUND input is sent directly to the MAIN outputs, bypassing the volume
control! This input allows the easy integration of surround sound components into
an existing twochannel hifi system. The SURROUND input cannot be selected over
the RECORD level.
The pinning of the SURROUND input is: PIN1=GND, PIN2=NEG, PIN3=POS.
NOTICE: Do only connect a unit with its own volume-control to this input.
Otherwise serious damage to your ears and equipments may occur.

13|46
12|46
OPERATION MANUAL 088 PREAMP
The input resistance and the amplification of the PHONO MC module can be
attuned to your pickup with the MC SETUP. For detailed instruction please refer to
the chapter THE SETUP MENUS / MC SETUP.
The PHONO SETUP offers the chance to switch on a subsonic filter to eliminate low
frequency noise.
The pinning of the balanced PHONO MC input is: PIN1=GND,PIN2=NEG,
PIN3=POS.
On request the PHONO MC modules and the adapter plugs are available at your
local dealer.
PHONO MM module
With a PHONO MM module the module input is a balanced PHONO MM input to
connect a record player with moving magnet pickup or high output moving coil
pickup.
If your record player has an unbalanced output, the balanced PHONO MM input can
be converted to unbalanced mode by using XLR-RCA adapter plugs.
The input capacitance and the amplification of the PHONO MM module can be
attuned to your pickup with the MM SETUP. For detailed instruction please refer to
the chapter THE SETUP MENUS / MM SETUP.
The PHONO SETUP offers the chance to switch on a subsonic filter to eliminate low
frequency noise.
The pinning of the balanced PHONO MM input is: PIN1=GND,PIN2=NEG,
PIN3=POS.
On request the PHONO MM modules and the adapter plugs are available at your
local dealer.
D/A converter module
With the D/A converter module inserted two inputs for digital audio signals will be
available: an unbalanced chinch input (RCA), which can receive pulse coded
signals (PCM) in the usual S/P-DIF format with a maximum sampling rate of 192kHz,
and a USB input, which supports USB class 1audio and USB class 2audio,
depending on the operating system of your computer. Since the USB input is
aso-called slave connection, no USB sticks or USB hard disks may be connected.
The RCA and USB inputs are selected by either pressing the
MODULE FUNCTION
(12)
key on the front panel of the device or by pressing and holding the AUDIO button
on the remote control for about
2
seconds. The active input will be indicated on the
display.
The sampling rate is toggled between 96kHz and 192kHz by pushing up the
MODULE FUNCTION (12) key on the front panel of the device or by shortly
pressing the AUDIO button on the remote control. With a sampling rate of 192kHz
the AUDIO LED (3) will be lit.
The level of both the RCA and USB inputs can be preset individually,
see THE SETUP MENUS / GLOBAL SETUP.
Adapter Plugs
If your stereo components should only offer unbalanced outputs, you are
able to use our balanced inputs with the adapter plugs as unbalanced inputs.
In these adapter plugs the Pins 2 (negative input) and Pin 1 (ground pin) are
connected (see graphic below). 4 XLRRCA adapters plugs are delivered with the
unit, allowing you to use 2 inputs as unbalanced inputs. If you need further plugs
you may get them at your authorized dealer.
NOTICE: Please use BURMESTER XLR-RCA adapters only.
WIRING OF THE ADAPTER PLUGS
RCA XLR
2
1
3
GROUND
SIGNAL
Module input
The module input (23) may be equipped alternatively with 4different modules:
NOTICE: Subsequent installation of other modules must only be done by
your authorized dealer or by Burmester Audiosysteme GmbH.
LINE module
The LINE module supplies an unbalanced high-level input.
PHONO MC module
With a PHONO MC module the module input is a balanced PHONO MC input to
connect a record player with moving coil pickup (no high output MC).
If your pickup has an unbalanced output, the balanced PHONO MC input can be
converted to unbalanced mode by using XLR-RCA adapter plugs.
15|46
14|46
OPERATION MANUAL 088 PREAMP
PLEASE NOTE: Don’t use any other tools but your hand to tighten the
GND screw! This way you avoid overwinding the screw.
MAIN output
To connect power amps or active loudspeakers the preamp provides the
MAIN output (19) as a regular balanced preamp output.
This output provides the volume-controlled signal of the selected input.
The pinning of the OUTPUT MAIN is: PIN1=GND, PIN2=NEG, PIN3=POS.
TAPE output
The output terminal TAPE output (20) must be connected to the recording input of
an analog recording device (mostly named TAPE IN or REC).
This output provides the signal of the selected input at maximum volume level.
Signals from the inputs TAPE and SURROUND cannot be taken from the
TAPE output. The volume control has no bearing on the signal at the TAPE output.
Die Lautstärkeregelung hat auf das Signal am TAPE-Ausgang keinen Einfluss.
The pinning of the TAPE output is: PIN1=GND,PIN2=NEG,PIN3=POS.
NOTICE: Never connect a power amp or active loudspeakers to this
output. Serious damage to your ears and equipments may occur.
Headphone jack
The headphone jack PHONES (18) requires headphones with a 6.3mm (1/4")
stereo plug and an impedance of 16Ωor more. For security measures the volume
level is being reduced to 01 respectively -79dB while inserting or pulling off the
phones plug. With the volume selector (6) on the front panel or with the buttons
VOLUME + and. VOLUME – on your remote control you select the volume level of
the phones output.
NOTICE: The signal at the MAIN OUTPUT will be interrupted while
inserting a headphone plug into the headphone jacks.
USB Connection
To establish the connection we will describe the variants for Microsoft and Apple
operating systems.
Connecting the 088 to a Windows™ operating system for the first time will
automatically prompt the installation of the USB class 1audio driver. In the system
management of your operating system you may then select the Burmester class 1
audio output from the list of audio devices. When playing back music over the PC
now, it will be output via the 088. Regrettably problems may occur on Windows PCs
in connection with class 2audio. Therefore we recommend selecting USB class 1
audio on PCs with Microsoft operating systems.
The Apple® operating systems automatically recognize both USB class 1audio and
USB class 2audio. To select between class 1and class 2audio, simply press the
OSD button on the remote control or the MODULE FUNCTION (12) key on the 088
for about 2seconds. The operating system will automatically recognize the
selected connection and activate it. You may then adjust the sampling rate
between PC and 088 in the audio settings of the operating system to as high as
192kHz / 24 bit.
USB Quality
The quality of the two USB audio classes differs in their sampling rate.
The D/A converter module of the 088 offers two options to establish a
USB connection: either as USB class 1audio or as USB class 2audio. USB class 1
audio can transmit signals of up to 96 kHz / 24 bit while class 2audio can handle
signals of up to 192kHz / 24 bit.
PLEASE NOTE: The volume level may be controlled either from the PC or
from the 088. So if the PC volume level is set to zero, the 088 will receive
no signal.
GROUNDING screw
When using the PHONO input as an unbalanced input for a record player it is
necessary to connect the GND wire of your record player to the GND screw (24).
Loosen the GND screw, clamp the GND wire of your turntable between the two
washers and tighten the GND screw.

17|46
16|46
OPERATION MANUAL 088 PREAMP
With the exception of the AC mains switch, which is located on the rear panel of the
unit, all operating controls are located on the front panel of the preamp.
AC MAINS SWITCH
The AC mains switch (15) which completely disconnects the AC power to the unit
is located on the rear panel of the 088 above the AC mains terminal. By switching to
the ON position the stand-by transformer is powered up.
SWITCHING ON AND OFF
The POWER switch (8) switches the preamp on and off, presuming the AC mains
switch is in the ON position.
With the POWER switch (8) set to “OFF” all functions of the preamp are powered
down.
Flipping the POWER switch (8) from “OFF” to “STBY”, the POWER LED (7) lights
up orange. This shows that the unit is in stand-by mode.
When the POWER switch is in “STBY” position the unit can be switched on and off
by pulling up the POWER switch, pushing the POWER button on the BURMESTER
remote control, the Burlink interface or by the DC IN jack.
In operating mode (ON) the POWER LED (7) lights up red and all functions of the
preamp are activated.
PLEASE NOTE: Always switch off the preamp with the POWER switch first
before bringing the AC mains switch into OFF position.
VOLUME LEVEL
The Volume selector (6) controls the volume level in 61 steps from 00 (mute) to 60
(maximum volume) or in dB-steps from MUTE to +5dB (maximum volume with LOW
amplification) or + 21dB (maximum volume with HIGH amplification). The selected
volume level will be shown in the alphanumeric display (4).
The volume selector also controls functions in the SETUP menus.
REMOTE
Connecting DC OUT (25) to the corresponding DC IN-jack of another BURMESTER-
unit offers the function to switch on or off this other unit simultaneous by the 088.
In this case, the 088 has the master function.
Connecting DC IN (26) to the corresponding DC OUT-jack of another BURMESTER-
unit offers the function to switch on or off the 088 simultaneous by the other unit.
In this case, 088 has the slave function.
BurLink
To the BURmester-LINK interface plugs (16), (17) a computer system e.g. PC,
CRESTRON™, AMX™ can be connected to the preamp 088. The computer system
allows a comfortable control of your HighEnd system using for example an
individual programmable touch panel. With the LEDs beside the plugs named
Tand R(Transmit and Receive) you are able to monitor whether data exchange
is working.
You will find the commands to control the
088
in the chapter BurLink.
Operating Controls

19|46
18|46
OPERATION MANUAL 088 PREAMP
INPUT SELECTION
With the input selector (1) you select the input you want to listen to. The selected
input will be shown in the alphanumeric display (4).
The input selector also controls functions in the SETUP menus.
PHASE REVERSAL
In factory settings the preamp 088 passes incoming signals without phase reversal
to the MAIN and TAPE outputs. If the pin polarity of a reproducer differs from the
pin polarity of power amps or active speakers connected to the output terminals
(see also owner `s manual PINS 2and 3) there is the possibility to reverse the
phase of the according input by 180˚.
The phase reversal is activated or deactivated by pulling the switch key
PHASE/DISPLAY (9) up, or by longer pressing the DIM button (approx. 2seconds)
on your remote control. If the phase reversal is activated (180˚), the PHASE LED (2)
illuminates.
Every input needs to be preset separately. The presetting will be maintained.
NOTICE: Please be advised that each input can be reversed separately.
A phase reversal of the outputs is not intended.
DISPLAY BRIGHTNESS
By pushing the switch key PHASE/DISPLAY (9) down, or by shortly pressing the
DIM button on your remote control you can adjust the brightness of your display in
four steps from “maximum brightness” to “off”.
If modus “off” is chosen, the display illuminates when the device is operated to
indicate that a function is controlled, and dims out after a few seconds.
In modus “off”, the device shifts to maximum brightness in SETUP-mode.
The display will stay illuminated until you leave the SETUP-mode.
MODULE FUNCTION SWITCH KEY
SUBSONIC FILTER
If your preamp is equipped with either a Phono MM or Phono MC module, you have
the option to select a subsonic filter. Our subsonic filter eliminates low frequency
signals, which might come from the record player or wavy records. Switch on the
subsonic filter, if the bass membranes of your loudspeakers are moving very slowly
with a large swing.
The subsonic filter is activated or deactivated by pulling the switch key
MODULE FUNCTION (10) up, or by shortly pressing the AUDIO button on your
remote control. If the subsonic filter is activated, the AUDIO LED (3) illuminates.
USB RCA
If your preamp is equipped with a DAC module you are able to switch the inputs of
the module. Switching between the inputs RCA and USB can be done by pushing
down the switch key MODULE FUNCTION (10) on the front panel or by longer
pushing (approx. 2seconds) the AUDIO button on your remote control.
The active input will be shown in the display.
The volumes of the inputs RCA and USB are separately adjustable.
(see THE SETUP MENUS / GLOBAL SETUP)
96KHZ 192KHZ
If your preamp is equipped with a DAC module you are able to select the sample
rate of the DAC module. Switching the sample rate between 96kHz and 192kHz can
be done by pulling up the switch key MODULE FUNCTION (10) on the front panel of
the unit or by shortly pushing the AUDIO button on your remote control.
If the sample rate is 192kHz, the AUDIO LED (3) illuminates.

21|46
20|46
OPERATION MANUAL 088 PREAMP
INPUT NAMES
Through factory settings all inputs of the preamp 088 are assigned with specific
names. You may, however label the inputs 1through 5with other names.
We provide a range of names. It is of course possible to choose an individual name,
e.g. the type of your device.
Adjustment options are available in the GLOBAL SETUP in submenu
INPUT NAMES.
For specific instructions please refer to THE SETUP MENUS/ GLOBAL SETUP.
Factory setting assigns the following names:
• INPUT 1CD
• INPUT 2TUNER
• INPUT 3TAPE
• INPUT 4AUX1
• INPUT 5AUX2
• INPUT 6SURROUND
• MODULE INPUT LINE (if equipped with a LINE MODULE)
PH-MC (if equipped with a LINE MODULE)
PH-MM (if equipped with a PHONO MM MODULE)
DA USB and DA RCA (if equipped with a D/A-CONVERTER
MODULE)
Restoring factory settings will reset all the input names to the ones above.
VOLUME SCALE
Through factory settings the volume steps are set to the BURMESTER curve.
The volume indicator is divided into steps between 0(mute) to 60
(maximum volume). You may change the setting to dB steps.
By pushing down the switch key (12) you may change between the Burmester or
dB scale.
Special Functions
The preamp 088 offers a variety of special functions in order to allow a personalized
configuration of the device. Most functions are adjustable in the SETUP MENUS.
OUTPUT AMPLIFICATION
Through factory settings the entire volume of the preamp 088 is set to a maximum
amplification of +5dB (factor 1.8). This preset should be maintained if you are
operating your system with BURMESTER power amps, which have a high input
sensitivity. If you are operating the preamp 088 with power amps or active speak-
ers with low input sensitivity, it is possible to change the maximum amplification to
+21 dB (factor 11.2).
To change the amplification switch key (12) needs to be pulled up.
At high amplification the HIGH/LOW-LED (5) will illuminate.
NOTICE: After changing the output amplification, the unit always
switches to volume level 01 respectively to -79dB.
INPUT SENSITIVITY
Through factory settings all inputs are set to the same input sensitivity.
As experience has shown, connected reproducers deliver different output levels.
Therefore, it is possible to decrease every input of the preamp 088 up to -6dB
(factor 2) or to increase it up to 12 dB (factor 4) in order to adjust the different
volumes of your sources.
Adjustment options are available in the GLOBAL SETUP in submenu INPUT LEVEL.
For specific instructions please refer to THE SETUP MENUS/ GLOBAL SETUP.
VOLUME BALANCE
Some spatial arrangements require shifting the volume conditions for each
reproducing channel. The volume shift is realized by reducing one of the two stereo
channels. It is possible to reduce one channel of the preamp
088
up to
9
dB
(factor
2
.
8
) in steps of
1
dB, and for specific situations to switch off completely.
Adjustment options are available in the MAIN SETUP in submenu BAL.
For specific instructions please refer to THE SETUP MENUS/ MAIN SETUP.

23|46
22|46
OPERATION MANUAL 088 PREAMP
The Setup Menus
The SETUP menus of the preamp 088 allow comfortable programming of certain
basic settings as well as special functions. Changes in some of the settings have an
impact on the reproduction of the signal. We recommend, selecting a moderate
volume level before activating a setup.
NOTICE: While the SETUP menu is active, the volume selector (6) on
the front panel of the 088 serves to change the settings of the various
menu items. During this procedure the volume level can only be changed
by the volume buttons on your remote control.
Activating the SETUP Menus
GLOBAL SETUP:
Pushing down the switch key (13) or longer pressing (approx. 2seconds) the MENU
button on your remote control activates the GLOBAL SETUP.
MAIN SETUP:
Pulling up the switch key (13) or shortly pressing the MENU button on your remote
control activates the MAIN SETUP.
PHONO SETUP:
Pulling up the switch key (10) or shortly pressing the AUDIO button on your remote
control activates the PHONO SETUP.
This menu can only be activated, if a PHONO MC or PHONO MM module is equipped
and the PH-MC or PH-MM input is selected.
AS EQUIPPED:
MC SETUP:
Pushing down the switch key (10) or longer pressing (approx. 2seconds) the
AUDIO button on your remote control activates the MC SETUP.
This menu can only be activated, if a PHONO MC module is implemented and the
PHMC input is selected.
MM SETUP:
Pushing down the switch key (10) or longer pressing (approx. 2seconds) the
AUDIO button on your remote control activates the MM SETUP.
This menu can only be activated, if a PHONO MM module is implemented and the
PHMM input is selected.
SERIAL NUMBER
In order to view the serial number of your preamp 088 after switching on the device,
the function needs to be activated.
You will find the activation options in the GLOBAL SETUP in submenu SNR.
For specific instructions please refer to THE SETUP MENUS/ GLOBAL SETUP.
SWITCHING OFF CONTROL ELEMENTS OF DEVICE
In order to prevent undesired control of the preamp 088, it is possible to lock all
controlling elements on the front panel (except the POWER switch).
Then all functions are only operable via remote control. This provides a child proof
lock option.
This option can be found in the GLOBAL SETUP in submenu FR O NT- P.
For specific instructions please refer to THE SETUP MENUS/ GLOBAL SETUP.
INITIAL VOLUME
After switching on your preamp 088, a certain volume is set.
The range of this setting extends from volume 01 and -79 dB respectively up to
20 and -60 dB respectively. If the setting LAST is chosen, the volume that was last
selected will be used. For security reasons, this is only possible up to a maximum
volume of 20 and. -60 dB respectively.
You will find the adjustment options in the MAIN SETUP in submenu VOL.
For specific instructions please refer to THE SETUP MENUS/ MAIN SETUP.
The different functions of the Phono MC and Phono MM module are available in
THE SETUP MENUS / PHONO SETUP and THE SETUP MENUS / MC SETUP,
THE SETUP MENUS / MM SETUP respectively.

25|46
24|46
OPERATION MANUAL 088 PREAMP
Select menu item
The different items of the SETUP menus are selected by turning the input
selector (1) on the front panel or pressing the navigation buttons ► ◄ on your
remote control. (check tables)
The alphanumeric display (4) shows the selected item.
Change settings
To change the setting of a selected menu item turn the volume selector (6) on the
front panel or press the navigation buttons ▲ ▼ on your remote control.
The selected value of the menu item is indicated on the right side of the
alphanumeric display (4).
The selected value of any menu item will be saved immediately.
Exit SETUP
Exiting the setup menu is done by pushing the same switch key that has activated
the setup or by shortly pushing the MENU button on your remote control.
The display will show SETUP SAVED!.
The Global Setup
The GLOBAL SETUP offers the adjustment of global functions like INPUT LEVEL,
INPUT NAMES, displaying the SERIAL NUMBER, SWITCHING OFF CONTROL
ELEMENTS on the front panel, RC INPUT selection and resetting to FACTORY
SETTINGS.
The following chart provides an overview of all menu items, which can be adjusted
in the GLOBAL SETUP. The factory settings (defaults) are listed in brackets.
Subsequent to the chart you will find a detailed description of the menu items.
MENU ITEM DESCRIPTION DISPLAY VALUE
Input level Pre-level adjustment for
every input
INPUT
LEVEL
-06 to -01,
(00),
+01 to +12
Input names Individual input names INPUT
NAMES
Input name
Displaying serial
number
Displaying serial number after
switching on the unit
SNR (OFF) / ON
on/off of control
elements on front
panel
Activating/Deactivating
control elements on the
front panel
FRONT-P (ON) / OFF
RC Input selection Activating/Deactivation
Station +/– keys of the
remote control
RC INPUT (NO) / YES
Factory settings Loading all factory settings DEFAU LT S
The GLOBAL SETUP MENU is activated by pushing down the switch key (13) on
your device or by longer pushing the MENU button (approx. 2 sec) on your remote
control. The display indicates the activation by shortly showing GLOBAL SETUP,
followed by the first menu item.
To exit and automatically save the menu push down the switch (13) or press the
MENU button on your remote control.

27|46
26|46
OPERATION MANUAL 088 PREAMP
Input level
By adjusting the input level, you can equalize jumps in the volume resulting from
differing output levels of the reproducers when switching between input sources.
Select the menu item INPUT LEVEL either with the left rotary switch or the
navigation buttons ► ◄ on your remote control.
If the menu item is selected, you will reach the input selection by using the right
rotary switch or the OK button on your remote control.
With the left rotary switch or the navigation buttons ► ◄ on your remote control
you may now select the desired input.
With the right rotary switch or the navigation buttons ▲ ▼ on your remote control
you may now select the desired increase or decrease. The range of selection
reaches from +12 dB to -06 dB in single steps.
In order to return to the menu item level, you have to select the item BACK either
with the left rotary switch or the navigation buttons ► ◄ on your remote control.
Now confirm with the right rotary switch or by pressing the OK button on your
remote control. The display indicates INPUT LEVEL if the action is completed.
Input names
Through factory settings all inputs of the preamp 088 are assigned with specific
names (INPUT1= CD etc.). You may, however label every input with another name of
your choice. We provide a range of names. It is of course possible to select an
individual name, e.g. the type of your device. Please refer to the menu item input
selection in the chapter remote control.
Select the menu item INPUT NAMES with the navigation buttons ► ◄.
If the menu item is selected, you will reach the input selection by pressing the OK
button on your remote control.
With the navigation buttons ► ◄ you may select the desired input.
With the navigation buttons ▲ ▼ you may select the desired name. Fixed Input
names are DVD,SAT,DVB,DAB,VHS,TV,CD,TUNER,PHONO,AUX 1,AUX 2,
AUX 3,PC and IPOD.
The item USER allows an individual name of your choice. By pushing the OK button
when USER is selected you will reach the name programming level.
A blinking digit indicates which part of the name can be modified. By using the
navigation buttons ► ◄ you may select the position you would like to modify. With
the navigation buttons ▲ ▼ you may select the desired sign (letter A-Z, digit 0-9,
blank space, hyphen or underscore). By pressing the OK button you finish the input
of signs. The display will show SAVE:YES OK?
Now select YES/NO with the navigation buttons ▲ ▼ and confirm by pressing the
OK button on your remote control. If YES is selected, the adjustment is accepted,
if NO is selected, the old setting is maintained.
In order to return to the menu item level, you have to select the item BACK with the
navigation buttons ► ◄. Now confirm by pressing the OK button. The display
indicates INPUT NAMES if the action is completed.
Displaying serial number
It is possible to choose whether the device is supposed to show the serial
number (ON) after switching on the device or not (OFF).
Select menu item SNR with the left rotary switch or the navigation buttons ► ◄ on
your remote control.
With the right rotary switch or the navigation buttons ▲ ▼ on your remote control
you may select one of the following:
OFF serial number not displayed
ON serial number displayed after switching on the device
Deactivating control panel
In order to prevent accidental use of the control elements on the front panel,
it is possible to deactivate all controlling elements on your device (except the
POWER-switch). All functions can then only be operated via remote control.
This provides a child proof lock option.
Select menu item FR O NT- P with the left rotary switch or the navigation buttons
►◄on your remote control. With the right rotary switch or the navigation buttons
▲ ▼ on your remote control you may select one of the following:
ON Die Taster und Drehknöpfe am Gerät sind aktiviert.
OFF Die Taster und Drehknöpfe am Gerät sind ausgeschaltet.

29|46
28|46
OPERATION MANUAL 088 PREAMP
The MAIN SETUP offers the adjustment of functions like BALANCE and
INITIAL VOLUME.
The following chart provides an overview of all menu items, which can be adjusted
in the MAIN SETUP. The factory settings (defaults) are listed in brackets.
Subsequent to the chart you will find a detailed description of the menu items.
MENU ITEM DESCRIPTION DISPL AY VALUE
Balance Sets volume left/right ratio BAL OFF R, -09R to -01R
(<C>) -01L to -09L,
OFF L
Initial volume Selects volume after
switching on the device
VOL (01) to 20, LAST
The MAIN SETUP MENU is activated by pulling up the switch key (13) on the front
panel or by pressing the MENU button on your remote control. The display
indicates the activation by showing MAIN SETUP, followed by the first menu item.
To exit and automatically save the menu pull up the switch key (13) or press the
MENU button on your remote control.
Input selection with the remote control
If you want to change the inputs of the preamp with the keys STATION +/- of your
remote control, you need to set this item to YES. If this item is set to NO, inputs can
only be changed with the input selector (1) on the front panel of the unit and the
direct input buttons on the remote control, for example the CD button.
Select menu item RC INPUT with the left rotary switch or the navigation buttons
► ◄ on your remote control.
With the right rotary switch or the navigation buttons ▲ ▼ on your remote control
you may select one of the following.
NO Inputs cannot be changed with the STATION keys of the remote control.
YES Inputs can be changed with the STATION keys of the remote control.
Factory Settings
In order to reset all adjustments including display brightness back to factory
settings you have to select the menu item D E FA U LTS . Now confirm with the right
rotary switch or by pressing the OK button on your remote control. This provides
a child proof lock option.
The display indicates BUILDING followed by PRESET, which confirms that factory
settings have been loaded successfully. Afterwards the menu item INPUT LEVEL
will be shown in the display.
By pushing down the switch key (13) or shortly pressing MENU on your remote
control you leave the menu and factory settings will be activated.
The Main Setup

31|46
30|46
OPERATION MANUAL 088 PREAMP
Balance
Some spatial arrangements require a shift of the volume ratio between the two
reproducing channels. The volume shift is realized by reducing one of the two
stereo channels. It is possible to alleviate one channel of the preamp 088 up to 9dB
(factor 2.8) in steps of 1dB, and for specific situations to switch it off completely.
Select menu item BAL with the left rotary switch or the navigation buttons ► ◄ on
your remote control.
With the right rotary switch of the navigation buttons ▲ ▼ on your remote control
you may select the desired value:
<C> both stereo channels of the MAIN output will be reproduced at
the same volume level
-09R to -01R the right channel of the MAIN output will be reproduced with
reduced volume
OFF R the right channel of the MAIN output is muted
-09L to -01L the left channel of the MAIN output will be reproduced with
reduced volume
OFF L the left channel of the MAIN output is muted
The balance setting has no effect on the SURROUND input and on the TAPE output.
Initial volume
This menu item preselects the volume for the MAIN output of your device when it is
switched on.
Select menu item VOL with the left rotary switch or the navigation buttons ► ◄ on
your remote control.
With the right rotary switch or the navigation buttons ▲ ▼ on your remote control
you may select the desired value:
The range of selection reaches from 01 to 20 and -79 dB to -60 dB respectively,
in single steps.
If the setting LAST is chosen, the volume that was last selected will be used.
For security reasons, this is only possible up to a maximum volume of 20 and
-60 dB respectively.
The MC SETUP offers the adjustment of functions like AMPLIFICATION and
INPUT RESISTANCE.
NOTICE: This menu is only available if your preamp 088 is equipped with
a PHONO MC module and the input PHMC is selected.
The following chart provides an overview of all menu items, which may be adjusted
in the MC SETUP. The factory settings (defaults) are listed in brackets. Subsequent
to the chart you will find a detailed description of the menu items.
MENU ITEM DESCRIPTION DISPL AY VALUE
Amplification Adjusts PHONO MC amplification GAIN 54dB / 60dB /
(66dB) / 72dB
Input resistance Adjusts input capacitance of
PHONO MC module
LOAD 33Ω/ 47Ω/ 91Ω/
(120Ω) / 390Ω/ 47kΩ
The MC SETUP MENU is activated by pushing down the switch key (10) on the front
panel or by longer pressing the AUDIO button (approx. 2sec) on your remote
control. The display indicates the activation by showing MC SETUP, followed by the
first menu item.
To exit and automatically save the menu push down the switch key (10) or press the
MENU button on your remote control.
The MC Setup

33|46
32|46
OPERATION MANUAL 088 PREAMP
Amplification
With this option you are able to adjust the playback volume of the PHONO MC
module to your record player.
With the left rotary switch or the navigation buttons ► ◄ on your remote control
select the option GAIN.
With the right rotary switch or the navigation buttons ▲ ▼ on your remote control
select the amplification.
Input resistance
With this option you are able to adjust the input resistance of the PHONO MC
module to the pickup of your record player. Usually the manufacturers of pickup
systems have recommended settings for this option. Of course you can try different
settings, whatever sounds best to your ears.
With the left rotary switch or the navigations buttons ► ◄ on your remote control
select the option LOAD.
With the right rotary switch or the navigations buttons ▲ ▼ on your remote control
select the desired input resistance.
The MM SETUP offers the adjustment of functions like AMPLIFICATION and
INPUT CAPACITANCE.
NOTICE: This menu is only available if your preamp 088 is equipped with
a PHONO MM module and the input PHMM is selected.
The following chart provides an overview of all menu items, which may be adjusted
in the MM SETUP. The factory settings (defaults) are listed in brackets. Subsequent
to the chart you will find a detailed description of the menu items.
MENU ITEM DESCRIPTION DISPL AY VALUE
Amplification Adjusts PHONO MM
amplification
GAIN 34dB, 40dB, (46dB),
52dB
Input capacitance Adjusts input capacitance of
PHONO MM module
LOAD (68pF), 120pF,
180pF, 220p F,
260p F, 300pF,
360pF, 400pF
The MM SETUP MENU is activated by pushing down the switch (10) on the front
panel or by an extended pushing of the AUDIO button (approx. 2sec) on your
remote control. The display indicates the activation by showing MM SETUP,
followed by the first menu item.
To exit and automatically save the menu push down the switch (10) or press the
MENU button on your remote control.
The MM Setup

35|46
34|46
OPERATION MANUAL 088 PREAMP
Amplification
With this option you are able to adjust the playback volume of the PHONO MM
module to your record player.
With the left rotary switch or the navigation buttons ► ◄ on your remote control
select the option GAIN.
With the right rotary switch or the navigation buttons ▲ ▼ on your remote control
select the amplification.
Input capacitance
With this option you are able to adjust the input capacitance of the PHONO MM
module to the pickup of your record player. Usually the manufacturers of pickup
systems have recommended settings for this option. Of course you can try different
settings, whatever sounds best to your ears.
With the left rotary switch or the navigations buttons ► ◄ on your remote control
select the option LOAD.
With the right rotary switch or the navigations buttons ▲ ▼ on your remote control
select the desired input capacitance.
Independent to the desired capacitance, the input resistance is always 47kΩ.
Remote Control
SWITCHING ONOFF
The POWER button switches the preamp on or off, provided the Mains switch on
the rear panel of the preamp is set to ON and the power switch on the front panel of
the preamp is set to STBY.
INPUT SELECTION
The buttons TUNER, PHONO, TAPE, DISC, AUX, SURR activate the according
input. If you have renamed the inputs the buttons will react as follows:
TUNER:
all inputs with the character combinations TU,DAB,DVB,ADR,RADIO, RDS,053,
993,931,915,978 in its name
PHONO:
all inputs with the character combinations PH, VINYL, PL ATTE in its name
TAPE:
all inputs with the character combinations TAPE, DAT, REV, BAND in its name
DISC:
all inputs with the character combinations CD,DISC,DISC3,DISC33,DVD,BD,
MD,LD,VD,001,006,052,061,069,089,992,916,917,937,963,939 in its
name
AUX:
all inputs with character combinations which are not listed above will be toggled
through, e.g. the DAC inputs, if a DAC module is equipped
SURR:
the SURROUND input will be activated
NOTICE:
If you have multiple inputs with same characters
(for example CD1and CD2), you will be able to toggle through those
inputs with the DISC button on your remote control.

37|46
36|46
OPERATION MANUAL 088 PREAMP
Furthermore you have the option to switch through all inputs, independent of the
names, with the buttons STATION+ and STATIO N-. With the STATION+ button in
ascending order (INPUT 1INPUT 2etc…), with the STATION - button in
descending order (INPUT 4INPUT 3etc…).
NOTICE:
To be able to use the STATION +/- keys on your remote control
for switching between the inputs you have to set the menu item RC INPUT
in the GLOBAL SETUP to YES.
PLAYBACK VOLUME
With the buttons VOLUME + and VOLUME - you are able to adjust the volume for
the MAIN output. The volume level is shown in the display. By shortly pressing the
VOLUME buttons you are able to change the volume in small steps.
DISPLAY BRIGHTNESS
With the DIM button you are able to adjust the brightness of the display in 4steps.
These steps vary between “max. brightness” and “off”.
If you choose the option “off” the display will only light up when you change
anything. This gives you a feedback about the changes you are applying.
When you are done with your changes, the display will go blank again after a couple
of seconds. If you enter the SETUP MENU while display is “off”, it will automatically
go to “maximum brightness” for the time you are in the SETUP MENU.
PHASE REVERSAL
Longer Pressing the DIM button (approx. 2seconds) will reverse the phase of the
presently activated input channel by 180°. When the phase reversal is active,
the PHASE LED (2) will light up.
OUTPUT AMPLIFICATION
The button MODE changes the amplification of the preamp. At high amplification
the HIGH/LOW-LED (5) will illuminate.
NOTICE
:
After changing the output amplification, the unit always switches
to volume level 01 respectively to -79dB.
VOLUME DISPLAY
By holding down the MODE key (for approx. two seconds), you can switch the
volume increments and display between the dB scale and the Burmester scale.
UP SAMPLING
If you have a D/A-converter module, and the module input is selected you are able
to change the sample rate between 192kHz (AUDIO LED (3) lights up) and 96 kHz
(AUDIO LED (3) is off). You may do so by shortly pressing the AUDIO button.
INPUT DA MODULE
If you have a D/A-converter module and the module input is selected, you have the
option to select between the USB and the RCA input. Longer pressing the AUDIO
button (approx. 2seconds) will switch the inputs.
SETUP MENUS
• Longer pressing the D-MENU button (approx. 2seconds) will open the
GLOBAL MENU. Shortly pressing D-MENU again will close the menu.
• Shortly pressing the D-MENU button will open the MAIN MENU.
Shortly pressing the D-MENU button again will close the menu
• Shortly pressing the AUDIO button will open the PHONO MENU, if a Phono MM
or MC module is equipped and the module input is selected. Shortly pressing
the MENU button will close the menu.
• Longer pressing the AUDIO button (approx. 2seconds) will open the MC MENU,
if a Phono MC module is equipped and the module input is selected.
Shortly pressing the MENU button will close the menu.
• Longer pressing the AUDIO button (approx. 2seconds) will open the
MM MENU, if a Phono MM module is equipped and the module input is selected.
Shortly pressing the MENU button will close the menu.

39|46
38|46
OPERATION MANUAL 088 PREAMP
BurLink
CONNECTIONS
Connections to the BURLINK interface can either be done by the 9-pin D-SUB
connector (RS-232) or by the USB connector.
RS-
232
configuration:
9600
Baud,
8
bit, parity: none,
1
stop bit, no hardware
handshake A USB device driver needs to be installed when using the USB connector.
System requirements for using the USB software are either WINDOWS 2000 or
WINDOWS XP operating system.
COMMANDS
Listed below are the possible commands to control the preamp 088. All commands
needs to be sent in capital letters finished with a “carriage return” \r .
POWON\r switches the unit on
POWOFF\r switches the unit to stand-by mode
INP+\r switches the inputs of the preamp
INP-\r switches the inputs of the preamp
INP1\r switches to input 1
INP2\r switches to input 2
INP3\r switches to input 3
INP4\r switches to input 4
INP5\r switches to input 5
INP_SURR\r switches to input SURROUND
INP_MOD\r switches to module input
DAC_SRC_INP\r switches between the inputs of the D/A converter module,
if equipped
DAC_SRC_RCA\r switches to the RCA input of the D/A converter module,
if equipped
DAC_SRC_USB\r switches to the USB input of the D/A converter module,
if equipped
VOLUP\r increases the volume by one step
VOLDN\r decreases the volume by one step
VOL_BURxx\r sets the volume level to the value xx referred to the
BURMESTER scale
VOL_DByxx\r sets the volume level to the value xx referred to the dB
scale
SCALE_BUR\r sets the volume level to the Burmester curve
SCALE_DB\r sets the volume level to the dB curve
PHASE\r switches the active input between 0˚ and 180˚ phase
PHASEON\r switches the active input to 180˚ phase
PHASEOFF\r switches the active input to 0˚ phase
GAIN\r switches the output amplification between LOW and HIGH
GAIN_LOW\r switches the output amplification to LOW
GAIN_HIGH\r switches the output amplification to HIGH
AUDIO\r switches the D/A converter module between a sample rate
of 96kHz and 192kHz, if equipped
AUDIO96\r switches the D/A converter module to a sample rate of
96kHz, if equipped
AUDIO192\r switches the D/A converter module to a sample rate of
192kHz, if equipped
SUBSONIC_ON\r switches the subsonic filter on, if a Phono module is
equipped
SUBSONIC_OFF\r switches the subsonic filter off, if a Phono module is
equipped
DIM\r switches the brightness up step by step (0,1,2,3,0,1,2....)
DIM0\r switches the display brightness to maximum
DIM1\r switches the display brightness to middle
Table of contents
Other Burmester Amplifier manuals

Burmester
Burmester 159 User manual

Burmester
Burmester Classic Series User manual

Burmester
Burmester 077 User manual

Burmester
Burmester 909 MK5 User manual

Burmester
Burmester 911 MK 3 User manual

Burmester
Burmester 218 User manual

Burmester
Burmester 011 User manual

Burmester
Burmester 099 User manual

Burmester
Burmester 159 User manual

Burmester
Burmester Classic Series User manual

Burmester
Burmester 035 User manual

Burmester
Burmester 036 User manual

Burmester
Burmester 911 MK3 User manual

Burmester
Burmester 808 MK5 User manual

Burmester
Burmester 077 User manual

Burmester
Burmester 082 User manual

Burmester
Burmester Classic 101 User manual

Burmester
Burmester Top Line Phono preamp 100 User manual