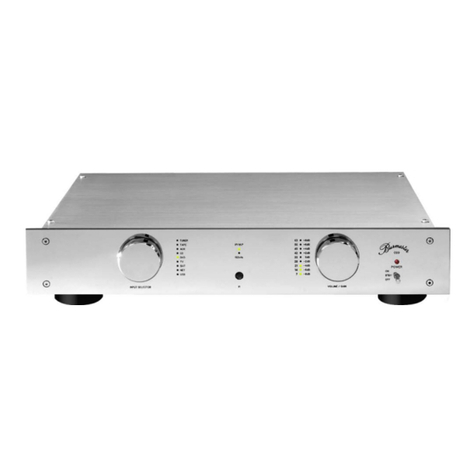
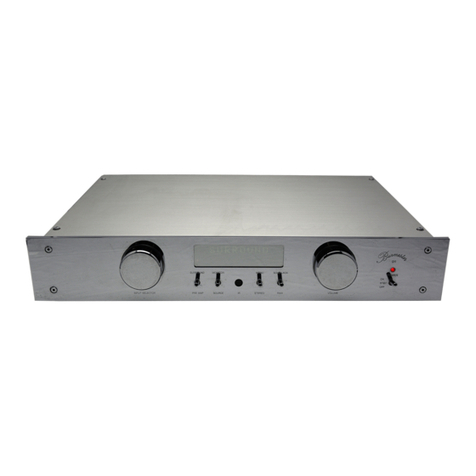
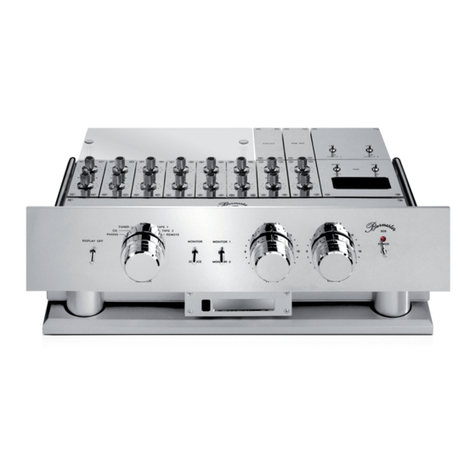
Burmester 082 User manual

OWNER´S MANUAL
CLASSIC LINE
INTEGRATED AMPLIFIER
082
HIGH END MADE IN GERMANY
BURMESTER AUDIOSYSTEME GMBH • WILHELM-KABUS-STRAßE 47• 10829 BERLIN • GERMANY
TEL ++49/(0)30/78 79 68 – 0 • FAX ++49/(0)30/78 79 68 – 68 •E-MAIL: m[email protected] • www.burmester.de

VERSION: 1.1 from OCTOBER 1
st
2010

Dear Audiophile,
Thank you for choosing this Burmester audio component. We sincerely appreciate your trust in us.
You have purchased a unit which excels in musical fidelity and combines uncompromising manufacturing
quality with technical innovation and the highest degree of operating flexibility.
We recommend reading this user manual at least once in its entirety before initial operation. This will enable
you to make full use of all capabilities of this outstanding audiophile instrument.
Should you have any further questions, please contact your dealer or us directly.
Talk to us about your special requests, even if they seem out of the ordinary. We happily accept technical
reasonable challenges.
Enjoy your enhanced listening pleasure.
Your Burmester Team

C O N T E N T
UNPACKING AND SETTING UP 1
FUNCTIONAL OVERWIEW OF FRONT AND REAR PANEL 2
CONNECTIONS 3-4
OPERATING CONTROLS 5-6
REMOTE CONTROL 6
THE SETUP MENU 7
ERROR PROTECTION 8
BURLINK 9
GENERAL INSTRUCTIONS 10 - 11
TECHNICAL SPECIFICATIONS 12

1
UNPACKING AND SETTING UP
CAUTION: The integrated amplifier 082 is very heavy. To avoid injury during unpacking and set-up, this
should only be done by persons who are accustomed to handling such weights.
The integrated amplifier 082 is shipped inside a plastic protective cover. Make sure that children do not play
with it to avoid the danger of suffocation.
Unpacking To avoid damaging the housing, please do not use pointed or sharp tools to open the box.
Please make sure that the content of the box is complete. If something is missing or you
notice any damage while unpacking, do not hook up the unit. Instead, contact your
authorized dealer.
Content of box The box should contain the following:
•1 Integrated amplifier 082
•1 AC power cord
•1 remote control 067
•1 owner’s manual
Packaging We recommend keeping the original packing in case the unit needs to be shipped in the
future.
Setting up Carefully remove the unit from its packaging and set it up in an appropriate location. To
protect the 082 from overheating make sure that the location offers sufficient air circulation
around the unit. Also, avoid excessive exposure to sun, dust and humidity.
Ventilation ducts and openings in the housing serve to keep the unit cool. They must not be
covered up with magazines, table cloth, curtains etc.
If the 082 has to be operated in an extremely warm environment it may be necessary
to supply additional ventilation. Avoid operating the unit in an excessively humid
environment like bath rooms etc.

2
FUNCTIONAL OVERVIEW
FRONT PANEL
(1) IR receiver (7) INPUT buttons
(2) Standby LED shows standby mode (8) VOLUME knob
(3) Display (9) POWER button for turning the unit on or off
(4) TONE LED illuminates when tone control is activated (10) TONE button for activating/deactivating the
(5) INPUT button for SURROUND input tone control or the tone control setup
(6) MONITOR button for tape monitoring (11) SETUP button for configuring the 082
REAR PANEL
(12) SURROUND input balanced (21) Loudspeaker terminal right, positive
(13) PREAMP output balanced (22) Loudspeaker terminal right, negative
(14) PREAMP output unbalanced (23) AC mains switch
(15) TAPE output unbalanced, (24) AC mains terminal
for analog recording device (25) REMOTE output
(16) TAPE input unbalanced (26) BURLINK interface RS-232 with check LEDs
(17) AUX2 input unbalanced (27) REMOTE input
(18) AUX1 input balanced (28) Headphones jack
(19) TUNER input balanced (29) BURLINK interface USB with check LEDs
(20) CD input balanced (30) Loudspeaker terminal left, negative
(31) Loudspeaker terminal left, positive

3
CONNECTIONS
All connection terminals are located on the rear panel. While connecting the amplifier all components of the music
system must be turned off.
CAUTION: Before connecting the unit, please check if the input voltage of the 082 is equal to the local voltage of
your wall outlet. Make sure the ground lead in your power outlet is working correctly. A missing or faulty ground is
extremely dangerous!
In case of doubt contact a licensed electrician.
AC mains terminal Make sure the AC mains switch (23) is set to OFF. Connect the appliance connector of the
power cord to the AC mains terminal (24). Then plug the power cord into the wall outlet.
Inputs To connect source components like CD-Player, FM-Tuner, Tape deck etc. the amplifier
provides three balanced inputs (XLR) named CD (20), TUNER (19) and AUX1 (18) and
two unbalanced inputs (RCA) named AUX2 (17) and TAPE (16). For the best sound we
recommend using the balanced inputs whenever possible.
The pinning of the balanced inputs is: PIN1=GND, PIN2=NEG, PIN3=POS.
NOTICE: If necessary, the balanced inputs can be converted to unbalanced mode by using
XLR-RCA adapter plugs. These adapter plugs are available on request at your local dealer.
SURROUND input This input allows the easy integration of surround sound components into an existing two-
channel hifi system.
To do this, the two front channels (right front / left front) of a surround sound processor or
decoder must be connected to the input SURROUND - IN (12). In this configuration the
signal is sent directly to the power amp stages of the 082, bypassing tone control and
volume control. Volume and other signal settings are controlled by the connected surround
sound processor or decoder.
CAUTION: Only connect components with their own volume control to the
SURROUND input!
The pinning of the SURROUND input is: PIN1=GND, PIN2=NEG, PIN3=POS.
NOTICE: If necessary, the balanced SURROUND input can be converted to unbalanced
mode by using XLR-RCA adapter plugs. These adapter plugs are available on request at
your local dealer.
Loudspeaker The speaker cables are connected to the binding posts of the loudspeaker terminals
terminals (21), (22) and (30), (31).
The loudspeaker terminal R POS (21) must be connected to the positive binding post of
the right loudspeaker (commonly marked in red), the loudspeaker terminal R NEG (22)
must be connected to the negative binding post of the right loudspeaker (commonly marked
in black or blue).
Correspondingly, the left loudspeaker must be hooked up to the terminals L POS (31) and L
NEG (30).
To ensure optimal signal flow we recommend assembling the speaker cables with copper
spade lugs.
CAUTION: Under full load an integrated amplifier like the 082 can produce voltages at
the speaker terminals that are high enough to be dangerous. Therefore, never touch
the terminals while operating the unit.
Headphones jack The headphones jack PHONES (28) requires headphones with a 6,3mm stereo plug and
an impedance of 100Ωand more. When headphones are connected, the speakers are
switched off automatically and the volume level is reduced. When pulling the phones plug
from the jack the speakers are being switched back on and the volume level is also
lowered.
4
TAPE output The output terminal OUTPUT TAPE (15) must be connected to the recording input of the
taping device that has been hooked up with its outputs to the INPUT TAPE (16).
The tape out terminal provides the signal of the selected input CD, TUNER, AUX1 or AUX2
but not the signals from the inputs TAPE and SURROUND.
Volume and tone control have no influence to the TAPE OUT signal.
PREAMP outputs For additional connection of power amps or active loudspeakers the 082 provides two pairs
of output jacks: For balanced connection you have to use the SYM-OUT (13) and for
unbalanced connection you have to use the ASYM-OUT (14).
These outputs provides the signal of the selected input CD, TUNER, AUX1, AUX2 or TAPE
but not the signals of the input SURROUND.
The pinning of the balanced output is: PIN1=GND, PIN2=NEG, PIN3=POS.
Volume and tone control have no influence to the TAPE OUT signal.
REMOTE Connecting DC OUT (25) to the corresponding DC IN-jack of another BURMESTER-unit
offers to switch on or off this other unit simultaneously by the 082. In this case, 082 has the
master function.
Connecting DC IN (27) to the corresponding DC OUT-jack of another BURMESTER-unit
offers to switch on or off the 082 simultaneously by the other unit. In this case, 082 has the
slave function.
BURLINK To the BURmester-LINK interface plugs (26), (29) a computer system like PC,
CRESTRON
®
, Nevo e.g. can be connected to the integrated amplifier 082. The computer
system allows a comfortable control of your hifi system using an individual programmable
touch panel for example. With the LEDs beside the plugs named Tand R(Transmit and
Receive) you can check whether data exchange is working.

5
OPERATING CONTROLS
With the exception of the AC mains switch all operating controls are located on the front panel. To operate the unit it
must be connected to the AC power supply.
AC mains switch The AC mains switch (23) which turns AC power to the unit on and off is located on the
rear panel above the AC mains terminal. By switching to the ON position the transformer is
powered up and the unit is in standby mode. The standby mode is shown by the lightning of
the Standby LED (2).
POWER button The POWER button (9) turns the unit on and off provided that the AC mains switch is in the
ON position.
When the amp is ready for operation the display (3) will light up.
In standby mode only the standby LED (2) lights up.
After switching on the 082, the safety monitoring system takes a few seconds to check all
functions. The speaker terminals and preamp outputs are enabled only, if no errors are
detected.
CAUTION: Always use the POWER button (9) first to switch the unit off, before setting the
AC mains switch (23) to OFF.
VOLUME knob The VOLUME knob (8) controls the volume level in 61 steps from 00 (mute) to 60 (full
volume). If the VOLUME knob is turned slowly, the volume changes step by step. If rotated
quickly, the volume changes in larger increments. The display indicates the selected
volume level.
The VOLUME knob also controls the functions in the SETUP menu.
INPUT selection Inputs are selected by pressing the respective input buttons (7). The display (3) indicates
the selection.
SURROUND input Pressing the button SURR(ound) (5) activates the input SURROUND IN (12). The signal
from the SURROUND input is routed directly to the power amp stages, bypassing tone
control and volume control.
MONITOR function Pressing the button labeled MONITOR (15) blocks the direct signal path during recording
and switches to replaying the just recorded signal. When the monitor function is activated,
the display will add a –M to the selected source name.
The inputs TAPE and SURROUND have no monitor function.

6
Adjusting the The tone control allows increasing or decreasing bass and treble output in 2dB steps from
tone control plus to minus 14dB and an adjustment of the stereo balance in 1dB steps up to –60dB.
Pressing and holding the button labeled TONE (10) switches into the tone control mode.
The menu items treble, bass and balance can be called up sequentially by briefly pressing
the TONE button.
TREBLE ADJUSTMENT: The display shows TRBL ....
Use the VOLUME knob (8) to adjust the treble between +14dB
and –14dB.
BASS ADJUSTMENT: The display shows BASS ....
Use the VOLUME knob (8) to adjust the bass between +14dB
and –14dB.
BALANCE ADJUSTMENT: The display shows BAL ....
Use the VOLUME knob (8) to adjust the stereo balance.
The BALANCE function lowers the volume in the left or right
channel in 60 steps up to –60dB. An arrow in the display
indicates, if the volume level of the left or the right channel is
being changed.
The tone control mode is automatically terminated after 10 seconds without any adjustment.
The selected settings are retained when leaving the tone control mode.
Activating the In normal operation the signal path by-passes the tone control completely.
Tone control To switch the tone control into the signal path, press the button TONE (10) briefly. The
TONE LED (4) illuminates, when the tone control is activated.
To switch the tone control off, press the button TONE (10) briefly again and the TONE LED
(4) will go out.
REMOTE CONTROL
The 067 remote control is delivered with the 082. By definition the buttons POWER, TUNER, TAPE, SURR, AUX,
have the same functions as the corresponding control buttons on the front panel of the amplifier 082.
With repeatedly pressing the AUX key you can change between the inputs AUX1 and AUX2.
The DISC button has the same function as the CD button on the front panel. By pressing the MENU button you
activate the SETUP menu. The MONITOR button does not exist on the remote control.
Pushing the DIM button on the remote control, varies the brightness of the display in four steps between “max.
brightness” and “off”.
If brightness is selected to “off“, the display will light up only when any controls are used to change settings. After a
few seconds it automatically switches off again.
The buttons VOLUME + and VOLUME – adjust the volume control. When the tone control menu or the setup menu
is activated, you can change the settings of the selected menu item with the VOLUME buttons.
All other keys on the remote control have no functions with respect to the 082.

7
THE SETUP MENU
The setup menu allows the easy programming of certain basic settings of the integrated amplifier 082.
Activating setup Press the button SETUP (11) on the front panel or press either the SETUP- or the D MENU
button on the remote control.
Select menu item The different items of the setup menu are selected in the sequence specified below by
repeatedly pressing the SETUP or D MENU button.
The activated menu item is indicated on the left side of the display (3).
Change settings To change the setting of an activated menu item, rotate the VOLUME knob (8)
counterclockwise to lower the set value or clockwise to increase it. To change the settings
you can also use the VOLUME buttons on the remote control.
The selected value of the menu item is indicated on the right side of the display (3).
Deactivating setup The setup menu is closed automatically after 10 seconds, when no adjustment has been
made.
Menu items The following table lists all items that can be adjusted using the setup menu. The factory
default settings have been underlined.
MENU ITEM DESCRIPTION DISPLAY VALUE
Input level CD Input level adjustment for input CD L-CD -9 to 0 to +9
Input level TUNER Input level adjustment for input TUNER L-TU -9 to 0 to +9
Input level TAPE Input level adjustment for input TAPE L-TP -9 to 0 to +9
Input level AUX1 Input level adjustment for input AUX1 L-A1 -9 to 0 to +9
Input level AUX2 Input level adjustment for input AUX2 L-A2 -9 to 0 to +9
Volume Selecting initial volume (L=Last volume) VOL 0 to 5, 10, 15, 20, L
Output amplification Power amplification high (HI) or low (LO) PA HI / LO
Input level The input level adjustment feature serves to avoid big jumps in volume, when switching
between signal sources with different output levels.
Volume This menu item allows you to preset the volume level, when the 082 is switched on. The
setting Lrepresents LAST, which means that when you switch on the 082, it starts at the
same volume level it was last playing before it was switched off. The maximum value is
limited to 30.
Output amplification To achieve the best match with your loudspeakers, the output level of the amplification
stages may be adjusted. HI stands for high amplification, LO accordingly for low
amplification. When switching between these settings, the relays are briefly switched off to
avoid malfunction.

8
ERROR PROTECTION
The integrated amplifier 082 offers a sophisticated error mounting system, which protects the unit as well as the
connected loudspeakers from damage, should certain errors occur.
If any of the following errors occurs, the loudspeaker relays are automatically switched off and the type of error is
indicated in the display (3). After the cause for the error has ceased, the loudspeakers will automatically come back
on.
Overheating If under full power the 082 exceeds the maximum allowable operating temperature, the
protection system acts as follows:
•The amplifier is muted and the speaker outputs are switched off
•The display shows TEMP
•The volume is automatically reduced by four steps
If the 082 cools down below the maximum allowable temperature within three minutes, the
speaker outputs are automatically switched back on.
If the 082 does not cool down below the maximum allowable temperature within three
minutes, the unit switches automatically into standby mode. The display continues to
indicate TEMP and the standby LED also illuminates. Please leave the 082 turned off for a
while, allowing it to cool down.
Overload/DC offset If high currents overload the power transistors or DC current is detected at the outputs, the
protection system of the 082 acts as follow:
•The amplifier is muted and the speaker outputs are switched off
•The display shows OF/CU
•Automatic lowering of volume level until the problem is resolved
If lowering the volume resolves the problem, the speaker outputs are automatically switched
back on.
If the volume is lowered all the way to 0, the 082 switches automatically into standby mode.
The display continues to show OF/CU but the standby LED also illuminates. In this case,
use the AC mains switch (24) to switch the unit off and check all connections. If you
cannot detect an external problem, please contact your dealer.

9
BURLINK
CONNECTIONS
Connecting to the BURLINK interface can be done either with the 9 pin D-SUB connector (RS-232) or with the USB
2.0 connector.
RS-232 configuration: 9600Baud, 8bit, parity: none, 1 stop bit, no hardware handshake
A USB device driver needs to be installed when using the USB connector. System requirements for using the USB
software are either WINDOWS 2000 or WINDOWS XP operating system.
COMMANDS
Following the possible commands to control the integrated amplifier 082 are listed. All commands needs to be sent
in capital letters finished with a “carriage return“ \r .
POWON\r switches the unit on
POWOFF\r switches the unit to standby mode
CD\r activates the CD input
TUNER\r activates the TUNER input
AUX\r changes between inputs AUX1 and AUX2
AUX1\r activates the AUX1 input
AUX2\r activates the AUX2 input
TAPE\r activates the TAPE input
SURR\r activates the SURROUND input
VOLUP\r increases the volume for one step
VOLDN\r decreases the volume for one step
MONITOR\r switches the monitor loop on or off
MONITORON\r switches the monitor loop on
MONITOROFF\r switches the monitor loop off
TONE\r switches the tone control on or off
TONEON\r switches the tone control on
TONEOFF\r switches the tone control off
BASSUP\r increases the bass volume for one step (2dB)
BASSDN\r decreases the bass volume for one step (2dB)
TREBLEUP\r increases the treble volume for one step (2dB)
TREBLEDN\r decreases the treble volume for one step (2dB)
BALANCEL\r lowers the volume of the right channel by one step (1dB)
BALANCER\r lowers the volume of the left channel by one step (1dB)
DIM0\r switches the display brightness to maximum
DIM1\r switches the display brightness to middle
DIM2\r switches the display brightness to low
DIM3\r switches the display to off mode
DIM\r switches the brightness step by step (0,1,2,3,0,1,2....)
TYPE\r shows the type of the unit
VERSION\r shows the software version of the unit

10
GENERAL INSTRUCTIONS
Please read these instructions and the owner´ s manual carefully and keep these instructions safely with the
owner´ s manual of your component.
If you have any questions, we ask you to contact your dealer.
Operating temperature An operating temperature that is too high or too low may cause malfunctioning. We
therefore recommend letting the unit sit for a while after unpacking and before connecting
and operating it.
Setting up When choosing a place for your equipment please observe the following:
- Avoid direct sunlight.
- Do not subject the equipment to excessive heat, cold, humidity or dust.
- Provide adequate air circulation; avoid placing the equipment in enclosures.
- Slots and other openings in the housing are for ventilation. They must not be covered up.
- Please note that the component is not exposed to dripping water or splash water, also
don´ t place boxes with liquid in onto your component.
- Open flames like candles must not be placed on top of any electronic unit.
Mains voltage - Check before operating the unit to see if the mains voltage setting shown on the back
panel below the AC mains input conforms to the voltage of your household power supply.
Any change should be done by an expert only.
- For AC connection please use only the three-pronged power cable provided.
The grounding pin should not be bypassed under any circumstances. Connect the
component only to a wall outlet with fully functional grounding pin.
Comm. Operation - Before installation switch off all components of a stereo system. Switch them back on only
after making sure that all connections have been made correctly and completely.
- Never try to operate the equipment when it has obviously been damaged or if liquid has
gotten into it.
Terminals The pins of the connecting terminals on the back panel should not be touched by fingers
under any circumstances. Static discharges may damage the electronic circuitry inside the
unit.
Interconnects We supply custom-made balanced as well as unbalanced interconnect cables and speaker
cables of any length to ensure highest-quality signal paths for our components. The
impedance of our cables is ideally matched to all BURMESTER components.
For the cleanest power supply we recommend our triple-shielded power cord BURMESTER-
POWER.
IR receiver The IR receiver receives signals from the BURMESTER remote control and must not be
covered up by objects.
Heat development Be careful when touching the housing – it may get quite warm during operation.
Reset If the unit does not react when pressing the control keys on the front it may be reset to
normal operation by switching it off and back on using the AC mains switch in the back.

11
!
Lightening strike During the summer months, malfunctions often occur due to voltage spikes in the power
lines after lightning strikes. Completely unplugging the power cord offers the only effective
protection. Merely switching the unit off does not suffice since voltage spikes are able to arc
over separated contacts.
Fuses The fuses are located inside the unit and should be changed by a qualified technician only.
Warranty We offer warranty for this unit provided the unit has been hooked-up and operated correctly,
is mechanically undamaged.
Opening the unit, modifying it or dismantling outlets will void the warranty.
Care Never clean the housing with a wet cloth or chemical cleaning agent. Always make sure that
no liquid gets into the housing.
This symbol on the equipment points to important orders which can be found in the owner´
s manual.
This symbol on or inside the equipment warns of dangerously high voltage.
If the unit is to be put out of operation definitively, take it to a local recycling plant for a
disposal which is not harmful to the environment.
CAUTION: The unit should be opened by qualified experts only. Opening brings with it the
chance of encountering dangerously high voltage. Therefore the power cord must
always be unplugged before opening the equipment.

12
TECHNICAL SPECIFICATIONS
Dimensions Width x Height x Depth 482 x 177 x 482 mm
(19.0 x 7.0 x 19.0 inches)
Weight 23.5 kg
(51.7 lbs)
Mains voltage and fuses 230V 50/60Hz 2 x slow 250mA E, 2 x slow A E
115V 50/60Hz 2 x slow 500mA E, 2 x slow A E
Power consumption ON max. 550 W
STBY (Mains switch ON) approx. 3 W
PLEASE NOTE: The dimensions do not include the length of binding posts and the space needed for
plugs of interconnect cables.
The technical data and design of this product are subject to change without notice.
Table of contents
Other Burmester Amplifier manuals

Burmester
Burmester Classic 101 User manual

Burmester
Burmester 911 MK 3 User manual

Burmester
Burmester Classic Series User manual

Burmester
Burmester 808 MK5 User manual

Burmester
Burmester 077 User manual

Burmester
Burmester 911 MK3 User manual

Burmester
Burmester Top Line Phono preamp 100 User manual

Burmester
Burmester 088 User manual

Burmester
Burmester 909 MK5 User manual

Burmester
Burmester 011 User manual