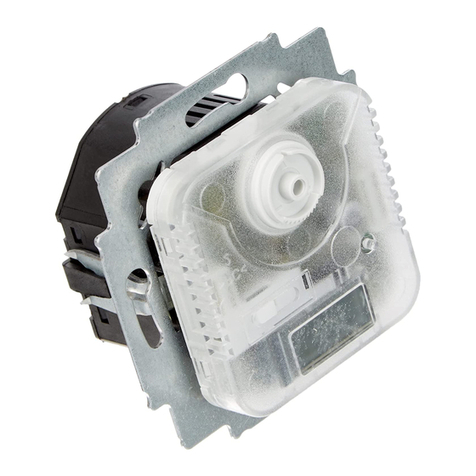
Busch-Jaeger 1099 UHK User manual

1473
-1-8396 │ 11.03.2014
Operating Instructions
Busch Temperaturregler
Pos: 2 /#N eus tru k tur #/O nl in e-D o ku men ta ti o n ( + KN X) /T it el bl ät ter /T e m per at ur r egl er /Ti t elbl att 10 99 @ 37\mod_1373543431500_15.docx@ 298504@ @ 1
Temperature controllers
1099 UHK
1099 UHKEA
=== En de d er Li st e für T e xt m ar ke Co ver = ==

Operating Instructions
Busch Temperaturregler
Operating Instructions | 1473-1-8396
— 2 —
Pos: 4 /#N eus tru k tur #/O nl in e-D ok um en ta tio n ( +KN X)/I n halt s verz ei c hnis (--> Für alle D o kume nte < --)/I nh alts v erz ei ch nis @ 19 \mod_1320649044386_15.docx@ 109653@ @ 1
1Safety....................................................................................................................................................................... 3
2Intended use ............................................................................................................................................................ 3
3Environment............................................................................................................................................................. 3
4Setup and function................................................................................................................................................... 4
4.1 Features of function and equipment........................................................................................................ 4
5Operation ................................................................................................................................................................. 4
6Offset function.......................................................................................................................................................... 5
7Technical data.......................................................................................................................................................... 5
8Installation and electrical connection ....................................................................................................................... 6
8.1 Requirements for the electrician ............................................................................................................. 6
8.2 Mounting ................................................................................................................................................. 6
8.3 Electrical connection ............................................................................................................................... 8
9Commissioning ........................................................................................................................................................ 9
=== En de d er Li st e für T e xt m ar ke TOC ===

Operating Instructions
Busch Temperaturregler
Safety
Operating Instructions | 1473-1-8396
— 3 —
Pos: 6 /#N eus tru k tur #/O nl in e-D ok um enta ti on ( +KN X) /Ü bers c hrif te n ( --> Für al le D o ku m ent e < --)/1. Ebene/S- T/Si ch er hei t @ 18 \mod_1302612791790_15.docx@ 103357@ 1 @ 1
1 Safety
Pos: 7 /#N eus tru k tur #/O nl in e-D ok um en ta tio n ( +KN X)/ Sic her h eits hi n weis e un d Hi n weis e ( --> F ür all e D o kum ent e < --)/W ar nhi n wei s e/ Si ch erh ei t - 230V @ 18\mod_1302606816750_15.docx@ 103308@ @ 1
Warning
Electric voltage!
Risk of death and fire due to electrical voltage of 230 V.
– Work on the 230V supply system may only be performed by authorised electricians!
– Disconnect the mains power supply prior to installation and/or disassembly!
Pos: 8 /#N eus tru k tur #/O nl in e-D ok um enta ti on ( +KN X) /Ü bers c hrif te n ( --> Für al le D o ku m ent e < --)/1. Ebene/A- F/Bes ti mm u ngs ge mäß er Gebra uc h @ 18\mod_1302763321316_15.docx@ 103483@ 1 @ 1
2 Intended use
Pos: 9 /#N eus tru k tur #/O nl in e-Dokumentation(+KNX)/BestimmungsgemäßerGebrauch(-->Für alleDokumente<--)/Bus ch-D i mmer /B esti m mung sg em äß er G ebr a uch @ 2 3\mod_1335350449857_15.docx@ 208763@ @ 1
The device is to be used exclusively with the components that are supplied and licensed as described in chapter
"Setup and function".
Pos: 10 / #N e ustr ukt ur# /O nl in e-D ok u ment ati on (+ KN X) /Ü ber sc hrif t en (--> F ür al l e D ok ume nte <--) /1. E bene/U - Z /U mw elt @ 18 \mod_1302614158967_15.docx@ 103383@ 1 @ 1
3 Environment
Pos: 11 / #N e ustr ukt ur# /O nl in e-Dokumentation(+KNX)/SicherheitshinweiseundHinweise(-->Für alleDokumente<--)/Hinweise- Umwelt/Hinweis - Umwelt - HinweisElektrogeräte@ 18\mod_1302763973434_15.docx@103500@ @ 1
Consider the protection of the environment!
Used electric and electronic devices must not be disposed of with domestic waste.
– The device contains valuable raw materials which can be recycled. Therefore, dispose of the
device at the appropriate collecting depot.
Pos: 12 / #N e ustr ukt ur# /O nl in e-Dokumentation(+KNX)/SicherheitshinweiseundHinweise(-->Für alleDokumente<--)/Hinweise- Umwelt/Hinweis - Umwelt - EntsorgungElektrogeräte@ 20\mod_1325760695972_15.docx@ 136583@ @ 1
All packaging materials and devices bear the markings and test seals for proper disposal. Always dispose of the
packaging material and electric devices and their components via the authorized collecting depots and disposal
companies.
The products meet the legal requirements, in particular the laws governing electronic and electrical devices and
the REACH ordinance.
(EU Directive 2002/96/EC WEEE and 2002/95/EC RoHS)
(EU REACH ordinance and law for the implementation of the ordinance (EC) No.1907/2006)
Pos: 13 / #N e ustr ukt ur# /O nl in e-Dokumentati on (+ KN X)/ Ste uer mod ul e - O nline-Dokumentation(-->Für alleDokumente<--)/++++++++++++Seitenumbruch++++++++++++ @ 9\mod_1268898668093_0.docx@ 52149@ @ 1

Operating Instructions
Busch Temperaturregler
Setup and function
Operating Instructions | 1473-1-8396
— 4 —
Pos: 14 / #N e ustr ukt ur# /O nl in e-D ok u ment ati on (+ KN X) /Ü ber sc hrif t en (--> F ür al l e D ok ume nte <--)/1.Ebene/A- F/AufbauundFunktion@ 11\mod_1279185435352_15.docx@83027@ 1 @ 1
4 Setup and function
Pos: 15 / #N e ustr ukt ur# /O nl in e-Dokumentation(+KNX)/AufbauundFunktion/Temperaturregler/Verwendung1099 @ 37\mod_1373543224390_15.docx@ 298487@ @ 1
The temperature controller is used to control the temperature in closed rooms.
Application only for de-energized closed actuating drives.
Pos: 16 / #N e ustr ukt ur# /O nl in e-D ok u ment ati on (+ KN X) /Ü ber sc hrif t en (--> F ür al l e D o kume nt e <--)/2.Ebene/A- F/Funktions-u n d Aus s t att ung s m er kmal e @ 23\mod_1336557630140_15.docx@ 209136@ 2 @ 1
4.1 Features of function and equipment
Pos: 17 / #N e ustr ukt ur# /O nl in e-Dokumentation(+KNX)/AufbauundFunktion/Temperaturregler/Funktionen1099@ 37\mod_1373543826093_15.docx@ 298519@ @ 1
1099 UHKEA
1099 UHK
With manual switch for switchover between cooling/OFF/heating
With external input for switchover between heating and cooling.
Pos: 18 / #N e ustr ukt ur# /O nl in e-D ok u ment ati on (+ KN X) /Ü ber sc hrif t en (--> F ür al l e D ok ume nte <--)/1. Ebene/A- F/ B edi e nu ng @ 1 1\mod_1279185541649_15.docx@ 83043@ 1 @ 1
5 Operation
Pos: 19 / #N e ustr ukt ur# /O nl in e-Dokumentation(+ KN X)/B edi e nung /T emp erat ur reg ler /B edi en ung - 1099 @ 37\mod_1373544541890_15.docx@ 298567@ @ 1
Pos: 21 / #N e ustr ukt ur# /O nl in e-D oku me ntati on ( +KN X) /B edi enu ng /T emp erat urr egl er /B edi enu ng - 1099 @ 37\mod_1373544541890_1.docx@ 298566@ 1 @ 4
1099 UHKEA
1099 UHK
Fig. 1: Operation
No.
Function
A LED red Operating mode "Heating"
LED blue Operating mode "Cooling"
B
Sliding switch at 1099 UHKEA for selecting function B
C
Control knob for selecting the desired room temperature
Pos: 20 / #N e ustr ukt ur# /O nl in e-D oku me ntati on ( +KN X) /S teuer mod ul e - Online-Dokumentation(-->Für alleDokumente<--)/++++++++++++Seitenumbruch++++++++++++@ 9\mod_1268898668093_0.docx@ 52149@ @ 1

Operating Instructions
Busch Temperaturregler
Offset function
Operating Instructions | 1473-1-8396
— 5 —
Pos: 21 / #N e ustr ukt ur# /O nl in e-Dokumentation(+KNX)/Überschr if t en (--> Für al l e D o kume nt e <--) /1. Eb ene/M - O/ Offset-Funktionen@37\mod_1373544905078_15.docx@ 298599@ 2 @ 1
6 Offset function
Pos: 22 / #N e ustr ukt ur# /O nl in e-D ok u ment ati on (+ KN X) /B edi e nu ng /T em p erat ur r egl er / Ei nst el l ung e n Off -S et - 1099 @ 37\mod_1373544852375_15.docx@ 298583@ @ 1
Fig. 2: Offset function
Reaching the selected room temperature strongly depends on the ambient conditions such as heating/cooling
system capacity (5 K/h min.), room size, ambient temperature, insulation etc.
That is why the values in the scale are merely guide values. To obtain a setting that is as accurate as possible,
the adjusting knob (1) can be offset in 4 stages by a total of +/-6°C.
To do so, pull off the control knob and cut off the position lug (2) on its underside using a suitable tool.
Then shift the control knob by the desired correction temperature in relation to the vertical and put it back on.
Pos: 23 / #N e ustr ukt ur# /O nl in e-D ok u ment ati on (+ KN X) /Ü ber sc hrif t en (--> F ür al l e Dokumente<--)/1.Ebene/S-T /TechnischeDaten@ 11\mod_1279185386320_15.docx@ 83019@ 2 @ 1
7 Technical data
Pos: 24 / #N e ustr ukt ur# /O nl in e-Dokumentation(+KNX)/TechnischeDaten/Temperaturregler/TechnischeDaten 1099@ 37 \mod_1373544943578_15.docx@ 298615@ @ 1
General
Nominal voltage
230 V ~ ±10%, 50 / 60 Hz
Switching capacity (inductive) heating
10 (4) A, 230 V ~
Switching capacity (inductive) cooling
5 (2) A, 230 V ~
Connection
1.5 mm² … 2.5 mm²
Temperature adjustment range
~ 5 to 30°C (1 = 5°C | 2 = 10°C | 3 = 15°C | 4 = 20°C | 5 = 25°C | 6 = 30°C)
Switching temperature difference *
Approx. +/- 0.5 K
Protection type
IP 20, (EN 60529)
Power loss (Relay off)
0.5 W
Switch contact (independent normally open
contact)
2
Mode of operation (DIN EN 60730-1)
1 B
Degree of contamination (DIN EN 60730-1)
2
Rated surge voltage (DIN EN 60730-1)
4000 V
* Typical control operation can not always be attained for cooling areas close to the floor. When the device
heats up due to high current loads, the set value should be checked especially in cooling operating mode and,
if necessary, the set-point temperature should be raised.
Pos: 25 / #N e ustr ukt ur# /O nl in e-D oku me ntati on ( +KN X) /S teuer mod ul e - Online-Dokumentation(-->Für alleDokumente<--)/++++++++++++Seitenumbruch++++++++++++@ 9\mod_1268898668093_0.docx@ 52149@ @ 1

Operating Instructions
Busch Temperaturregler
Installation and electrical
connection
Operating Instructions | 1473-1-8396
— 6 —
Pos: 26 / #N e ustr ukt ur# /O nl in e-D ok u ment ati on (+ KN X) /Ü ber sc hrif t en (--> F ür al l e D ok ume nte <--) /1. E bene/M - O/ Mont age un d elektr ischer Ansc hl us s @ 23\mod_1336477157864_15.docx@ 209033@ 3@ 1
8 Installation and electrical connection
Pos: 27 / #N e ustr ukt ur# /O nl in e-Dokumentation(+KNX)/SicherheitshinweiseundHinweise(-->Für alleDokumente<--)/W arn hin wei se /Si c her hei t - N i ed ers pa nn ung s- und 230 V-Leitu ngen @ 23\mod_1336558868201_15.docx@209164@ @ 1
Warning
Electric voltage!
Risk of death due to electrical voltage of 230 V during short-circuit in the low-voltage line.
– Low-voltage and 230 V lines must not be installed together in a flush-mounted socket!
Pos: 28 / #N e ustr ukt ur# /O nl in e-Dokumentation(+KNX)/SicherheitshinweiseundHinweise(-->Für alleDokumente<--)/War n hin wei se /Sic h er hei t - F ac h ken nt nis s e @ 2 3\mod_1336559183027_15.docx@ 209179@ 2 @ 1
8.1 Requirements for the electrician
Warning
Electric voltage!
Install the device only if you have the necessary electrical engineering knowledge and experience.
•Incorrect installation endangers your life and that of the user of the electrical system.
•Incorrect installation can cause serious damage to property, e.g. due to fire.
The minimum necessary expert knowledge and requirements for the installation are as follows:
•Apply the "five safety rules" (DIN VDE 0105, EN 50110):
1. Disconnect from power;
2. Secure against being re-connected;
3. Ensure there is no voltage;
4. Connect to earth and short-circuit;
5. Cover or barricade adjacent live parts.
•Use suitable personal protective clothing.
•Use only suitable tools and measuring devices.
•Check the supply network type (TN system, IT system, TT system) to secure the following
power supply conditions (classic connection to ground, protective earthing, necessary
additional measures, etc.).
Pos: 29 / #N e ustr ukt ur# /O nl in e-D ok u ment ati on (+ KN X) /Ü ber sc hrif t en (--> F ür al l e D ok ume nte <--) /2. E bene/M - O/ M o nt ag e @ 18 \mod_1302615960458_15.docx@ 103424@ 2 @ 1
8.2 Mounting
Pos: 30 / #N e ustr ukt ur# /O nl in e-Dokumentation(+KNX)/Sicherheitshinweiseun d Hinweise (--> Für alleDokumente<--)/War n hin wei se /Sic h er hei t - 23 0 V @ 18\mod_1302606816750_15.docx@103308@ @ 1
Warning
Electric voltage!
Risk of death and fire due to electrical voltage of 230 V.
– Work on the 230V supply system may only be performed by authorised electricians!
– Disconnect the mains power supply prior to installation and/or disassembly!
Pos: 31 / #N e ustr ukt ur# /O nl in e-D oku me ntati on ( +KN X) /S teuer mod ul e - Online-Dokumentation(-->Für alleDokumente<--)/++++++++++++ Seitenumbruch++++++++++++ @9 \mod_1268898668093_0.docx@52149@ @ 1

Operating Instructions
Busch Temperaturregler
Installation and electrical
connection
Operating Instructions | 1473-1-8396
— 7 —
Pos: 32 / #N e ustr ukt ur# /O nl in e-D ok u ment ati on (+ KN X) /M o nt age/ al le G er ä te/M ont ag e - UP-Dosen - DIN 49073-1odergeeignetesAufputzgehaeuse- OhneDocvari abl e @ 25\mod_1340354979636_15.docx@ 219890@ @ 1
The flush-mounted insert must only be installed in flush-mounted wall boxes according to DIN 49073-1, Part 1, or
suitable surface-mounted housings.
Pos: 33 / #N e ustr ukt ur# /O nl in e-Dokumentation(+ KN X) /M o nt age/ T e mper atur r egl er /M on tag e 1 0 99 @ 3 7\mod_1373545684031_15.docx@ 298631@ @ 1
Note
Use only in dry rooms!
Fig. 3: Installation
No.
Function
A
Height: 150 cm/minimum distance: 30 cm
B
Avoid mounting on thermal bridges
C
Avoid draught and direct sunlight
D
Avoid the heat radiation of external devices
Fig. 4: Position for putting on the adjustment wheel
Fig. 5: Putting on the adjustment wheel
To put on the adjustment wheel, turn the two arrows towards each other (1). The position lug (3) on the
adjustment wheel (2) can now be put on in its normal vertical position.
Pos: 34 / #N e ustr ukt ur# /O nl in e-D oku me ntati on ( +KN X) /S teuer mod ul e - Online-Dokumentation(-->Für alle Dokumente<--)/++++++++++++ Seitenumbruch++++++++++++ @ 9\mod_1268898668093_0.docx@ 52149@ @ 1

Operating Instructions
Busch Temperaturregler
Installation and electrical
connection
Operating Instructions | 1473-1-8396
— 8 —
Pos: 35 / #N e ustr ukt ur# /O nl in e-D ok u ment ati on (+ KN X) /Ü ber sc hrif t en (--> F ür al l e D ok ume nte <--)/2. Ebene/A- F/ El e ktris c her A nsc hl uss @ 21\mod_1328177051724_15.docx @ 13 8042 @ 2 @ 1
8.3 Electrical connection
Pos: 36 / #N e ustr ukt ur# /O nl in e-D ok ume nt ati on ( +KN X) /A nsc hl us s/T e mper a turr eg l er/A ns c hlus s 10 99 @ 3 7\mod_1373546314562_15.docx@ 298647@ @ 1
1099 UHKEA
1099 UHK
Fig. 6: Connection to a 2-pipe system
1099 UHKEA
1099 UHK
Fig. 7: Connection to a 4-pipe system
Terminal designation
Assignment
Input 1099 UHK for switchover to cooling mode
Output for controlling the heating load
Output for controlling the cooling load
Note
At high humidity (tendency toward thunder storms) during cooling mode, attention should be paid
to dew formation on the cooled surface.
Cooling should be reset early or switched off completely to prevent moisture from damaging the
cooled surface.
Pos: 37 / #N e ustr ukt ur# /O nl in e-D oku me ntati on ( +KN X) /S teuer mod ul e - Online-Dokumentation(-->Für alleDokumente<--)/++++++++++++Seitenumbruch++++++++++++@ 9\mod_1268898668093_0.docx@ 52149@ @ 1

Operating Instructions
Busch Temperaturregler
Commissioning
Operating Instructions | 1473-1-8396
— 9 —
Pos: 38 / #N e ustr ukt ur# /O nl in e-D ok u ment ati on (+ KN X) /Ü ber sc hrif t en (--> F ür al l e D ok ume nte <--) /1. E bene/ G - L/In be tr ie bn ah me @ 11\mod_1279185496977_15.docx@ 83035 @ 2@ 1
9 Commissioning
Pos: 39 / #N e ustr ukt ur# /O nl in e-Dokumentation(+KNX)/Inbetriebnahme/Temperaturregler/Inbetriebnahme- 1099@ 37\mod_1373547005250_15.docx@ 298663@ @ 1
Note
When the temperature controller is used for the first time, it has to be taken into account that the
switching point precision is not reached until about 1-2 hours of operation after installation.
It is recommended to set a temperature that is higher (heating operation) or lower (cooling
operation) than actually desired, to reduce the time required for initial adaptation.
=== En de d er Li st e für T e xt m ar ke Co nt e nt ===

Operating Instructions
Busch Temperaturregler
1473-1-8396 | 11.03.2014
Pos: 41 / #N e ustr ukt ur# /O nl in e-D oku me ntati on ( +KN X) /Rüc k sei te n (--> Für alleDokumente<--)/Rüc ks eit e - BJE-V ariante@ 32\mod_1357201421897_15.docx@ 262132@ @ 1
A member of the ABB Group
Busch
-Jaeger Elektro GmbH
PO box
58505 Lüdenscheid
Freisenbergstraße 2
58513 Lüdenscheid
Germany
www.BUSCH
-JAEGER.de
Central
sales service:
Phone:
+49 (0) 2351 956-1600
Fax:
+49 (0) 2351 956-1700
Notice
We reserve the right to at all times make
technical changes as well as changes to the
contents of this document without prior notice.
The detailed specifications agreed to at the time
of ordering apply to all orders. ABB accepts no
responsibility for possible errors or
incompleteness in this document.
We reserve all rights to this document and the
topics and illustrations contained the
rein. The
document and its contents, or extracts thereof,
must not be reproduced, transmitted or reused by
third parties without prior written consent by ABB.
Copyright©
2014 Busch-Jaeger Elektro GmbH
All rights reserved
=== En de d er Li st e für T e xt m ar ke Bac kco ver = ==
This manual suits for next models
1
Table of contents
Other Busch-Jaeger Temperature Controllers manuals
Popular Temperature Controllers manuals by other brands

Oregon Scientific
Oregon Scientific PSR01A user manual

domat
domat THERMASGARD HTF 50 Operating Instructions, Mounting & Installation

Gira
Gira temperature controller installation manual

ThermoFisher Scientific
ThermoFisher Scientific 2325 instruction manual

Yatai
Yatai YLD-2000 instruction manual

Lumel
Lumel RE01 user manual