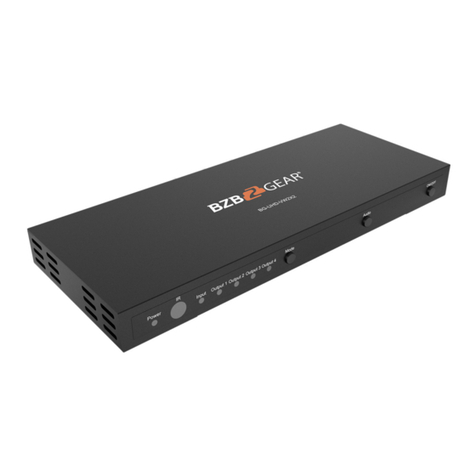
BZB Gear BG-UHD-VWP-1X4 User manual

BG-UHD-VWP-1X4
1X4 4K 18Gbps UHD VideoWall Processor/Controller with
Scaler/Audio and 1X3/1X4/2X2/4X1 Layouts
User Manual

BZBGEAR BG-UHD-VWP-1X4 PRODUCT MANUAL
Address: 830 National Drive #140, Sacramento, CA 95834, USA ·Tel: +1(888)499-9906 ·Email: support@bzbgear.com 2

BZBGEAR BG-UHD-VWP-1X4 PRODUCT MANUAL
TABLE OF CONTENTS
Statement 4
Safety Precaution 4
Introduction 5
Features 5
Packing List 5
Specifications 6
Hardware Installation 7
Application Diagram 7
Operation Controls and Functions 8
Operation 10
Tech Support 23
Warranty 23
Mission Statement 24
Copyright 24
Address: 830 National Drive #140, Sacramento, CA 95834, USA ·Tel: +1(888)499-9906 ·Email: support@bzbgear.com 3

BZBGEAR BG-UHD-VWP-1X4 PRODUCT MANUAL
Statement
Please read these instructions carefully before connecting, operating, or configuring this
product. Please save this manual for future reference.
Safety Precaution
●To prevent damaging this product, avoid heavy pressure, strong vibration, or immersion
during transportation, storage, and installation.
●The housing of this product is made of organic materials. Do not expose to any liquid,
gas, or solids which may corrode the shell.
●Do not expose the product to rain or moisture.
●To prevent the risk of electric shock, do not open the case. Installation and maintenance
should only be carried out by qualified technicians.
●Do not use the product beyond the specified temperature, humidity, or power supply
specifications.
●This product does not contain parts that can be maintained or repaired by users.
Damage caused by dismantling the product without authorization from BZBGEAR is not
covered under the warranty policy.
●Installation and use of this product must strictly comply with local electrical safety
standards.
Address: 830 National Drive #140, Sacramento, CA 95834, USA ·Tel: +1(888)499-9906 ·Email: support@bzbgear.com 4

BZBGEAR BG-UHD-VWP-1X4 PRODUCT MANUAL
Introduction
The BG-UHD-VWP-1X4 4K 1x4 Video Wall Processor is a powerful, cost effective, video
processor for multiple flat panel displays or projectors. The unit allows users to input HDMI/
DisplayPort signals up to 4K2K@60Hz 4:4:4. The embedded scaler converts video signals
to match the native resolution of monitors, flat panel displays, projectors as well as
user-selectable output settings up to WUXGA (1920x1200).
The BG-UHD-VWP-1X4 layouts can be modified to fit various applications in digital signage,
broadcasting, education, and surveillance systems.
Features
●4x HDMI outputs
●HDMI and DisplayPort input from 640x480 to 4K2K@60 (YUV 4:4:4), interlaced or
progressive
●HDCP compliant
●DisplayPort 1.2a & HDMI 2.0a compliant
●Image parameters and layouts are automatically saved in flash memory of the device
and can be recalled for later use
●Firmware upgradable
●The video wall processor can control via USB, push buttons, Ethernet, and IR
remote control.
●Resize, position,and zoom for each HDMI output video
●Remote control to switch 1x1, 2x2, 1x3 rotate, and 1x4 modes
●4K2K60 (YUV 4:4:4) can be divided and displayed onto four 1080p60 TVs (2x2
layout only)
Packing List
●1x BG-UHD-VWP-1X4
●1x User Manual
●1x 1U rack-mounting ear set
●1x 12V power supply
●1x Installation software CD
●1x IR Remote control (15 keys)
Address: 830 National Drive #140, Sacramento, CA 95834, USA ·Tel: +1(888)499-9906 ·Email: support@bzbgear.com 5

BZBGEAR BG-UHD-VWP-1X4 PRODUCT MANUAL
Specifications
Model Name
BG-UHD-VWP-1X4
Technical Specifications
HDCP compliance
Yes
Video bandwidth
Input – Single link 600MHz [18Gbps]
Output –Single-link 225MHz [6.75Gbps]
Video support
Input - 4K2K@60 (4:2:2 8 bits) / 4K2K@60 (4:4:4 8 bits)
Output – 1920x1080@60 / 1920x1200@60
Video Format Support
HDMI / DisplayPort
Audio support
Yes
ESD protection
Human body model — ±15kV [air-gap discharge] & ±8kV [contact
discharge]
Input
1x HDMI + 1x DisplayPort + 1x USB + 1xRJ45
Output
4x HDMI + 1x Stereo
Control
IR remote control / Ethernet / USB (virtual) / Front Panel / Cloud Control
Input TMDS signal
1.2 Volts [peak-to-peak]
HDMI connector
Type A [19-pin female]
Mini-USB connector
Type A
RJ-45 connector
WE/SS 8P8C
Mechanical
Enclosure
Metal case
Dimensions
(L x W x H)
Model
290 x 180 x 44mm [11.4” x 7” x 1.7”]
Package
376 x 240 x 112mm [1’2” x 9.4” x 4.4”]
Carton
590 x 510 x405 mm [1’9” x 1’7” x 1’3”]
Weight
Model
1427 g [3.2lbs]
Package
2077g [4.6lbs]
Fixedness
1U rack-mount with ears and Wall hanging holes
Power supply
12V DC
Power Consumption
12W
Operation temperature
0~40°C [32~104°F]
Storage temperature
-20~60°C [-4~140°F]
Relative humidity
20~90% RH [no condensation]
Address: 830 National Drive #140, Sacramento, CA 95834, USA ·Tel: +1(888)499-9906 ·Email: support@bzbgear.com 6

BZBGEAR BG-UHD-VWP-1X4 PRODUCT MANUAL
Hardware Installation
1. Connect the sources to the HDMI / DisplayPort Inputs of the BG-UHD-VWP-1X4.
2. Connect all displays to HDMI Outputs of the BG-UHD-VWP-1X4.
3. Connect the +12V DC power supply to the BG-UHD-VWP-1X4
Application Diagram
Address: 830 National Drive #140, Sacramento, CA 95834, USA ·Tel: +1(888)499-9906 ·Email: support@bzbgear.com 7

BZBGEAR BG-UHD-VWP-1X4 PRODUCT MANUAL
Operation Controls and Functions
Front Panel
1. LED indicator:
●PWR - Power indicator LED
●LOCK - When the device panel is locked the LED will illuminate.
●4K - If source resolution is 4K, the LED indicator will illuminate.
●Source - When the source is from HDMI the LED indicator will illuminate solid
but if the source is from DisplayPort the LED indicator will blink.
2. IR SENSOR: IR sensor for receiving the IR commands from IR remote
3. Control buttons:
●Button 1 (Source) - Source setting (HDMI or DisplayPort)
●Button 2 (LOCK) - Press button for 3 seconds will enable/disable device
locked
●Button 3 (2x2) - Fast switch to 1x1 and 2x2
●Button 4 (+90°) - Fast switch to 3x1 90° and 4x1 90°
●Button 5 (-90°) - Fast switch to 3x1 -90° and 4x1 -90°
●Button 6 (Preset 1)
●Button 7 (Preset 2)
Address: 830 National Drive #140, Sacramento, CA 95834, USA ·Tel: +1(888)499-9906 ·Email: support@bzbgear.com 8

BZBGEAR BG-UHD-VWP-1X4 PRODUCT MANUAL
Rear Panel
4. Power Switch: Power ON/OFF switch
5. +12V DC: 12V DC power jack
6. Dip Switch: For firmware update (Default mode: on)
7. USB virtual COM
8. Ethernet: Ethernet control port
9. Stereo audio output – L
10. Stereo audio output – R
11. HDMI INPUT
12. DisplayPort INPUT
13. Output 1-4: HDMI outputs
Supported Resolution
Input resolution
Output resolution
720x480@60Hz
720x576@50Hz
1280x720@60Hz
1920x1080@30Hz
1920x1080@60Hz
4K2K@30Hz
4K2K@60Hz (4:2:2 8 bits)
4K2K@60Hz (4:4:4 8 bits)
640x480@60Hz
720x480@60Hz
720x576@60Hz
800x600@60Hz
1024x768@60Hz
1280x720@60Hz
1280x768@60Hz
1280x960@60Hz
1280x1024@60Hz
1366x768@60Hz
1440x900@60Hz
1680x1050@60Hz
1920x1080@60Hz
1920x1200@60Hz
1600x1200@60Hz
Address: 830 National Drive #140, Sacramento, CA 95834, USA ·Tel: +1(888)499-9906 ·Email: support@bzbgear.com 9

BZBGEAR BG-UHD-VWP-1X4 PRODUCT MANUAL
Operation
IR Remote Control
Button
Function
INFO
Display device status (IN/OUT Resolution, EDID, Layout)
MUTE
Turn off the stereo audio output
POWER
Power ON/OFF the video wall processor
Fast switch to VW1x1 (Full Screen)
SOURCE
Source setting (HDMI or DisplayPort)
Fast switch to VW3x1 (+90°)
Fast switch to VW2x2
Fast switch to VW4x1 (-90°)
Fast switch to VW4x1 (+90°)
PRESET-
Previous custom layout
PRESET+
Next custom layout
Factory Reset
Factory default reset
2160p 60
Default EDID 2160p 60
2160p 30
Default EDID 2160p 30
1080p 60
Default EDID 1080p 60
Software Operation
System Requirement and Precautions
1. Whenever you power off the BG-UHD-VWP-1X4 keep the device unpowered for at
least 5 to 10 seconds to allow power capacitors to discharge.
2. The BG-UHD-VWP-1X4 control program is compatible with WindowOS machines
connected through USB.
3. Before you click on the icon of the software, ensure you have connected your
computer and the BG-UHD-VWP-1X4 via USB otherwise the software will not be
able to establish a connection.
Start the software control program
When starting the control software the following window will pop up. There are two ways to
control the BG-UHD-VWP-1X4.
1. USB Connection: Use a USB cable to connect to the port on the device and a
computer. Select the correct virtual COM port and click the OK button.
Address: 830 National Drive #140, Sacramento, CA 95834, USA ·Tel: +1(888)499-9906 ·Email: support@bzbgear.com 10

BZBGEAR BG-UHD-VWP-1X4 PRODUCT MANUAL
2. Ethernet Connection: Connect either directly to the ethernet port of the device or
over a network. Enter the device’s IP address and click the green Check button.
After the software control successfully connects it will enter the control interface.
Control Interface
1. Connection Status:
Shows the connection information and status. If you use USB to connect to the device
the icon will be . If you use Ethernet/IP to connect to the device the icon will shown
as .
Address: 830 National Drive #140, Sacramento, CA 95834, USA ·Tel: +1(888)499-9906 ·Email: support@bzbgear.com 11

BZBGEAR BG-UHD-VWP-1X4 PRODUCT MANUAL
2. Quick Selection:
Note: This function is not available when the input resolution is set to 4K2K@60Hz
Here you can set the screen resolution, screen coordinates, and split screen. Select the
TV picture to modify its settings. The different color frames represent different output
ports of the device. The coordinate section allows modification of the TV position in the
video wall. The unit also provides 8 preset spaces to save frequently used display
configurations.
Rotation:
Note: This function is only available when the input resolution is set to 1080p.
The software is capable of independently rotating each input. Users can select clockwise or
counterclockwise to rotate the screen.
Address: 830 National Drive #140, Sacramento, CA 95834, USA ·Tel: +1(888)499-9906 ·Email: support@bzbgear.com 12

BZBGEAR BG-UHD-VWP-1X4 PRODUCT MANUAL
Output Selection and Resolution:
1. Step 1: Check the input resolution and choose an output resolution.
Set the output resolution. Choose the display icon to select the output port and set
the resolution. When setting a resolution the coordinates of the output will also be
changed. An input source (HDMI or DisplayPort) can also be selected or lock/unlock
the device.
*Note that when you select the Synchronize function, all windows need to be set to
the same resolution, otherwise the output will be abnormal.
*If you lock the device, only the factory reset function will work.
2. Step 2: Output Setting
There are three output modes that can be set: resolution, position, size and split
screen. The different modes are described in step 2-1, 2-2, and 2-3.
*Note: When you want to change to another mode you need to go back to step 2.
●Quick Selection
●From file
●Custom define
Address: 830 National Drive #140, Sacramento, CA 95834, USA ·Tel: +1(888)499-9906 ·Email: support@bzbgear.com 13

BZBGEAR BG-UHD-VWP-1X4 PRODUCT MANUAL
3. Step 2-1: Quick Selection
If you choose the Quick Selection mode you can select a default screen split and rotate the
screen (rotation only available when set to 1080p).
●3x1: This mode will divide the screen into 3 parts and rotate the figure. The
remaining part shows the full screen.
●4x1: This mode will divide the screen into 4 parts and rotate the figure.
When selecting the 3x1 or 4x1 modes the picture in the right part of the control interface will
show a red circle. You can slide this white circle to resize the output screen. In addition, you
also can input the number to adjust the coordinates.
Note: 4K2K60 (YUV 4:4:4) can only be displayed in an 2x2 layout (1080p60 for each output)
4. Step 2-2: Configuration From File
You can load and read a configuration from the existing file on your PC/laptop.
Address: 830 National Drive #140, Sacramento, CA 95834, USA ·Tel: +1(888)499-9906 ·Email: support@bzbgear.com 14

BZBGEAR BG-UHD-VWP-1X4 PRODUCT MANUAL
5. Step 2-3: Custom Define
In the Custom Define mode you can define how to cut in both directions and which part you
want to display on an output. If you want to estimate which part is selected click the Grid
button to display a grid on the screen. After modifying the settings click the
button. Click the button to save the configuration for future usage. Modifying the
setting coordinates will determine the screen location on the display.
6. Step 3: Adjust Image
●Zoom In/Out: You can change pixel size from the edge of image by clicking
and button (the edge of image has four directions). After adjusting the image,
the rest of this image will be auto-scaled to fulfill the screen.
●Horizontal shift/Vertical shift: You can move the image on each screen in horizontal
or vertical directions and move one pixel at a time.
Address: 830 National Drive #140, Sacramento, CA 95834, USA ·Tel: +1(888)499-9906 ·Email: support@bzbgear.com 15

BZBGEAR BG-UHD-VWP-1X4 PRODUCT MANUAL
3. EDID (Extended Display Identification Data)
The EDID learning function is only necessary whenever you encounter any display on the
HDMI output port that cannot play audio and video properly. Because the HDMI sources
and displays may have various level of capability in playing audio and video, the general
principle is that the source will output the lowest standards in terms of audio format and
video resolutions to be commonly acceptable among all HDMI displays. In this case, a 720p
stereo HDMI signal output would be probably the safest choice. Nevertheless, the user can
force the matrix to learn the EDID of the lowest capable HDMI display among others to
make sure all displays are capable to play the HDMI signals normally.
●Select Default EDID (1-5 default EDID).
Address: 830 National Drive #140, Sacramento, CA 95834, USA ·Tel: +1(888)499-9906 ·Email: support@bzbgear.com 16

BZBGEAR BG-UHD-VWP-1X4 PRODUCT MANUAL
●Click button to learn default EDID.
1. Learn EDID from Display
●Select the Output.
●Click button to learn display EDID.
2. Learn EDID from File
●Click button to select the EDID file and write it into input.
3. (4) View EDID content
●Select the EDID input source (Input, Output or From File).
●Click button to read the EDID description and analysis.
●Click button to save the EDID as a file in the connected computer.
4. Advanced Settings
1. Machine Name
You can set the machine name here up to a max length of 8 characters.
2. Change Graph
You can change the splash screen of the device.
●Click the button to select a splash screen.
●After selection click the button to write it to the device.
Address: 830 National Drive #140, Sacramento, CA 95834, USA ·Tel: +1(888)499-9906 ·Email: support@bzbgear.com 17

BZBGEAR BG-UHD-VWP-1X4 PRODUCT MANUAL
3. Factory Reset
●Click the button to do factory reset to default settings.
●This reset process takes about 5 seconds.
●A pop-up dialog will appear which indicates the operation is complete.
Restart the unit after clicking OK.
5. 4K2K Settings
When the input has a resolution of 4K2K@60Hz the output display will be forced into a 2x2
layout and a user can only set the output position. There are 8 preset spaces to save
frequently used scenarios to the device.
Address: 830 National Drive #140, Sacramento, CA 95834, USA ·Tel: +1(888)499-9906 ·Email: support@bzbgear.com 18

BZBGEAR BG-UHD-VWP-1X4 PRODUCT MANUAL
6. Cloud setting-Association Code
Click the button to get an “association code”. The device can use this code to
pair with a cloud server. After a successful pairing you can reset the cloud.
*The unit needs to be paired to cloud within 2 minutes after getting an association code.
7. IP Configure
Using ethernet to control the software program.
Click the button to set up a network. Click the “Read from device” button
to display the current network settings.
DHCP: To have the network automatically assign an IP address to the device check the
DHCP box and click “Write to Device.”
Static: To manually configure the network settings, uncheck the DHCP box and fill in the
IP, Mask, and Gateway fields and then click “Write to Device.”
8. Info
Read the software and firmware version.
Address: 830 National Drive #140, Sacramento, CA 95834, USA ·Tel: +1(888)499-9906 ·Email: support@bzbgear.com 19

BZBGEAR BG-UHD-VWP-1X4 PRODUCT MANUAL
9. Refresh
The refresh function can refresh information for displayed settings and can also
reconnect the device. You can click button to update the control connection.
A “ReConnectForm” window will pop up and allow a user to select how they would like to
connect to the device..
Firmware Update through Mini-USB
1. Please ensure the file of the new firmware is in the root directory of USB Flash Drive.
The file name should be firmware.bin.
2. Use a mini-USB to female USB type A cable to connect the USB interface of the
device and the USB Flash Drive.
3. Change the dip switches to F/W mode.
4. Power cycle the device and it will automatically start the FW update process (The
process will take about 10 seconds).
Cloud Control (IntriCloud) through Ethernet Port
Create Account
The first time using the IntriCloud service, please create a new account.
1. Access IntriCloud (http://www.intri.cloud) and click “Create new account”.
Address: 830 National Drive #140, Sacramento, CA 95834, USA ·Tel: +1(888)499-9906 ·Email: support@bzbgear.com 20
Table of contents
Other BZB Gear Controllers manuals

BZB Gear
BZB Gear BG-VOP-CB User manual

BZB Gear
BZB Gear BG-Commander User manual

BZB Gear
BZB Gear Mini Pro User manual
BZB Gear
BZB Gear BG-UHD-VW29 User manual

BZB Gear
BZB Gear BG-Commander User manual

BZB Gear
BZB Gear BG-VOP-CB User manual

BZB Gear
BZB Gear BG-UHD-VW2X2 User manual
BZB Gear
BZB Gear BG-CJ-IPRSPRO User manual