Congratulations on your purc ase of a ig quality Cadco Commercial warming
appliance.
IMPORTA T SAFEGUARDS
1. Read all instructions before use.
2. Do not touc ot surfaces! Always use ot pads or pot older until unit cools.
3. To protect against electrical azards, do not immerse cord, plug or tray in
water or any ot er liquid.
4. Close supervision is necessary w en any appliance is used by or near
c ildren.
5. Unplug unit from outlet w en not in use or before cleaning. Allow to cool
completely before cleaning or storing.
6. Do not operate any appliance wit a damaged cord or plug or if t e appliance
malfunctions or as been damaged in any manner. Call Cadco Customer
Service at 860-738-2500 wit any questions or service needs. Canadian
customers call Joicey Food Services, Ltd. in Ontario, Tel. (905) 825-9665.
7. Do not use t is appliance outdoors.
8. Do not let cord ang over an edge of table or counter. Do not let cord touc
appliances ot surface.
9. Do not place on or near a ot gas or electric burner, or in a eated oven.
10.Do not use t is appliance for ot er t an intended use.
11.Do not clean wit metal scouring pads. T ey can scratc and ruin your finis .
12.A fire may occur if t is appliance is covered or touc ing flammable material,
including curtains, walls, etc., w en in operation.
13.Do not use plastic dishes or plastic wraps in warmer.
14. Do not run the unit dry. It is designed for wet operation only.
SAVE THESE I STRUCTIO S
IMPORTA T OTES
1. Your unit is equipped wit a grounded, current-carrying plug. T is plug will
fit into any 3 pronged outlet. T is is a safety feature.
2. Electrical connection must be a proper outlet for the 3 pronged cord.
Before connecting power, make sure the voltage and frequency
correspond to the data plate on the unit, and that your electrical circuit
can handle the Amps used by the unit in addition to any other appliances
operating on the same circuit.
3. A s ort power cord is provided to reduce t e azards resulting from accidents
suc as tripping, entanglement, etc.
-If a long cord set or extension cord is used:
(A) T e marketed electrical rating of t e cord set or extension cord s ould
be at least as great as t e electrical rating of t e appliance.
(B) T e longer cord s ould be arranged so t at it will not drape over t e
countertop or tabletop, w ere it can be pulled on by c ildren or tripped over
accidentally.
OPERATI G I STRUCTIO S
1. Plug unit into appropriate electrical outlet. (See Important Notes.)
2. This unit is for wet operation only. Running it dry will void the warranty.
l Add about 4 quarts of water to inner water holder. There should be liquid
at least to the MI fill line at all times during operation.
l Do not exceed t e MAX fill line in t e inner water holder w en using well
inserts /steam table pan(s)
l You may use more t an 4 quarts of liquid in t e inner water holder w en
NOT using well inserts /steam table pan(s) (EX., if keeping corn on t e cob
warm or eating ot dogs directly in t e inner water holder.)
3. If using steam table pans or well inserts, position t em as applicable:
l Steam table pans s ould be positioned so t eir top edges sit on t e top lip
of t e inner water holder. Use enoug steam pans to cover t e top of t e
inner water older so steam does not escape. Cadco warmers will andle
one full size, two alf size, or t ree t ird size steam table pans.
l If using well inserts, first put t e lid on t e inner water holder. T en
position t e well inserts in t e oles in t e lid, and put well covers in place.
If well inserts bob in t e water and do not sit firmly in place, remove some
of t e water from t e inner water holder t roug t e safety spigot.
NOTE: Models DWW-2P & DWW-11 ave two 9 quart well inserts = total 18 quarts.
Model DWW-3P as t ree 1/3 size, 5 quart, 6 deep steam pans = total 15 quarts.
5. Turn unit on by pressing t e power switch to t e On (l) position. W en t e
power is on, t e power switch will lig t up wit a green lig t.
6. Turn infinite heat control knob to 212o F/ ig position and pre eat for
approximately 10 minutes if using 4 quarts of water. (Pre eat longer if using
more water.) T en set to desired eat position for olding temperature. T e
infinite heat control knob as 13 eat settings ranging from 104o - 212oF
(40o-100oC.) Eac line on t e control knob represents a 5o C increment. Use
t e following c art to c oose your eat setting:
40oC = 104oF45
oC = 113oF50
oC = 122oF55
oC = 131oF
60oC = 140oF65
oC = 149oF70
oC = 158oF75
oC = 167oF
80oC = 176oF85
oC = 185oF90
oC = 194oF95
oC = 203oF
100oC = 212oF
7. T e temperature light will come on only during eat cycle, and will go out
w en set eat level is attained.
inner water older
(stainless steel) Note: Removing t e wells/steam
pans, well covers, and lids from t e
DWW-3P or DWW-11 provides t e
Full Size Warmer configuration.
Full Size Warmer
configuration
23
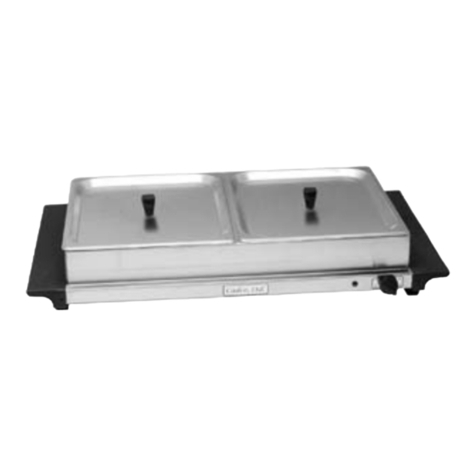
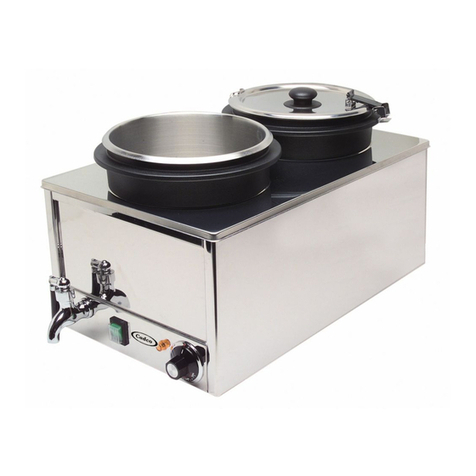
Model DWW-3P*
infinite
temperature
control knob
1/3 size
steam pan
(3 supplied)
clear
polycarbonate lid
(3 supplied)
power switc
safety spigot
temperature lig t
power
switc
temperature
lig t
well insert
(2 supplied)
well cover
(2 supplied)
Model DWW-11
safety
spigot
infinite
temperature
control knob
(remove to
access inner
water older)
lid
utensil slot
(1 per lid)
*Model DWW-2P =
same as DWW-3P,
except as (2) 9 qt.
pans & lids
