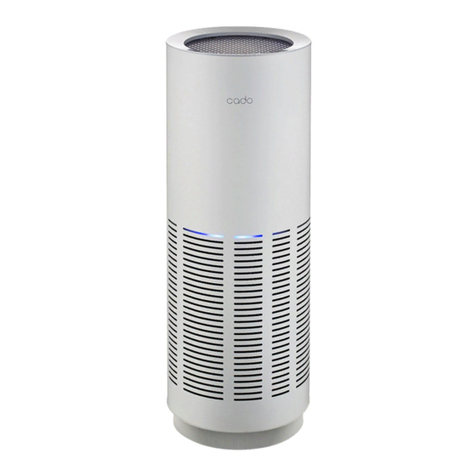
CADO LEAF 120 User manual

Quick Start Guide
Guide de démarrage rapide
Schnellstartanleitung
Guida Rapida
Skrócona Instrukcja Obsługi
120
Air Purifier


FRANCAIS 17
DEUTSCH 31
ITALIANO 45
POLSKA 59
ENGLISH 3
Make sure you read this document, as well as the attached “Safety Precautions,” before
using the appliance. Please keep these documents after reading.
Assurez-vous de lire ce document, ainsi que les "Précautions de sécurité" fournies, avant
d'utiliser l'appareil. Veuillez conserver ces documents après les avoir lus.
Przed rozpoczęciem użytkowania urządzenia należy przeczytaćniniejszy dokument, a
także dołączony dokument „Zasady dotyczące bezpieczeństwa”. Po przeczytaniu
dokumenty należy zachować.
Assicurarsi di leggere il presente documento, oltre alle “Precauzioni sulla sicurezza”,
prima di utilizzare l’apparecchio. Conservare questi documenti dopo la lettura.
Bitte lesen Sie dieses Dokument und die beigefügten „Sicherheitshinweise" vor Benutzung
des Geräts unbedingt durch. Bitte heben Sie die Dokumente nach dem Lesen auf.

3
DCIN24V
Air inlet
Top cover
Filter fixing
cover
Filter
Air outlet
Control panel
Top cover
lever
DC IN
connector
Unit back face
Unit bottom face
Parts

EN
4
Photocatalytic lamp
Odor indicator
Odor
sensor
Illumination level sensor
AC adapter
DC plug
AC power cord
Note:
・This appliance is not designed to eliminate all toxic substances in the air (for example, it does not eliminate carbon
monoxide from cigarette smoke). Furthermore, this appliance cannot ventilate. When using the appliance in a closed
room, periodically ventilate the room.
AC adapter
Sensors

5
1
2
Note:
・Make sure that the power is turned off when installing a filter.
・When installing a new filter, take the new filter out of the bag and then install it.
How to start
1. Slide the top cover lever to the right and remove the top cover.
2. Remove the filter fixing cover.
3. Take out the filter and remove the bag.
Installing filter

EN
6
4. Set the filter on the base unit.
5. Place the filter fixing cover.
6. Install the top cover by aligning the top cover
notch and lever position.

77
3. Connect the power plug to a power outlet.
All indicators turn on for about 2 seconds when the power is connected normally.
1. Insert the DC plug of the AC adapter in the DC IN connector
on the bottom face of the base unit.
2. Connect the AC power cord to the AC adapter.
Note:
・The supplied AC adapter is made for the base unit.
Do not connect it to any appliance other than the base unit.
Connecting power
DC IN 24V
DCIN24V

EN
8
Control panel
Power
indicator
Mode
indicator
Filter
replacement
indicator
Starting the unit
Press the power button.
How to operate
Air volume
indicator
Timer
indicator
Odor indicator
Illumination
intensity sensor
Power Mode Air volume Timer
The indicators turn on and the appliance starts operating in automatic mode.
The indicator turns off and the appliance stops operating when the power button is pressed while
the appliance is in operation.

9
Auto Rapid
Auto Rapid
The operating mode (indicator) changes according to
the sequence described.
Air volume can be set to the desired level, regardless
of the degree of contamination of the air in the room.
The operating mode (indicator) changes according to
the sequence described.
Selecting the operation mode
Press the mode button.
Selecting the air volume
Press the air volume button.
About operating modes
Normally use this mode.
The room condition is detected with the odor sensor, and the air volume
setting switched between low, middle, and high.
Use this mode if you want to quickly clean the air. The unit operates with an air
volume stronger than the high air volume setting for 2 hours, then changes to
automatic mode.
Auto
Rapid
Note:
・Operating mode and manual mode cannot be set simultaneously.
Note:
・Manual mode and operating mode cannot be set simultaneously.

EN
10
1 h 8 h OFF4 h
The power turns off automatically when the specified
time elapses.
The timer time (indicator) changes according to the
sequence described.
Photocatalytic lamp
The activated carbon included in the filter uses photocatalytic technology that reacts to
visible light.
Dimmer function
The brightness of the surrounding area is detected by the illumination level sensor, which is
located inside the power button. When the surrounding area becomes dark, the lit photocatalytic
lamp and odor indicator are also dimmed.
The lamp installed in the appliance uses a long-life blue LED and does not have any effects on the eyes or human
body in the way ultraviolet rays do. However, since the light is strong, turn off the power of the base unit to ensure
there is no direct exposure to the light when removing the filter, e.g. when replacing it.
Press the timer button.
Selecting the operation time
The odor sensor detects pollutants in the air and indicates
the air conditions in the room using the three colors blue,
yellow and orange.
Odor indicator
Blue
Yellow
Orange
Clean
Slightly polluted
Polluted

11
Photocatalytic lamp
Odor indicator
Illumination level sensor
The odor sensor primarily detects the odors of cigarettes, pets and cosmetic products.
・ The odor sensor may react to the gas and alcohol contents of a spray, as well as changes in temperature and
humidity. Furthermore, the sensor may not react depending on the components of the odor.
・ The odor sensor initializes for about five minutes after the power cord is connected, and the appliance is unable to
make accurate detections during that time. Wait for a moment and see whether the odor indicator changes to a
different color. It is also recommended to connect the power cord when the air in the room is clean (free of
cigarette smoke, etc), since the appliance uses the conditions of the air during the initialization process as a basis
for its operation.
・ The odor sensor makes a relative detection of the conditions of the air in the room. If the intensity of an odor does
not vary even when the odor is strong, the sensor may not react to this odor for that reason.
About the odor sensor

EN
12
Maintenance
・ Continuing to use the appliance without cleaning it can result in insufficient performance of
its air purifying functions, due to reasons such as accumulation of dust. Clean the appliance
periodically (once or more per month is recommended).
・ Failure to clean the appliance periodically may void the manufacturer warranty when
malfunction occurs due to contamination or similar reasons.
A soft cloth available in the marketplace, a cotton
swab, or a vacuum cleaner come in handy for cleaning.
Use a neutral detergent diluted with water to remove
stubborn stains.
Note:
・Do not use any stiff brushes. Using such items may scratch the base unit.
・When using detergent, always use a neutral detergent. Using any other detegent may cause
damage or warp the unit.
・ Properly remove the neutral detergent with a clean cloth after cleaning.
・Remove the filter and other attachments from the base unit to ensure that detergent will not
splash on the filter when cleaning the base unit.
1. Turn off the power of the base unit and pull the power cord out from the power outlet.
Unit
OFF

13
2. Wipe dust from the unit with a soft cloth.
3. Remove dust on the air inlet and air outlet by cleaning with a vacuum cleaner or the like.
Alternatively, remove it with a soft cloth.
Filter
・The replacement timing varies depending on the environment where the appliance is used, but a rough standard
would be to replace it every six months to a year.
・ When the appliance is used in a location with very contaminated air, the replacement period may come earlier.
・The filter may emit odor in a few weeks to a few months and may require replacement, depending on the
operating environment.
・If the smell becomes noticeable then replace the filter, or alternatively the situation may be improved by drying
the filter under sunlight in a well-ventilated place for about a day (this does not guarantee that there will be a
recovery of functionality).
The filter is a consumable part and must be replaced by periodically purchasing a new filter.

EN
14
When the filter needs to be replaced, the filter replacement indicator will light up.
Replace the filter with a new filter.
Filter replacement
Refer to ‘How to start - Installing filters’ to remove the old filter and change it with a
new filter.
Filter replacement method
OLD NEW

15
The filter replacement indicator will not turn off even after the filter has been replaced.
Initialize the filter replacement indicator with the procedure described below.
Note:
・The filter replacement indicator is also initialized when the filter is replaced and the operation
described above is performed before the filter replacement indicator is turned on.
Reset the filter replacement indicator
1. Press the power button and turn on the power
of the unit.
2. Continue to press the timer button for about
5 seconds to flash the filter replacement indicator.
3. Press the timer button again immediately to turn
off the filter replacement indicator and complete
initialization.
ON
5 SEC

EN
16
Specifications
LEAF 120
Power 24V DC (AC adapter: 100 - 240V 50 - 60Hz)
Model AP-C120
Applicable floor
area (m2)25 *1
Weight (kg) 4.6 (including the filter)
Power cord
length (m) AC power code: 0.7 / DC power code: approximately 1.8
Accessories Safety precautions, Quick start guide, Warranty card,
AC adapter, AC power cord, Filter FL-C120 *2
Operation mode
Power
consumption (W)
*1 Calculated using a testing method based on JEM1467 of the Japan Electrical Manufacturers' Association when operating on rapid mode.
*2 Dimensions (mm) ∅200 × Height 120 ・ Design and specifications are subject to change without notice.
Dimensions (mm) ∅240 × Height 315
Operational
noise (dBA)
Low
0.2
34
14
Middle
0.4
77
28
Rapid
(2 hours)
1.5
180
59
High
0.7
109
39
Air volume (m³/h)

17
DCIN24V
Entrée d'air
Couvercle
supérieur
Couvercle de
fixation du filtre
Filtre
Sortie d'air
Panneau de
commande
Levier du
couvercle
supérieur
Connecteur
d'entrée CC
Face arrière de l'unité
Face inférieure de l'unité
Composants
DCIN24V

FR
18
Lampe photocatalytique
Indicateur d'odeur
Détecteur
d'odeur
Capteur de niveau d'éclairage
Unité de base de
l'adaptateur
secteur CA
Fiche CC
Câble
d'alimentation CA
Note:
・Cet appareil n'est pas conçu pour éliminer toutes les substances toxiques présentes dans l'air (par exemple, il
n'élimine pas le monoxyde de carbone de la fumée de cigarette). De plus, cet appareil ne peut pas ventiler. Si vous
utilisez l'appareil dans une pièce fermée, ventilez régulièrement la pièce.
Adaptateur secteur CA
Capteurs

19
1
2
1
2
Note:
・Assurez-vous que l'alimentation est coupée lors de l'installation d'un filtre.
・Lors de l'installation d'un filtre neuf, enlevez le filtre neuf du sachet puis installez-le.
Prise en main
1. Faites coulisser le levier du couvercle
supérieur vers la droite et enlevez le couvercle supérieur.
2. Enlevez le couvercle de fixation du filtre.
3. Retirez le filtre et sortez-le de son emballage.
Installation des filtres
This manual suits for next models
1
Table of contents
Languages:
Other CADO Air Cleaner manuals

CADO
CADO Leaf Portable MP-C30 User manual

CADO
CADO LEAF 320i User manual

CADO
CADO AP-C200 User manual

CADO
CADO LEAF 320i User manual

CADO
CADO AP-C310 User manual

CADO
CADO LEAF 200 User manual

CADO
CADO AP-C300 User manual

CADO
CADO MP-C20U User manual

CADO
CADO LEAF portable User manual

CADO
CADO AP-C710S User manual