Installation Steps IMPORTANT! Read Completely Before Installing.
DIAGRAM 2
4. Use an electric drill
with 5/16" (0,8 cm)
drill bit to drill pilot
holes into locations
marked on wall.*
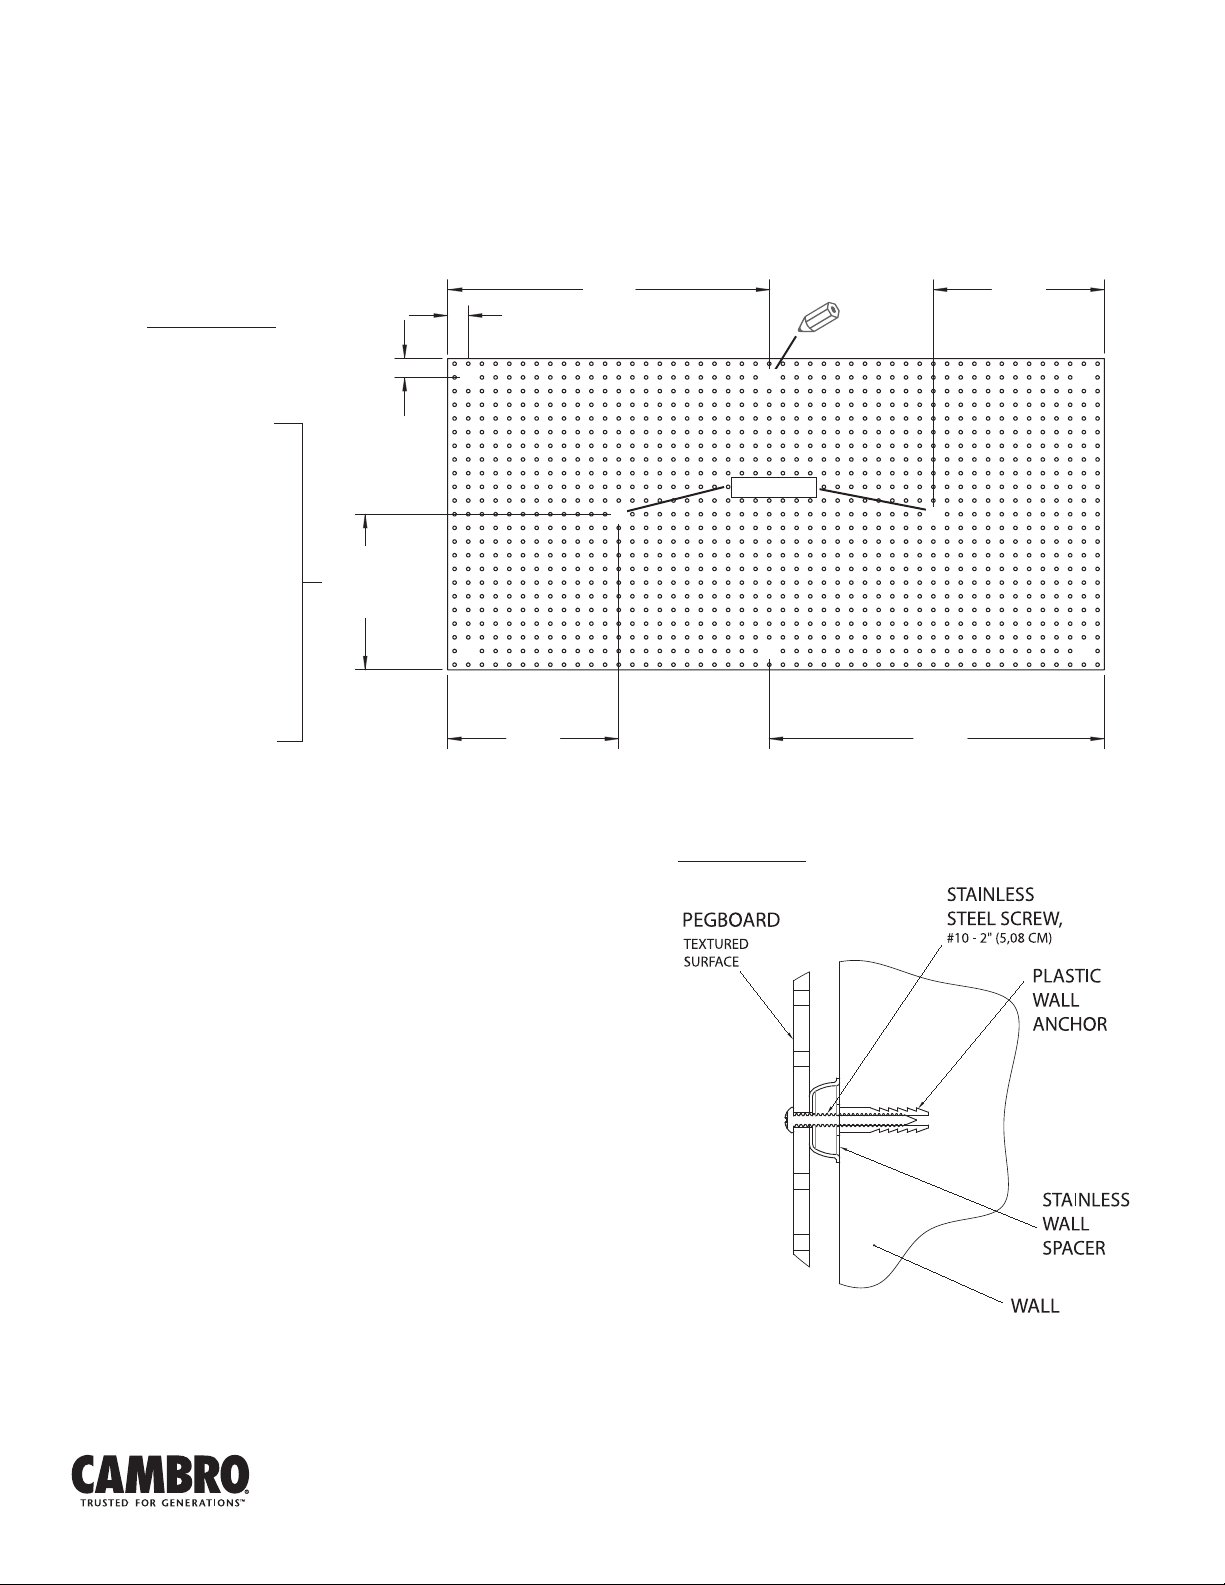
5. Insert plastic wall
anchors into pilot holes.*
*NOTE: It is not
necessary to pre-drill
pilot holes or use wall
anchors when installing
wall screws into wood
wall studs.
6. Insert wall screws
through pegboard holes
on textured side of
pegboard panel.
(DIAGRAM 1)
7. Slip spacers vertically
over each screw in the
back of the pegboard
as shown. (DIAGRAM 2)
8. Install wall screws.
Start at the top corner
hole locations rst. Use
Phillips No. 2 screwdriver
to install each screw
halfway. This allows
exibility to insert all
screws more evenly
into the wall before
tightening down.
9. Tighten all screws into
wall so wall spacers
are snug against the
wall surface.
IMPORTANT!
Do Not overtighten.
Telephone 714 848 1555 Toll Free 800 854 7631 Customer Service 800 833 3003
© Cambro Manufacturing Company 5801 Skylab Road, Huntington Beach, California 92647-2056
Printed in USA 1/21
UMPEGWM
D102003
1. Use pegboard to determine best
location and height for mounting
to wall, vertically or horizontally.
2. Hold pegboard at against wall
surface and use level to make
sure pegboard is level and
square in place. (DIAGRAM 1)
3. Use a pencil to trace inside 8 peg
hole locations indicated.
(DIAGRAM 1)
DIAGRAM 1
CSPEGKIT18
CS Pegboard Kit 18 x 48
Actual depth is 16.75"
8.5" to center hole
CSPEGKIT21
CS Pegboard Kit 21 x 48
Actual depth is 19.75"
10.50" to center hole
CSPEGKIT24
CS Pegboard Kit 24 x 48
Actual depth is 22.75"
11.5" to center hole
12.5
"
1.5"
1.375"
24.5
"
12.5
"
23.5
"
Dimension
determined by
pegboard size.
Center Hole
➊ ➋ ➌
➍ ➎
➏ ➐ ➑


