TITLE
7pre-installed sim card
The pre-installed SIM card is an IOT/M2M multi SIM complete with 480MB data allowance and 3 year life term.
Under average usage of 3-4 gate manoeuvres per day, the data should last approximately 3 years.
In case you use up the 480MB data volume before the end of the 3-year term, you can easily add another 480MB data
volume by making a top-up, details of which can be found here:
www.cameconnect.co.uk/gsmmodule
Due to situations outside of our control, CAME cannot guarantee signal strength or availability and therefore will not be
held liable for lack of service.
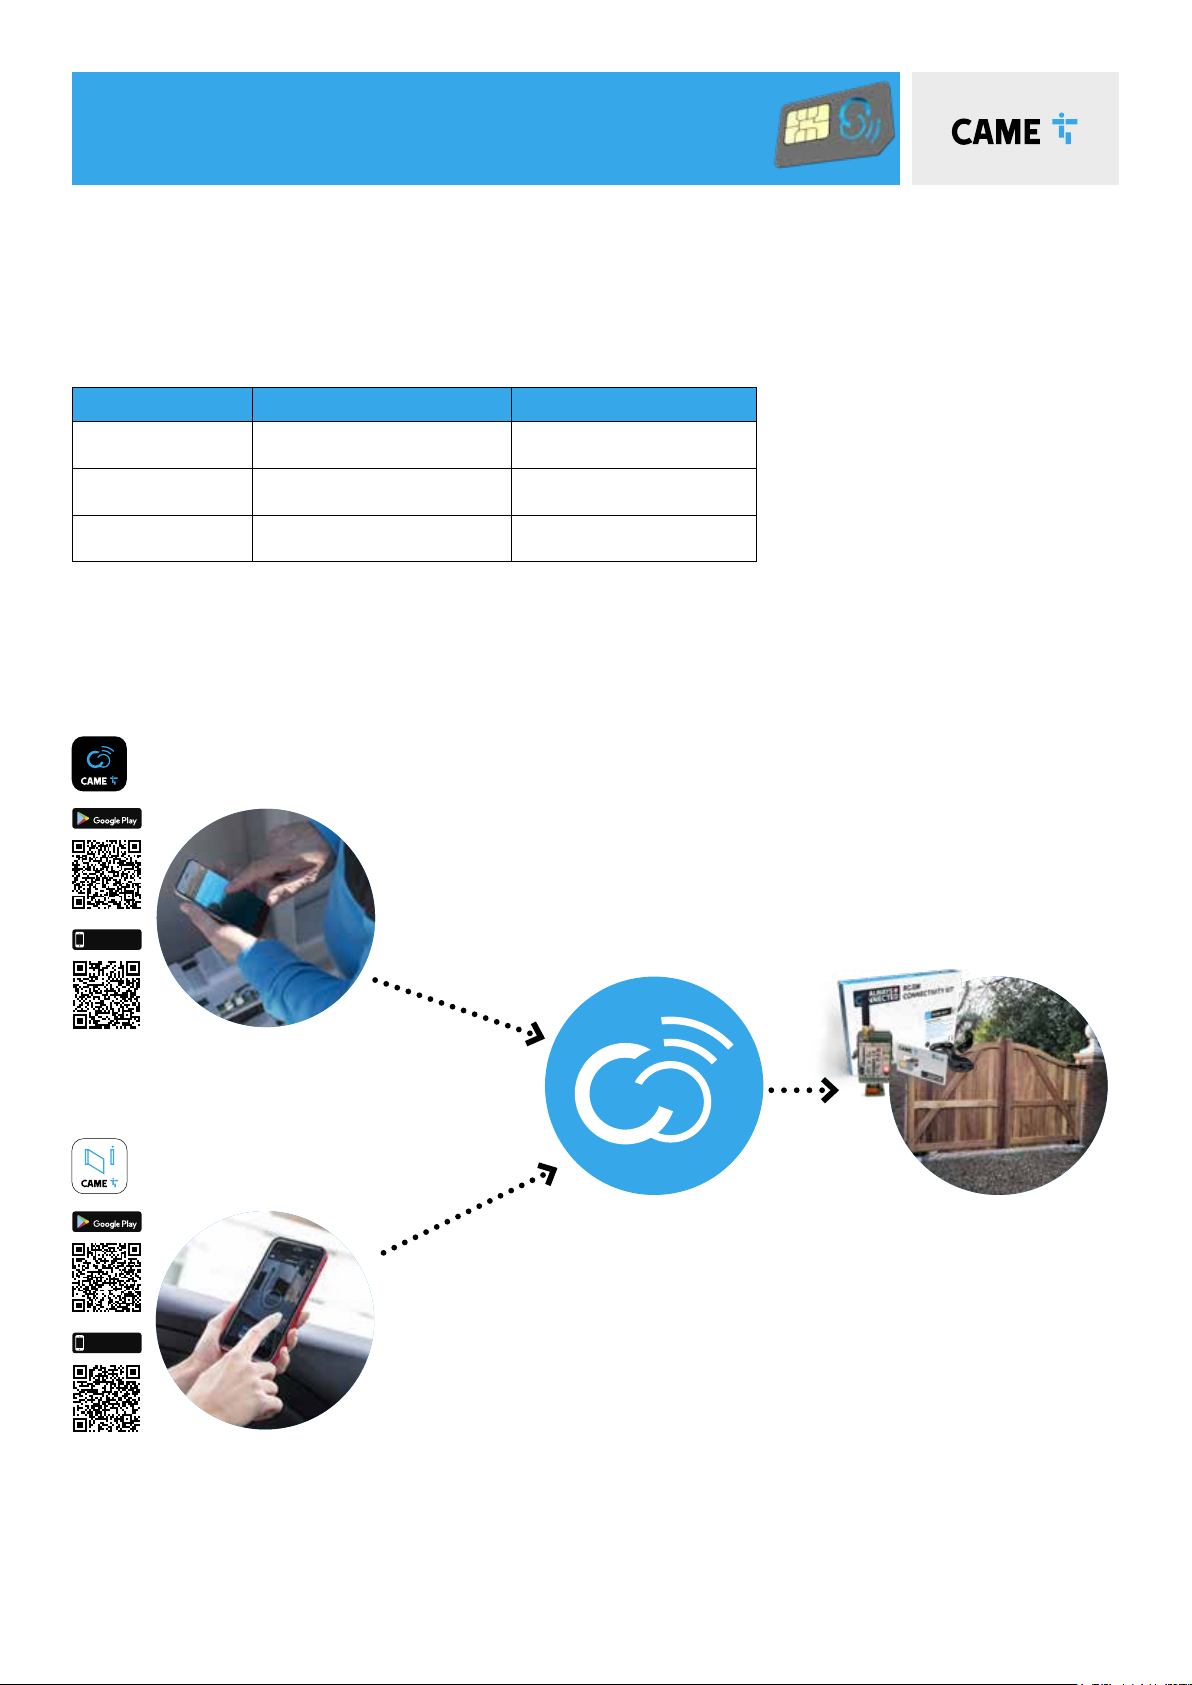
came automation
internet
came cloud
setup app
for the installer
automation app
for the end user
System Frequency Approx. Movements Est. SIM Life Based on Usage
Occasional Usage Approx. 5 gate manoeuvres per
week
4-7 Years*
Average Usage** Approx. 3-4 gate manoeuvres
per day
3-4 Years
High Usage Approx. 5+ gate manoeuvres per
day, multiple scenarios running
1-3 Years
* SIM will expire after 3-4 years. (CAME guarantees 3 years with some tolerance for shelf life consideration)
** We anticipate SIM provided will have sufficient data for Average Usage (as shown above) lasting approx. 3 years
8initial power ON
Power on the control board.
to check motor direction using control panel
CAUTION, Ensure the gate movement area is clear of all obstructions
Check the motor direction A2– ON
For motor 2, Press and hold
The gate should open, if not reverse the motor cables for motor 2 (Connections M2, N2)
Leave the gate leaf in the halfway position.
For motor 1, Press and hold
The gate should open, if not reverse the motor cables for motor 1 (Connections M1, N1)
Leave the gate leaf in the halfway position.
OUT1OUT2
Keycode
123456789ABCDE F
MATR
54051 6
300mAE GSM – 900 33dBm
DCS – 1800 30dBm
869.5MHz 14dBm
24V
CONNECT
123 4
GND
A
N
T
10+
2
COM
IN2
COM
IN1
B
A
–
1A 30V
RGSM001S
1 2
1GSM LED (Blue)
After a few seconds the LED will flash 1x/sec
indicating the RGSM001S is registered on a
GSM network.
2POWER LED (Green)
The LED will flash 5x/sec indicating the
RGSM001S is not yet configured on the
Connect platform.
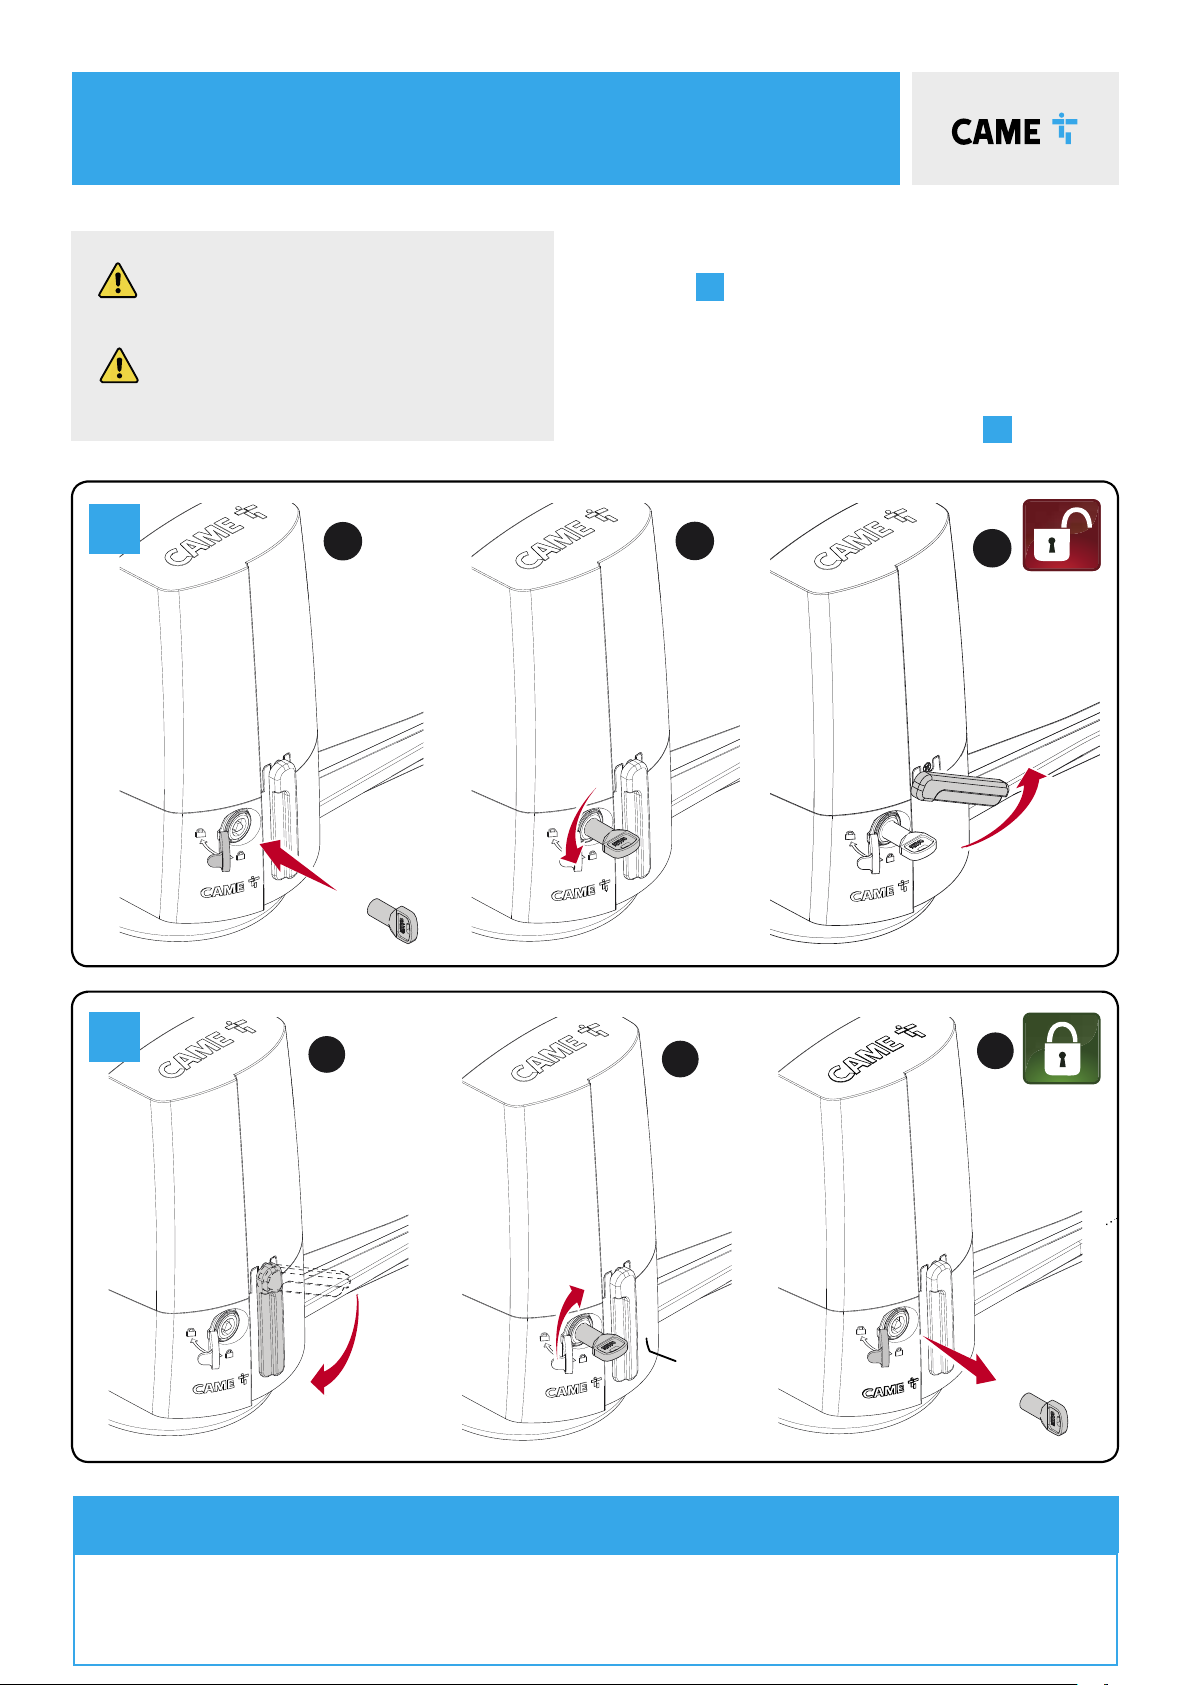
antenna bracket Fitting instructions
Make sure your kit
contains the antenna,
bracket and cable.
Remove the safety
screw from the cable.
Tighten the safety
screw until the cable is
secure.
Screw the bracket
into place using the
two holes. Do not
screw into the plastic
enclosure as this
will invalidate your
warranty.
Slot the cable into
the single hole of the
bracket and re-attach
the safety screw.
Screw the antenna into
place.
1 2 3 4 5 6
Installer Tip
If the RGSM001S is located
in a concealed area and a
low GSM signal observed,
please use the supplied cable
extension for the GSM aerial.
This then allows the aerial to
be located in a more suitable
position.