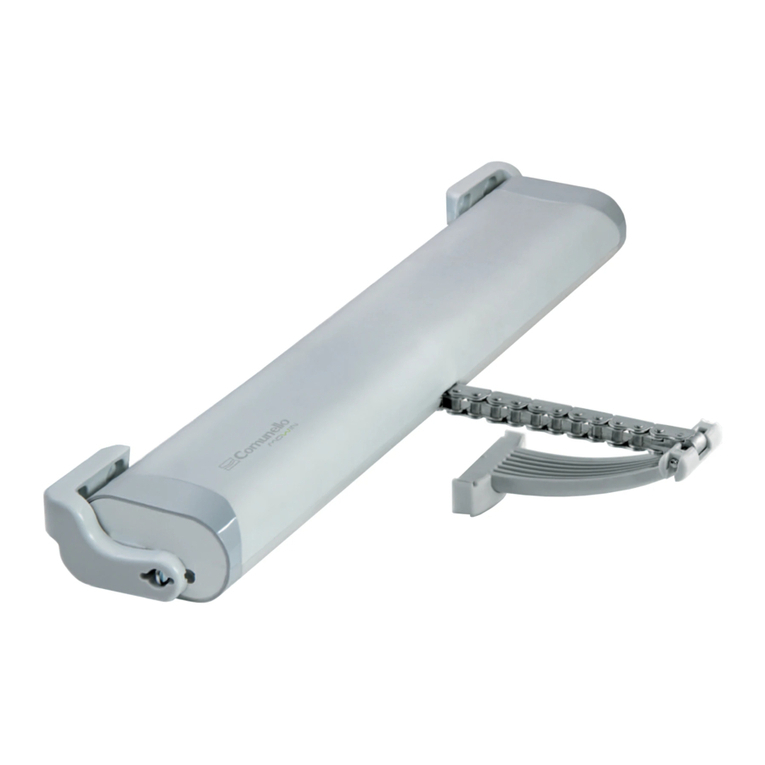
Comunello Automation ABACUS 220 User manual

ABACUS 220 / 300 / 500 / ONE
INSTALLATION AND USER’S MANUAL
Electromechanical rod actuators
ideal for residential swing gates
ISTRUZIONI D’USO E DI INSTALLAZIONE
INSTALLATIONS-UND GEBRAUCHSANLEITUNG
INSTRUCIONS D’UTILISATION ET D’INSTALLATION
INSTRUCCIONES DE USO Y DE INSTALACION
ИНСТРУКЦИЯ ПО МОНТАЖУ
comunello.com
91300216 - Rev. 04 - 03.10.18
ABACUS 220 / 300 / 500
INSTALLATION AND USER’S MANUAL
Electromechanical rod actuators
ideal for residential and industrial swing gates
ISTRUZIONI D’USO E DI INSTALLAZIONE
INSTALLATIONS-UND GEBRAUCHSANLEITUNG
INSTRUCIONS D’UTILISATION ET D’INSTALLATION
INSTRUCCIONES DE USO Y DE INSTALACION
ИНСТРУКЦИЯ ПО МОНТАЖУ
comunello.com
Rev. 00 - 09.12.13

2COMUNELLO ®Copyright 2016 - All rights reserved
FIG. 1A
FIG. 2
FIG. 1B
Z
C0
K
X
W
Y
E = 30 mm
Bmin = 90 mm
Bmin
Y
Z
MA
X
X K
E
C
0

3
COMUNELLO ®Copyright 2016 - All rights reserved
AS300
X 80 100 120 140 160 180 200
YK Z
αmax C0
K Z
αmax C0
K Z
αmax C0
K Z
αmax C0
K Z
αmax C0
K Z
αmax C0
K Z
αmax C0
100 605 65 585 65 565 70 545 75 525 80 505 95 488 102,5
96° 685 105° 685 114° 685 115° 685 101° 685 94° 685 90° 688
120 608 75 588 70 568 70 548 75 528 85 508 102,5
95° 688 104° 688 110° 688 105° 688 95° 688 90° 688
140 607 65 586 65 567 75 547 80 529 90
95° 688 105° 688 110° 688 96° 688 90° 688
160 605 70 584 75 566 80
94° 688 100° 688 95° 688
180 600 75 580 80
89° 685 90° 680
200 600 80
90° 685
AS500
X 80 100 120 140 160 180 200 220 240 260
YK Z
αmax C0
K Z
αmax C0
K Z
αmax C0
K Z
αmax C0
K Z
αmax C0
K Z
αmax C0
K Z
αmax C0
K Z
αmax C0
K Z
αmax C0
K Z
αmax C0
100 758 60 738 60 718 60 698 65 678 75 658 85 638 95 618 102,5 597 120 577 135
95° 838 104° 838 113° 838 120° 838 127° 838 130° 838 135° 838 133° 838 118° 837 118° 837
120 757 60 737 60 717 65 698 70 678 80 658 90 638 100 618 115 598 125 577 135
94° 837 102° 837 110° 837 116° 838 123° 838 128° 838 132° 838 123° 838 112° 837 105° 837
140 756 65 736 60 716 75 696 80 676 85 656 90 636 102,5 616 115 596 125 576 140
94° 836 102° 836 108° 836 115° 836 120° 836 125° 836 129° 836 115° 836 107° 836 101° 836
160 756 65 736 70 716 80 696 90 676 95 656 102,5 636 120 616 125 596 135 576 145
93° 836 100° 836 106° 836 112° 836 118° 836 112° 836 115° 836 108° 836 101° 836 96° 836
180 753 70 733 75 713 80 693 90 673 95 653 102,5 633 115 613 125 593 140
93° 838 99° 838 104° 838 110° 838 115° 838 119° 838 109° 838 100° 838 95° 838
200 756 75 736 80 716 90 696 102,5 676 110 656 120 637 130 617 140
93° 838 98° 838 104° 838 108° 838 113° 838 117° 838 103° 838 97° 838
220 748 80 728 90 708 100 688 110 673 115 653 120 633 130 613 140
93° 837 98° 837 102° 837 107° 838 111° 838 115° 838 95° 838 90° 835
240 748 85 728 95 709 100 692 110 672 120 654 130 635 140 615 145
93° 838 98° 838 102° 837 106° 838 108° 838 97° 838 90° 838 89° 838
ABACUS 220
ABACUS 300
ABACUS 500
AC 85
AC 85
AC 80
AC 80
AC 80 + AC 85
NOT SUGGESTED AC 80
NOT SUGGESTED
AS220
X 80 100 120 140 160 180 200
YK Z
αmax C0
K Z
αmax C0
K Z
αmax C0
K Z
αmax C0
K Z
αmax C0
K Z
αmax C0
K Z
αmax C0
100 568 55 548 60 528 65 508 75 488 85 468 95 448 110
98° 648,5 107° 648,5 115° 648,5 118° 648,5 103° 648,5 95° 648,5 90° 648,5
120 567 60 549 65 529 75 509 85 489 90 469 105
97° 649 105° 649 112° 649 106° 649 96° 649 90° 649
140 566 65 546 70 526 80 506 90 488 100
96° 649 104° 649 110° 649 95° 649 89° 649
160 564 70 546 75 527 85 508 95
95° 649 102° 649 95° 649 88° 649
180 564 75 544 85 526 95
95° 649 96° 649 87° 649


FIG. 4
FIG. 5A FIG. 5B
FIG. 3

5
COMUNELLO ®Copyright 2016 - All rights reserved
ITALIANO
FIG. 5C
FIG. 6
Z2
FIG. 6 A

FIG. 7
FIG. 8

7
COMUNELLO ®Copyright 2016 - All rights reserved
ITALIANO
FIG. 9
FIG. 11
FIG. 13
FIG. 10
FIG. 12

FIG. 14
AS220-230V-FM ABACUS 220 230V NERO
AS300-230V-FM ABACUS 300 230V NERO
AS300-230V-FE - ABACUS 300 230V NERO
AS500-230V-FE - ABACUS 500 230V NERO
AS220-230V-FM+E ABACUS 220 230V NERO
AS300-230V-FM+E ABACUS 300 230V NERO
AS500-230V-FM+E ABACUS 500 230V NERO
AS220-24V-FM ABACUS 220 24V NERO
AS300-24V-FM ABACUS 300 24V NERO
AS220-24V-FE ABACUS 220 24V NERO
AS300-24V-FE ABACUS 300 24V NERO
AS220-24V-FE+E ABACUS 220 24V NERO
AS500-24V-FE+E ABACUS 500 24V NERO

9
COMUNELLO ®Copyright 2016 - All rights reserved
FIG. 14A
FIG. 14B
AS220-ONE-24V
AS300-ONE-24V
AS500-ONE-24V

FIG. 15
FIG. 16
FIG. 16A

11
COMUNELLO ®Copyright 2016 - All rights reserved
FIG. 17
95
132
765
95
61.3
150
105
805
115
61.5
105955
150
115
61.5
ABACUS 220
ABACUS 300
ABACUS 500

12 COMUNELLO ®Copyright 2016 - All rights reserved
DICHIARAZIONE DI CONFORMITÁ CE
Il sottoscritto, sig. COMUNELLO LUCA rappresentante il seguente costruttore
F.lli COMUNELLO spa
Via Cassola 64, 36027 Rosà (VI) Italy
DICHIARA che l’apparecchiatura descritta in appresso:
Descrizione Automazione elettromeccanica per ante battenti con pistoni.
Modello ABACUS 220 / 300 / 500 / ONE
è conforme alle disposizioni legislative che traspongono le seguenti direttive:
• 2014/30/EU (Direttiva EMCD) • 2011/65/EU (Direttiva RoHS)
• 2014/35/EU (Direttiva LVD)
e che sono state applicate tutte le norme e/o speciche tecniche di seguito indicate
EN61000-6-2:2005 + EN61000-6-3:2007
EN62233 :2008
EN60335-1 :2012
ed emendamenti successivi
Rosà (VI) – Italia
21-04-2016
Inoltre dichiara che non è consentito mettere in servizio il macchinario no a che la macchina in cui sarà incorporata o di cui diverrà
componente sia stata identicata e ne sia stata dichiarata la conformità alle condizioni della Direttiva 2006/42/CE e alla legislazione
nazionale che la traspone.
Dr. LUCA COMUNELLO
Legale rappresentante della FRATELLI COMUNELLO s.p.a.
ABACUS 220 / 300 / 500 / ONE
ISTRUZIONI D’USO E DI INSTALLAZIONE
Fratelli Comunello S.p.A.
Azienda con Sistema Gestione Qualità certicato
UNI EN ISO 9001:2008.
(Certicato n° 50 100 11235 Rev. 02)

13
COMUNELLO ®Copyright 2016 - All rights reserved
ITALIANO
INDICE
1 AVVERTENZE GENERALI
1.1 Avvertenze per la sicurezza
1.2 Avvertenze per l’installazione
1.3 Avvertenze per l’uso
2 DESCRIZIONE DEL PRODOTTO E DESTINAZIONE D’USO
2.1 Descrizione del prodotto
2.2 Installazione tipica
3 CARATTERISTICHE TECNICHE DEL PRODOTTO
4 INSTALLAZIONE
4.1 Veriche preliminari
4.2 Limiti d’impiego
4.3 Lavori di predisposizione all’installazione
4.4 Installazione del motoriduttore mod. ABACUS
4.4.1 Installazione
4.4.2 Installazione necorsa
4.4.3 Sblocco manuale del motoriduttore
5 PREDISPOSIZIONE AI COLLEGAMENTI ELETTRICI
6 COLLAUDO
7 MANUTENZIONE DEL PRODOTTO
8 RICAMBI
9 SMALTIMENTO DEL PRODOTTO
10 GARANZIA
1 AVVERTENZE
1.1 AVVERTENZE PER LA SICUREZZA
Il presente manuale di installazione è rivolto
esclusivamente a personale professionalmente
competente. È necessario leggere tutte le
istruzioni prima di procedere all’installazione.
Tutto quello che non è espressamente
previsto in queste istruzioni non è permesso;
usi non previsti potrebbero essere fonte
di danni al prodotto e mettere in pericolo
persone e cose. Il costruttore declina qualsiasi
responsabilità dall’inosservanza della buona
tecnica nella costruzione dei cancelli, nonché
delle deformazioni che potrebbero vericarsi
durante l’uso. Conservare questo manuale
anche per utilizzi futuri. La progettazione, la
fabbricazione dei dispositivi che compongono
ABACUS ed il presente manuale rispettano
pienamente la norma vigente. Considerando
le situazioni di rischio che possono vericarsi
durante l’installazione e l’uso di ABACUS è
necessario che anche l’installazione avvenga
nel pieno rispetto di leggi, norme e regolamenti;
in particolare:
1.2 AVVERTENZE PER L’INSTALLAZIONE
• Prima di iniziare l’installazione vericare la
necessità di ulteriori dispositivi e materiali che
possono servire a completare l’automazione
con ABACUS in base alla specica situazione
d’impiego.
• Il materiale dell’imballaggio deve essere
smaltito nel pieno rispetto della normativa
locale.
1.3 AVVERTENZE PER L’USO
• Non eseguire modiche su nessuna parte se
non previste nel presente manuale. Operazioni
di questo tipo possono solo causare
malfunzionamento. Il costruttore declina ogni
responsabilità per danni derivati da prodotti
modicati.
• Evitare che le parti dell’automatismo possano
venir immerse in acqua o in altre sostanze
liquide. Anche durante l’installazione evitare
che liquidi possano penetrare all’interno della
centrale e di altri dispositivi aperti.
• Qualora sostanze liquide siano penetrate
all’interno dei dispositivi dell’automatismo,
scollegare i mmediatamente l’alimentazione
elettrica e rivolgersi al servizio di assistenza;
l’uso di ABACUS in tali situazioni può causare
situazioni di pericolo.
• Non tenere qualsiasi componente di ABACUS
vicino a fonti di calore né esporlo a amme; tali
azioni possono danneggiarlo ed essere causa
di malfunzionamenti, incendio o situazioni di
pericolo.
• Nel caso di lunghi periodi di inutilizzo, per
evitare il rischio di perdite di sostanze nocive
dalla batteria opzionale è preferibile estrarla e
custodirla in luogo asciutto.
• Collegare la centrale solo ad una linea di
alimentazione elettrica dotata di messa a terra
di sicurezza.
• Tutte le operazioni che richiedono l’apertura
dei gusci di ABACUS devono avvenire
con la centrale di comando scollegata
dall’alimentazione elettrica; se il dispositivo
di sconnessione non è a vista apporvi un
cartello: “ATTENZIONE MANUTENZIONE IN
CORSO”.
• Qualora si verichino interventi di interruttori
automatici o di fusibili, prima di ripristinarli è
necessario individuare ed eliminare il guasto.
• Nel caso di guasto non risolvibile facendo
uso delle informazioni riportate nel presente
manuale, interpellare il servizio di assistenza.
2 DESCRIZIONE DEL PRODOTTO
E DESTINAZIONE D’USO
2.1 DESCRIZIONE DEL PRODOTTO
Attuatore elettromeccanico a pistone per cancelli a battente . La robusta
struttura in alluminio pressofuso permette di alloggiare sia i motori a
spazzola che monofase rendendo disponibile sia la versione 24V sia la
versione 230V. Scocca in alluminio con verniciatura a polvere resistente
agli agenti atmosferici.

14 COMUNELLO ®Copyright 2016 - All rights reserved
2.2 INSTALLAZIONE TIPICA
E
C C
F F
G
BB
H
A
D
LEGENDA
A MOTORIDUTTORE
B FOTOCELLULE IN APERTURA
C FOTOCELLULE IN CHIUSURA
D LAMPEGGIANTE
E SELETTORE A CHIAVE
F ARRESTO FINECORSA IN APERTURA
G FERMO CENTRALE IN CHIUSURA
H CENTRALE ESTERNA
3 CARATTERISTICHE TECNICHE DEL
PRODOTTO
ABACUS 220
ABACUS
220 ONE
ABACUS 220 ABACUS 300
ABACUS
300 ONE
ABACUS 500 ABACUS 500
ABACUS
500 ONE
ABACUS 500
Alimentazione motore 24V
230V ~ 50Hz
24V
230V ~ 50Hz
24V
230V ~ 50Hz
Potenza assorbita 70 W 180 W 110 W 280 W 110 W 280 W
Assorbimento Max 3 A 0,8 A 5 A 1,2 A 5 A 1,2 A
SPINTA MAX 1500 N 1400 N 2000 N 1800 N 2000 N 1800 N
SPINTA NOM 500 N 400 N 600 N 700 N 600 N 700 N
Intermittenza di lavoro 30% 0,3 Intensivo 0,4 Intensivo 0,4
Grado di protezione IP 44 D
Classe di isolamento II 1 messa
a terra
II 1 messa
a terra
II 1 messa
a terra
Temp. di funzionamento da -20°C a + 50°C
Peso max del cancello VEDERE GRAFICO
Velocità a vuoto 15 mm/s 14 mm/s 22 mm/s 15 mm/s 22 mm/s 15 mm/s
Peso 8,2 Kg 8,6 Kg 11,2 Kg 11,6 Kg 11,9 Kg 12,3 Kg
LIMITI DI IMPIEGO - ABACUS 220
LIMITI DI IMPIEGO - ABACUS 300
LIMITI DI IMPIEGO - ABACUS 500
4 INSTALLAZIONE
4.1 VERIFICHE PRELIMINARI
Prima di procedere all’installazione, è necessario vericare l’integrità dei
componenti del prodotto, l’adeguatezza del modello scelto e l’idoneità
dell’ambiente destinato all’installazione:
• Vericare che tutto il materiale da utilizzare sia in ottimo stato e adatto
all’uso previsto.
• Vericare che la struttura meccanica del cancello sia adatta ad essere
automatizzata. Il presente prodotto non può automatizzare un cancello
che non sia già efciente e sicuro; inoltre, non può risolvere difetti causati
da un’installazione errata del cancello o da una sua cattiva manutenzione.
• Vericare che le condizioni di funzionamento dei dispositivi siano
compatibili con i limiti d’impiego dichiarati.
• Muovere manualmente le ante del cancello nelle due direzioni e
accertarsi che lo sforzo sia costante.
• Portare manualmente le ante del cancello in una posizione qualsiasi;
quindi lasciarle ferme e accertarsi che non si muovano.
• Vericare che la zona di ssaggio del motoriduttore sia compatibile con
l’ingombro di quest’ultimo ed accertarsi che ci sia lo spazio sufciente
per la rotazione completa del suo braccio.
• Nelle vicinanze del motoriduttore, accertarsi che ci sia spazio sufciente
per effettuare la manovra manuale di sblocco del motoriduttore.
• Accertarsi che le superci scelte per installare i vari dispositivi, siano
solide e possano garantire un ssaggio stabile.
• Accertarsi che ciascun dispositivo da installare sia collocato in una
posizione protetta e al riparo da urti accidentali.
4.2 LIMITI D’IMPIEGO
Prima di eseguire l’installazione, vericare che il motore sia correttamente
dimensionato al peso ed alla lunghezza delle ante e sia nei limiti dei valori
riportati nel capitolo 3 “Caratteristiche tecniche del prodotto”.
4.3 LAVORI DI PREDISPOSIZIONE ALL’INSTALLAZIONE
Facendo riferimento alle FIG. 1A e 1B, stabilire la posizione approssimativa
in cui verrà installato ciascun componente previsto nell’impianto e lo
schema di collegamento più appropriato. In seguito viene riportata una lista
dei componenti necessari:
• Motoriduttori elettromeccanici
• Coppia di fotocellule
• Coppia di battenti di arresto in Apertura e battente di arresto in chiusura
• Colonne per fotocellule
• Segnalatore lampeggiante
• Selettore a chiave o tastiera digitale
• Elettroserratura verticale per ante superiori a 3 m
• Centrale di comando
4.4 INSTALLAZIONE DEL MOTORIDUTTORE ABACUS
4.4.1 INSTALLAZIONE:
• Effettuare lo sblocco manuale come descritto nel capitolo 4.4.3.
• Togliere il coperchio posteriore come illustrato nella FIG. 4.
• Stabilire la posizione dell’automatismo in corrispondenza di un traverso solido.
• Fissare provvisoriamente la piastra Z1 al pilastro orientandola a seconda
della larghezza del pilastro (FIG. 5A).
• Tagliare e fissare provvisoriamente la piastra forata (FIG. 5B)
considerando le quote in FIG. 1A e FIG.1B.
• A cancello completamente chiuso ssare provvisoriamente la piastra Z2 all’anta.
• Saldare la piastra forata (FIG. 5C) rispettando le quote in FIG. 1A e FIG. 1B.
• Unire il motore alla staffa posteriore mediante il perno in dotazione (FIG. 6).
• Inserire il perno mobile P nel foro della staffa anteriore e ssarlo con la
vite e la rondella in dotazione (FIG. 6).
• Serrare la vite nella staffa posteriore.
• Con il motore sbloccato, vericare manualmente che l’anta raggiunga le

15
COMUNELLO ®Copyright 2016 - All rights reserved
ITALIANO
posizioni di apertura e chiusura pressate e che l’attuatore non
interferisca con l’anta o con il pilastro.
• Saldare e ssare denitivamente le piastre.
• Procedere con i collegamenti elettrici come specicato nel CAP.5.
• Bloccare il motore come specicato nel CAP 4.4.3.
• Eseguire alcune manovre successive per vericare che l’installazione sia
effettuate a regola d’arte.
• Chiudere il coperchio con le 4 viti.
4.4.2 INSTALLAZIONE FINECORSA
Per ogni installazione è indispensabile predisporre nel cancello da
automatizzare degli arresti meccanici in chiusura ed apertura. Per
un’ulteriore sicurezza è possibile utilizzare i fermi meccanici / elettronici
regolabili incorporati nell’attuatore. La regolazione del fermo meccanico si
effettua come segue:
• Portare l’anta in posizione di massima chiusura no a sbattere contro il
battente ssato a terra (FIG. 7).
• Allentare la vite del necorsa “A” quanto basta per poterlo muovere no
a toccare il perno mobile (FIG 8).
• Eseguire la stessa operazione in posizione di massima apertura (con
l’altro necorsa).
Nel caso di necorsa elettromeccanico i necorsa “A“ e “B“ devono andare
a contatto con il perno mobile facendo scattare il commutatore.
4.4.3 SBLOCCO MANUALE DEL MOTORE
Lo sblocco manuale va attivato quando si deve aprire manualmente il
cancello. L’attivazione del sistema di sblocco potrebbe provocare movimenti
incontrollati del cancello nel caso in cui siano presenti sbilanciamenti o
guasti meccanici.
Nel caso di abacus 300 / 500 procedere come segue:
• Aprire lo sportellino in plastica ed inserire la chiave personalizzata (FIG. 2).
• Ruotare la chiave in senso orario per 360° (FIG. 9). In questo modo
si rende folle l’ingranaggio permettendo così, l’apertura manuale del
cancello (FIG.10).
• Per ripristinare il comando motorizzato, portare la chiave nella posizione
iniziale (FIG. 11).
• Togliere la chiave e riporla in un luogo sicuro e conosciuto agli interessati.
Nel caso di ABACUS 220 la chiave viene sostituita da una maniglia con
impronta personalizzata. Ruotare di 90° nella direzione indicata nella
copertura FIG. 3.
5 PREDISPOSIZIONE AI COLLEGAMENTI
ELETTRICI
ATTENZIONE! Per il collegamento alla rete, utilizzare cavo multipolare
previsto da normativa vigente come da manuale della centrale.
• Effetture lo sblocco manuale come illustrato nel paragrafo 4.4.3.
• Togliere la parte in plastica come illustrato in FIG. 4.
• Allentare pressacavo “G” posto nella parte inferiore del motore. FIG. 12.
• Inserire il cavo dell’alimentazione, dell’encoder e/o dei necorsa.
• Collegare i li alla morsettiera e la messa a terra al capocorda ad
occhiello seguendo le indicazioni dell’etichetta accanto FIG. 14.
• Bloccare il cavo serrando il pressacavo. FIG. 15.
In caso di rottura del condensatore (solo nel caso di Abacus 230 V) è
possibile effettuarne la sostituzione:
• Togliere alimentazione alla centrale.
• Effetture lo sblocco manuale come illustrato nel paragrafo 4.4.3.
• Togliere la parte in plastica come illustrato in FIG. 4.
• Togliere il copricondensatore svitando le due viti come in FIG. 16.
• Togliere il condensatore intervenendo sulla morsettiera e sostituirlo con
uno nuovo.
6 COLLAUDO
Ogni singolo elemento dell’automatismo, ad esempio bordi sensibili,
fotocellule, arresto di emergenza, ecc. richiede una specica fase di
collaudo; per questi dispositivi si dovranno eseguire le procedure riportate
nei rispettivi manuali d’istruzioni. Per il collaudo di ABACUS eseguire la
seguente sequenza di operazioni:
• Vericare che sia stato rispettato rigorosamente tutto quanto previsto nel
presente manuale ed in particolare nel capitolo 1 “Avvertenze”.
• Utilizzando i dispositivi di comando o arresto previsti (selettore a
chiave, pulsanti di comando o trasmettitori radio), effettuare delle prove
di apertura, chiusura ed arresto del cancello e vericare che il
comportamento corrisponda a quanto previsto.
• Vericare uno ad uno il corretto funzionamento di tutti i dispositivi di
sicurezza presenti nell’impianto (fotocellule, bordi sensibili, arresto di
emergenza, ecc.).
• Se le situazioni pericolose provocate dal movimento dell’anta sono
state salvaguardate mediante la limitazione della forza d’impatto si
deve eseguire la misura della forza secondo quanto previsto dalla
norma EN 12445.
7 MANUTENZIONE DEL PRODOTTO
La manutenzione deve essere effettuata regolarmente da parte di personale
qualicato secondo quanto previsto dalle leggi e normative vigenti. Per
ABACUS è necessaria una manutenzione programmata al massimo entro
6 mesi o 10.000 manovre dalla precedente manutenzione:
• Scollegare qualsiasi fonte di alimentazione dal motore.
• Vericare e sotituire tutte le parti di movimento usurate.
• Vericare lo stato di deterioramento di tutte le parti dell’automazione.
8 RICAMBI
È possibile acquistare dei particolari di ricambio in caso di tale necessità
contattare l’assistenza tecnica.
9 SMALTIMENTO
Al termine della vita dell’automazione, assicuratevi che lo smantellamento
sia eseguito da personale qualicato e che i materiali vengano riciclati o
smaltiti secondo le norme valide a livello locale.
10 GARANZIA
Fratelli Comunello SpA garantisce, a condizione del rispetto delle speciche
prestazionali indicate nei manuali di istruzione dei prodotti, il corretto
funzionamento degli attuatori per 24 mesi dalla data di fabbricazione. Fratelli
Comunello S.p.a. garantisce in via esclusiva, e quindi con esclusione di
domande risarcitorie formulate per equivalente, la riparazione o sostituzione
gratuita delle parti difettose che verranno riconosciute tali, secondo
l’insindacabile giudizio tecnico del personale di Fratelli Comunello SpA. Il
materiale in garanzia inviato alla sede della Fratelli Comunello SpA, dovrà
essere spedito in porto franco e verrà quindi rispedito in porto assegnato.
Il materiale ritenuto difettoso ed inviato a Fratelli Comunello S.p.a. rimarrà di
proprietà di quest’ultima società.
- Il costo di manodopera necessario per le riparazioni e sostituzioni eseguite
rimane a carico dell’acquirente. Non viene riconosciuto alcun indennizzo
per il periodo d’inoperatività dell’impianto. L’intervento non prolunga la
durata della garanzia. A pena di decadenza, l’acquirente deve denunciare
gli eventuali vizi e difetti dei prodotti, entro il termine di 8 (otto) giorni da
calcolarsi rispettivamente dalla data di scoperta dei vizi o dalla data di
consegna della merce. La denuncia dovrà essere fatta esclusivamente per
iscritto. La garanzia non comprende: Avarie o danni causati dal trasporto;
avarie o danni causati da vizi dell’impianto elettrico presente presso
l’acquirente il prodotto e/o da trascuratezza, negligenza, inadeguatezza,
uso anomalo di tale impianto; avarie o danni dovuti a manomissioni poste
in essere da parte di personale non autorizzato o conseguenti allo scorretto
uso/installazione (a questo proposito, si consiglia una manutenzione del
sistema almeno ogni sei mesi) o all’impiego di pezzi di ricambio non originali;
difetti causati da agenti chimici e/o fenomeni atmosferici.
La garanzia non comprende il costo per materiale di consumo né quello per
vizi presunti o veriche di comodo.
Caratteristiche dei prodotti
I prodotti realizzati da Fratelli Comunello SpA sono soggetti a continue
innovazioni e miglioramenti; pertanto, le caratteristiche costruttive e
l’immagine degli stessi, potranno subire variazioni anche senza preavviso.
Foro competente
Poiché il contratto viene perfezionato mediante Conferma d’Ordine
compilata in Rosà, in caso di controversia legale di qualsiasi natura è
applicabile il diritto italiano ed è competente il Foro di Vicenza (VI).

16 COMUNELLO ®Copyright 2016 - All rights reserved
ABACUS 220 / 300 / 500 / ONE
INSTALLATION AND USER’S MANUAL
Fratelli Comunello S.p.A.
Company with certied Quality Management System
UNI EN ISO 9001:2008.
(Certicate n° 50 100 11235 Rev. 02)
EC DECLARATION OF COMFORMITY:
The undersigned Mr. Luca Comunello, representing the following manufacturer,
Fratelli COMUNELLO Spa
Via Cassola 64, 36027 Rosà (VI) – Italy
DECLARES that the equipment described below:
Description: Automation for swing doors with pistons.
Model: ABACUS 220 / 300 / 500 / ONE
Is in compliance with the provisions set down in the following directives:
• 2014/30/EU (EMCD Directive) • 2011/65/EU (RoHS Directive)
• 2014/35/EU (LVD Directive)
and that all the rules and/or technical specications shown below have been applied:
EN61000-6-2:2005 + EN61000-6-3:2007
EN62233 :2008
EN60335-1 :2012
and the following amendments.
Rosà (VI) – Italy
21-04-2016
and he also declares that it is not allowed to commission the device until the machinery where it will be incorporated or whose it will
become a component will have been identied and will have been declared in compliance with the conditions of the 2006/42 EC Directive
and with the national legislation that transpose it.
Mr. Luca Comunello
Fratelli Comunello Legal Representative

17
COMUNELLO ®Copyright 2016 - All rights reserved
ENGLISH
ABACUS CONTENTS
1 GENERAL PRESCRIPTIONS
1.1 Safety prescriptions
1.2 Installation prescriptions
1.3 Operating prescriptions
2 MODELS AND PRODUCTS DESCRIPTION
2.1 Description
2.2 Typical installation
3 PRODUCT TECHNICAL SPECIFICATIONS
4 INSTALLATION
4.1 Preliminary checks
4.2 Operating limits
4.3 Preparatory work for installation
4.4 Installing the ABACUS operator
4.4.1 Installation
4.4.2 Limit stops installation
4.4.3 Operator manual release
5 PREPARATION FOR ELECTRICAL CONNECTIONS
6 TESTING
7 PRODUCT MAINTENANCE
8 SPARE PARTS
9 DISPOSAL OF THE PRODUCT
10 WARRANTY
1 PRESCRIPTIONS
1.1 SAFETY PRESCRIPTIONS
This installation manual is addressed exclusively
to professionally skilled personnel. Read all
the instructions carefully before starting the
installation procedures. Any operations that are
not expressly set down in these instructions
are to be considered prohibited; improper use
may result in damage to the product and place
persons and property at risk.
The manufacturer declines all liability for failure
to observe best practices in gate construction
and for any possible deformation that may
occur during use of the product. Store this
manual in a safe place for future reference.
The design and construction of the devices of
which model ABACUS is composed and also
this manual are in full compliance with statutory
legislation. In consideration of potential hazards
that may arise during the installation and use
of ABACUS, also the installation procedures
must be carried out in full compliance with the
applicable laws, standards and regulations;
namely:
1.2 INSTALLATION PRESCRIPTIONS
• Before starting the installation procedures
make sure you have any additional devices
and materials that may be required to
complete the automation system with
ABACUS in consideration of the specific
application.
• Dispose of packaging materials in
compliance with local regulations.
1.3 OPERATING PRESCRIPTIONS
• No modifications can be made to any part of
the product unless specified in this manual.
Unauthorized modification of the product is
likely to lead to malfunctions and risks.
The manufacturer declines all liability
for damage caused by unauthorized
modifications.
• The parts of the automation system must
never be immersed in water or other liquids.
During the installation procedures ensure
that no liquids penetrate inside the control
unit or other open devices.
• If liquids penetrate any parts of the
automation system disconnect the electrical
power supply immediately and consult
technical service; the use of ABACUS in
such conditions may give rise to potentially
hazardous situations.
• Keep all parts of ABACUS away from heat
sources and open flames; exposure to heat
or flames may damage the devices and
cause faults, fire, or hazardous situations.
• When the equipment remains unused for a
long time, remove the optional battery and
store it in a dry place to avoid the risk of
leakage of harmful substances.
• Connect the control unit exclusively to an
electric power supply line equipped with an
efficient protective earth conductor.
• Any operations that require the housing of
ABACUS to be opened must be performed
with the control unit and the electrical power
supply disconnected; if the disconnect device
is not clearly visible, attach a warning notice
to the effect: “WARNING - MAINTENANCE IN
PROGRESS”.
• In the case of tripping of circuit breakers or
blowing of fuses, find the fault and remedy
it before resetting the circuit breaker or
changing the fuse.
• If the fault cannot be remedied using the
information given in this manual, consult
technical service.
2 PRODUCT DESCRIPTION
AND INTENDED USE
2.1 PRODUCT DESCRIPTION
Electromechanical rod operator for residential gates. The rugged die cast
aluminium structure can accommodate brush motors or single phase
motors, so the operator can be supplied in either a 24V version or a 230V
version. Aluminium housing with weather resistant powder coating.

18 COMUNELLO ®Copyright 2016 - All rights reserved
2.2 TYPICAL INSTALLATION
E
C C
F F
G
BB
H
A
D
KEY
A OPERATOR
B OPENING PHOTOCELLS
C CLOSING PHOTOCELLS
D FLASHING LIGHT
E KEY SELECTOR SWITCH
F OPENING LIMIT STOP
G CENTRAL CLOSING STOP
H EXTERNAL CONTROL UNIT
3 PRODUCT TECHNICAL SPECIFICATIONS
ABACUS 220
ABACUS
220 ONE
ABACUS 220 ABACUS 300
ABACUS
300 ONE
ABACUS 500 ABACUS 500
ABACUS
500 ONE
ABACUS 500
Power supply 24V
230V ~ 50Hz
24V
230V ~ 50Hz
24V
230V ~ 50Hz
Operator power supply 70 W 180 W 110 W 280 W 110 W 280 W
Current input 3 A 0,8 A 5 A 1,2 A 5 A 1,2 A
MAXIMUM THRUST 1500 N 1400 N 2000 N 1800 N 2000 N 1800 N
NOMINAL THRUST 500 N 400 N 600 N 700 N 600 N 700 N
Intermittenza di lavoro 30% 0,3 Intensive 0,4 Intensive 0,4
Grado di protezione IP 44 D
Classe di isolamento II 1 earthing II 1 earthing II 1 earthing
Working temperature da -20°C a + 50°C
Peso max del cancello SEE THE CHART
Velocità a vuoto 15 mm/s 14 mm/s 22 mm/s 15 mm/s 22 mm/s 15 mm/s
Weight 8,2 Kg 8,6 Kg 11,2 Kg 11,6 Kg 11,9 Kg 12,3 Kg
LEAF WEIGHT (Kg)
LEAF LENGHT (m)
LIMITS OF USE - ABACUS 220
LEAF WEIGHT (Kg)
LEAF LENGHT (m)
LIMITS OF USE - ABACUS 300
LEAF WEIGHT (Kg)
LEAF LENGHT (m)
LIMITS OF USE - ABACUS 500
4 INSTALLATION
4.1 PRELIMINARY CHECKS
Before starting the installation work, check the condition of the product
components, the suitability of the chosen gate operator model and the
suitability of the intended installation environment:
• Ensure that all material used is in perfect condition and t for purpose.
• Make sure that the mechanical structure of the gate is suitable for
automation. This product cannot be used to automate a gate unless the
gate is already in good working order and safe; furthermore, it cannot
remedy defects caused by incorrect installation or lack of maintenance
of the gate.
• Check that the operating conditions of the devices are compatible with
the stated operating limits.
• Move the gate leaves manually in both directions to ensure the force
required is constant throughout the full range of movement.
• Move the gate leaves manually to any position then release them to
check that they remain stationary.
• Check that the area in which the operator is to be mounted is compatible
with the size of the unit and make sure there is sufcient clearance for
the full movement of the arm.
• Ensure that there is sufcient space around the operator to perform the
manual release procedure.
• Ensure that the surfaces on which the devices are to be mounted are
solid and able to provide a secure anchorage.
• Ensure that all devices to be installed are in a sheltered location and
such as to minimize the risk of accidental impact.
4.2 OPERATING LIMITS
Before starting the installation work make sure the operator is correctly sized
in relation to the dimensions and length of the gate leaves and within the
limits of the values given in the chapter “Product technical specications”.
4.3 PREPARATORY WORK FOR INSTALLATION
With reference to gures 1A and 1B, choose the approximate position in
which each component of the system is to be installed and choose the
most appropriate connection layout. List of components required:
• Electromechanical operators
• Pair of photocells
• Pair of opening and closing limit stops
• Posts for photocells
• Flashing light
• Keyswitch or digital keypad
• Vertical electric lock for gate leaves of more than 3 m
• Control unit
4.4 INSTALLING THE ABACUS OPERATOR
4.4.1 INSTALLATION:
• Release the operator as shown in FIG. 2 and FIG. 3.
• Remove the rear cover as shown in FIG. 4.
• Perform the manual release as described in heading 4.4.3.
• Choose the position for the gate operator in correspondence with a
sturdy cross member on the gate.
• Secure plate Z1 to the gate pillar on a provisional basis, orienting it in
accordance with the width of the pillar (FIG. 5A).
• Cut and provisionally x the drilled plate (FIG. 5B) taking account of the
dimensions shown in FIG. 1A and FIG. 1B
• With the gate fully closed, provisionally x plate Z2 to the gate leaf. Weld
the drilled plate (FIG. 5C) observing the dimensions shown in FIG. 1A
and FIG. 1B.
• Couple the operator to the rear bracket using the supplied pin (FIG. 6).

19
COMUNELLO ®Copyright 2016 - All rights reserved
ENGLISH
• Insert mobile pin P into the hole in the front bracket and secure it with the
supplied screw and washer (FIG. 6).
• Tighten the screw in the rear bracket.
• With the operator released, manually check that the gate leaf reaches
the required opening and closing positions and that the operator does
not interfere with the gate leaf or the pillar.
• Weld the plates and secure them permanently.
• Make the electrical connections as described in Ch 5.
• Lock the operator as described in heading 4.4.3.
• Perform a series of open and close cycles and check that the installation
has been carried out properly in accordance with best technical practice.
• Close the cover and secure it with the 4 screws provided.
4.4.2 INSTALLATION OF LIMIT STOPS AND SWITCHES
For each installation it is essential to equip the gate with mechanical closing
and opening limit stops. As an additional safety measure you can also use
the adjustable limit stops / switches incorporated in the operator.
Adjust the mechanical stop as follows:
• Bring the gate leaf to its maximum closing position until it comes to rest
against the limit stop anchored to the ground (FIG. 7).
• Loosen the screw of limit stop “A” sufciently to be able to move it until
touching the mobile pin (FIG. 8).
• Perform the same operation in the maximum opening position (with the
other limit stop).
In the case of electromechanical limit switches, end stops “A” and
“B” must locate against the mobile pin, thus causing the switch to trip.
4.4.3 OPERATOR MANUAL RELEASE
Perform the manual release procedure when the gate is to be opened
manually. Activation of the release system may result in uncontrolled
movements of the gate in the presence of imbalance or mechanical faults.
In the case of Abacus 300/500, proceed as follows:
• Open the plastic cover and insert the customized key (FIG. 2).
• Turn the key clockwise through 360° (FIG. 9). This action serves to
disengage the gear thereby allowing the gate to be opened manually.
(FIG.10).
• To restore automatic control of the gate, return the key to its initial
position (FIG. 11).
• Remove the key and stow it in a safe place that is known only to persons
authorized to use the gate.
In the case of ABACUS 220 the key is replaced by a handle with a
customized socket. Turn the handle through 90° in the direction shown on
the housing (FIG. 3).
5 PREPARATION FOR ELECTRICAL
CONNECTIONS
WARNING! To connect to the network, use a multipolar cable provided by
regulations by the book’s unit.
• Perform the manual release as illustrated in heading 4.4.3.
• Remove the plastic cover as shown in FIG. 4.
• Loosen cable gland “G” located on the lower side of the operator. FIG.
12.
• Insert the power and encoder cable as shown in FIG. 13.
• Connect the wires to the terminal strip and connect the earth conductor
to the ring terminal in accordance with the indications on the adjacent
label FIG. 14.
• Secure the cable by tightening the cable gland FIG. 15.
In case the capacitor breaks down (Abacus 230 V only) it can be replaced
as follows:
• Perform the manual release as illustrated in heading 4.4.3.
• Remove the plastic cover as shown in FIG. 4.
• Remove the capacitor cover by unscrewing the two screws as shown in
FIG.16.
• Remove the capacitor by disconnecting it from the terminal strip and
replace it with an identical new component.
6 TESTING
Each part of the automation system, e.g. safety edges, photocells,
emergency stop, etc. must be tested; follow the procedures shown in
the instruction manuals supplied with the devices in question. Perform the
following sequence of operations for testing of ABACUS:
• Check that all the prescriptions in this manual have been followed
scrupulously, with special attention to the matters set down in chapter 1
“Prescriptions”.
• Using the supplied control or stopping devices (key selector switch,
pushbuttons or radio transmitters), perform gate opening, closing and
stopping tests and make sure the gate responds correctly to the various
commands.
• Check operation of all the system’s safety devices (photocells, safety
edges, emergency stop, etc.) one by one.
• If potentially hazardous situations caused by movement of the gate
leaves have been eliminated by limitation of impact force, the associated
force must be measured as prescribed in standard EN 12445.
7 PRODUCT MAINTENANCE
Maintenance must be carried out at regular intervals by qualied personnel
in compliance with the provisions of statutory legislation and the regulations
in force. ABACUS must be serviced at least once every 6 months or after
10.000 operating cycles since the last service.
• Disconnect the operator from all power supplies
• Check all the moving parts and replace any worn parts
• Check all parts of the automation system for signs of deterioration
8 SPARE PARTS
Spare parts can be purchased by contacting technical service.
9 DISPOSAL
At the end of its useful life the automation system must be dismantled by
qualied personnel and the materials must be recycled or disposed of in
compliance with the local legislation in force.
10 WARRANTY
fmndjklsvnbdsjkl Fratelli Comunello SpA provides a warranty for 24 months
for the correct functioning of the actuators from the date of manufacture,
provided that the performance specications indicated in the product
instruction manuals are respected. Free of charge repair and replacement
of components that are found to be faulty according to the indisputable
judgment of the company’s technical staff shall be guaranteed at the
sole discretion of Fratelli Comunello Spa, and so excluding any claim for
damages made by others. Warranty material shall be returned to Fratelli
Comunello S.p.a. headquarters carriage paid and will then be shipped to
the customer carriage unpaid. The material found to be faulty and returned
to Fratelli Comunello S.p.a. shall remain property of the Seller. Any cost
resulting from any work needed to repair the defect or to replace the
material shall be charged to the Buyer. No compensation shall be allowed
for the period of device inactivity. Work under warranty does not prolong the
warranty period. The defect of the product shall be reported by the Buyer
within 8 (eight) days from its discovery or from the date of delivery of the
goods, under penalty of invalidation of the warranty. Such claim shall be
notied in writing.
Warranty does not cover:
Any product defect or damage that may have been incurred during
transport; any defect or damage arising from any fault and/or from neglect,
inadequacy and misuse of the electrical wiring in the Buyer’s property; any
defect or damage caused by any repairs carried out by non authorised
personnel or by incorrect use/installation (with reference to this, system
maintenance is recommended every 6 months) or if not original spare parts
are used; any defect caused by chemicals or atmospheric conditions. The
warranty does not cover any cost neither for consumable materials nor for
alleged defects or convenient surveys.
Product Features Fratelli Comunello SpA products are subjected to
continue changes and improvements; their technical features and image
may therefore change without previous notice.
Competent court
Since the contract of sale is conrmed by an Order Conrmation drawn up
in Rosà, any such dispute shall be settled by the laws of Italy and by the
court of Vicenza (VI).

20 COMUNELLO ®Copyright 2016 - All rights reserved
ABACUS 220 / 300 / 500 / ONE
INSTALLATIONS-UND GEBRAUCHSANLEITUNG
Fratelli Comunello S.p.A.
Unternehmen mit UNI EN ISO 9001:2008
zertizierten Qualitätssystem
(Bescheinigung n° 50 100 11235 Rev. 02)
CE-KONFORMITÄTSERKLÄRUNG
Der Unterzeichner, Herr COMUNELLO LUCA, der den folgenden Hersteller vertritt:
F.lli COMUNELLO spa
Via Cassola 64, 36027 Rosà (VI) Italy
RKLÄRT, dass die anbei beschriebene Ausrüstung:
Beschreibung Automatisierung für Drehügeltüren mit Kolben.
Modell ABACUS 220 / 300 / 500 / ONE
den Gesetzesbestimmungen entspricht, die folgende Richtlinien umsetzen:
• 2014/30/EU (EMCD-Richtlinie) • 2011/65/EU (RoHS-Richtlinie)
• 2014/35/EU (LVD-Richtlinie)
und dass alle folgenden Normen und/oder technischen Spezikationen angewendet wurden:
EN61000-6-2:2005 + EN61000-6-3:2007
EN62233 :2008
EN60335-1 :2012
sowie ihre nachträglichen Änderungen.
Rosà (VI) – Italien
21-04-2016
Außerdem wird erklärt, dass es nicht erlaubt ist, die Automatisierung in Betrieb zu setzen, solange die Anlage, in die sie eingebaut wird
oder mit der sie zusammengebaut wird, identiziert wurde und deren Konformität mit den Erfordernissen der Richtlinie 2006/42/EG und
der entsprechenden nationalen Gesetzgebung erklärt wurde.
Dr. LUCA COMUNELLO
Rechtsvertreter der Firma FRATELLI COMUNELLO s.p.a.
This manual suits for next models
5
Table of contents
Languages:
Other Comunello Automation Gate Opener manuals

Comunello Automation
Comunello Automation MAST SLIM GMASTS05N0G00A User manual

Comunello Automation
Comunello Automation LIWIN User manual

Comunello Automation
Comunello Automation DART ADJUSTABLE User manual

Comunello Automation
Comunello Automation RAM 220 User manual

Comunello Automation
Comunello Automation CONDOR 220 User manual

Comunello Automation
Comunello Automation INDEX EURO User manual

Comunello Automation
Comunello Automation DART User manual

Comunello Automation
Comunello Automation DART SLIM User manual

Comunello Automation
Comunello Automation SWIFT User manual

Comunello Automation
Comunello Automation MAST GMAST005N0G00A User manual