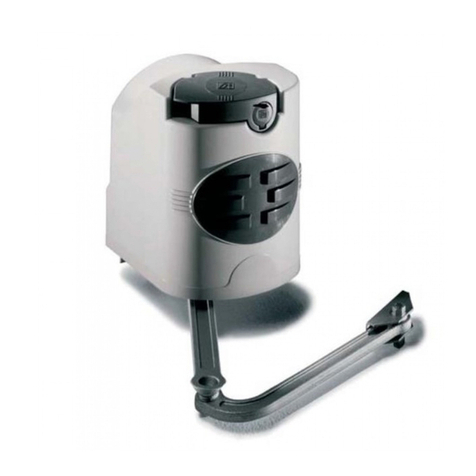
CAME FA40230CB User manual

Installation manual
FA40230CB
En
g
lish
E
N
119DW02EN
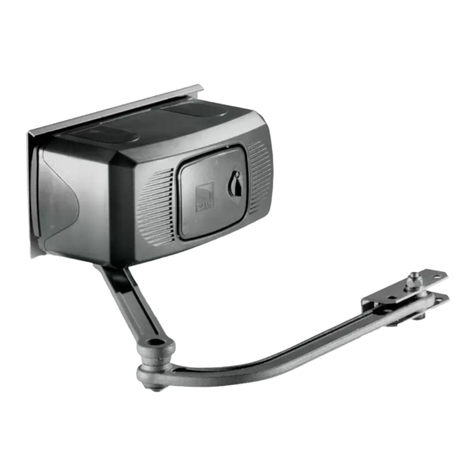
OPERATOR
FOR SWING GATES
www.metalines.com

Page 2 - Manual code: 119DW02EN vers. 3 03/2014 © CAME Cancelli Automatici S.p.A. - The data and information provided in this manual are subject to change at any time without prior notice by CAME Cancelli Automatici S.p.A.
Premise
• Employ this product only for the use for which it was expressly made. Any
other use is dangerous. CAME Cancelli Automatici S.p.A is not liable for any
damage caused by improper, wrongful and unreasonable use • Keep these
warnings together with the installation and operation manuals that come with
the operator.
Before installing
(checking what's there: if your evaluation is negative, do not proceed before
having complied with all safety requirements)
• Check that the automated parts are in good mechanical order, that the ope-
rator is level and aligned, and that it opens and closes properly. Make sure you
have suitable mechanical stops • If the operator is to be installed at a height of
over 2.5 m from the ground or other access level, make sure you have any ne-
cessary protections and/or warnings in place • If any pedestrian openings are
fitted into the operator, there must also be a a system to block their opening
while they are moving • Make sure that the opening automated door or gate
cannot entrap people against the fixed parts of the operator • Do not install the
operator upside down or onto elements that could yield and bend. If necessary,
add suitable reinforcements to the anchoring points • Do not install door or
gate leaves on tilted surfaces • Make sure any sprinkler systems cannot wet
the operator from the ground up • Make sure the temperature range shown
on the product literature is suitable to the climate where it will be installed •
Follow all instructions as improper installation may result in serious bodily
injury • It is important to follow these instructions for the safety of people.
Keep these instructions.
Installing
• Suitably section o and demarcate the entire installation site to prevent
unauthorized persons from entering the area, especially minors and children
• Be careful when handling operators that weigh over 20 kg. If need be, use
proper safety hoisting equipment • All opening commands (that is, buttons,
key switches, magnetic readers, and so on.) must be installed at least 1.85
m from the perimeter of the gate's working area, or where they cannot be
reached from outside the gate. Also, any direct commands (whether buttons,
touch panels, and so on) must be installed at least 1.5 m from the ground and
must not be reachable by unauthorized persons • All maintained action com-
mands, must be fitted in places from which the moving gate leaves and transit
and driving areas are visible • Apply, if missing, a permanent sign showing the
position of the release device • Before delivering to the users, make sure the
system is EN 12453 standard compliant (regarding impact forces), and also
make sure the system has been properly adjusted and that any safety, protec-
tion and manual release devices are working properly • Apply Warning Signs
(such as the gate's plate) where necessary and in a visible place
Special user-instructions and recommendations
• Keep gate operation areas clean and free of any obstructions. Make sure that
the photocells are free of any overgrown vegetation and that the operator's
area of operation is free of any obstructions • Do not allow children to play
with fixed commands, or to loiter in the gate's maneuvering area. Keep any
remote control transmitters or any other command device away from children,
to prevent the operator from being accidentally activated. • The apparatus
may be used by children of eight years and above and by physical ly, mentally
and sensorially challenged people, or even ones without any experience, pro-
vided this happens under close supervision or once they have been properly
instructed to use the apparatus safely and to the potential hazards involved.
Children must not play with the apparatus. Cleaning and maintenance by users
must not be done by children, unless properly supervised • Frequently check
the system for any malfunctions or signs of wear and tear or damage to the
moving structures, to the component parts, all anchoring points, including ca-
bles and any accessible connections. Keep any hinges, moving joints and slide
rails properly lubricated • Perform functional checks on the photocells and
sensitive safety edges, every six months. To check whether the photocells are
working, wave an object in front of them while the gate is closing; if the ope-
rator inverts its direction of travel or suddenly stops, the photocells are wor-
king properly. This is the only maintenance operation to do with the power on.
Constantly clean the photocells' glass covers using a slightly water-moistened
cloth; do not use any solvents or other chemical products that may ruin the
devices • If repairs or modifications are required to the system, release the
operator and do not use it until safety conditions have been restored • Cut
o the power supply before releasing the operator for manual openings and
before any other operation, to prevent potentially hazardous situations. Read
the instructions • If the power supply cable is damaged, it must be replaced
by the manufacturer or authorized technical assistance service, or in any case,
by similarly qualified persons, to prevent any risk • It is FORBIDDEN for users
to perform any OPERATIONS THAT ARE NOT EXPRESSLY REQUIRED OF THEM
AND WHICH ARE NOT LISTED in the manuals. For any repairs, modifications
and adjustments and for extra-ordinary maintenance, CALL TECHNICAL ASSI-
STANCE • Log the job and checks into the periodic maintenance log.
Additional special recommendations for everyone
• Keep away from hinges and mechanical moving parts • Do not enter the
operator's area of operation when it is moving • Do not counter the operator's
movement as this could result in dangerous situations • Always pay special
attention to any dangerous points, which have to be labeled with specific pic-
tograms and/or black and yellow stripes • While using a selector switch or
a command in maintained actions, keep checking that there are no persons
within the operating range of any moving parts, until the command is released
• The gate may move at any time and without warning • Always cut o the
power supply before performing any maintenance or cleaning
Danger of hand crushing
Danger! High voltage.
No transiting while maneuvering
WARNING!
important safety instructions for people:
READ CAREFULLY!
Danger of foot crushing
www.metalines.com

8
4
1
2
6
7
14
15
1617
13
1211109
18
5
3
19
Page 3 - Manual code: 119D W02 EN vers. 3 03/2014 © CAME Cancelli Automatici S.p.A. - The data and information provided in this manual are subject to change at any time without prior notice by CAME Cancelli Automatici S.p.A.
KEY
This symbol indicates parts to read carefully.
⚠This symbol indicates parts about safety.
☞This symbol tells you what to say to the end users.
DESCRIPTION
The operator consists of die cast aluminium casing with an irreversible worm screw inside and a plastic ABS cover which houses the control board. With arms,
brackets and mechanical end stops.
Intended use
The operator has been designed and built by CAME Cancelli Automatici S.p.A. in compliance with current safety standards to motorise swing gates for residential or
condominium use.
Any installation and operation that differs from what is set out in this manual is prohibited.
Limits of use
Type FA40230CB
Max. leaf length (m) 2,3 2 1,5 1
Max. leaf weight (kg) 200 215 250 300
REGULATORY REFERENCES
Came Cancelli Automatici is a company with an ISO 9001-certified company quality management system and an ISO 14001-certified environmental management
system.
The product in question complies with the regulations referred to in the declaration of conformity.
Packing list
1. 1 x operator
2. 1 x pillar bracket
3. 1 x rubber shim
4. 1 x transmission arm
5. 1 x driven arm
6. 1 x gate bracket
7. 2 x mechanical end runs
8. 1 x installation manual
9. 1 x washer for slow shaft
10. 1 x UNI5739 M10x14 screw
11. 1 x Ø10 plug
12. 2 x UNI7474 M8 nuts
13. 2 x UNI5739 M6x10 screws
14. 2 x UNI6957 2.9x19 screws
15. 2 x UNI6593 Ø6 washers
16. 2 x pins for arms
17. 2 x UNI5933 M8x20 screws
18. 1 x UNI6592 Ø12 washer
19. 2 x release keys
Technical data
Type FA40230CB
Protection rating (IP) 54
Power supply (V - 50/60 Hz) 230 AC
Motor power supply (V - 50/60 Hz) 230 AC
Assorbimento (A) 1.4
Power draw (A) 160
Torque (Nm) 180 max.
Opening time to 90° (sec) 18
Duty cycle 30 %
Operating temperature (°C) -20 ÷ +55
Motor thermal protection (°C) 150
Insulation class I
Weight (kg) 12,7
www.metalines.com

3
8
4
7
6
5
2
11
10
1
9
200 235
230
173 100
81,5
40
120
60
18
Page 4 - Manual code: 119DW02EN vers. 3 03/2014 © CAME Cancelli Automatici S.p.A. - The data and information provided in this manual are subject to change at any time without prior notice by CAME Cancelli Automatici S.p.A.
Dimensions (mm)
Description of the components
1. Cover
2. Gearmotor
3. Control board
4. Pillar bracket
5. Transmission arm
6. Driven arm
7. Gate bracket
8. Unlocking hatch
9. Mechanical end stops
10. LED control board
11. Straight arm with 001STYLO-BD slide rail
(optional accessory)
www.metalines.com

6
1
4
2
6
6
6
9
3
5
8
7
7
8
8
Page 5 - Manual code: 119D W02 EN vers. 3 03/2014 © CAME Cancelli Automatici S.p.A. - The data and information provided in this manual are subject to change at any time without prior notice by CAME Cancelli Automatici S.p.A.
Example of a system
1. FA40230CB operator
2. FA40230 gearmotor
3. Flashing light
4. Antenna
5. Key selector
6. Photocells
7. Photocell column
8. End run
9. Inspection chamber
Examples of use
www.metalines.com

Page 6 - Manual code: 119DW02EN vers. 3 03/2014 © CAME Cancelli Automatici S.p.A. - The data and information provided in this manual are subject to change at any time without prior notice by CAME Cancelli Automatici S.p.A.
Connection Cable type Cable length
1 < 10 m
Cable length
10 < 20 m
Cable length
20 < 30 m
230 V AC board power supply
FROR CEI
20-22
IEC EN
50267-2-1
3G x 1.5 mm23G x 2.5 mm23G x 4 mm2
230 V AC motor power supply 4G x 1 mm24G x 1.5 mm24G x 2.5 mm2
Flashing light 2 x 0.5 mm22 x 1 mm22 x 1.5 mm2
Photocell transmitters 2 x 0.5 mm22 x 0.5 mm22 x 0.5 mm2
Photocell receivers 4 x 0.5 mm24 x 0.5 mm24 x 0.5 mm2
Control and safety devices 2 x 0.5 mm22 x 0.5 mm22 x 0.5 mm2
Antenna RG58 max. 10 m
Encoder TWISTED max. 30 m
N.B.: If the cables differ in length compared to what is shown in the table, the cable cross-section is determined according to the actual current draw of the
devices connected and according to the provisions of the IEC EN 60204-1 standard.
For connections that require several, sequential loads, the sizes given on the table must be re-evaluated based on actual power draw and distances. When
connecting products that are not specified in this manual, please refer to the documentation provided with said products.
Types of cables and minimum thicknesses
GENERAL INSTALLATION INSTRUCTIONS
⚠Installation must be carried out by qualified and experienced personnel in compliance with applicable regulations.
Preliminary checks
⚠Before starting installation:
• Any emergency cut off devices must be built into the fixed hard-wiring circuits and compliant with the cabling regulations
• Means for disconnections must be incorporated in the fixed wiring in accordance with the wiring rules;
• Prepare suitable piping and ducts for routing the electrical cables, ensuring protection against mechanical damage;
• Prepare a drain pipe to prevent stagnation that may cause oxidation;
• Make sure that any connections within the container (made to ensure the continuity of the protection circuit) are fitted with additional insulation compared to
the other internal conductor parts;
• Make sure the gate structure is sturdy enough, that the hinges are in proper working order and that there is no friction between the moving and fixed parts;
• Make sure there are opening and closing mechanical stops.
Tools and materials
Make sure you have all the tools and materials you will need for the installation at hand to work in total safety and compliance with current standards and regulations.
The figure shows some examples of installer’s tools.
www.metalines.com

173
81,5
40
120
100
60
18
AB
120 min.
C MAX
47,5
310 max.
200 min.
Page 7 - Manual code: 119D W02 EN vers. 3 03/2014 © CAME Cancelli Automatici S.p.A. - The data and information provided in this manual are subject to change at any time without prior notice by CAME Cancelli Automatici S.p.A.
INSTALLATION
⚠The following illustrations are only examples, given that the space for securing the operator and accessories varies depending on the overall dimensions. The
installation technician is responsible for choosing the most suitable solution.
Installing corrugated tubes
Set up corrugated tubes for the connections coming from the junction box.
N.B. the number of tubes depends on the type of system installed and any accessories.
Two corrugated tubes are required where the FA40230CB operator is installed.
Securing the brackets
N.B. the drawings refer to installation of the left-hand gearmotor. The installation of the right-hand gearmotor is symmetrical.
Determine the fixing point for the gate bracket and calculate the fixing point of the pillar bracket, respecting the values shown in the drawings and table.
Application size (mm)
Leaf opening (°) A C MAX B
90° 140 0 - 200 420
90° 160 - 180 200 380
110° 200 - 220 0 - 50 400
www.metalines.com

3
4
7
5
6
5
1
2
Page 8 - Manual code: 119DW02EN vers. 3 03/2014 © CAME Cancelli Automatici S.p.A. - The data and information provided in this manual are subject to change at any time without prior notice by CAME Cancelli Automatici S.p.A.
Mark the fixing points on the pillar bracket and gate bracket. The measurements of the distance between the holes in the brackets are indicated in the dimensions
paragraph.
Drill the fixing points, insert the anchors or use suitable inserts to secure the brackets.
N.B. the drawings are mere examples. It is up to the installer to choose the most suitable solution depending on leaf type and thickness.
Before installing the operator, remove the cover from the gearmotor. Remove the protective lock cap from the release hatch, insert the key in the lock and turn it
().
Open the hatch and unscrew the screw securing the cover to the gearmotor ().
Lift the cover by pulling gently on the side ().
Remove the pillar bracket from the gearmotor ().
Secure the brackets with suitable screws. Insert the rubber shim into the pillar bracket.
www.metalines.com

a
b
d
e
f
g
h
f
g
i
h
c
Page 9 - Manual code: 119D W02 EN vers. 3 03/2014 © CAME Cancelli Automatici S.p.A. - The data and information provided in this manual are subject to change at any time without prior notice by CAME Cancelli Automatici S.p.A.
Securing the gearmotor
Prepare the electrical cables needed for the connections, passing them through the cable glands and securing them to the U-bolt on the pillar mounting
bracket. Insert the gearmotor into the pillar bracket and secure it with screws and nuts (a b).
Insert the plug (c) into the hole in the gearmotor shaft. Secure the transmission arm to the shaft with the slow shaft washer (d) and the screw (e).
Secure the drive arm to the transmission arm using the pin, the screw and the washer ().
Release the gearmotor, secure the drive arm to the gate bracket as shown in the drawing ().
www.metalines.com

j
Page 10 - Manual code: 119DW02EN vers. 3 03/2014 © CAME Cancelli Automatici S.p.A. - The data and information provided in this manual are subject to change at any time without prior notice by CAME Cancelli Automatici S.p.A.
Secure the stop using the screw (j).
Mechanical end stop
Centre of the arm
⚠Caution:iftherearenoendstops,endrunsmustbefitted.
Securing mechanical stops
Unlock the gearmotor.
During opening.
Open the leaf completely. Mark the casing by the centre of the arm.
Close the leaf manually Insert the mechanical stop as shown. The mark on the casing must match the groove on the end run.
www.metalines.com

j
Page 11 - Manual code: 119 DW 02E N vers. 3 03/2014 © CAME Cancelli Automatici S.p.A. - The data and information provided in this manual are subject to change at any time without prior notice by CAME Cancelli Automatici S.p.A.
Secure the stop using the screw (j).
Mechanical end stop
Centre of the arm
Open the leaf manually. Insert the mechanical stop as shown.
During closing.
Mark the casing by the centre of the arm.
www.metalines.com

-
+
-
+
-
+
-
+
Page 12 - Manual code: 119DW02EN vers. 3 03/2014 © CAME Cancelli Automatici S.p.A. - The data and information provided in this manual are subject to change at any time without prior notice by CAME Cancelli Automatici S.p.A.
Similarly, adjust the opening end run using the anchor on the other stop (see drawing).
Determining the end run points
For left-hand gearmotor (internal view).
With the gearmotor released and the leaf closed, adjust the closing end run anchor, turning it clockwise and anti-clockwise. Secure the anchor with the nut
(see drawing).
www.metalines.com

-
+
-
+
-
+
-
+
Page 13 - Manual code: 119D W02 EN vers. 3 03/2014 © CAME Cancelli Automatici S.p.A. - The data and information provided in this manual are subject to change at any time without prior notice by CAME Cancelli Automatici S.p.A.
For right-hand gearmotor (internal view).
With the gearmotor released and the leaf closed, adjust the closing end run anchor, turning it clockwise and anti-clockwise. Secure the anchor with the nut (see
drawing).
Similarly, adjust the opening end run using the anchor on the other stop (see drawing).
www.metalines.com

1
22
23
25
24
2
5
10 12
11 4
13
16
17
18
21 20 19 15
14
6
6
9
3
3
7
8
Page 14 - Manual code: 119DW02EN vers. 3 03/2014 © CAME Cancelli Automatici S.p.A. - The data and information provided in this manual are subject to change at any time without prior notice by CAME Cancelli Automatici S.p.A.
ELECTRICAL CONNECTIONS AND PROGRAMMING
⚠Caution! Before intervening on the control panel, disconnect mains power and remove the batteries if inserted.
The control board is powered at 230 VAC with a frequency of 50-60 Hz.
The control devices and accessories are powered at 24 VAC.
⚠The total power of the accessories should not exceed 40 W.
The functions on the input and output contacts and the adjustments of the times and management of the users are set and viewed on the display managed by a software
program.
All the connections are protected by quick fuses.
Description of the components
1. Transformer
2. 230 V power supply terminal block
3. Transformer terminal block
4. Gearmotor terminal block
5. Control and safety device terminal block
6. Encoder terminal block
7. Transponder device terminal block
8. Keypad selector terminal block
9. Antenna terminal block
10. Accessory fuse
11. Panel fuse
12. Line fuse
13. Transformer thermal protection terminal block
14. Power indicator LED
15. Programming indicator LED
16. Display
17. Programming buttons
18. FA001 board connection connector
19. Memory roll card connector
20. R700 or R800 board connector
21. AF board connector
22. LED control board
23. Connector for connection to the ZF4 panel
24. Terminal block for connection to the second LED control
board
25. Gate status indicator LED
FUSE TABLE
Line fuse 5 A-F
Panel fuse 630 mA-F
Accessory fuse 1,6 A-F
Electric lock fuse 3.15 A-F
www.metalines.com

24V 12V 0 U V W X Y E L1T L2T CT L N
10 11 ES
L2T L1T
1 2 3 4
0 12 24
24V 12V 0
10 11 ES TS 1 2 3 3P 4 5 7 CX CY
U V W X Y E
Page 15 - Manual code: 119 DW0 2EN vers. 3 03/2014 © CAME Cancelli Automatici S.p.A. - The data and information provided in this manual are subject to change at any time without prior notice by CAME Cancelli Automatici S.p.A.
Power supply
Warning devices
Power supply 230 VAC
frequency 50/60 Hz
Electric lock 12 V - 15 W max
FA001 - LED control board. Indicates the stages
of movement of the gate and anomalies.
Gate open indicator light (contact capacity: 24 V - 3 W max.).
Indicates the status of the gate, see F 10 function.
Terminals for powering the
accessories at 24 V AC.
Flashing light (contact
capacity: 230 V - 25 W max.).
Flashes during gate opening
and closing.
Transformer
Black
Red
White
Orange
Purple
Blue
Cycle or courtesy lamp (contact rated for: 230 V - 25 W Max).
Auxiliary connection to freely position outdoor lamp, to enhance lighting when parking or
driving off.
Cycle: it stays lit from the moment the lead starts opening until it is completely closed
(including the automatic closing time).
Courtesy: stays lit for a set time of 180 seconds.
www.metalines.com

CANCELLIAUTOMATICI
R700
CANCELLIAUTOMATICI
R800
AF
CAME
ACCESSCONTROL
10 11 ES TS 1 2 3 3P 4 5 7 CX CY
+ENC1- +ENC2- S1 GND A B
Page 16 - Manual code: 119DW02EN vers. 3 03/2014 © CAME Cancelli Automatici S.p.A. - The data and information provided in this manual are subject to change at any time without prior notice by CAME Cancelli Automatici S.p.A.
Antenna with RG58 cable.
AF card
Red
Black
White
Blue
Stop button (NC contact) Stops the gate with the exclusion of automatic clo-
sing. To resume movement, press the control button or other control device.
N.B. if not in use, select 0 (Disabled) from the F 1 function.
OPEN ONLY function from the control device (NO contact)
OPEN-STOP-CLOSE-STOP (sequential) function / OPEN-
CLOSE-REVERSE (step-by-step) from the control device (NO
contact)
See F7 function
PARTIAL OPENING/PEDESTRIAN function from the control device
(NO contact)
CLOSE ONLY function from the control device (NO contact)
Contact (NO) for transponder or card
reader with R700 card).
Contact (NO) for keypad with
R800 card).
N.B. insert the encoding card (R700)
to recognise the sensor (TSP00) or the
card reader (LT001).
N.B. insert the encoding
card (R800) to recognise the
keypad (S6000/S7000).
Control devices
www.metalines.com

FA40230FA40230CB
U V W X Y E
+ ENC1 - + ENC2 -
FA40230CB
U V W X Y E
+ ENC1 - + ENC2 -
FA40230FA40230CB
U V W X Y E
+ ENC1 - + ENC2 -
U V W X Y E
+ ENC1 - + ENC2 -
FA40230CBFA40230
FA40230CBFA40230
Page 17 - Manual code: 119DW 02 EN vers. 3 03/2014 © CAME Cancelli Automatici S.p.A. - The data and information provided in this manual are subject to change at any time without prior notice by CAME Cancelli Automatici S.p.A.
Electrical connections:
operator installed on the right (internal view).
Electrical connections:
operator installed on the left (internal view).
(Default configuration)
Encoder wire colour:
+ = White
ENC = Brown
- = Green
Electrical connections:
operator installed on the left and gearmotor installed on the
right (internal view) with operator with delayed closing.
(Default configuration)
Electrical connections:
gearmotor installed on the left and operator installed
on the right (internal view) with operator with delayed
closing.
Encoder wire colour:
+ = White
ENC = Brown
- = Green
Connection between the gearmotor with encoder and the second gearmotor
Connecting the gearmotor with encoder
www.metalines.com

2 3 3P 4 5 7 CX CY 10 11 ES TS 1 2 3 3P 4 5 7 CX CY
10 11 ES TS 1 2 3 3P 4 5 7 CX CY
DF
RX TX
./ # .#
RX TX
Page 18 - Manual code: 119DW02EN vers. 3 03/2014 © CAME Cancelli Automatici S.p.A. - The data and information provided in this manual are subject to change at any time without prior notice by CAME Cancelli Automatici S.p.A.
Photocells
Configure the CX or CY (NC) contact, input for safety
devices such as photocells, compliant with the EN 12978
standard.
See CX (F2 function) or CY (F3 function) input functions in:
- C1 reopening during closing. While the leaves are closing, the
opening of the contact causes the reversal of the direction of
movement until completely open;
- C2 reclosing during opening. While the leaves are opening,
the opening of the contact causes the reversal of the direction of
movement until completely closed;
- C3 partial stop. The leaves stop, if moving, with consequent
preparation for automatic closing (if the automatic closing function
has been enabled);
- C4 waiting for obstacle. The leaves stop, if in movement, with
consequent resumption of movement after the obstacle has been
removed.
N.B. if the CX and CY contacts are not used, they must be
disabled in programming.
DF with DFI connection
control panel.
Photocells
DIR
Photocells
DELTA-S
Photocells
DELTA
Safety devices
Sensitive edges
Configure the CX or CY (NC) contact, input for safety
devices such as sensitive edges, compliant with the
EN 12978 standard. See CX (F2 function) or CY (F3
function) input functions in:
- C7 reopening during closing. While the gate is
closing, the opening of the contact causes the
reversal of the direction of movement until completely
open;
- C8 reclosing during opening. While the gate is
opening, the opening of the contact causes the
reversal of the direction of movement until completely
closed.
N.B. if the CX and CY contacts are not used, they
must be disabled in programming.
www.metalines.com

+ENC2- S1 GND A B
10 11 ES TS 1 2 3 3P 4 5 7 CX CY
./
.#
#
&53)"),%M!
48
48
48 #
.#
DELTA
DIR / DELTA S
CANCELLIAUTOMATICI
R700
ACCESSCONTROL
CANCELLIAUTOMATICI
R800
S7000 S6000
AF
TSP00LT001
24V 12V 0 U V W X Y E L1T L2T CT L N
L2T L1T
1 2 3 4
0 12 24
Page 19 - Manual code: 119 DW0 2EN vers. 3 03/2014 © CAME Cancelli Automatici S.p.A. - The data and information provided in this manual are subject to change at any time without prior notice by CAME Cancelli Automatici S.p.A.
Memory roll
R700 card
R800 card
AF card
Photocell safety connection
With each opening or closing command, the panel checks that the photocells work. Any
anomaly inhibits any command.
Use the F 5 function to select on which inputs to activate the link.
Memorising data
To enter, modify, and remove users or control the operator via radio, insert the AF card.
If using the transponder or the card reader, insert the R700 card. If using the keypad, on the other hand, insert the R800 card.
The memory roll is used to memorise user data and system configuration, which can then be used in another control board.
Adjusting motor torque
To vary the motor torque, move the indicated faston to one of the 4 positions: 1 min to 4 max.
www.metalines.com

ESC < > ENTER
F I
ENTER
ENTER
ENTER
< >
< >
< >
ENTER
Fi
Fi
F2
F3
0
i
03
i3
ESC
{
{
{
Page 20 - Manual code: 119DW02EN vers. 3 03/2014 © CAME Cancelli Automatici S.p.A. - The data and information provided in this manual are subject to change at any time without prior notice by CAME Cancelli Automatici S.p.A.
The ENTER key is used to:
- access the menus;
- confirm and store the set value.
The ESC key is used to:
- exit the menus;
- undo the changes.
The keys < > are used to:
- move from one menu heading to another;
- increase or decrease a value.
Display
Description of programming commands
To access the menu, hold down the
ENTER button for at least one second.
To choose the menu
heading, move using the
arrows...
... then press ENTER
navigate the “sub-menus”
using the arrows as well...
To increase or decrease the
value, use the arrows...
...to exit the menu, wait 10 seconds or
press ESC.
☞N.B. when the menu is active, the system cannot be used.
... then press ENTER
... then press ENTER to confirm...
Menu navigation
www.metalines.com
Other manuals for FA40230CB
1
This manual suits for next models
4
Table of contents
Other CAME Gate Opener manuals