2
Start
Design by Canmore Corporation www.canmore.com.tw
Trainer
LAP
TrainerTrainerTrainer
繁體中文
简体中文
日本語
Deutsch
English
Trainer
LAP
Language
English
Trainer
LAP
Time
Link GPS
Link GPS
Custom
Trainer
LAP
Gender
Male
2014
20:00
01.22
Trainer
LAP
Age
38
Trainer
LAP
Unit
m, km, kg
Trainer
LAP
Trainer
LAP
Trainer
LAP
MAX Hear Rate
176 bmp
Height
180 cm
Weight
080 kg
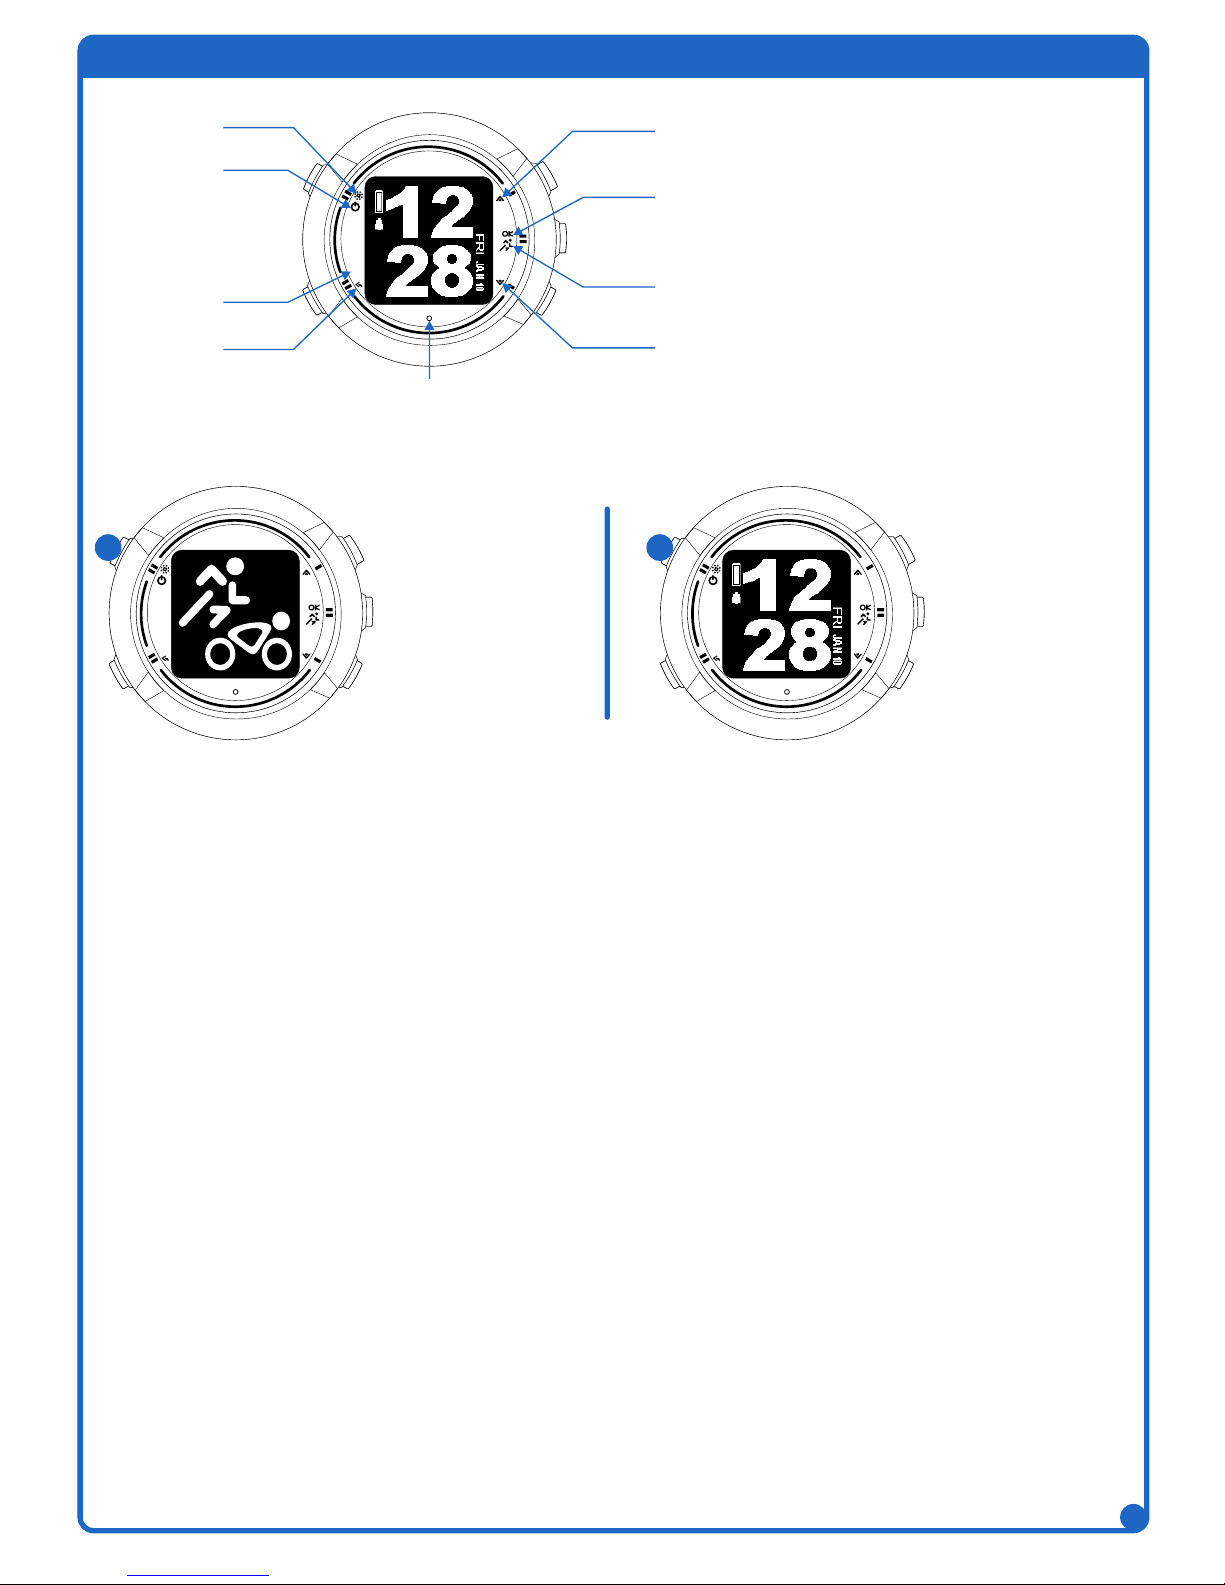
Hold the “Power” button
for 2~3 seconds to turn on.
1. Press the “Up” or “Down” buttons to choose your language.
2. Press the OK button to accept your choice.
1. Press the “Up” or “Down” button
to choose your gender.
2. Press the “OK” button to accept
your choice.
1. Press the “Up” or “Down” button
to change the number of your age .
2. Press the “OK” button to accept
your setting.
1. Press the “Up” or “Down” button to choose the
method of the time and date setting, Link GPS
or Custom.
2. Press the “OK” button to accept your choice.
3. When the watch isn’t linked GPS or choose
Custom, setting time by yourself.
4. When setting it by yourself, pressing the “Up”
or “Down” buttons to change the number.
Then pressing the “OK” button to accept your
setting and go to next option.
1. Press the “Up” or “Down” buttons
to choose your unit.
2. Press the “OK” button to accept
your choice.
1. Press the “Up” or “Down” buttons
to change the number of your
weight.
2. Press the “OK” button to accept
your setting.
1. Press the “Up” or “Down” buttons
to change the number of your max
hear rate.
2. Press the “OK” button to accept
your setting.
1. Press the “Up” or “Down” buttons
to change the number of your
height.
2. Press the “OK” button to accept
your setting.
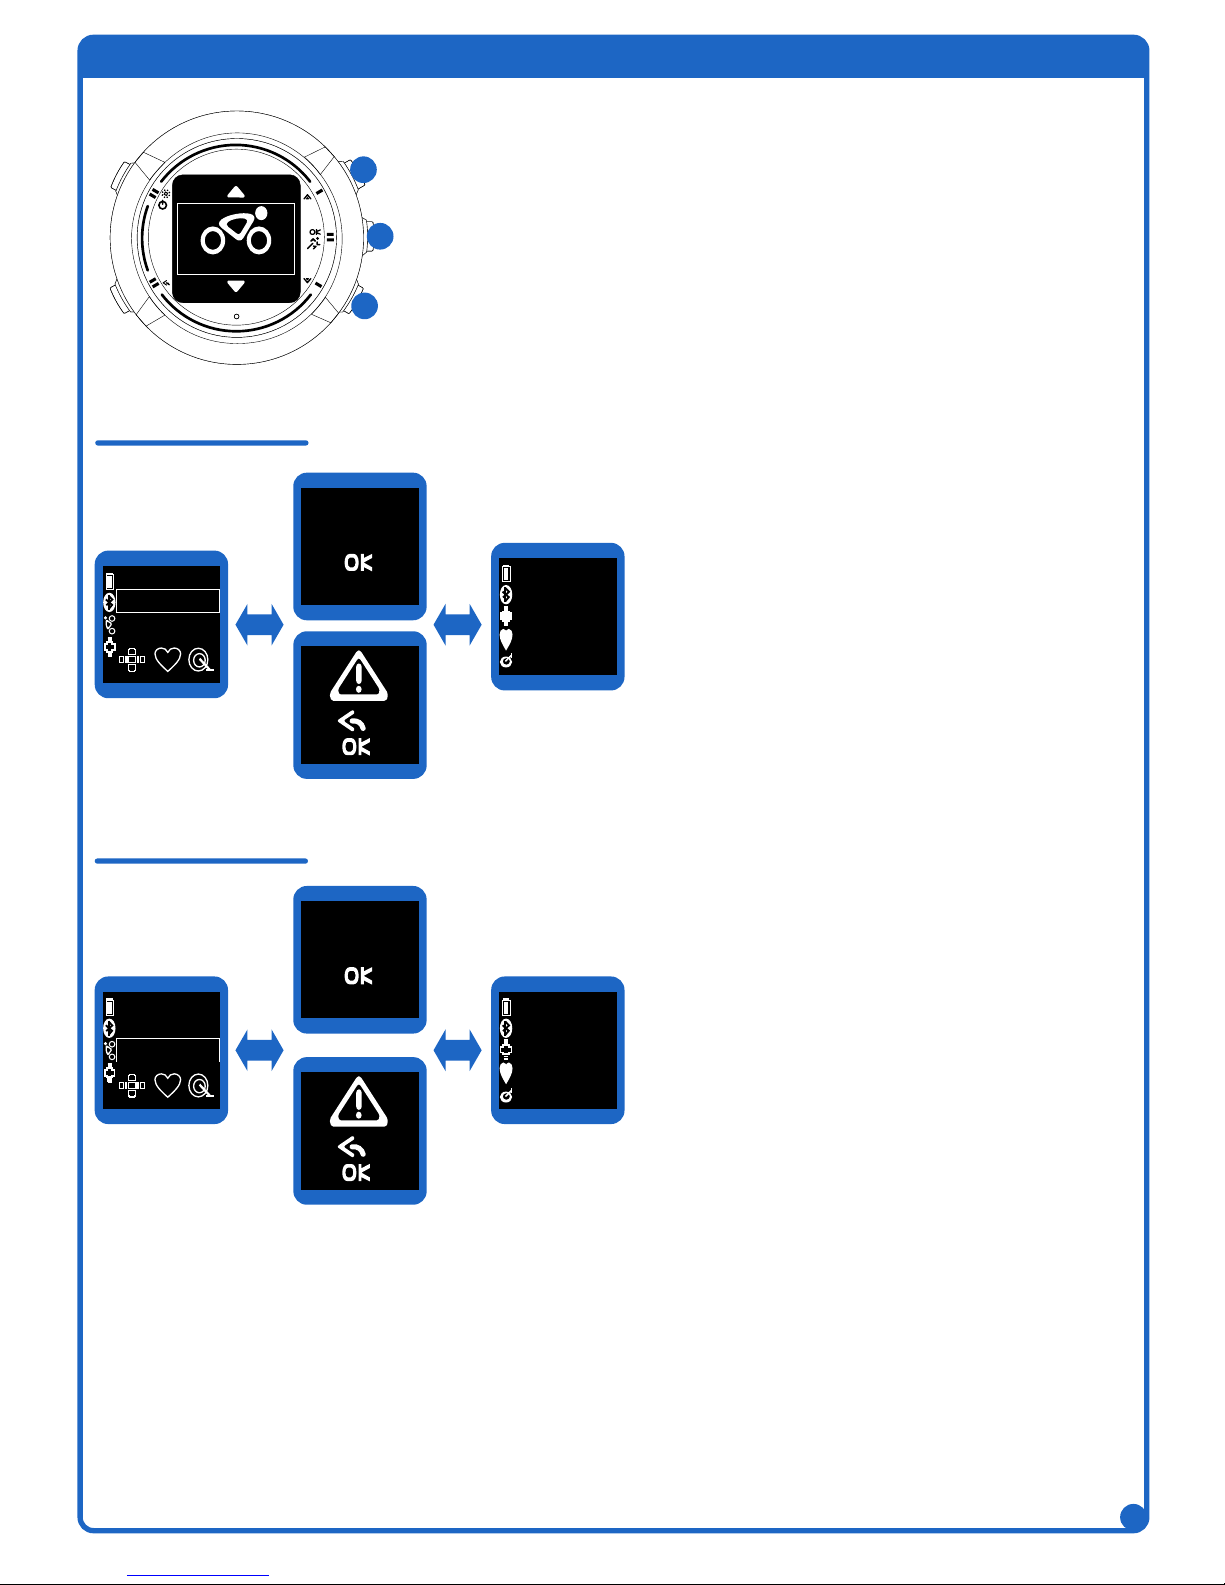
Non-rotate
Rotate 180